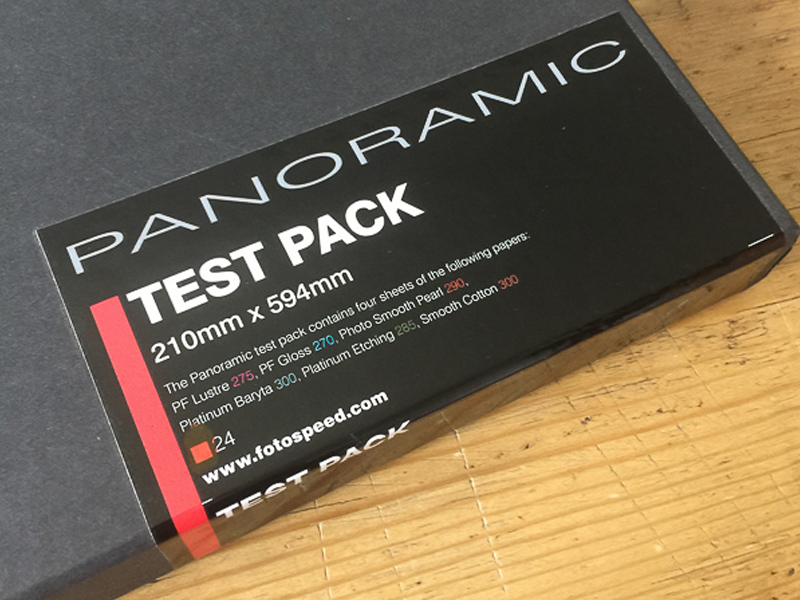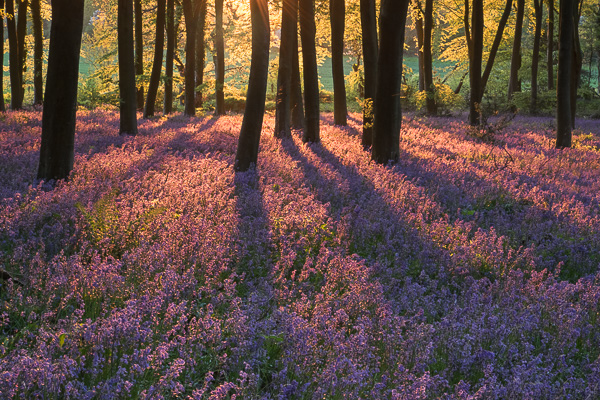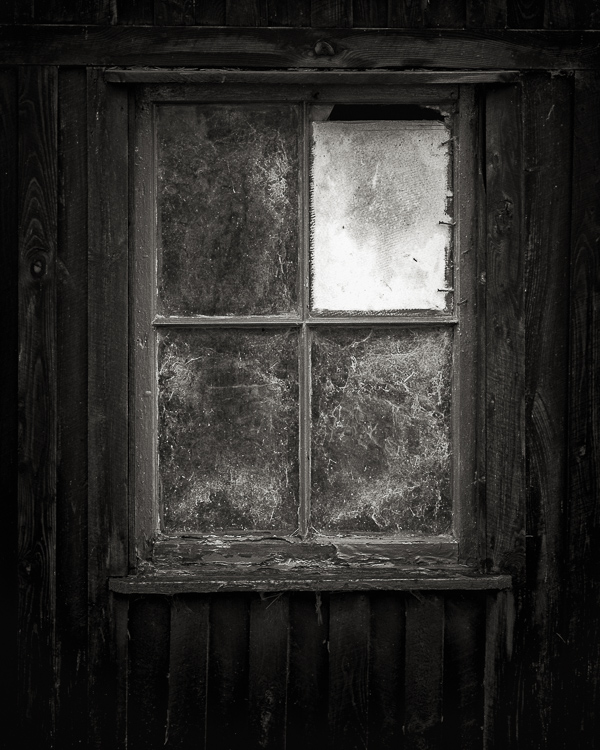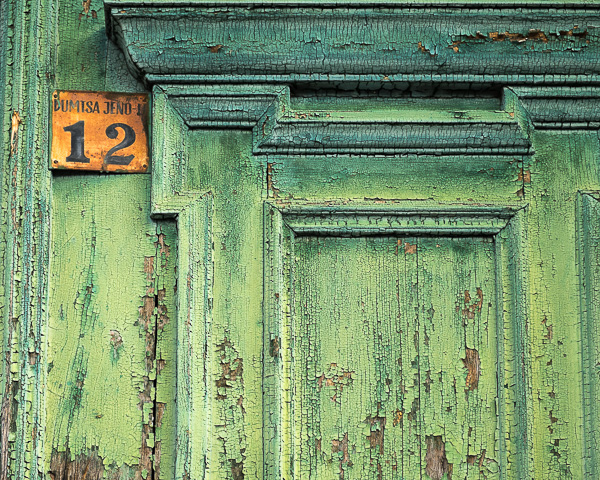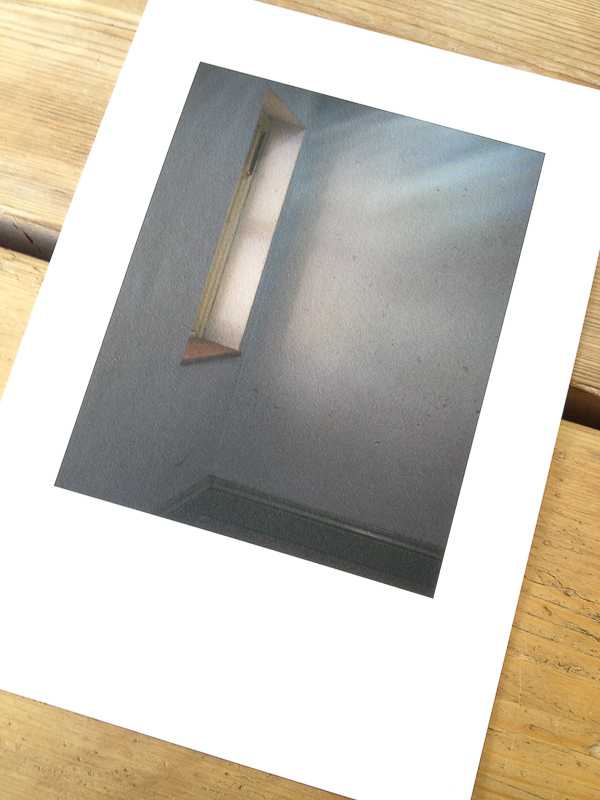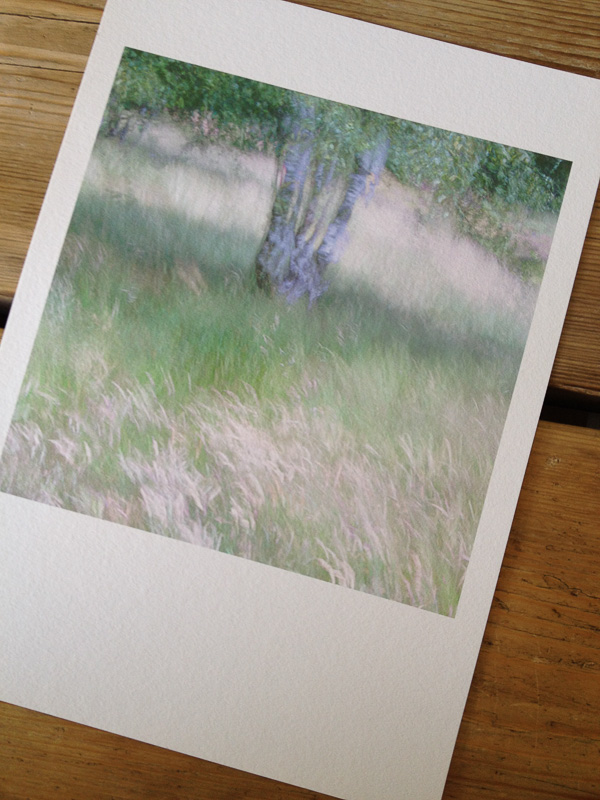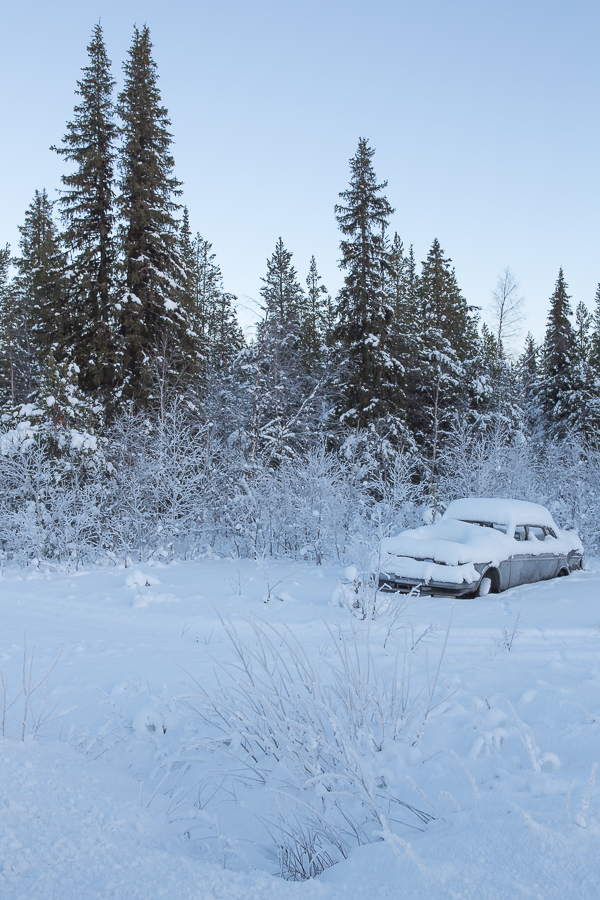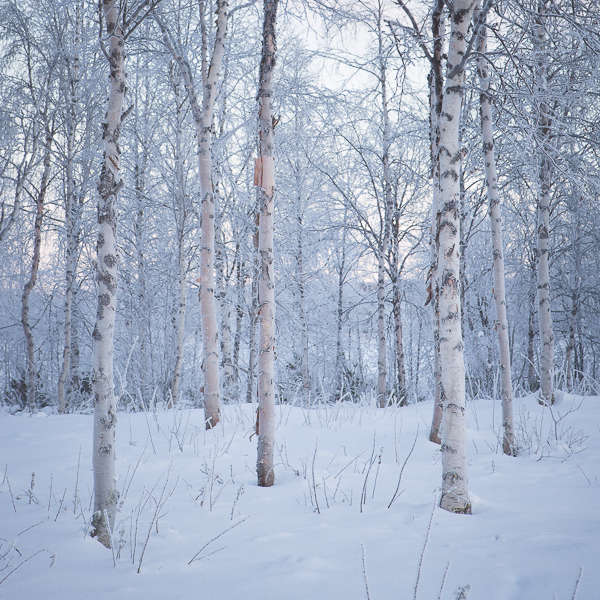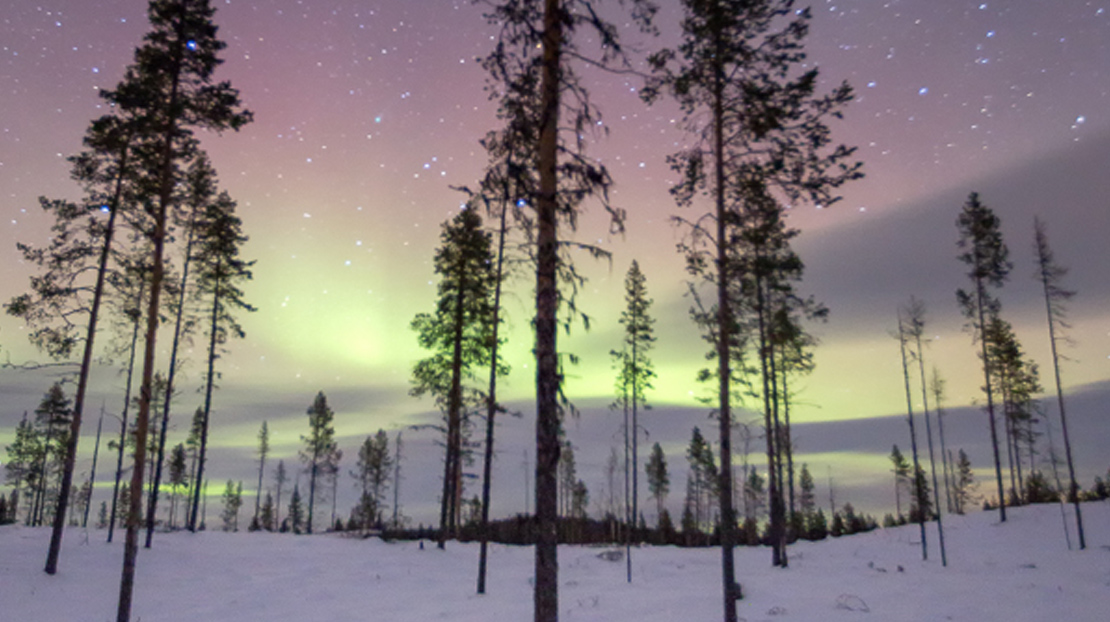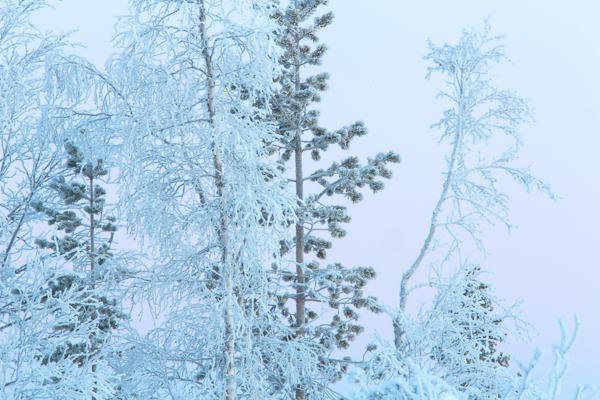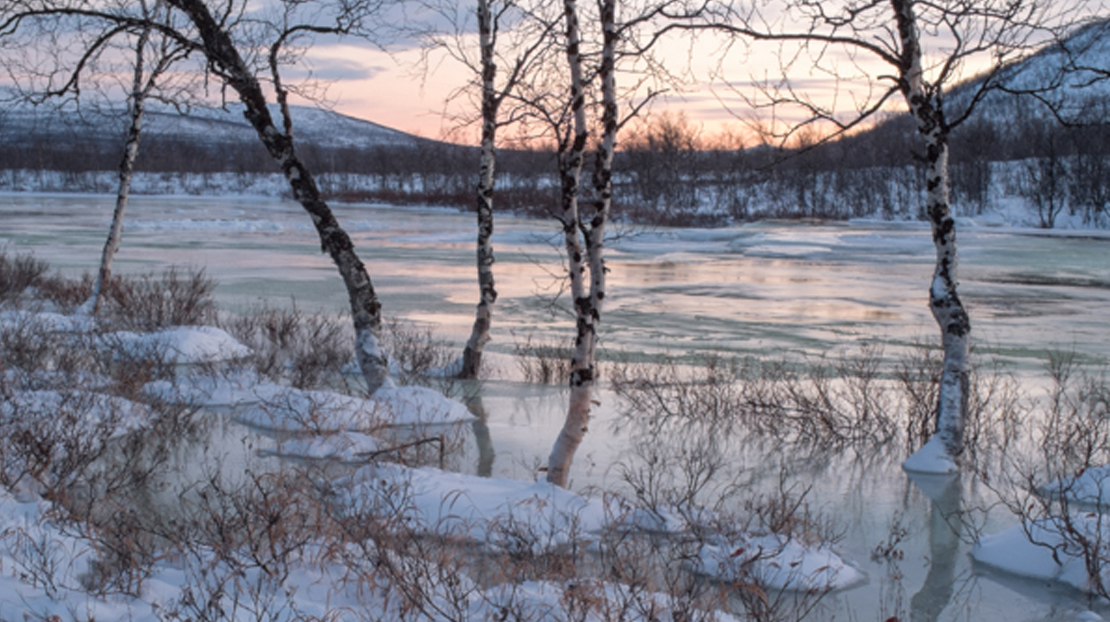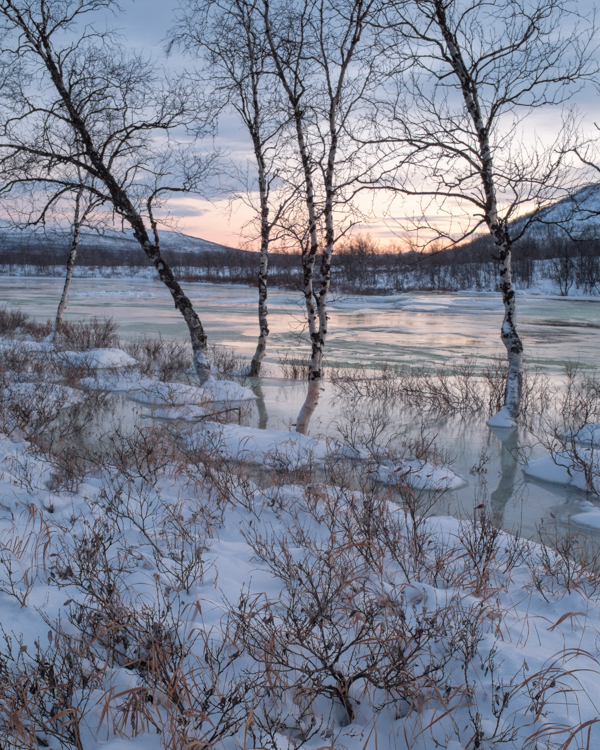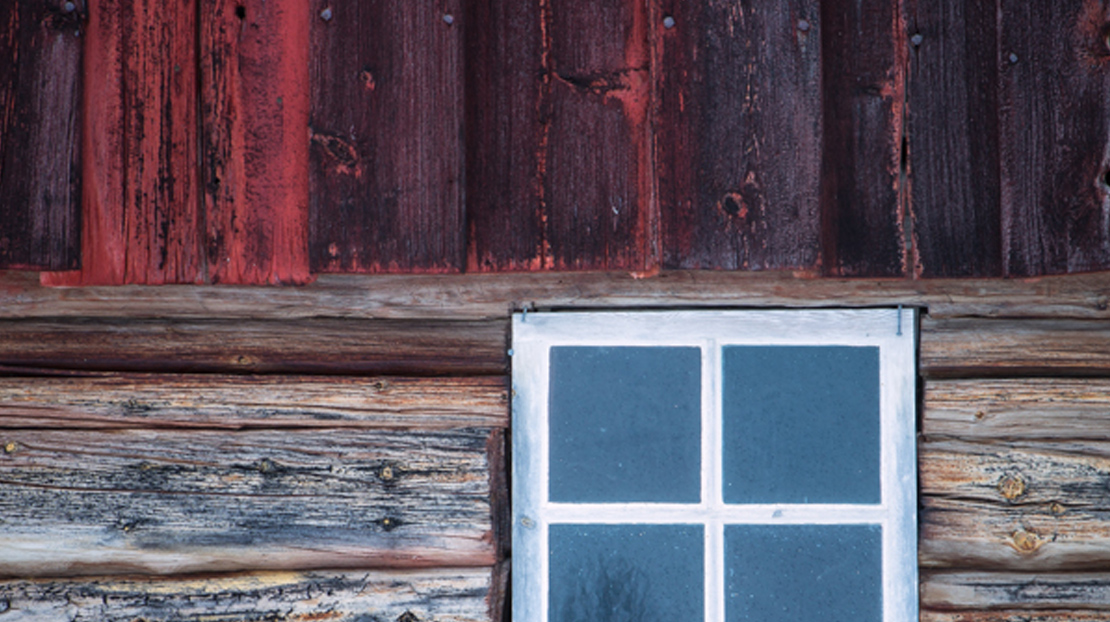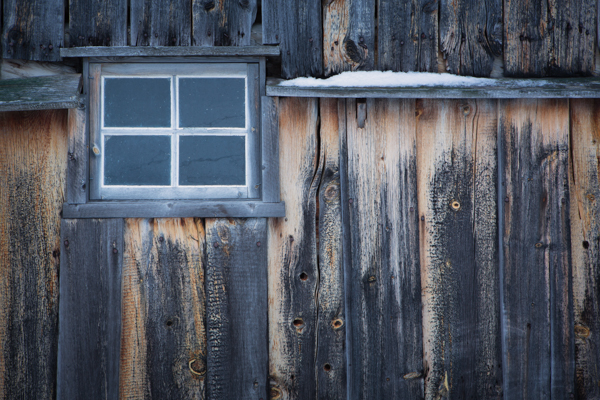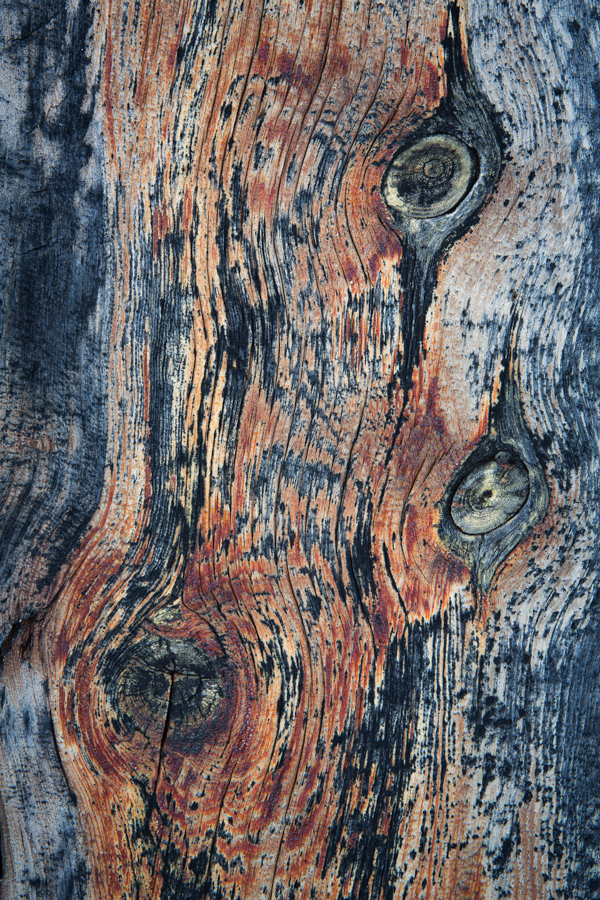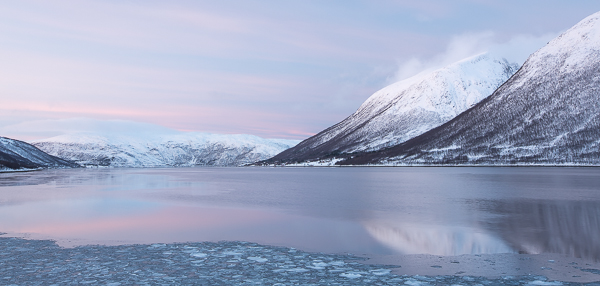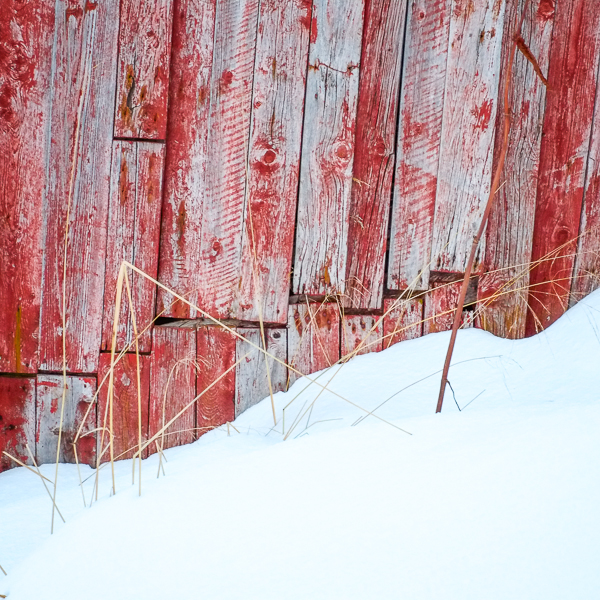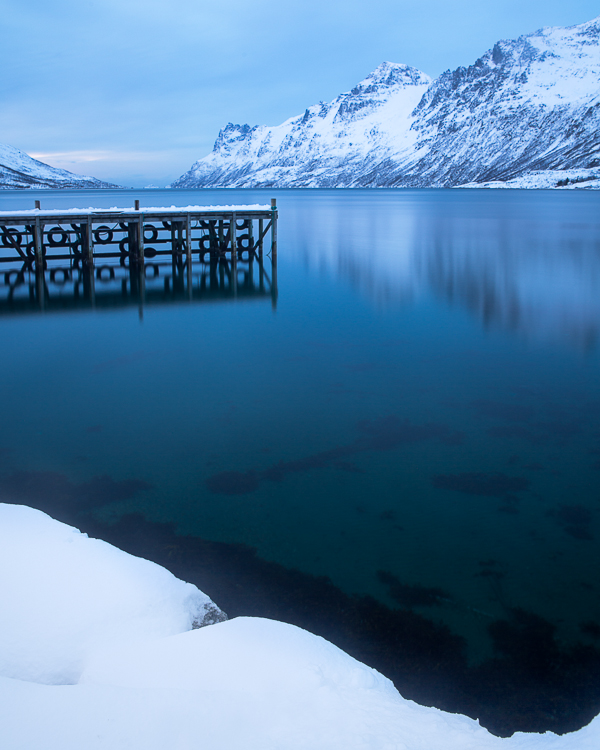
Fotospeed are the only fine art paper company I am aware of who provide us with custom made panoramic papers. I shoot a lot of panoramas in my work, both combining exposures in software (now a feature of Lightroom CC as well as Photoshop, a welcome development) and by cropping into a single image to a ratio which yields an image with the characteristic panoramic ‘letterbox’ format. I am not a lover of really wide angle lenses having grown tired of the distortion they produce. I prefer, when I want to show the wide sweep of the landscape, to reveal it in a panorama. (I know wide angle lenses can be used to inject drama into images, but again, I am finding myself moving towards quieter, less dramatic images in my work and so I have sold on my super wide lenses now due to lack of use.
Author: dougchinnery
Integrity & Generosity in Photography – Become a ‘Photographic Philanthropist’
It’s late. I want to go to bed, but I feel I have to write this blog post. It is based on something that has been niggling at me a lot of late, and then a comment was posted on my Facebook page which finally moved me to write my thoughts down.
I was nominated for one of these ‘Facebook Challenges’ this week – I don’t usually take them up, but in this instance I was asked very nicely by a photographer who I admire a great deal if I minded being nominated and since I had already been nominated by another photographer who I also greatly admire, I guessed it was time to give in. The first post went okay (the ‘challenge involves posting an image a day for five days and nominating other photographers each day to do the same).
Adding Copyright Details to Files on Import to Lightroom
In January every year I update the metadata preset in Lightroom which embeds my copyright information into every file I import into my Lightroom catalogue,
This year I thought I would record a brief video to show how it was done, in case you might find it useful. Enjoy!
Hard Proofing Techniques – A Practical Example
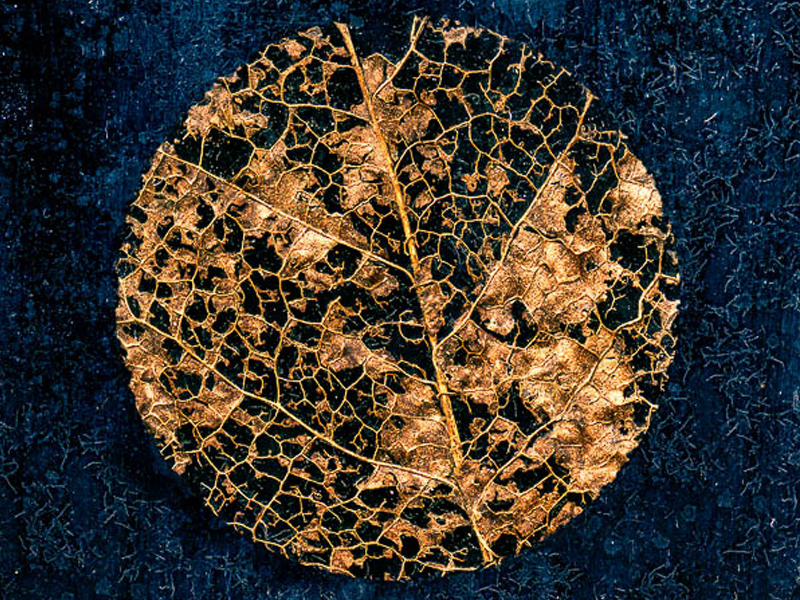
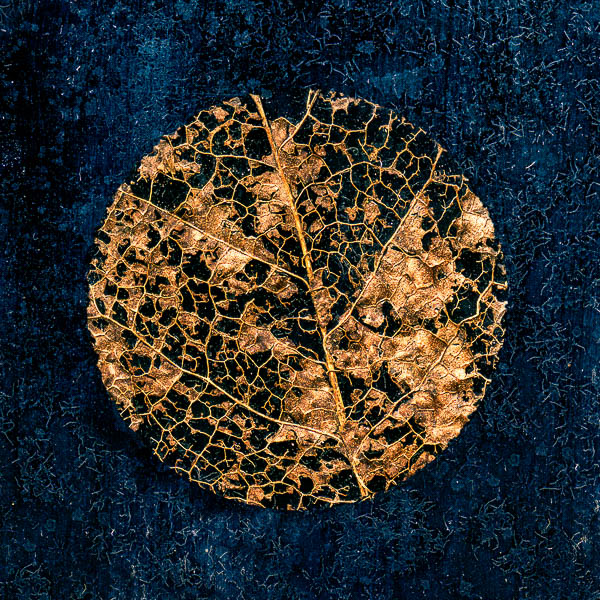
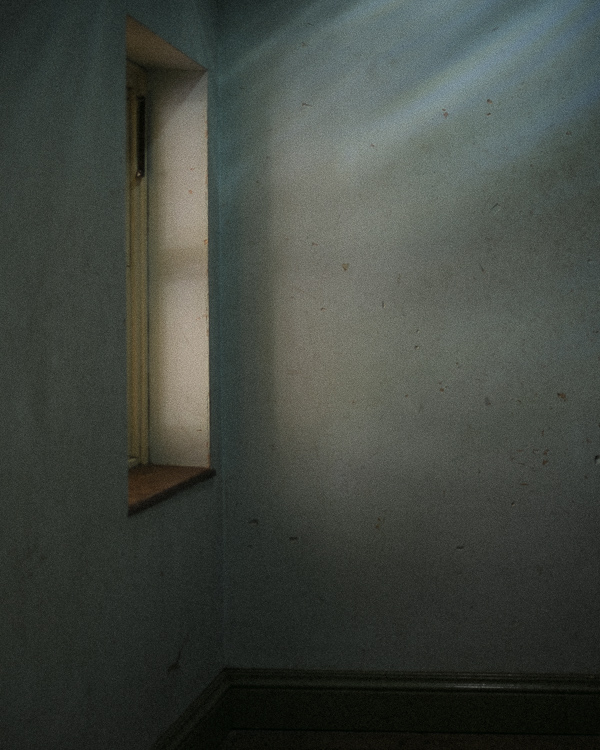
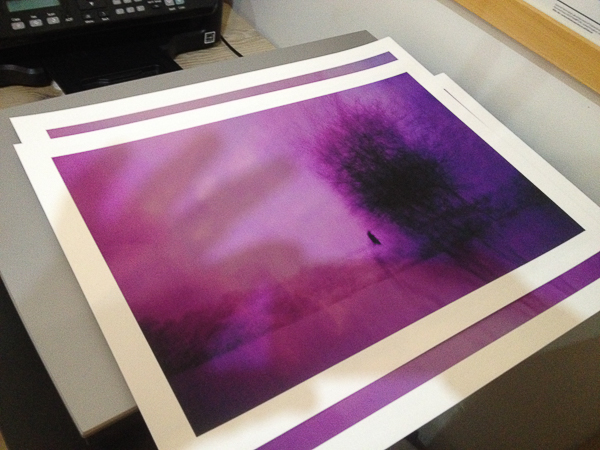
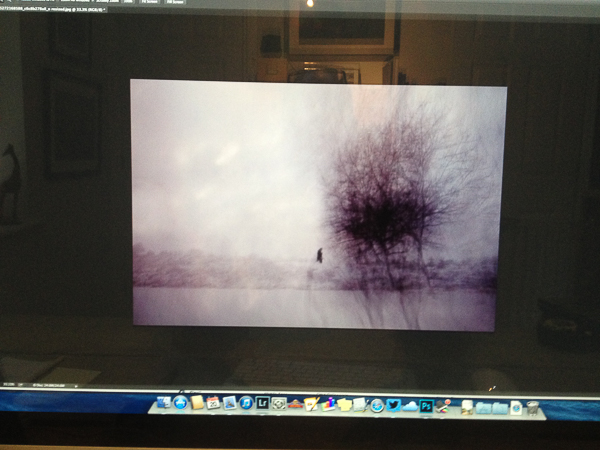
Today I had a client order for one of Chris Friels prints (the image above) to prepare and thought it would make a good subject for a blog post on hard proofing techniques.
Chris’s images can be very hard to print. He uses strong colours with low contrast and they look best printed on very matt paper. My paper of choice for most of his work is Fotospeeds superb Platinum Etching – a heavy-weight matt paper with a gentle texture which gives landscapes and many other types of images a beautiful feel and ‘presence’. Matt papers do bring with them challenges though. The matt surface reduces the gamut of colours they can display and so it can often take some work to translate what you are seeing on your screen on to the paper, even with a fully colour managed workflow. You can check out Fotospeeds papers on their website HERE – they are a great company to deal with.
Autumn in Snowdonia – Trip Report
I have just returned from a three day trip to North Wales where I was running a workshop in the Snowdonia National Park. Our base was the fabulous Tan-Y-Foel guest house where we were cared for perfectly by owners Chris & Maria. (If you are planning a trip to Snowdonia I can highly recommend staying at Tan-Y-Foel, the location is breathtaking from its elevated position set away from the road in above a beech forested valley with views to the mountains. The rooms, food and service could not be better and being just outside of Betws-y-Coed it is in the perfect place to explore magnificent Snowdonia – have a look at their website, which will be updated in early 2015 – http://www.tyfhotel.co.uk ) Chris and Maria kindly reserved the whole property for us so we had it to ourselves and this meant we could choose breakfast time to fit with our sunrise shoots – perfection!
Visualisation, Pre-visualisation, Preparation and Pedantics
This post is the result of an interesting and stimulating Twitter debate this week and I felt it needed exploring in more than 140 characters.
The question was raised “do you (or should you) ‘pre-visualise’ your images of a location before you visit?” or something along those lines. This is a big question and I would just like to tackle it from a number of different perspectives.
What is DACS? and Why you should claim
There is a way for published photographers (and artists, poets and writers) to receive additional income from their work and I thought it might be useful to put a blog post together about it.
In the same way that the Performing Rights Society monitor radio stations, TV broadcasts, public events and music played in public places in order to make sure musicians are compensated when their work us played, there is a similar organisation in place for creatives whose work appears in print.
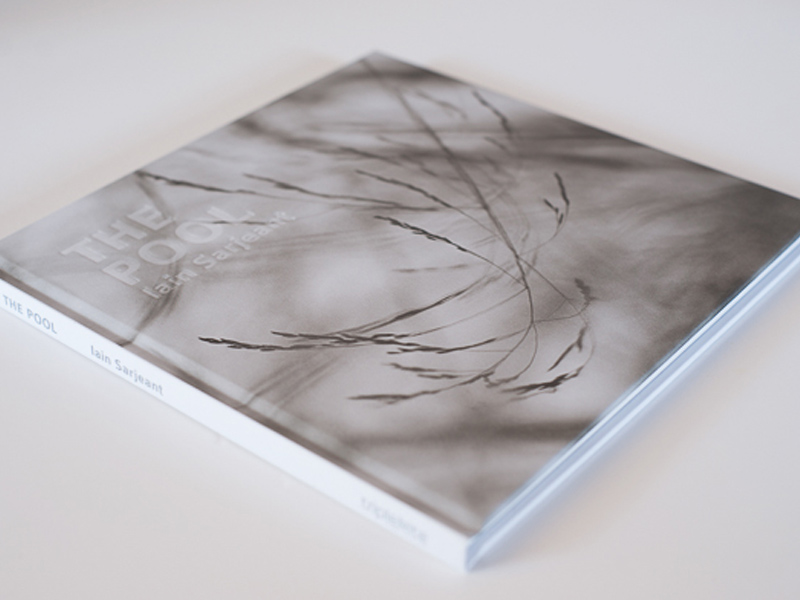
The Pool by Iain Sarjeant
From the first time I heard that Iains series, The Pool, was to be published by Triplekite, I was excited. I have followed Iains work for a few years now and The Pool series has become a favorite of mine.
I first came across the work on Iains website a year or two ago and was instantly entranced by its delicate beauty and simplicity. Iain is a full time professional photographer working out of Strathpeffer in Scotland. His work is often characterised by its keen observational quality. Iain is a man who walks around with his eyes wide open and seems to see things where many do not.
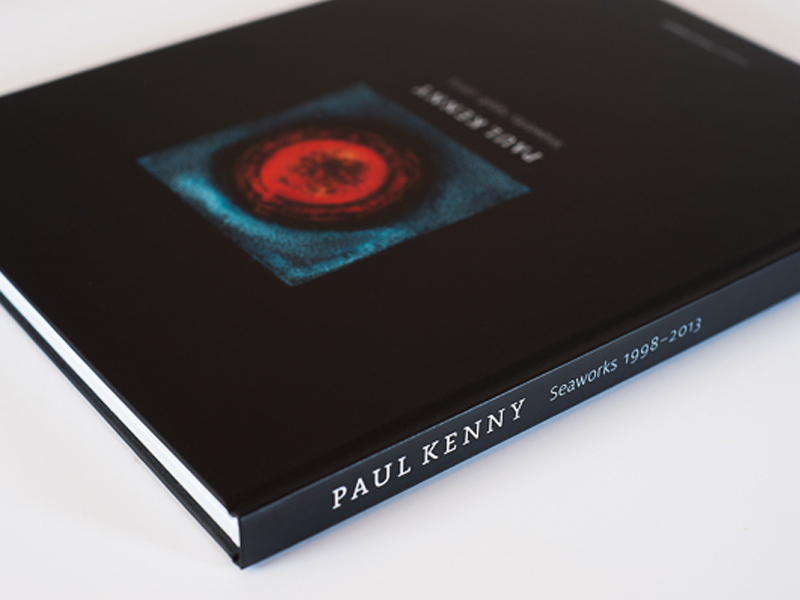
Seaworks 1998-2013 by Paul Kenny
I first became aware of a man, Paul Kenny, several years ago through an article in, I think, Outdoor Photography magazine. I read about a photographer who was visiting, annually, a small stone sheep pen by a beach on the west coast of Scotland. Here he camped for a week or two each year and photographed this sheep pen. The rocks, the lichen, the patterns, shapes and forms. The enclosure had been built no one really knows how many centuries or millennia previously, the rocks used were beautifully round, smooth and encrusted in lichen which grew painfully slowly over generations of mans existence, populating their own spherical worlds, forming continents and islands of life. I had never come across such devotion and application in a photographer before and he really made a deep impression on me.
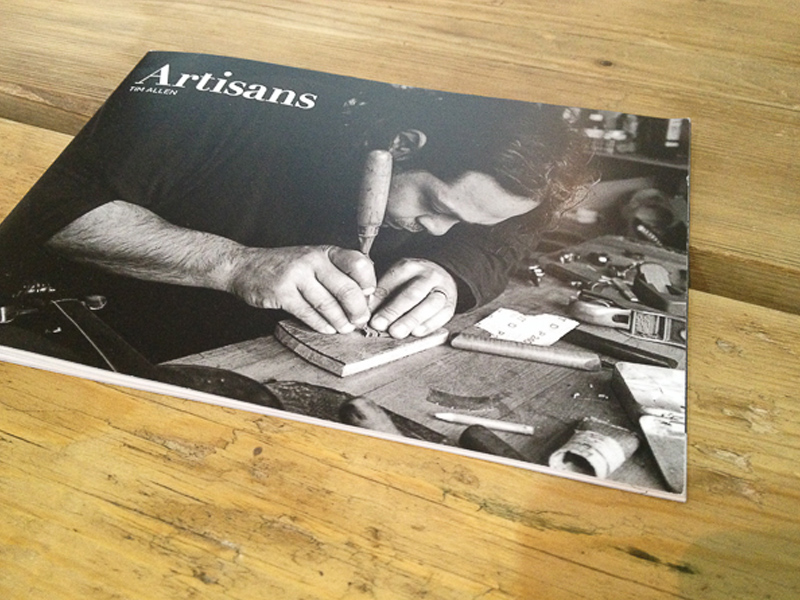
Artisans – A new photo book supporting an excellent cause
I was delighted to receive my copy of a very limited edition photo book this week, ‘Artisans’ by photographer Tim Allen. This is his second book produced in support of the National Ankylosing Spondylitis Society who do great work for people suffering with that condition. Tim has been putting out teasers on Twitter for some months about the book so it was great to finally get my hands on my copy.
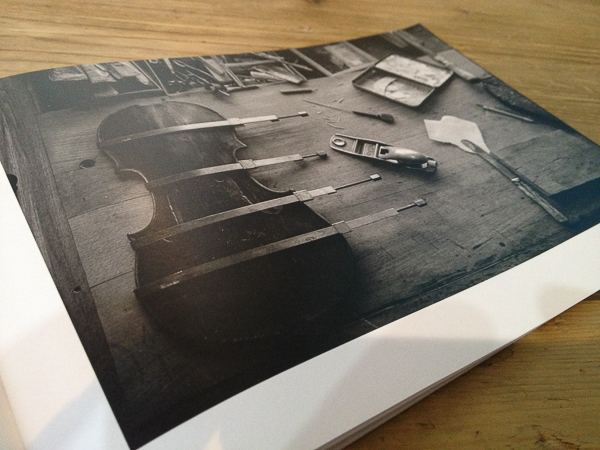
Tims day job is as a graphic designer so not only is he able to make the images for the books but he also does all the design work himself. He contacted several ‘artisans’ in the south east of England asking if they would mind if he went to their workshops to photograph them working at their craft and it seems many were eager to get involved in the project. Indeed, the project is still ongoing, so maybe a second volume will follow. In this book we have a violin repairer, stained glass window maker, stonemason, boat-wright and a blacksmith.
The images are all in monochrome which I feel is the perfect choice for this theme. It gives the images a timeless feel and links in wit the way these craftsmen are working with tools and using techniques often centuries or more old. There is something evocative about these trades and the tools they use, the workshops they inhabit that makes them a fascinating subject for a photographic project. Tims images often get in close, focusing on the hands and the attention to detail of craftsmen. I also love the images of all the paraphernalia decorating the workshops, the odd tools with unimaginable uses, the bottles and tins of liquids and pastes all with wonderful graphics and names. The oil, wood shavings, the soft light – you can feel yourself there watching them work through the images.
This is only a slim volume of 35 pages in soft back but it makes a lovely addition to any photo book collection and the print run is small at 200, so once its gone its gone. The delight of investing in projects like this is the knowledge that not only do we get a lovely book to treasure for life but the profits will be supporting a very worthwhile cause too. When you buy a copy you have the option, if you are a UK tax payer, to ‘Gift Aid’ your contribution (just a tick box – nothing more) and for doing this the charity gets an extra 25% added on to your donation from the government, which has got to be good!
So, I know these are selling out quickly, why not drop over to the website and hit the ‘buy now’ button and treat yourself to a little something and help others in the process – you will find all the details on the website HERE. And spread the word on Twitter and Facebook – projects like this need to be supported – its so good to see people giving back and any help we can give to help them, I think we should. Thanks!
Should I sell my DSLR and buy a Fuji?
I am being asked this question by clients so often now (twice in the last 24 hours, for example), I think it is time to put the answer in a blog, to save me writing endless emails if nothing else 🙂
So many photographers are hearing the buzz around the Fuji system (and other mirror-less systems. Many of these others are excellent, but I am a Fuji user so will use Fuji as the basis for my answer, but you can substitute the system you are considering just as well). They are seeing the amazing images these cameras produce and looking enviously at the small camera bags and lighter tripods required.
Many of us are getting to an age where kit weight becomes a bigger issue, year by year. It is a great shame if lugging kit gradually puts us off from going out with our cameras. Photography should not be about kit, but about making pictures and loving being out making them. Anything that gets in the way needs to be looked at and if possible, fixed.
The big question in the minds of DSLR users when considering switching to a mirror-less system is “will it be as good as my DSLR?”. Perhaps you are wondering, “will I lose quality?” “Will I be able to print as big?” “Are the lenses any good?” “How good is the autofocus?” and so on, and these are all very important questions. It’s important to look into the capabilities of kit before investing, but once the purchase is made it is even more important to get back to enjoying making images rather than obsessing about kit. Kit doesn’t make great pictures, we do.
So I will try and answer those questions for you based on my experience. I am not kit obsessed, I am not interested in brands (Despite me teasing Nikon users on Twitter on a regular basis) and I will tell you the facts, warts and all. I am not writing this as some Fuji evangelist to try and convince you to switch. Nor am I writing as a DSLR die hard with an obsession about megapixels who wants to put fear into your hearts. All I care about is pictures and enjoying photography. Read on and make up your own mind. (Oh, and all images in this post were made with the Fuji).
As you read, remember my comments on auto focus, battery life, frame rate etc are based on my Fuji X-Pro 1 (and some use of my wife’s XE-2, when I can prize it lout of her hands). The X Pro 1 is the ‘old man’ of the Fuji range now and all subsequent models out perform it in frame rate, auto focus, battery life etc – so I am experiencing a worst case scenario. If you opt for the XT-1, you will have a much better experience than me (and I love my X Pro 1).
How did I come to invest in the Fuji system? Well, I was doing a lot of foreign travel leading workshops for Charlie Waites company, Light & Land. On tours my main role is guiding and teaching, but when you are away for a few days you do get a chance to make some pictures of your own. I wanted a light, compact system I could fly with which produced good images, but was easier to travel with than my professional Canon system.
I am the privileged position that I can run two systems so I didn’t have to agonise about giving up my DSLR. But I realise for most photographers, a choice has to be made.
To be honest, I wasn’t really interested in the Fuji. I viewed it just as a second body, a compromise for limited use. I had no thoughts about it replacing my Canon kit. I bought a second hand X-Pro 1, with the 35mm and 18-55mm lenses. I got a nice lightweight tripod and set off on my first trip.
That trip was a revelation. From day one I loved using the Fuji, it felt great in the hand. The image quality when I got home astounded me. Bearing in mind this is a 16mp sensor and I am used to the 24mp of my full frame Canon 5D mk3, I could see little or no difference. In fact, the way the Fuji handles colour and contrast really appealed to me. In some ways the images were better than the Canons. There is something ’filmic’ about the images. I love using the camera so much I have hardly used my Canon in the last year.
I do prefer the Canon for macro photography. I have the Canon 100mm L macro lens which is breathtaking. The macro lens Fuji produce is perhaps their weakest, slow to auto focus and not a true macro as it only works at 2:1 rather than 1:1 like the Canon. Of course, as with all lenses, I could buy a Fuji/Canon adaptor and put my Canon macro on the Fuji, and this is certainly an option. I will say the Fuji macro lens us great for portraits and other types of photography.
You will also find the Fuji bodies slower to auto focus than most DSLRs. By slower, I don’t mean they take a week and a half to lock on, but they are just a little less responsive. I have the X-Pro1 and the XE-2. The XE-2 focuses faster than the X-Pro1. I understand the XT-1 focuses faster than the XE-2. Fuji are improving all the time. If you are PRIMARILY a sports or wildlife photographer then I would caution against jumping in to the Fuji system just yet. You will miss a lot of shots. If you are PRIMARILY a people, landscape, architecture or still life photographer I honestly think you have no worries at all. Many pro wedding photographers are using Fujis to shoot weddings beautifully, and they need responsive auto focus, but tracking a hunting cheetah on Safari is pushing the Fuji!
For outdoor photographers it needs to be born in mind that it’s only the XT1 that is weather sealed. Fuji have also just started releasing a range of weather sealed lenses. So if you plan to shoot in wet weather, go for the XT1 and weather sealed lenses.
You are NOT buying a DSLR and it won’t perform like one. The focus is a little slower. The frame rate might be slower. But how often, in reality, do you need to fire 9 frames a second and for all of them to be tac sharp. REALLY? But how often does having a big heavy bag on your back take the joy away from photography or make you quit earlier in the day than you would like?
You will hate the battery life on the Fuji. I carry five, yes five, spare batteries for a days shooting to make sure I have power. Having said that, batteries are only £9 currently from Amazon, so carrying several isn’t prohibitive. The battery warning light gives almost no warning it’s about to fail either. It’s a long way from DSLR battery performance. You will also find the cameras boot up time is slower than a DSLR (at least my xPros is). With each new model it is getting faster, but I have missed shots by having the camera off to preserve battery power, seeing something but by the time it is ready to fire the moment has passed. It takes a second or two to boot up. It doesn’t sound a lot but to a street photographer it’s an eternity.
On the XPro I also hate it that I have to remove my tripod quick release plate every time I need to change the battery. That’s bad design. But Fuji are addressing it on later models.
I was worried I wouldn’t like the electronic viewfinder (EVF), but these fears were unfounded. I love it. It is fast, responsive and well designed. It has got better model by model, so don’t worry that this will be an issue for you.
What is the high ISO performance like? I regularly use mine, handheld, at night, wide open at ISO 1600 and 3200. At 1600 and above noise is noticeable but, depending on your point of view, perhaps attractive. It is easily reduced in software. At 3200 it is very evident. At ISO 800 and below the camera produces clean files you will love. I often want the graininess of “noise” so for me it is not usually an issue.
How do I rate the lenses? Here Fuji have excelled. They have committed to a wide range (a lesson Sony could learn from for the amazing A7). I find the lenses as good as the Canon professional ’L’ lenses, and that is saying something. I now have the 18, 23, 35, 60, 18-55 & 55-200mm and love them all (just with the provisos about the limitations of the macro lens I mentioned earlier). I lust after the 56mm and will probably add the 14mm also. Most of the time the 23 and 35mm live on the camera and I often go out with just on or the other and force myself to work with it.
What about the big question of resolution and whether you can print big from the files? I have printed to A3+ with no issues and have customers printing much larger from the files (and by much larger, I mean several feet wide – sometimes the files are upscaled – yes, sharp intake of breath, that actually works really well). This comes down to a basic understanding of how big images are to be viewed. Enlarging beyond the native resolution of the sensor means detail is affected… But this is only noticeable if you stick your nose 2cm from the paper. Big prints are big because they should be viewed from several feet away. When you step back and enjoy them as designed there are no issues. If you are expecting the resolution of an A4 print to be maintained at A2 then forget it, but unless you have a medium format sensor or similar the same applies to DSLRS. If you are obsessed with micro sharpness and pixels, if you spend your life looking at images with your nose pressed against the paper and only print at A2 and above then the Fuji might not be for you. But if you really enjoy photographs and view at the correct distance for the size of print and generally print up to A3’ish, you have absolutely nothing to worry about. If you then need to occasionally print biggest, yes, the files will go bigger. Just don’t expect them to look like Phase IQ180 files at 3 meters wide. This is a pet gripe of mine, enjoy pictures, not pixels. (Please watch this video by Zack Arais on resolution and sensor size too – he puts things into perspective, and it’s funny).
I found I have to have a completely different workflow in the field when using the Fuji. I tried using it as I do my Canon system and found it frustrating, so I have developed a Fuji workflow. Whereas with the Canon I work in manual focus and manual exposure, on the Fuji I use auto focus and aperture priority. I also shoot in JPEG plus raw on the Fuji, whereas on the Canon I use raw only. This is because and (I never thought I would say this), I love the Jpegs the Fuji produces. I use them for Facebook, Twitter and quick work. For my master files I then process the raw files.
There are still issues processing the files in Lightroom. Some images (and it is only some) display a mushiness in the fine detail. There is a workaround you can read about HERE. I am sure Adobe are working on the situation and will soon remedy it. They have already added the Fuji film presets to LR so these can be applied to raw files if you wish.
I enjoy using a smaller tripod. I love having a tiny camera bag. I love the Lee filter kit designed for mirror-less systems. I love how inconspicuous the Fuji is, attracting less attention on the streets and in buildings. I love it’s retro look. I love the quality of the files it produces (the closest to film in I have found from a digital camera). I love how it will shoot square format for me. I love the film simulation modes, especially the mono ones. I love the ease of packing for flights. I love being able to work for longer without feeling tired. Yes, I am a convert. The Fuji is now my camera of choice for just about all of my photography, except macro and multiple exposures.
A point I would like to mention which really sets Fuji apart from just about all of the other manufacturers, notably so, is the way they listen to customer feedback. All modern companies say they value our feedback, but so often disappoint us by not doing anything about what we say, or falling short in meeting what we ask for. However, I am constantly surprised and delighted by Fuji who REALLY DO listen and react to customer comments. Often within weeks customer suggestions are implemented in firmware upgrades and in new models we see the majority of customer requests implemented. I strongly believe this is a major reason why Fuji has built such a loyal following so quickly. They are making cameras we want, the way we want and improving them all the time in response to the ways we use them. They are a fabulous company to buy into. It gives me great confidence to invest my money into their gear.
So, should you sell your DSLR and jump on the Fuji bandwagon? It’s up to you. Ask yourself, what is most important to you? Remember, currently, in some areas, they don’t perform like DSLRS, but be honest, do you really push your DSLR hard? I honestly think that for the majority of camera users a mirror-less system is ideal and will exceed your expectations. They are not for everyone, wildlife, sports and perhaps people who do a lot of astro photography should stick to a DSLR. For most others, switching needs to be seriously considered as an option. I’m fortunate I can run two systems (I run several, actually, if I include my old film Hasselblad, my pinhole etc) so don’t have to choose. I have the best of both worlds. But as soon as Fuji bring out a model which is just a little better, I can see me selling my Canon system. At the moment it is only macros and multiple exposures that are keeping me with it.
Whatever you decide I hope that, once the choice is made, you get back to enjoying making images rather than obsessing about the kit!
I would be very interested in your thoughts on this. Please leave a comment with your experiences or questions, below.
My first experiences with Fotospeed papers & lessons learned about soft proofing
I have long used Ilford Gallerie Gold Fibre Silk as my paper of choice for my monochrome prints and Hahnemuhle 308 Photorag for most of my colour prints. I was happy with the Ilford, but the Hahnemuhle was causing me issues. Despite being a beautiful paper, with a lovely texture, it frequently got jammed in my Epson R2880 printer or picked up roller pinch marks. I also found, despite being air blown before printing, that it would shed fibres after printing, leaving white areas on the image. It is an expensive paper and these frustrations got the better of me.
Working for Light & Land with Charlie Waite and his team of photographers I saw how they used Fotospeed papers. I went to see Charlie’s exhibition, currently on at the National Theatre in London (If you haven’t been, go, it’s wonderful – allow an hour to enjoy it) and he had printed it all on Fotospeed Platinum Etching 285. I was stunned by the prints, being sure the paper choice had enhanced Charlie’s sublime photographs. I was also aware of Joe Cornish high regard for the Smooth Cotton White 300, printing his work on this paper. This encouraged me to investigate their products further.
My first purchase was Platinum Etching 285. From the first image I printed I was hooked. It ran smoothly in the printer without shedding fibres and the colours and tones were a near perfect match to what I was seeing on my screen. The soft Matt texture was ideal for the style of the image.
My next print job with Fotospeed papers was more important. Not only was it for a client, rather than a print for myself, but also the images were Chris Friels, rather than my own. I always feel a greater sense of responsibility printing the work of another photographer, trying to realise their vision for the image.
If you are familiar with Chris’s work you will know he uses extreme dark tones and some intense colours. This makes them challenging to print. This job proved to be true to form. The first image I tried was in grey tones with a very slight magenta/lilac tone. This I felt was the easiest of the three, to get me started.
I always print from Lightroom, loving the controls there. I had no worries over the colours so didn’t soft proof the image and went straight to print. It came out bright magenta. And I mean BRIGHT! My immediate thought was a cartridge had run out, throwing off the colour balance. I replaced three cartridges showing low levels and hit print again. Same result!
Now I was perplexed. I soft proofed the image but apart from an issue with some deep blacks it wasn’t showing any issues. Then I realised I hadn’t downloaded the ICC profile for the Platinum Etching paper from Fotospeed, I had it set to Hahnemuhle 308 PhotoRag. (I’m ashamed to say) That must be it! I remedied that, hit print again. Same problem. Now I was worried. What was going on.
I decided to follow Fotospeeds printing instructions (Typical man, only refer to the manual as a last resort). Their instructions apply to Photoshop so I decided to give it a try and did to the letter what they recommend. This got to the root of the problem. It reminded me of a bug I read about somewhere. I had 16 bit output checked in my original prints as I am usually printing from tiffs. However this particular image of Chris’s was shot as an 8 bit JPEG. The Fotospeed instructions showed the 16 bit option turned off, this reminded me of the issue so I deselected it. The print was perfect. Lesson learned.
I was on a roll now and moved to the second image. This image was made up of extreme colours so I soft proofed in Photoshop. This showed that almost nothing in the image was printable!!! I tried my usual soft proofing techniques to pull the colours into gamut but they were so far out it ruined the image. The colours differed too much from the original and went very flat, losing vibrancy. Not an option. So I tried changing the rendering intent from Perceptive to Relative (see this post for more details on rendering intents) but this didn’t help either.
My next option solved the problem. I switched the paper (And the ICC profile) from Platinum Etching 285, which is a matt paper, to Fotospeeds Platinum Baryta. Why did I do this? Because matt paper is only able to display a very limited range of colours (a gamut of colours) than lustre papers. Gloss papers can display an even wider colour gamut. So if ever you have issues getting the colours right on matt paper, try moving to a lustre or gloss paper (remembering to switch ICC profiles in your print software). Often this will fix the issue. Fotospeeds Baryta paper had a gamut wide enough that I didn’t have to make any colour adjustments in soft proofing. The image printed beautifully.
Then on to the third and final image, another with extreme colours. This time, using the Baryta paper I soft proofed with no issues and it printed first time.
This whole process taught me several lessons. Firstly, I need to always check I have the correct ICC profile loaded for the paper I am using. Secondly, to use soft proofing to check the paper can handle the colour gamut. If the gamut is an issue, to make changes in software or to move to a different paper with the ability to display a wider gamut of colours.
The big lesson for me, though, was how much easier it was to work on the image to get it right for printing in Photoshop. I hate to say this. I have always loved printing from Lightroom and it does print beautifully. I also like how easy it is in Lightroom to set up page layout templates.
However, I found Photoshop is much better at making colour tweaks to an image to pull colours into gamut without spoiling the whole image. You can be very targeted in the colour ranges you work with, whereas Lightroom doesn’t allow you to be as precise. I Also preferred the way Photoshop displays the image with the papers ICC profile applied to simulate the print. The other thing I liked was sizing the print in Photoshop. So I have moved from being a die hard lover of Lightroom for printing to someone who will use Photoshop for tricky prints in future. I guess it is all about personal preferences and also using the right tool for the job. I definitely think that for difficult prints, Photoshop is the tool to use.
(One nice feature I will miss from Lightroom if I soft proof in Photoshop is something the soft proof virtual copy does for us. When we soft proof in Lightroom it offers to create a virtual copy if the file with the soft proofing adjustments, so that our master file remains unchanged. A great thing about this virtual copy is that it embeds the ICC paper profile into itself for the paper we are proofing for. Then when you print it automatically communicates this profile to the printer along with the rendering intent you proofed for. This is clever stuff and a benefit of soft proofing in Lightroom)
A lesson I have learned, which explains a lot, since doing this print job concerns the visible gamut warning in Photoshop and Lightroom. I have always used this thinking it was an accurate warning of colours which the printer would be unable to reproduce on my chosen paper. However, I must admit, I have often found (and told my students) it often is best to go ahead and print even if the gamut warning is indicating an issue with some colours as the resulting print is often fine. I put this down to the rendering intent doing a good job at replacing those out of gamut colours with close replacements. However, further reading has revealed that the gamut warning system used by Adobe is rather old and predates ICC colour management. It was designed for a graphic arts based workflow rather than photography and modern fine art printers actually will have no issues rendering those colours. What is actually of more importance now is the contrast ratio of monitors compared to papers. Many monitors are set to a contrast ratio of 500:1 or similar whereas gloss paper is closer to 200:1 with matt and lustre papers running even lower than that. Soft proofing should focus on correcting contrast issues and tweaking colours to bring them back to a correct state in soft proofing with the gamut warning turned off in most cases. I am going to try this and see how I get on.
I have now switched my studio over to using the Fotospeed range of papers exclusively because I have been so impressed with them. I will blog about each type I use as I put them through their paces and I am pleased to be working closely with the guys at Fotospeed too. They are a long established company and really know their stuff.
Soft proofing is a big subject and will make a huge difference to the quality of your prints. It’s one of the things I cover in my Lightroom and Photoshop workshops and will be dealing with on my print workshops with Master Printer, Jack Lowe. The next Jack Lowe workshop is fully booked but if you would like to go on the no-obligation short list to hear of future dates, please just click THIS LINK TO EMAIL ME.
I am pleased to say that from now on in my Lightroom and Photoshop workshops (which I hold in my home studio) you will go home with a free print on one of Fotospeeds beautiful papers (perhaps one of mine, or one of your own) along with the knowledge of how to make beautiful prints of your own work too.
You will find available workshop dates ON THIS PAGE or, please CLICK THIS LINK and drop me an email if you would like more details or would like to book a one to one session with me.
You can find full details about and buy Fotospeed papers HERE – I recommend you give them a try.
What Are ‘Rendering Intents’ and How Should I Use Them?
I don’t know about you, but I love to print my favourite images. It seems such a shame that so many images today lie unseen on hard drives, when really an image is not fully realised until it is printed. There is just something about holding a well made print in the hand which brings out the full beauty of an image.
For many, though, printing is a bit of a dark art and there is much confusion about ICC profiles, paper profiles, gamuts and such like that can be daunting. One area that seems to cause confusion and is not well understood by many is ‘rendering intents’.
Before I begin, a disclaimer. I am not a colour scientist, not do I claim to be a world expert on colour management. My understanding is based on my own learning. I am sure there may well be much more to what I explain below and so if you are an expert, please feel free to add some comments below the post to add to (or correct) what I have said. I am keen to learn!
Rendering intents is a system built into ICC profiles that we see in print dialogues and we are asked to make a decision about which one to use. There are four main rendering intents and, in reality, only two are of real interest to us as photographers.
The usual advice we are given is to ‘try both and see which you prefer’ (I have even said this myself), but it is not really a very satisfactory way of working. Much better to understand what they are and what they do, then we can make a well informed decision and understand what effect they will have on the results.
Firstly, its important to say, we are dealing with the fine tuning of colour management here. Often you can print an image using both of the main rendering intents and it is hard for us to see any difference between them. At other times, though, it can make a huge difference to how our final print will look.
So what are they? As I mentioned, they are built in to ICC profiles. These profiles are the way different devices (cameras, computers and printers for example) communicate the colour (Hue, saturation and luminance) of each pixel an image to each other in an effort to maintain colour consistency.
Rendering intents are there for those situations when we have pixels of certain colours in our image which go beyond the capabilities of the ICC colour space we are working in. Briefly, colour spaces are, for example, sRGB or Adobe RGB, and each space is used for a different purpose. sRGB is the space used for monitors and ‘the internet’, for example, it is a smaller colour space than Adobe RGB, capable of displaying far fewer shades of colour. The range of colours a profile can display is galled its ‘Gamut’.
So situations arise where, if your image has a wide range of colours which exceeds those of the colour space you are printing in or exporting to (say, to upload an image to your website) then the profile needs a ‘map’. This map tells it what colours to swap the colours it can’t reproduce for. So, if you have been working in Adobe RGB (or ProPhoto RGB) and now are about to upload an image to your website which requires the file to be converted to sRGB so that it displays properly on the (uncalibrated) monitors of your websites visitors from all over the world, the profile needs to know how to handle these ‘out of gamut’ colours. You might have a green which displays fine in Adobe RGB but isn’t available in sRGB and so the profile asks you to choose a ‘rendering intent’. This is the map which tells it, when it sees this particular shade of green that it can’t display then change it to this other shade of green which it can show.
Its a bit like having a recipe book for Indian food. It might show a list of rare spices but, knowing they may not be available in your country, it says ‘if spice X is unavailable, then spice Y will do nicely’.
Its this ‘nicely’ bit that causes the issue.
Each rendering intent is a different type of map, a different way of substituting one colour for another, and like spices in a curry – we all have our own tastes. Some like them hot, others aromatic and so the substitute choice can be critical. So to make the right choice for us we need to understand how each rendering intent is programmed and how it is likely to affect the results in our images, especially prints or images uploaded to the web.
No rendering intent will be perfect and you can’t really say that one is ideal to use all the time. This is because each is a compromise and will affect the colours in our image differently. Depending on the image and our goals for that image, we need to choose the right intent, or map.
So what are they and what does each one do;
1. Perceptual Intent – This can compress or expand the full gamut of colours in the source profile in order to make them fit into the destination profile. What on earth does that mean in reality? Perceptual intent is designed to maintain the relationships between colours and often gives a more natural look to the final image. It should be noted that this can mean that it also alters colours which are in the destination profiles gamut already (so they don’t actually NEED to change). It does this to maintain the balance between all the colours in the image and to keep everything looking natural.
It should also be noted that each companies perceptual intent mapping in its own ICC profiles are unique to that company, so the same image put through different company profiles using this intent can produce quite different results.
Perceptual Intent, then, is often the best one to use if both saturation and the relationship between colours is of primary concern to us.
2.The second and other most common intent (indeed Adobe Lightroom ONLY allows a choice between Perceptual and Relative Colourmetric intents) is Relative Colourmetric Intent. This does not allow colours which are in gamut in the destination profile to be changed, they must stay unaltered. It only alters out of gamut colours. Additionally, it only alters these just enough to bring them in to gamut so the relationship between colours in our images change. (Most natural colours which have not been enhanced or played with too much in software, will fit into the gamut of inkjet printers – it is mainly colours which we have enhanced which cause issues).
This rendering intent does not reduce saturation, whereas Perceptual intent can. However, this intent can drastically alter the way an image looks to our eyes as regards the way the colours relate to each other.
Relative Intent is often the best to use if tonal relationships are more important to us in the image then the exact colours, and certainly in black and white printing this is probably the case.
(if you are making a big jump, from ProPhoto to sRGB profiles then, even if the profile offers you two choices of rendering intent, in actual fact it will only use Relative Colourmetric to do the mapping of out of gamut colours).
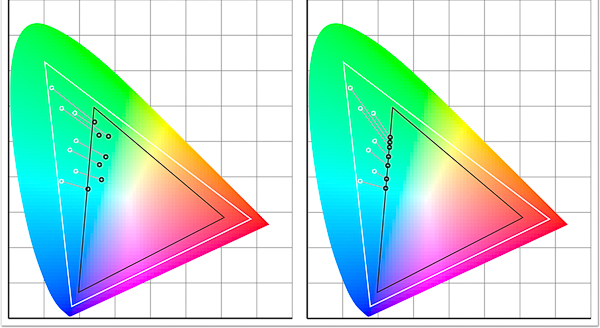
In the illustration above you can see an approximation of what is happening with each rendering intent. The white dots are the colours in the original image profile which are out of gamut in the destination profile. The lines lead from them showing how each is mapped into the new profile resulting in the destination colour at the black dot. In the left illustration we can see the Perceptual Intent at work. Notice how the colours all maintain their relationships to each other (spacings) for a natural look. In the right hand image we see the effect of Relative Intent mapping the colours. They are only pulled as far as each needs to be pulled to just get them in gamut and this alters how they look in relationship to each other.
It might seem from this that Perceptual is the logical choice in all situations, but it isn’t. Sometimes Relative does a more effective job, especially where tonality is more important.
The other two intents which are of less interest to us are
3.Saturation Intent – This is designed to give priority, as you would expect, to saturation of colour but in doing so, to get colours into a new gamut, will sacrifice hue and lightness of colours. It is of most use in technical printing when hue and lightness are not really important, but when saturation is, such as when printing mathematical charts and graphs.
4. Absolute Colourmetric Rendering Intent – This is a tricky one to describe but bases its calculations on the white point. It is used, for example, when converting to CMYK for images to be printed on papers which are below bright white (maybe a bit yellowy) and so it can show the effect of this on colours. Not generally something we, as photographers, have to worry about. But it is something that graphic designers and printers lay awake at night worrying about.
After all this is said, the only real way to know which is best for a particular image is to soft proof it in both relative and perceptual intents and choose the one we prefer for that image. In some cases the difference will be hard to see, in others it will be huge.
I hope this helps you understand a bit more about rendering intents and the need for us to focus on perceptual and relative intents in our work as photographers.
Remember – Perceptual is all about maintaining colour balance and saturation (and I think you will find in most colour photography this is the one you will find works best as it keeps your image as close to how you intended it to look as possible in most cases). Relative is more focused on tonal relationships and so will probably be your choice when printing in black and white or when printing in colour when the tones are more important than the exact shades.
(P.S. I will to be running another Print Masterclass workshop with master printer Jack Lowe in the New Year. These run over two days with Jack and I helping you to really understand and master colour management, soft proofing and printing. Jack has been a printer for over 15 years and is recognised world-wide as a master of his trade, used by many artists and professional fine art photographers for printing their work for exhibitions and portfolios. If you would like to join the no obligation shortlist, please just CLICK HERE to email me and I will add you to the list.)
Should I Back Up to the Cloud?
(New information added September 2017 – since writing the post below I have been using Backblaze for about a year now as my cloud back up provider. Zoolz became just too slow and was never fully backing me up – I always had files in my queue, especially after photographic trips, which defeated the object of a cloud back up. I NO LONGER RECOMMEND ZOOLZ. So after doing more extensive research I opted for Backblaze and have found them to be excellent. The cost is about £3.85 UK Pounds a month – less than $5 US Dollars. This gives me unlimited storage. I have just under two terabytes stored with them now. It is always up to date and is very fast. I have had to retrieve a couple of individual files from them and the system works reliably and well. I also like it that they allow you to back up unlimited external USB hard drives. Many other companies do not. If you would like to try their service, please sign up using THIS LINK as it will give you (and me) an extra free month of service from Backblaze at no extra cost to you on top of the free period they offer new customers to test out the service. Thank you).
Can I start by just apologising for this being such a long post, but I wanted it to cover the subject in depth and, hopefully, answer everyones questions. (and I have added some cloud type pictures, just to keep it interesting).
With the advent of fast broadband internet access the possibility of uploading large amounts of data to ‘The Cloud’ has finally become realistic for many. (If you live in a rural area, struggling with primeval broadband speeds, I feel your pain. I have only had a fibre optic connection for the last 18 months. Prior to that I was with you in the slow lane, so I know how it feels).
Firstly, what is ‘The Cloud’? Simply put it is a term used to describe data storage on the Internet. Our files aren’t floating in space somewhere, they are actually on hard drives in huge data centres in different parts of the World. These data centres often, for reasons of data security, copy all of the files to more than one location, usually in different countries and continents. If one data centre gets destroyed by an earthquake or invading martians at least your files and photos will be safely stored somewhere else on the planet for you. That is, until the martians land there too.
The bigger and more reliable suppliers of cloud based storage usually have the data in at least three nuclear bomb proof storage centres, each on a separate continent. The data is encrypted using very strong encryption methods and protected behind the most secure firewalls available. These guys are very serious about security. We tend to be paranoid about our bank details, but these data centres often hold the accounts of the largest companies on earth as well as the data of the worlds governments. Frankly, their data security is more important than ours (to them, at least) and so we benefit from security systems designed to protect them.
There are two forms cloud storage can take that I will look at it in this article. Firstly, the type provided by companies that have quickly become well known such as Dropbox and Copy. (Others include GoogleDrive, SkyDrive (incidentally, Microsofts Skydrive have just increased their free offering to 15GB to put pressure on the market leader, Dropbox – this makes them well worthy of consideration for a basic free service, and there are many more). These provide some free tempter storage for us, usually in the region of 2GB. This allows us to store a certain amount of data with them that we want to access from various places. They all provide web browser access to your files and in addition have apps for smart phones and tablets of all flavours. These allow access to your files from these devices too, wherever you have internet access.
I use and recommend people use Copy as their free Cloud based regular storage service. It works in the same way as Dropbox but instead of the measly 2GB of free space you get from Dropbox, Copy give you 10GB free. If you CLICK THIS LINK to sign up you will also get ANOTHER 5GB FREE, giving a total of 15GB free for life. (and I will get another 5GB free as you have used my link and for that I thank you). With Copy you can have a free app on your smartphone and tablet to access your files. You can also access them via any web browser anywhere in the world and you have an app on your PC or Mac to access them too, so everything is synchronised. I have been using it for a year now and the service has been flawless.
The types of files these services are designed to store are those we want regular access to. There is no charge for uploading or downloading files and there are no data limits for how much you transfer, just your storage limit, from the free amount they give you upwards. Many people find they can survive with just the free amount. Others soon find the service so useful that they want to exceed the free storage amount. Here is where these suppliers make their living. They charge for extra storage in packets of space. For example, £7.99 a month or £79 a year (if paid in advance) will get you 100GB of space on Dropbox.
These services also allow you to share files with friends, family and colleagues. This is very useful for files which are too large to email and where you want to share a file or files with a whole group of people. It can also be used to move files between your computers. Users soon find the service indispensable.
The main downside comes with large volumes of data (and for us as photographers, that means our images). For us, 100GB is nothing. In the days when many photographers happily fill 32GB memory cards in a day in their cameras and measure their photo libraries in terabytes it soon becomes prohibitively expensive to back up your entire library to these services. (an alternative to the Cloud for those who don’t want to pay or whose broadband connection is just too slow, is to rotate back up drives to an off site location. Some take one to work with them and leave it there in a safe place and bring back the previous drive to update. Some do the same, rotating drives at the home of a family member or friend. Always the issue with this is remembering to do it. It is surprising how easy it is for weeks or months to go by before we get around to swapping drives. If this happens it makes the system almost, but not quite, pointless).
This is where deep freeze storage comes in. An example of this style of cloud back up service is Amazons Glacier. This service is designed primarily for business users and is difficult for home users to work with, but more on that later.
Amazon have set up Glacier for individuals but mainly for companies who have vast amounts of data. Terabytes are shrugged off by Amazon, Glacier can handle Petabytes. Why ‘deep freeze’? This is because the idea behind this style of service is to upload files that we may never need to access again. We are putting them into deep freeze. This is in preparation for disaster recovery, for the day our house burns down and our computer and all our back up drives get destroyed. We can then pull back all of our data and restore it.
The price for this service is incredibly low. In fact it is hard to imagine how it could get any lower. The current fee is 1 US Cent per GB per month. So you can store 100GB for a year for $12, about £8. Compare that to Dropboxes £79!!!!!!! (Please note, many users are happy with other services, such as Backblaze and Crashplan which offer slightly different pricing structures and which may suit you better – I suggest you also check them out. I haven’t used them, so can’t comment based on experience. I have heard both good and bad about both, but then that is true of just about every supplier of any product or service!)
How do they get the price so low? A number of ways;
Firstly, As you upload the files they go into a queue at Glacier and can take up to five hours to be put into place on their servers. By controlling the flow of data to suit demand, Glacier can control costs.
Secondly, you pay to restore data back to your computer. You are allowed to restore about 20GB per month for free but beyond this you pay to restore data. This emphasises that the service is for cold storage, not the shuffling back and forth of files that Dropbox is used for. Again, by placing this restriction on its clients the price can be kept very low.
Next, it is not user friendly. It is designed to be used by IT departments with techy types who understand this stuff. I managed to work it out using various help files and web sites, but it took some research. I will explain the method later in the article.
Finally, you can’t ‘see’ your files. You don’t have a browser like File Manager or Finder to look at your folder structure and examine your files. Its all more obscure than that. This can be unnerving. Are my files really there?
The process for uploading to Glacier is a pain, frankly. You cannot upload data in packets of more than 4GB. You also need to use a piece of client software to handle the uploading process. I used Arq Backup on my Mac which is shareware and available to buy for a few dollars. This has to be configured to allow it access to your space on Glacier.
Then, to save space on Glacier (even though the storage costs are so low I still wanted to optimise the space – remember you will be paying for it for every month forever, even at one cent per gigabyte per month, over 20, 30 or 40 years with a growing data pile this will add up) I zipped up my folders. This has to be done manually and I grouped the folders into roughly 4GB zip files.
I then directed Arq backup to copy these to Glacier, which it did beautifully. With my BT Infinity 2 broadband connection and an ‘up to 20mb’ (and often faster than that) upload speed, I could upload 80GB overnight. The slow and time consuming part was manually and laboriously zipping folders into 4GB packets.
It was such a painful process that I got bored and was falling way behind schedule. Vital files that ought to have been copied to Glacier sat on my drives waiting to be prepared for Arq. It was one of those jobs that just kept being pushed down my to do list in favour of other ‘more important’ jobs. But with backing up, in reality, this is unacceptable.
This is where a company called Zoolz comes to the rescue. Zoolz are part of Genie, a large and well established organisation, and are based in the UK. They have a Cloud based back up system which uses Amazon Glacier to store our files. The great thing about Zoolz is they have realised how difficult Glacier is for most people to use and so they have designed their own client software for us.
This software allows us to simply click on folders on our hard drives and Zoolz backs them up to Glacier for us. No zipping, no grouping into 4gb packets (you can even upload files that are individually bigger than 4GB). The software also allows you to see all of your folders on Glacier just as if they were on your computer and, with image files (including raw files) you can see a thumbnail of the image which is so useful if you have accidentally deleted a file or files and need to selectively restore them. It is simplicity itself to use it and the client is available now for both Windows and Mac users.
They have a number of pricing plans for home users (and a range of products for business users too) so you can choose which is ideal for your needs and upgrade as your needs change.
Plan One – 100GB for £9.99 per year (£0.83 a month paid yearly in advance) – 1 user (1 computer and 1 external drive connected to that computer, no backup limitations)
Plan Two – 500GB for £34.99 per year (£2.91 a month paid yearly in advance)- 3 users (3 computers with 3 external/network drives connected to those computers, no backup limitations)
Plan Three – 1TB for £49.99 per year (£4.16 a month paid yearly in advance)- 5 users (3 computers with 3 external/network drives connected to those computers, no backup limitations)
Plan 4 – UNLIMITED DATA for £139.99 per year (£11.66 a month paid yearly in advance) – 5 users (UNLIMITED external/network drives connected to those computers, no backup limitations)
These prices are extremely competitive in the current market, especially if you factor in the time cost of manually preparing your files for Glacier by dealing with Amazon direct, along with the ability to view your files etc. I will still be very happy to pay the unlimited option price when my subscription runs out.
So what is Zoolz like to use in practise? As I have mentioned, the selecting of folders and files to back up is simplicity itself. Just click the ‘Data Selection’ option, click ‘select folders’ and then click on the folder or folders on your hard drive you want Zoolz to copy to Glacier for you.
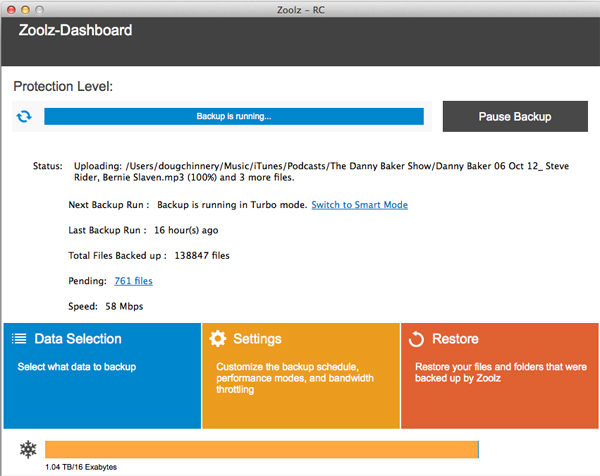
As a word of caution. I found the client works better if you select One main folder at a time and allow that to be backed up before selecting another. When I first started I selected my entire pictures folder, my music, my documents – the whole cahoona! That seems to slow things down somewhat! I soon found it better to, say select, the 2013 folder in Pictures and let Zoolz plough through backing up that years pictures before feeding it 2012 and so on.
Bearing in mind I could upload about 80GB a night to Glacier using Arq backup directly, Zoolz is massively slower. Zoolz say the don’t throttle the data flow, but whatever is happening, it is much slower. I rarely managed to get more than 20 or 25GB uploaded in any 24 hour period, let alone overnight.
I am using the Mac client which is actually in late beta so it may run a bit slower and be a bit buggier than the Windows version, so please allow for this (as of this writing in July 2014).
The issue is both that data doesn’t flow at the maximum upload speed of my broadband connection and the software stalls frequently. You will see that it seems to go through a process of ‘analysing’ and then ‘preparing’ each file before uploading it. This runs along fine but for some unknown reason the client will get stuck, usually when ‘analysing’ a particular file when it gets to 100% of that process.
This is not to bad if you are working at your desk and notice it. You can close the client, restart it and off it goes again quite happily. It is much more frustrating if it happens five minutes after you go to bed and when it could have run all night you find in the morning it has only uploaded a couple of files and then been stuck all night.
An amusing ‘feature’ is the client software tells you the upload speed. I was taken in by this on the first day. It will show a figure of say, 12mbps. Out comes the calculator and I worked out my entire backup should take about nine days. None too shabby. I posted this on Twitter and some wise IT types howled with derision at my foolishness. I soon found out why. Firstly, I soon found this speed to be fictitious. Also the speed shown only ever gets faster. Mine now shows 58mbps!!!!! I think what is happening is that the client logs the fastest speed it ever attains, even for a millisecond and proudly proclaims it to you. Don’t be fooled. It is a lie.
I soon realised that even in ‘Turbo Mode’ (more howls of derision) the Zoolz client is only ever using about a third of my upload bandwidth AT BEST, even thought he software warms you that in ‘Turbo Mode’ other upload processes on your computer will be affected as Zoolz will use all available bandwidth. Not on my system it doesn’t.
The alternative upload mode is ‘Smart Mode’. (Still hearing those howls). This is supposed to flex the upload speed depending on what else you are doing on the computer and uploading so that it doesn’t slow other things down. It makes no difference whatsoever if you use this mode, in fact, I think it is even slower.
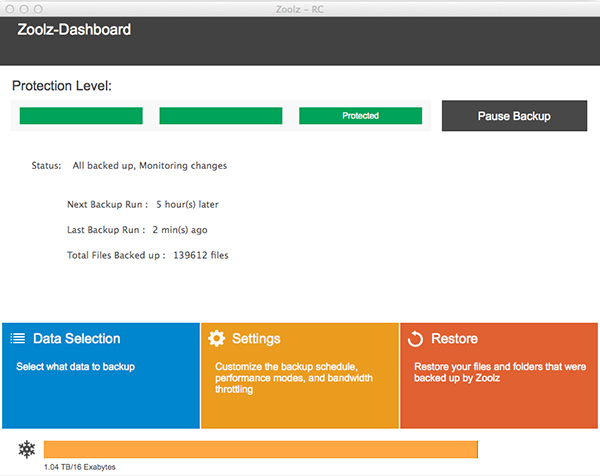
I have just finished my backup to the Cloud this very day! It ended up being a bit smaller than I anticipated at about 1.1TB. This has taken me about nine weeks. I have had the computer on 24 hours a day and have run it as flat out as I can. Whenever I am at home I pop in to my studio to check progress and make sure it hasn’t stalled. If it has, I restart the software. I couldn’t have done the uploading any faster without sitting at my desk 24 hours a day. It will feel strange to just have it scheduled to update daily now and for me not to have to worry about it or nurse it along.
Restarting the software becomes a bit of a bugbear as time goes on too. This is because the software is designed, each time it starts to check every folder for changes that it has been told to back up. Early on this only takes a minute as you have only selected a few folders, but as the data selected increases so does the time it takes to check it all. At 1 TB it now takes perhaps 15 minutes or more. So every time the software stalls and I have to restart it I then have to wait around, or remember to go back because it doesn’t then commence the back up automatically, it sits waiting for you to tell it to proceed.
This all probably sounds like a nightmare to you, and it is a nuisance, but it has become part of my life over the last two months. The end is in sight for me. I know once it is done then the software will just monitor the folders I have told it to automatically and once every two hours it will just back up all the new or changed files which will be quick and painless. The best thing is I know I will have as secure a backup regime as it is possible for me to have. My images, which are my business and my livelihood are protected against even the most catastrophic hardware failure or disaster/theft. Barring nuclear armageddon or those pesky martians, I am protected.
So despite the shortcomings of Zoolz right now, I still wholeheartedly recommend them. The pricing is excellent and once uploaded the client software is a dream. You may well have much less data than me (and if you are a Windows user, your upload may be much faster as I am using the beta release of the software) I have heard from some Windows Zoolz users who have uploaded a TB of data in just a couple of days, so my experience shouldn’t be taken as the norm.
If you do decide to try the free trial of Zoolz or to subscribe, please use THIS LINK. If you do, I will receive a small payment (you won’t pay any more). If you prefer it if I don’t receive a payment, simply go to www.zoolz.com. I never recommend products or services I haven’t tried myself and don’t use myself. I am always 100% honest about the good and bad about any products I describe.
If you are still with me at this point, well done for getting this far. You might be wondering what my onsite back up system is. It has changed a little since I last blogged about it, so I will, for the sake of completeness just run through it here.
I have a multilayered approach to backing up. The Cloud back up I have described above I view as my disaster recovery only to be used in a worst case scenario. I hope I will never use it.
The question I ask myself, and I encourage you to ask yourself when designing your back up system is, “how much data am I prepared to lose?” The answer will be the basis for how far you go with your back up system. Some people care nothing for their files and pictures, or seem not to, as the don’t or rarely back up. They don’t seem to grasp that EVERY hard drive will one day fail. Its a mechanical, electrical device and has a working life. It might fail in the next 15 seconds or it might run for another five years. We never know, thats the problem.
Those people who are less than diligent about backing up often ay they don’t care if they happen to lose a load of ‘stuff’. That is right up to the day they do and then they suddenly realise how vital a lot of that stuff is to everyday life and also just what sentimental value lies in many of our images. Personally, I think it is foolish and lazy not to back up, but it is a personal decision.
So, you may be prepared to lose a weeks work, so only back up weekly. If you could lose a months work, back up monthly. Personally, I would hate to lose a days work, so I back up continuously.
The next thing is to make your system as easy to use, both in backing up and in restoring data, as possible. A difficult system to use is likely to be neglected. That is pointless.
I am a Mac user and so my first line of defence is built in to all Macs and is called Time Machine. If you have a Mac and are not using it, I strongly urge you to connect an external drive to your computer and switch it on. It is ridiculously simple to use, is completely automatic and does (usually) a great job. It makes a mirror copy of your hard drive (and any other drives connected to your Mac that you want it to copy to. What I would caution is DONT TRUST IT ALONE. It can fail. Mine has. The disk copy can get corrupted and you need to format the drive and start again. But as a first line of defence it is marvellous and has saved my life a couple of times. I had a new iMac delivered which suffered a total hard drive failure three days after delivery. I had just got all my software loaded and configured. Apple sent me a new iMac, I connected the Time Machine drive and 30 minutes later the new machine was fully set up exactly (and I mean EXACTLY) as the other machine was just minutes before it failed. I don’t have to do a single thing. That saved me the best part of three days work configuring, setting up and loading the new iMac all over again. That converted me to Time Machine. I have also deleted odd files by mistake and Time Machine makes it a doodle to restore these in an instant.
It backs up your system completely – every single byte of data. Then it updates this every hour for a day, then it keeps daily backups for a week and then weekly backups for a month and so on and it keeps doing this until the drive you store it on is full. The it just deletes the very oldest files to make space. My 2TB Time Machine drive will hold about 6 months or so of backups of my system and I can go back to any point in that 6 months and restore a file or files, or reinstate the whole computer to that point.
I am sure there must be similar software available for Windows users (but it would be much better to buy a Mac 🙂
That is my first line of defence. But, as I said, I don’t rely on this. I then use a piece of Mac shareware called Superduper. This costs about $20 or so. It is a superb piece of software because it simple clones one drive onto another drive. You can schedule it to do this automatically, or, as I do, you can run it when you want.
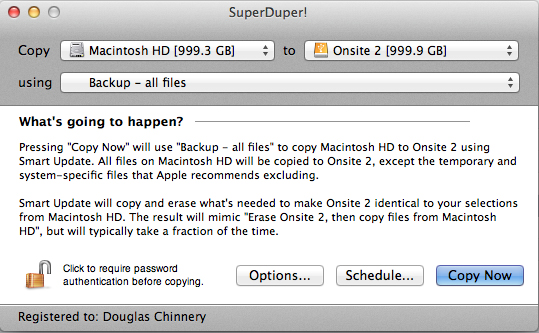
I copy my iMac drive and my external drives to other drives using it. This makes a mirror copy so when you look at those drives with Finder it is exactly like looking at the original drive. The files aren’t compressed or put into archives in the way many back up programs do. I like to be able to see all my files like this.
To speed the back ups, Superduper uses ‘Smart Copy’. The first time you copy a drive it takes a few hours depending on the size of the drive. However, future copies take much less time as it only adds files you have added, deletes files you have deleted and updates files you have deleted.
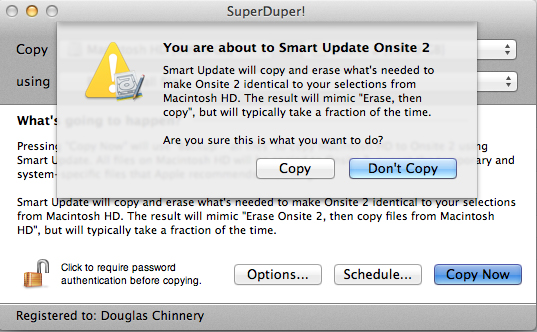
The disadvantage of this is if you have deleted a file by mistake on your main drive and then run the backup before you realise, it will be deleted form the backup too. This is where Time Machine covers me (and Zoolz). I also copy each of my drives to three other drives and I stagger these rather than doing them all at one, so there is a chance I will still have one which has the file I need on it.
Why do I copy each drive three times, especially as I have Zoolz and Time Machine? Well, I am a bit obsessed with backing up. But also, one of the copies is on to small portable drives which I take with me on the road to connect to my laptop. This means I have all my images and files with me when I am away and can work as normal. This also gives me an off site backup when I am away. If something was to happen to the house, a fire, flood or theft then I would be able to get back up and running quickly without having to resort to Zoolz. The other two drives are at home under my desk and I have two just in case one fails. These drives are a bit older and so I am prepared for them failing. It is so easy to just click the backup no button I don’t find it a chore to run the backups. I tend to run them when I am about to leave the computer, to go down for a meal or when I go to bed. then the backup is complete by the time I am finished.
Superduper has another advantage in that it will, if you want, make the backup of your main drive ‘bootable’. This means if your main hard drive fails you can boot your computer from the back up, keep working until you get a new drive in the computer and restore the Time Machine drive. This again is a massive time and hassle saver when things go wrong.
Some ask me why I don’t use a RAID or NAS system. These are very good and have many advantages. Your data is spread over several drives simultaneously. If one drive fails your data is safe and you can swap out the failed drive. Many units allow them to be connected over the internet so you can access your files from anywhere in the world where you have an internet connection. They are also great as home entertainment systems for streaming music and films around the home.
But I do have some issues with them, although here I have to say I am not an IT expert and so my understanding may not be correct. If a drive fails in a RAID system or something like a DROBO, it is great that your data is safe and you can swap out the drive. However, the weakness in the system as I see it is in the next few days. It can take some days depending on the speed of the system and the amount of data involved for the RAID system to rebuild the volumes. During this period your data is very vulnerable. If another drive fails (or if there is a power cut, flood etc) you will probably loose everything. As I understand it, the only really safe way to work with these systems is to have them backed up to another RAID or NAS. Then you are protected.
I think that, perhaps, RAID users tend to view them as a magic and infallible solution and so often neglect other additional back up methods. At a company I worked for I saw the firms RAID based server lose five drives in one day. This was a system that was under a year old and maintained by professional IT people. An extremely rare occurrence but it just shows complacency is foolish. The firm almost collapsed. Its entire financial system, factory planning system, customer database, artworks, quality system etc etc was all lost – everything. If one of the IT guys hadn’t continued to run each night an ancient manual tape back up (which often failed to work) which fortunately worked the night before the RAID failure the company could easily have collapsed. It took a week for the IT department to rebuild the RAID, restore the tape backup (very delicate) and test everything. Another few days and the firm would have been in serious trouble. Believe me, the MD had a second RAID installed immediately to mirror the first and another backup system put in place too. One bitten…
From a personal point of view, as a not very tecchy person, I find them a bit harder to understand and work with. I like the simplicity of cloned drives that I manage myself and that are all independent of each other. I understand that, it is all very simple and it is easy for me to manage. This I like.
So there it is, what must be the longest blog I have ever written. If you are still reading this you deserve a medal! Now I urge you to think through how protected your data is and if you see holes in your system, then get provisions put in place to deal with them. Data is becoming more and more important. Especially for us as photographers, our images are irreplaceable and their value to us tends to grow over time. Most of us can’t afford not to deal with this stuff, so even though all the above seems like a lot of hassle, in fact, now I have it in place it is really easy to manage and it works so simply. And I sleep well at night.
My final word to you. Hard drives. Don’t trust ‘em. Ever.
“The 16:10 from Carnarfon”
An illness in the family meant a long planned personal trip for Liz, Stan and I to France, exploring the Normandy and Brittany coast had to be shelved at the last minute. Instead we headed to North Wales in the camper van, ready to head home at short notice if needed.
I don’t know why, whether it was the fact that our plans had had to change with the disappointment that entailed or whether it was just a case of ‘photography fatigue’ coming from working as a professional but I found myself not touching the camera for ten days. Despite being in such a beautiful part of the country I didn’t make a single image. I had no inclination to whatsoever. I just enjoyed relaxing, walking, and resting. No sunrises, sunsets, nothing, not even an iPhone image.
Then, on day 11, we were on a steam train (doing the tourist thing) going from Carnafon to Porthmadog. The line runs below Snowdon to Beddgellert and through the stunning Aberglasyn pass. It was a hot, blue sky day, not the usual conditions for making landscape images but as we pulled away from Carnafon station I felt compelled to get my camera from my bag, blow the dust off and document the two and a half hour journey (it only runs at about 25 miles an hour flat out).
I was facing backwards so didn’t see things until the train was passing them. I decided I didn’t want the usual tourist snaps so, to mix things up, I would work one handed. I would use a single prime lens, the Fuji 35mm f1.4. I would fire the shutter instinctively, almost without thinking, whenever my brain/eye reacted to something. I quickly found having the auto focus selected made this unworkable. The fact that the objects were already passing the train when I was seeing them, then waiting for auto focus to lock meant I was missing too many images. I switched to manual focus and pre-focused, street photography style, a few meters outside the train. I wanted a softness to the images and knew the movement of the train would provide that to an extent, but found, due to how bright the day was, that even working at narrow apertures the shutter speed I was getting (working in aperture priority) was still very fast (even exceeding the maximum 4000th of a second of the Fuji X-Pro 1, at times). This meant that things were ending up a little too sharp for my tastes.
However, as we got to the woodland section of the trip, things changed. The lower light levels below the canopy of trees allowed me to open up the aperture, varying from f5.6 to f1.4 depending on how bright it was. This, coupled with the manual focus and train movement began to give me the look and feel to the images I wanted.
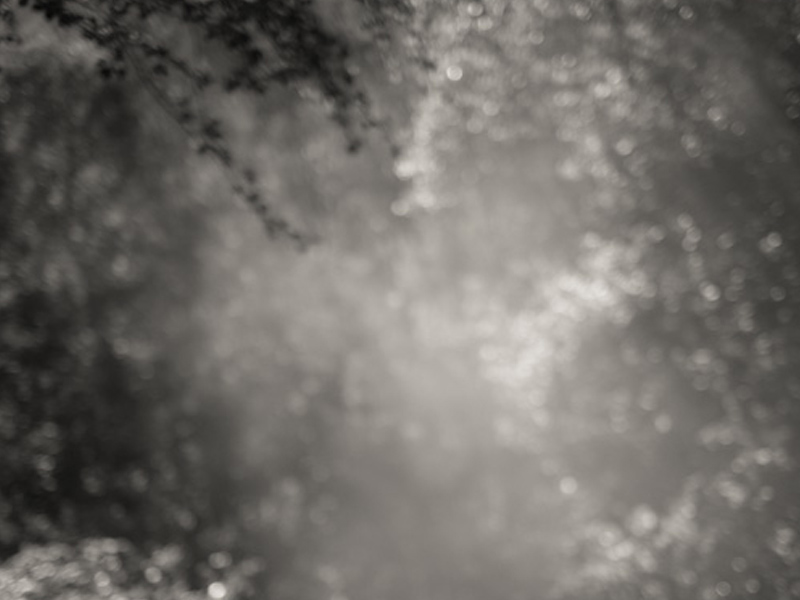
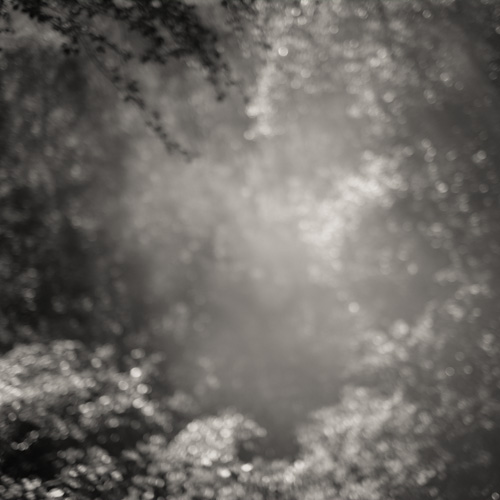
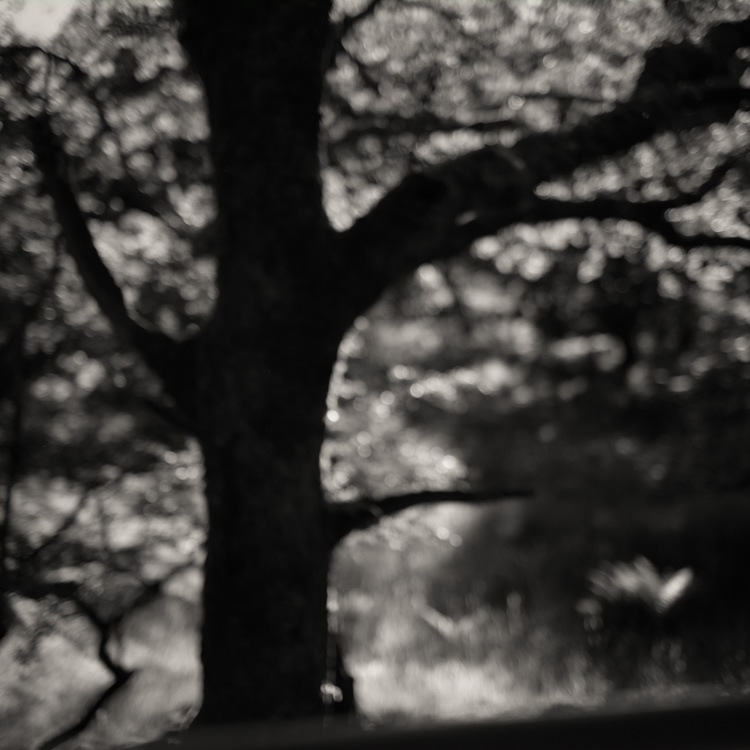
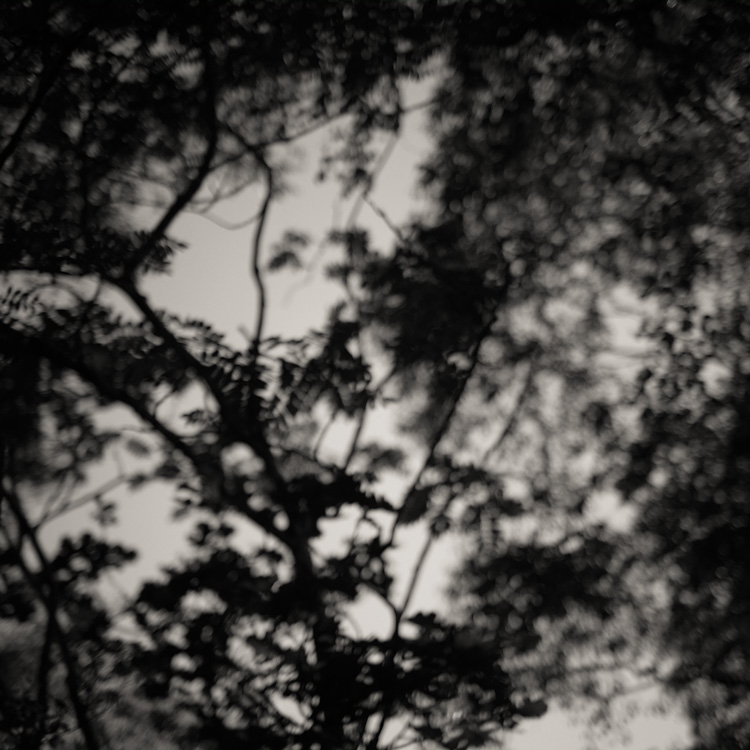
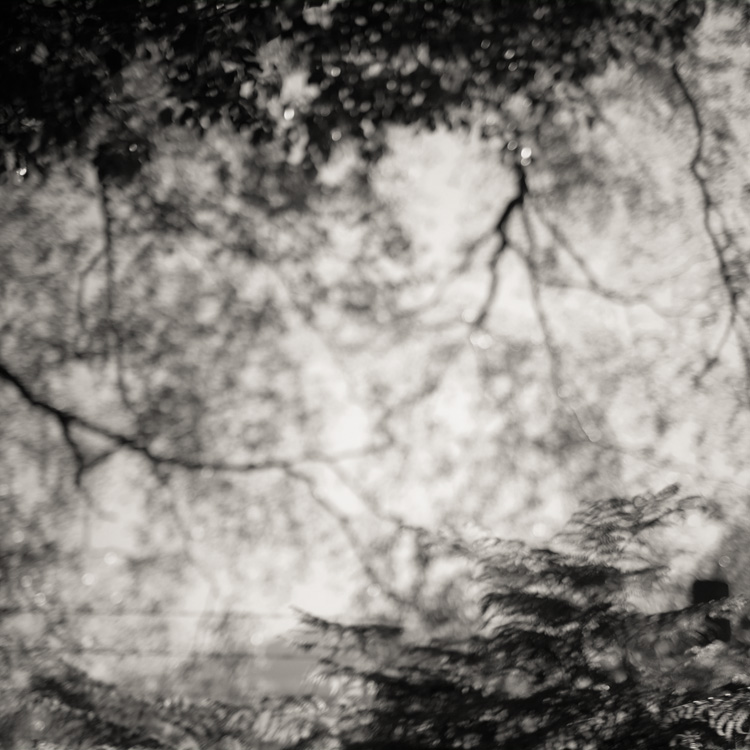
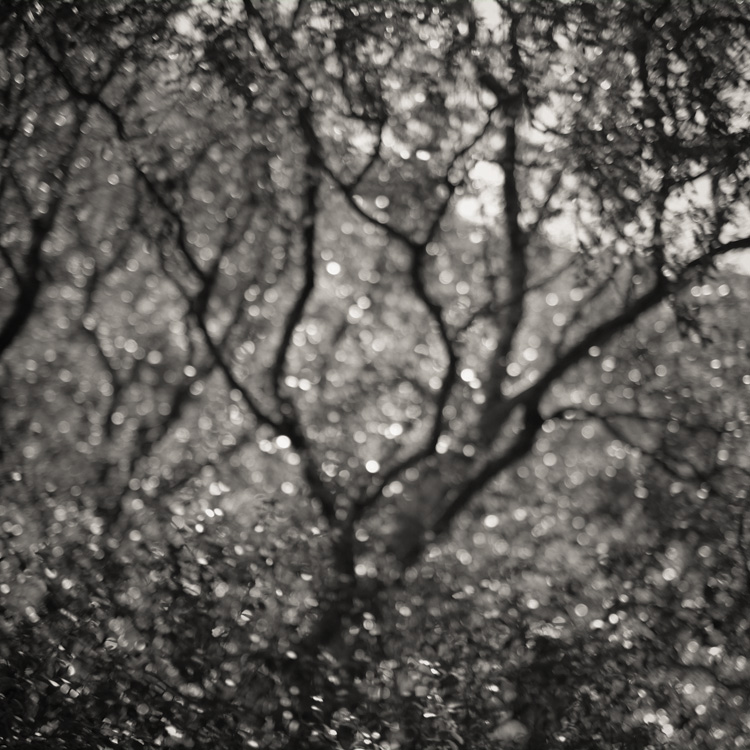
The bright sunlight filtering through the trees, bokeh’ed out by the wide aperture gave a pleasing sparkle to many shots. The out of focus and shallow depth of field gave impressions of the woodland without sharpness. I shot in raw and jpeg, using the Fuji in square format and its own internal mono conversion (which is applied to the jpeg but not the raw file which still imports with full colour). The mono setting I chose included the red filter.
Back in Lightroom, I imported and sorted the images. I wanted to as little as possible to them in the spirit of the spontaneous way the images were captured. So I have done no cropping and have made no adjustments in Lightroom at all (the examples you see here I have applied a slight vignette to and added a slight warm tone as an experiment but if you would like to see the whole project in pure mono you can, HERE, on my Behance portfolio site)
Seeing the images flashing up in mono on the cameras screen pushed me on and filled me with enthusiasm. The indifference to making images I had felt for the previous ten days had vanished and that two and a half hour train journey flashed by. I made over 1500 images and now, having sorted them, I have around 400 I am happy with. These will be distilled into two projects. A small set (that may never see the light of day) of sharper images made out in the wider landscape and then those I made in the woodlands down through the Aberglasyn Pass.
I am also keen to use some of the techniques I learned on the journey to see how they work in other situations. So it may yield other sets of images, we shall see. Below are just a few of the images for you to have a look at. Marmite images, certainly. Not to everyones taste! But they rekindled my enthusiasm.
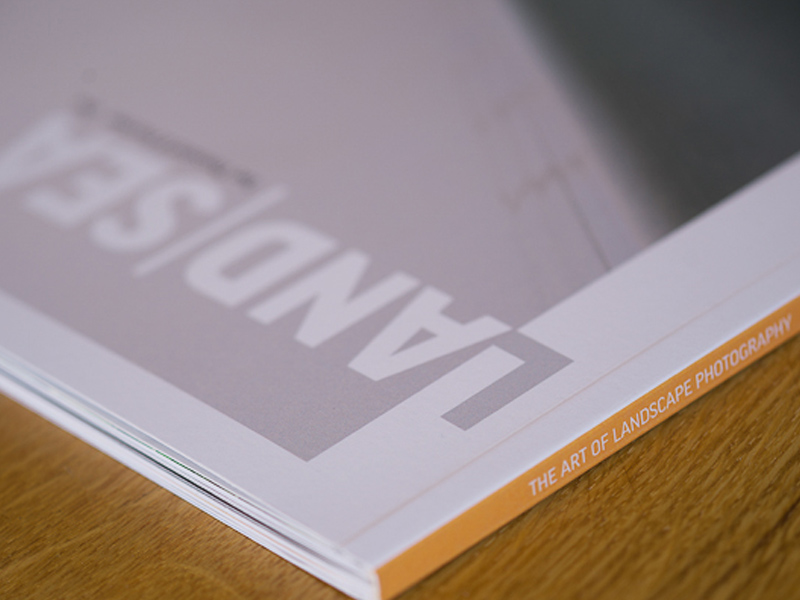
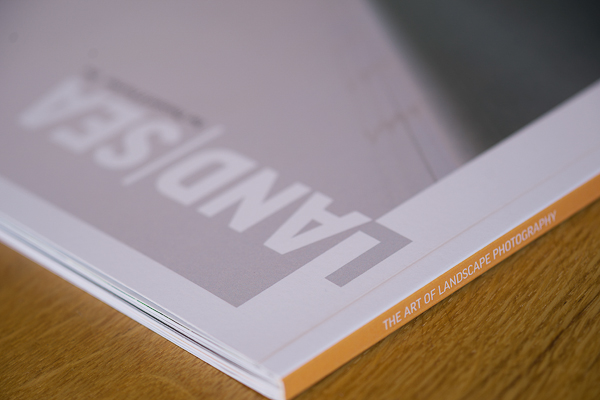
Review of Triplekites new book – Land | Sea
Land | Sea is the new release and the first in a new concept of publication from quality photography book publisher, Triplekite.
The new concept is based around an idea to provide a format which can be published around three times a year allowing portfolios from five photographers to be showcased. Triplekite have set themselves a difficult brief in this as they want to keep the selling price low, at £20, while maintaining their reputation for using very high quality print processes and materials coupled with design which focuses on the beauty of the images.
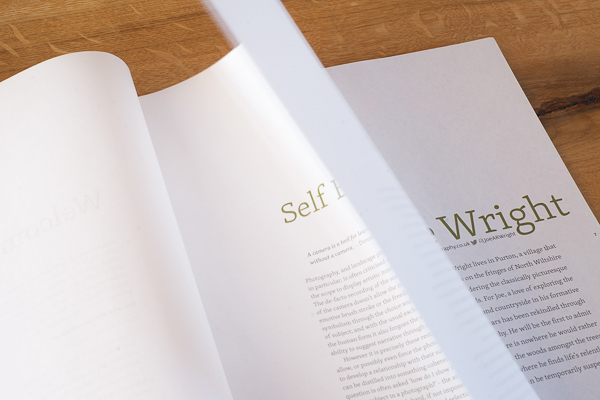
Have they succeeded? Most certainly. I was very keen to get my hands on a copy, indeed I held off doing the review until I had seen the physical book even though I get a sneak preview of the pdf prior to it going to print Lets take the physical quality of the book first. I was initially struck by the feel of the front cover. The soft cover material has a waxy coating which gives the book a luxury finish. Inside that care and attention to detail is reflected in the way two different paper weights have been used through the book. The pages on which the images are printed are of a substantial weight and thickness, but interleaved between them the pages which divide the photographers portfolios and the pages with the foreword etc are printed on a much lighter, almost translucent bible paper. It is attention to detail like this which elevates Triplekite publications and shows the people behind the books really care about what they are producing rather than being focused solely on profit.
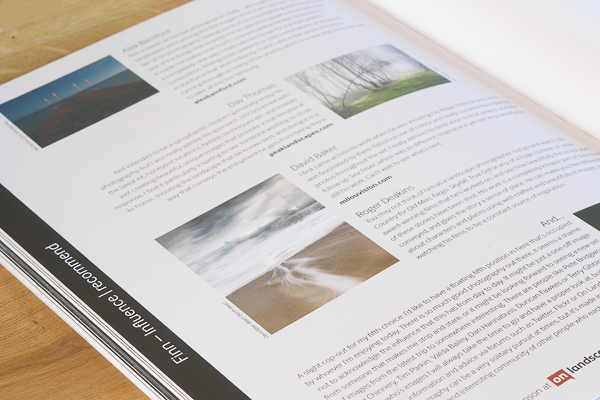
The graphic design of the book also demonstrates the same attention to detail and love of the images. The typography and colour scheme is quiet and understated, done specifically to keep the attention on the photographs, I’m sure. To compliment this, space is given to the images and they are laid out in such a way as to ensure they are the main focus of the publication. The book is 320 x 240mm, softbound with 68 pages and I found the page size easier to cope with than the larger pages of the ‘Sea Fever’ book, also published by Triplekite and as such it fits on my bookshelves better.
There is an introduction by Tim Parkin of OnLandscape, who has collaborated on the project, where he discusses self expression in photography and a special treat for lovers of fine photography is an afterword written by Paul Kenny. It is a fascinating thoughtful piece which he describes as “Musings on the relationship between landscape, photography and art”.
The featured photographers in this first edition are Joe Wright, Valda Bailey, Al Brydon, Giles McGarry and Finn Hopson. This choice of artists is interesting. Many publishers would go down the route of selecting individuals who all produce identikit work, work in the same style so that it appealed to lovers of that one style. However, this group of photographers have very diverse approaches to their art. As a result you are likely to find something new which excites you, much like buying a compilation album and discovering an artist you were previously unaware of in amongst the familiar tracks.
I think this approach is perfect. It encourages us to consider a broader range of styles and to question our own approaches to photography, rather than just focusing our book buying on photographers whose work is perhaps similar to our own or who are ‘safe’ buys.
In the case of all the photographers in this issue, I was aware of all of them, but even so, I wasn’t prepared for just how exciting some of the work was. Take Joe Wright, as an example. I have seen many of Joes images before and loved them, indeed I have met and enjoyed Joes company up in the Lakes. But, despite this, I wasn’t ready for just how wonderful his images were in Land | Sea. From the opening, full page image of Crocosmia flowers in the rain through to his woodland images and his intimate rock abstracts I was enthralled. I think, seeing his images here, that Joe needs a book to himself!
Brilliantly contrasting with Joes quiet landscapes and intimate landscape details, his portfolio is followed by that of Valda Bailey. And what a contrast. Valdas images, using multiple exposure techniques are full of passion and colour, vibrance and drama. Her portfolio demonstrates how being experimental and letting go of the more ‘standard’ conventions of landscape photography can free you and open up a new world of photographic opportunities. Here is another photographer who I can see having her own dedicated book in the not too distant future.
And so it goes through the book, next is Al Brydons dark, moody landscapes, often of neglected places or those less noticed, revealing a hidden beauty. Giles McGarrys fine monochrome architectural images (and I can see special attention has gone into the printing of Giles monochrome images as the reproduction of the tones is excellent and I know it is tricky to do this without special processes being employed – another testament to Triplekite putting the image quality in front of profit, bravo!) contrast with these superbly, highlighting what can be achieved with long exposures and intense attention to detail in image processing and finally, the book concludes with Finn Hopsons careful, quiet and soothing landscapes of his beloved South Downs. Wonderful pastoral images made in gentle light.
To accompany each photographers portfolio is a short essay from them on their approach, background and thoughts on image making. Particularly appreciated is a page from each in which they detail their personal photographic influences and role models which is a great springboard for us, as lovers of photography, to go off exploring and discovering even more fine work. This makes it an even more valuable resource.
I foresee that this series is going to become very collectable and will build into a great library of photographers portfolios over time. Triplekite have announced the next group of photographers who are to be featured in volume two and I am already salivating over the thought of seeing the edition.
Is there anything I would change? Hunger for images means I would love to see a couple more pages per photographer to allow for some more photographs and some more in depth comments from them, but I also understand the financial implications of enlarging the publication. On the whole, I have to say, Land | Sea exceeded my expectations both in quality of production and content, so there is little else I can think of to improve it. I guess things like inserting Q codes to take us straight to the photographers web sites could be put in, that might be a useful touch for some. Maybe an audio interview could be added to the Triplekite website with each photographer to extend the article? But all these things take time and resources and I do think the price point of the publication is important.
So I would encourage you to go to the Triplekite website, HERE, and purchase your own copy. You can also buy a print from any of the photographers featured in the book for just £20 (buy all five and you get one free) so this is a superb opportunity to collect images from photographers you love at an amazing price. Still available on the website is David Bakers ‘Sea Fever’ and Dav Thomas’s book ‘With Trees’.
I hope you enjoy the book as much as I have.
Disclaimer: In the interests of journalistic integrity I want to make it clear I get a free copy of the publication under review from Triplekite. The above link is also an affiliate link so if you use it I get a small commission. However, I can also honestly state that Triplekite make no attempt whatsoever to influence what I say about their books. They do not see (or ask to see) what I write prior to publication and they do not ask me to alter what I write (except if I make an error regarding technical details. If I don’t like any aspect of the books, I will say so. I take my integrity very seriously.
If you do wish to buy the book and use a link which does NOT give me any commission then this link HERE will do that for you. As a consequence of being a professional teacher, writer, photographer and active member of the photographic community it is inevitable that I will know many of the photographers featured in the books I review. Some are now close friends, others are acquaintances and some I know fleetingly or just by reputation. I hope all of these understand that as a reviewer I have to try and stand back from any personal relationships and give my honest review of what I see and read. If I praise the work I genuinely feel it deserves praise. If I am less complimentary then I will always try never to be unkind but always to be honest, but it will never be personal and I trust that if what I say is less than glowing that we can remain friends? I have come to realise that reviewers walk a minefield, but walk it they must.
Creative Photography Webinars with Onlandscape
I made three hour long videos for OnLandscape magazine in 2013 and they are now available via YouTube.
I have collected them together here for you to watch (and enjoy?)
Part I – a discussion of my creative/alternative technique images and approach (the echo on Tim’s mike is removed after about a minute)
Part II – A session filmed with me working live in the field showing camera techniques
Part III – The final video where I demonstrate my Adobe Lightroom and Photoshop techniques for processing these types of images
I hope you find these videos useful.
The Fuji X-Pro 1 – How did it perform in the Arctic?
I recently had the chance to take the Fuji X-Pro 1 with me on a workshop I was co-leading up above the arctic circle in the far north of Norway. I thought this would be an ideal opportunity to see how the camera performed in extreme conditions. I also had with me a newly delivered 23mm f1.4 Fuji lens to try out too. The images in this article were all made on the trip and all but the aurora shot are jpegs straight or virtually straight from the camera. If you followed my trip reports from the expedition you will have seen most of these images before (sorry!), but the aurora image with the 23mm lens is new, as are one or two of the others.
The idea of testing the lens here was to see how it performed shooting the “Northern Lights”, the Aurora Borealis, if we had a chance to see it. In theory the fast f1.4 aperture would make it ideal but I was also interested to test the sharpness of the lens and also to get a feel for its width, which although 23mm works out at about 35mm as a full-frame DSLR equivalent.
My main concern before setting off with the camera was battery performance in the extreme cold. I have found with the X-Pro 1, as many others have, that battery life is much poorer than I am used to with my DSLR. Of course, the battery is physically much smaller and the camera is fitted with a great electronic viewfinder (EVF) which must use quite a bit of power, so there are reasons behind this.
My frustrations with battery life are compounded by the fact of how difficult it is to change batteries quickly. I have the extended grip fitted to the camera which I find helps me with handling the camera and this has to be removed for every battery change. But, when shooting landscapes I also have to fit a quick release plate for my tripod and this requires a screwdriver (or coin) to remove it and this is also required to change the battery. The way I work I can easily go through four or more batteries in a days shooting and so this stripping down of the camera every time gets very tiresome. You can imagine how much I was looking forward to the drop off in battery performance in the minus 10 to minus 20 degree temperatures we were expecting.
So, how did the batteries perform? Surprisingly, quite well. In fact, I can’t say I noticed a deterioration over what I am used to. True, when shooting in such cold you tend not to shoot for extended periods, however the camera is cold, even in the bag. But I didn’t have to do more battery changes than normal. For that I was thankful.
How did the camera perform? There were a couple of issues. Bear in mind that at times I was using it at minus 20 degrees and often at well below freezing. The first issue I discovered almost straight away was the Fn button on the top of the camera which is programmable to whatever function you choose (I have it set to allow me to quickly change ISO) became “sticky”. To be honest, as it happened straight away I thought at first I had perhaps damaged the camera during the flight as the body had been in my pocket (with no lens attached). However, when the camera warmed up again later in the hotel the button returned to normal action. The next day, back in the cold, the stickiness returned. I found kit still worked but I had to press it carefully and be patient with it.
This button issue later extended to the AF button on the rear of the camera which allows you to select focus points for the auto focus system. In this case it went beyond sticky and refused to work, but again returned to life on warming up in the hotel.
Apart from these two issues the camera performed flawlessly in the extreme conditions we worked in and produced some images I am very happy with.
What I would say, however, is, that I found myself (contrary to what I have been doing here in the UK since buying the Fuji) reaching for my Canon 5D mk3 first. The Fuji has been my camera of choice since I bought it second hand a couple of months ago and I absolutely love it. But after a couple of days I realised I was favouring the Canon unconsciously over it, whereas since buying the Fuji I had not used the Canon at all except for a commissioned shoot which required it. I analysed why this was and realised that the Canon was much easier to use in the cold. I was wearing a pair of thin Merino wool inner gloves and with the Canon I could keep these on and operate the camera easily. However, the Fuji buttons required I take the gloves off due to the size and positioning of the buttons.
I also found the physical size of the Canon easier with gloves. So it was nothing to do with image quality, but rather the practicalities of usability in the arctic weather. I was also conscious of the button stickiness. The Canon had zero issues. It is a testament to the build quality that it shrugged off minus 20 easily. To give you an idea of what these temperatures are like to work in, my camera bag (and I) were getting frosted up at minus 20. Oh, and I didn’t change a battery in the Canon for the whole trip.
So, conclusions on the bodies. If I go to the arctic again the Fuji will stay at home (although it grieves me to say it). It is not ideal for these conditions. If it was my only camera it can handle it, but it is starting to show stress. I would, next time, take the 5Dmk 3 and and mk2 body as my spare body. However, on trips to warmer locations abroad, the Canon will be staying at home and My Fuji will be my travel camera and if my wife, Liz, will let me, her XE-2 body will be my spare body).
Now, thoughts on that 23mm lens. If you have used the 35mm lens you will know how wonderful it is. So you might be wondering if the 23mm is as good? Is it worth adding to your lens stable? Well, my in my opinion, you should. I have only used it a little but I am already blown away by it. It is as sharp, if not sharper. Wide open it is extraordinary. The bokeh is soft and dreamy. On the body of the X-Pro 1 the camera is nicely balanced in the hand (I use the body with the added grip). I am on the train going to London as I type this and I have the lens with me. If time allows I am going to put it through its paces on some street photography – a genre it is made for. I’ll post some images if they are up to scratch.
I used it for some aurora images in Norway. For shooting the aurora you have the lens wide open and focused on infinity. I could have done with a wider lens, in reality, to get more of the landscape in the shot. We were in a forest miles from any light pollution and this means total darkness so composing the image is very tricky. More width gives you latitude to crop away the edges if they are a bit messy. But it is not the fault of the lens that it wasn’t wide enough for what I wanted. The wide aperture gave me great speed, so at ISO1600 I was able to make these images at 10 to 20 seconds which is ideal for aurora images of this type. Had we had a more extreme display I think my shutter speed would have been down to a couple of seconds which would have captured the ‘curtain’ effect had we seen it. Even wide open, with the difficulty of focusing on infinity in absolute darkness I was able to get sharp images with surprising depth of field. The X-Pro 1 performs really well at high ISO’s. I pushed some images to ISO3200 and these do show some noise, but nothing that my Nik noise reduction plugin can’t reduce for me.
So, there we have it. A brief run down on the Fuji X-Pro 1 in the Arctic. It survived, but had a couple of issues. Its not ideal for these extreme conditions, but it held its own and I am delighted with the images it gave me. (all the images here were shot on it). As I am blessed with being able to have two camera systems, the Fuji and the Canon, I have the luxury of choice so if ever I get the chance to return it will be without the Fuji. But if I was a sole Fuji user, I would happily take it knowing I would come home with a great set of images.
Aurora Hunting in Norway, Trip Report – Our Final Day
Our last day is almost over. It seems unlikely we will be out tonight aurora hunting as our final overnight destination, the town of Narvik back in Norway, is blanketed in thick cloud and it is raining (a novelty after all the snow. The temperature is dropping though so more snow is expected).
Today we left Kiruna in Sweden and headed north with a blazing sunrise behind us (in this part of the world at this time of the year the sun rises briefly and sets in the south – something which feels very strange to those of us so used to it rising roughly in the east and setting generally in the west). As soon as we could we stopped to shoot the light before heading into a national park. Here the cloudless sky soon filled with low heavy cloud bearing snow. Before this had a chance to fall the group spent a productive hour shooting the ice at the side of a lake.
After coffee a blizzard began as we climbed a mountain pass. Visibility dropped dramatically. At the top of the pass is the border post with Norway. Here we were met with a queue of articulated lorries. A quick discussion with drivers revealed the descent into Norway had just been closed due to the blizzard. However it became apparent a snow plough was about to attempt to clear the pass and we decided to follow in its wake. What followed was an exciting descent in almost white out conditions. Lorries were stuck on the climb coming from the Norwegian side even though they were fitted with full chains on their wheels. These were extreme conditions. I think the group were relieved to reach the bottom of the pass safely. The alternate route back to Tromso involved a detour of about ten hours driving back across Sweden, up through Finland and across Norway, so we were pleased to make it for that reason too.
Tomorrow we make the four hour dash from Narvik to Tromso airport for our flight to Oslo and then on to Heathrow. Then I have a three or four hour drive back home. A long day!
So here are a final few snaps from the trip. I have many more to process but hope you have enjoyed seeing a few as I have blogged while on the road. I will be putting together a blog devoted to my thoughts on how the Fuji X-Pro 1 performed in the arctic (and how its performance compared to the Canon 5D mk3). I will also report back on my thoughts on the new 23mm f1.4 lens. But for now, if you will excuse me, I just have time to pack for my flight and grab a nap before we go for our final meal.
Aurora Hunting in Norway, Trip Report – Day Six
Finally, after six days of trying, we have seen the aurora.
The relief amongst the group was palpable. Everyone is so happy to have achieved our main goal on this trip.
This is the first time I have seen the aurora and I have to be honest, the display we saw tonight is about as low as the aurora gets. Activity was minimal and so we didn’t get the sweeping curtains of light across the sky most of us imagine. For us, the display was just a glow on the horizon. What you see here in the photograph is nothing like what you experience in the flesh. It is the ability of the digital sensor to record light over a long exposure, in this case around 15 seconds, that produces the intense colours. To the eye, the aurora at this level is barely green and you would drive past it thinking it was just clouds or light pollution if you didn’t have guide to point it out to you (in our case, Tony Spencer, who is one of the most experienced aurora guides in the world – this is trip 43 for him).
I have taken images of the aurora with the Fuji X-Pro 1 as promised, using the new 23mm f1.2 lens. I will post images and my conclusions to its performance in another blog post.
I have to say I am delighted to have witnessed this beautiful phenomena and I know I have only seen it at its least impressive. If we had had a full on display I might feel differently, but I got much more pleasure from photographing the hoar frost yesterday. We have just one night to go on the trip so one more chance to see the lights. We leave Kiruna and head back to Norway, our destination is Narvic, via a National Park, so more landscape photography beckons.
Now, if you don’t mind, it is very late and I need my beauty sleep 🙂
Aurora Hunting in Norway – Trip Report, Day Five
Another night passes and still no aurora. The tension is now building amongst the group. You can feel the anxiety each evening as we gather over our evening meal to look at the technical data relating to the auroral activity in the atmosphere. Yesterday in the late afternoon the activity suddenly spiked and we thought we would get our first glimpse. However, by the time we got to Kiruna and had our meal the graphs had all flatlined and the sky had filled with cloud. As group leaders we certainly feel the pressure to perform. Although we have absolutely no control over the clouds or the aurora we know just how much the clients want to see it. Not only do we have clients from the UK with us, but also some from the US and others from Australia. What a big investment they have all made in the trip. So we are prepared to drive as far as it takes and work as many hours as it takes if there is any chance at all to deliver the lights for the group. But, we just need that break in the clouds to coincide with some activity up on the edge of the atmosphere.
By coming to Kiruna here in Sweden we have moved away from the low pressure system which almost certainly would have meant no aurora up in northern Norway. This evening, so far, we have clear skies (and temperatures already plunging back towards the minus 20 degrees centigrade we experienced last night out in the tundra). As I type, at 17:00 local time, all three key graphs are flatlining. It couldn’t be any worse. There is nothing we can do but keep checking the graphs every few minutes, just hoping for them to leap into life. The more the graphs deviate from a flat line, the more spectacular the display. Right now, we would take a green glow on the horizon, anything!
That said, the day has not been a dead loss. Not by any means. We headed out into the tundra and forest and spent a brilliant day photographing the most stunning hoar frost. The temperature out there hasn’t risen above freezing for weeks and is mainly staying around minus ten degrees and lower so the hoar frost just builds and builds. As daylight faded the intense cold produced the most stunning blue and pink sky – the perfect foil to the frost.
I have processed up very quickly a few images from the day for you here just to show some of the things we have seen.
Now we are all back in our rooms. Time for a warming shower and a couple of hours sleep. Then a meal… and we all gather around the graph… watching the lines… wishing we had an auroral defibrillator to shock them into life. “Charging, Clear, BANG”.
Come back tomorrow to see if we managed to bring the patient back to life.
Aurora Hunting, Norway Trip – Day Four
Well, it’s been quite a day. As a group we took the decision last night to leave Sommeroy this morning as the weather forecast for the rest of our trip was dire. A low pressure system was going to dominate the whole of the north Norway coast for the next four or five days. Along with high winds driving snow and quite high temperatures for the time of year it meant that photography would be virtually impossible and certainly photographing the aurora would be almost certainly impossible. The cloud base would be just too low and too dense.
Once this decision had been made we headed off into the storm this morning on the 10 hour drive through Norway, down through Finland and into Sweden. In line with the forecast the storm in Norway was fierce. Gradually as we drove down through Finland the storm abated and the weather improved. We even managed to briefly stop beside a partly iced river to photograph the setting sun. Finally in the dark around 6 pm we arrived at our destination.
We’re now basing ourselves in the Swedish town of Kiruna. This town is surrounded by fast tundra and beautiful pine forest. Even in the headlights of the vehicles we could see the trees were covered in heavy hoarfrost. This will be a subject of our photography tomorrow. On the journey down the aurora activity increased considerably however in the last couple of hours cloud has rolled in and it seems unlikely that we will see a display tonight. But this increasing activity gives us hope that we will see the aurora over the next couple of days. The weather forecast here is much more favourable with clear skies and very low temperatures. In fact just north of here we experienced the lowest temperatures of the trip so far. The temperature gauges in the vehicles dropped below-20°C.
In the picture above of the silver birch trees I used the new 23 mm F 1.4 lens on the Fuji X-Pro 1. This was the first real photograph I have taken with the new lens and it has performed well. The shoot by the river was a bit rushed due to the failing light and us being on a long trip in difficult conditions. The temperature here was around-15° centigrade. (now I have uploaded it , twice, the image seems unsharp on my blog page but the original file and jpeg I am uploading are tac sharp – to be honest, I am too tired to fix it today, not sure what the issue is??? But the original is fine). The second photograph of the old shed door was taking yesterday on the Canon 5D mk3.
So, hopefully, tomorrow I will be able to report that not only have we had a good day shooting the landscape but also we have had our who first opportunity to see and capture the northern lights. But for that, as always, we are in the hands of the weather and solar activity. Certainly coming here gives us our best chance on both counts.
Aurora Hunting in Norway, Trip Report – Day Three
The weather today has deteriorated considerably. The temperature has risen a few degrees and it has rained, sleeted and snowed. The wind is stronger and now, at 15:30 in the afternoon as I type this back at our hotel it is dark outside and the wind is howling. The cloud base is very low, there is no way we are going to see the aurora tonight. However, even if the skies were clear, the auroral activity is very low indeed so we might not see it even then. I have a feeling we may have to make a long drive inland to Finland or Sweden over the weekend in search of better weather in order to get a better chance of seeing the ‘Northern Lights’.
So, thats the bad news out of the way. Have we let this put us off? No we haven’t. In conditions like this, it is fairly pointless trying to shoot wide landscapes. However, what the light is perfect for is detail work. With this in mind we headed off intrepidly after breakfast in search of texture and detail. After an hour of driving we found it in a cluster of very old Nordic fishing huts on the shore of a bay facing north into the arctic ocean.
These roughly made wooden huts have been scoured for generations by salt winds, snow and ice and bleached by the sun. Exposed to the wind and rain the layers of paint and rich, deep colours in the wood were extraordinary in todays overcast light. Bedding our tripods in the group spent a happy couple of hours filling memory cards with images full of texture and details.
I made some images with the Fuji X-Pro 1 and more with the 5D mk3. I have shown one from both cameras of the same subject here for comparison. Particularly as the Fuji image is handheld at ISO3200 whereas the Canon images were made on a tripod at ISO100 – interesting to see what you think. I know its not easy to see the differences on a web page, but it makes for an interesting comparison.
I find doing this type of image (which is a favourite style of mine) that I like to get the camera very parallel to the subject surface. I like a flat, rather than three dimensional composition. I also prefer compositions which exclude the sky. I prefer to get close to the shed walls and fill the frame with detail. I work at f8 to f11 in most cases to make sure I get good detail and sharpness. Good focus and tripod technique is essential (especially as we had a blustery wind to contend with).
The Fuji image here is a jpeg straight out of camera using the Astia pre-set. The Canon images are raw files which have had some basic processing done in Lightroom and Photoshop.
From this location we headed to another which was a partially frozen river in the mountains with small waterfalls, ice edging the flow, with beautiful rocks and lovely silver birches in the snow.
Because of just how short our days are now here, by this time it was getting dark and we headed home in driving sleet and snow to the hotel. Tonight after our meal plans need to be made for the weekend – the aurora needs to be found!
Aurora Hunting in Norway, Trip Report, Day Two
Last night Tony and I took it in shifts to keep a watch on the skies and the aurora reports but sadly the auroral activity was extremely low and there was nothing to be seen here despite broken cloud. At least the group had a long nights unbroken sleep to get over jet lag.
We headed out after breakfast into great soft pink light (the image above was one I managed to grab from one of the mornings locations). The temperatures here were below freezing all day and are currently around minus 10 a few miles inland. Here on the coast they are a little higher at around minus 2 to 4 but the wind is rising so it feels much colder. No snow has fallen after yesterdays blizzards.
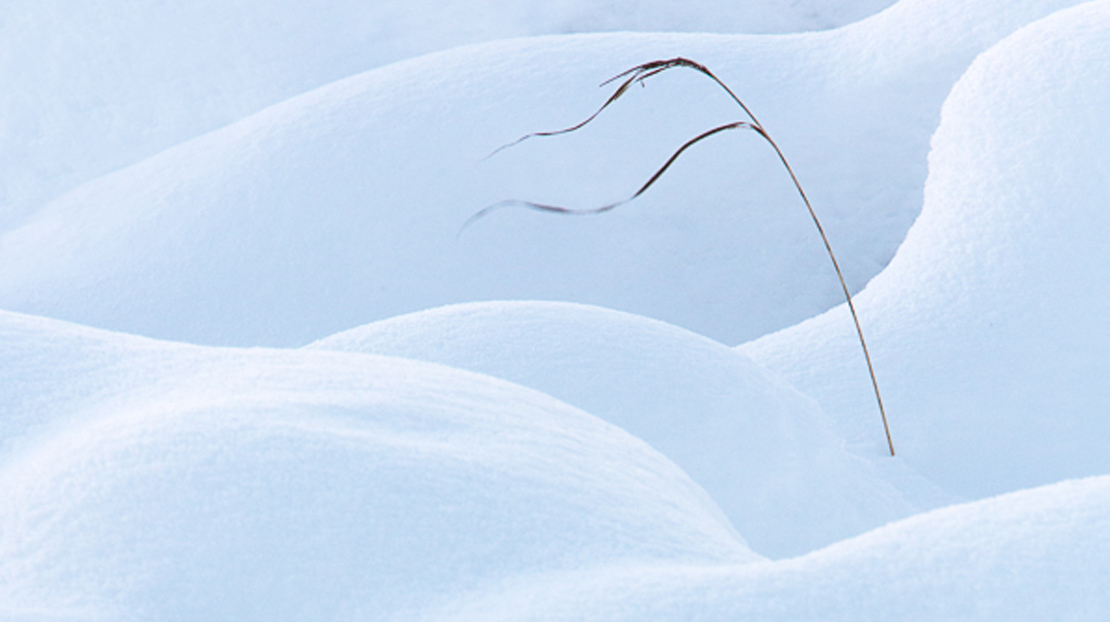
The group were getting used to working in such cold conditions. You soon learn not to let snow get onto your gear. For example, I dropped a body cap into the snow. It would have been crazy to put this on to the body of my camera. The snow melts in the bag then when the camera gets cold the snow then re-freezes causing damage or sticking the cap into place. One member of the group had her tripod head accidentally dropped in the snow. This quickly froze the ball head, which we had to defrost on location.
Keeping yourself warm is key too. As hands get cold it quickly becomes impossible to operate the camera, so, even though it slows down picture making, it is important to wear gloves (only removing them when necessary and putting them back on again as quickly as possible). Hats, gloves and warm coats are all very necessary. Decent boots here are very important. Not only do they need good grip for walking on compacted snow and ice but they also need to have good thermal barriers in the soles to help keep the feet warm when standing by the tripod for long periods. I am wearing North Face Chilkats and they are performing perfectly.
At these temperatures the cameras are working well. Batteries do drain more quickly but it is not so cold that this is becoming a real issue at this stage. It is also not so cold yet that we have to put our cameras in poly bags when returning them to the vans to stop condensation forming and refreezing. This becomes an issue when the temperature gets lower – closer to minus 20. Then it is vital to bag and seal the camera body and lenses in sealed poly bags when moving from outside into the van or a building. This helps stop condensation forming. The condensation is not too much of a problem until you take the gear back into the cold when it instantly re-freezes. This kills cameras and when on the front of lens elements will need to be scrapped off, much like scrapping ice off of a car windscreen. Not something you want to be doing with your beloved pro-lenses.
For those interested in how the Fuji X-Pro 1 is performing I have a few things to mention. It is interesting. I am finding the Canon 5D mk3 easier to use with gloves on and some of the scenes are so stunning I am feeling the need to use the bigger sensor. I have noticed the ‘function’ button gets a bit sticky in the cold when it drops very low (I have the button programmed to quickly change the ISO). I haven’t been using it for long periods so I can’t say battery performance has seen a noticeable drop in performance. The image quality continues to be superb.
As we haven’t seen the aurora yet, I can report on how it performs being pushed to capture that!
We covered three locations today. The first was an inland fjord (you can see an image from here at the top of this post). Ice was forming at the edge of the fjord and the pink light in the sky was beautifully subtle. From here we moved to a small frozen lake with a range of jagged mountains behind. The group worked on capturing the snow, ice, small silver birch tree with some stunning Alpen glow on the mountains behind. Our final location was another fjord, with a great jetty to use as foreground with rugged mountains and delicious silvery blue light. Great for a lengthened exposure just to flatten the water a little. My image is shown below. Once we had finished here (which included shooting a lovely fisherman’s hut full of textures and detail) we dived into a coffee shop for some well earned Lattes and chocolate brownies (well, its not all work on these trips, you know!).
Back at the hotel we are now resting in our rooms prior to our evening meal. On an aurora trip its important to use the afternoon darkness to sleep in case we spend the night out shooting the skies. Over the meal we will consult the space weather, cloud cover, and auroral activity reports to see if everything might come together in our favour. Who knows what the night holds. (23:30 update – sadly the cloud has rolled in and although the charts show a little auroral activity it is impossible to see it. Even with no activity we had planned to go out and shoot star trails but with heavy clouds, a rising and biting wind with heavy wind chill this was just pointless, so it is back to bed. There is always tomorrow).