Author: dougchinnery

Aurora Hunting in Norway – Trip Report, Day One.

aurora hunting day 1

Its 16:00 here in Sommeroy, north Norway and its been dark for two hours. Outside the hotel a blizzard rages. Visibility is below 50 meters at times. Welcome to Norway!

I’m here co-leading a workshop with famed aurora and landscape photographer Antony Spencer for Light & Land. We have just collected our group of 12 clients from Tromso airport and arrived safely at our hotel about an hours drive away. The journey was interesting to say the least as the blizzard raged. Here in Norway, they leave a thick layer of ice on the roads all winter and just scrape away the excess snow. All vehicles are fitted with studded tyres which grip into the ice incredibly well. Driving this way takes a bit of getting used to at first, but you soon learn.

Tony and I met at Heathrow airport at 05:00 yesterday for our flight. In fact, we were so busy catching up over breakfast that we almost missed our plane. I was the last person to board with seconds to spare. It took me to Oslo to get my breath back 🙂 Oslo was clear of snow and looked beautifully autumnal as we came in to land. It is on a similar latitude to Scotland and so, although it does get cold and snowy later, at this time of year it is much like Scotland. A quick change of planes and we headed north. Much further north. As we descended through the cloud it was apparent we were well and truly in the arctic.

I then had a baptism of fire, learning to drive on ice, in the dark, on the opposite side of the road to the way we drive in the UK. Oh, and a blizzard blew up. I don’t know if Tony enjoyed the drive. I was too busy concentrating to be concerned. Darkness at 14:00 has a weird effect on you. It feels like you should be heading for bed when in reality it is only the middle of the day. From a photographic point of view, this short day is wonderful. Sunrise here is, for the next few days, at around 10:00 – 10:30 (the days are shortening really fast and before we come home the sun will not be rising at all – I will get to experience the 24 hour arctic night) and with sunset at 14:00 we have this soft light for the whole time. Even when it is overcast the water goes a gorgeous steel grey blue, which offset against the snow and mountains is to die for. Its like photographing in a perpetual “golden hour”.

Sommeroy is a beautiful little area of islands, an archipelago that Norwegians visit in the summer. I think they think we are mad coming here at this time of year.

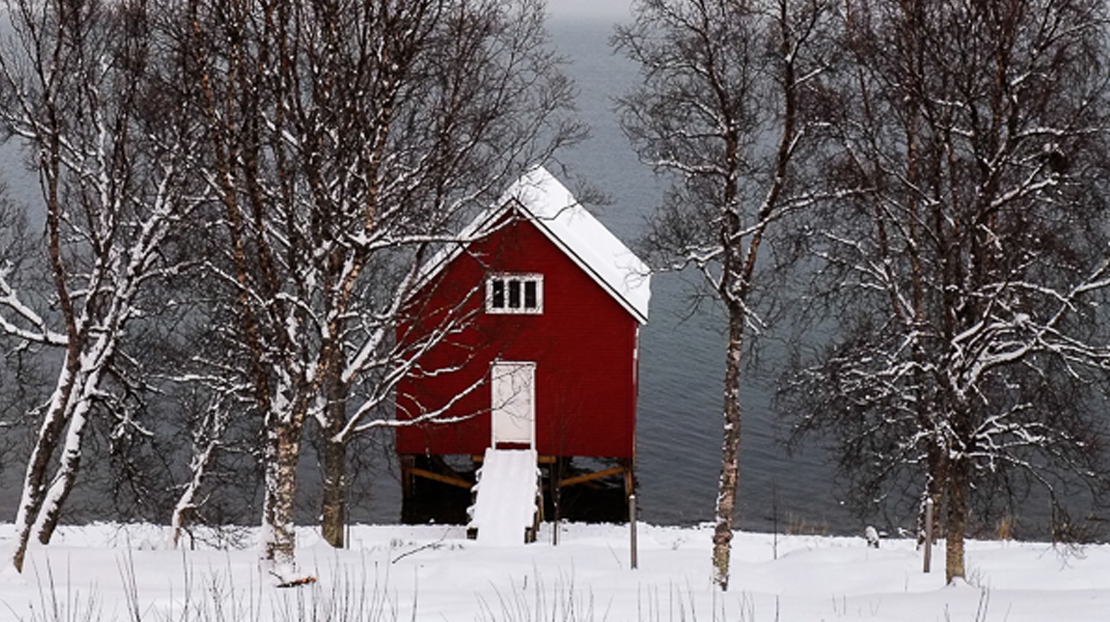
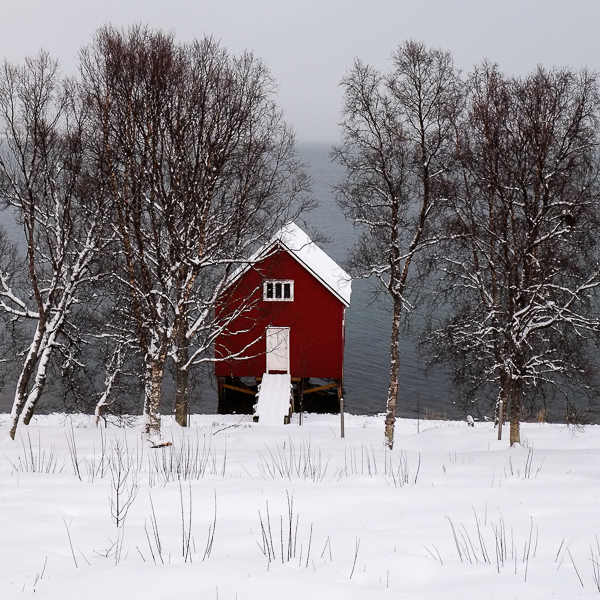
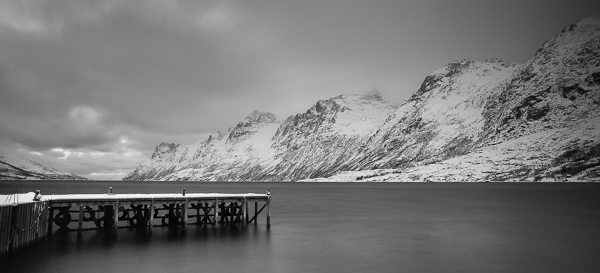
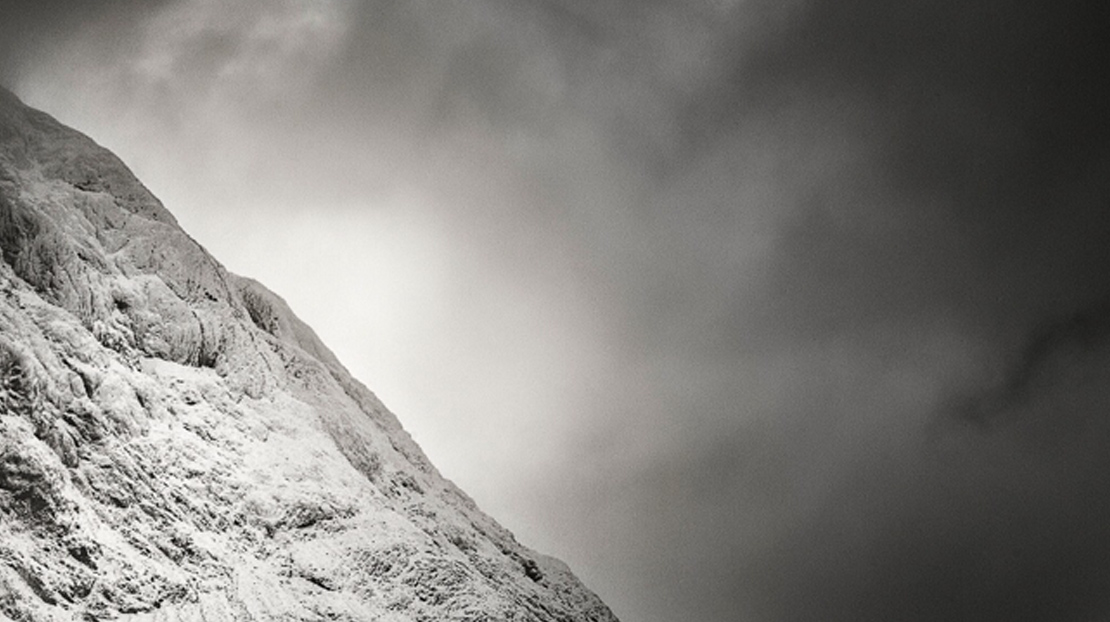
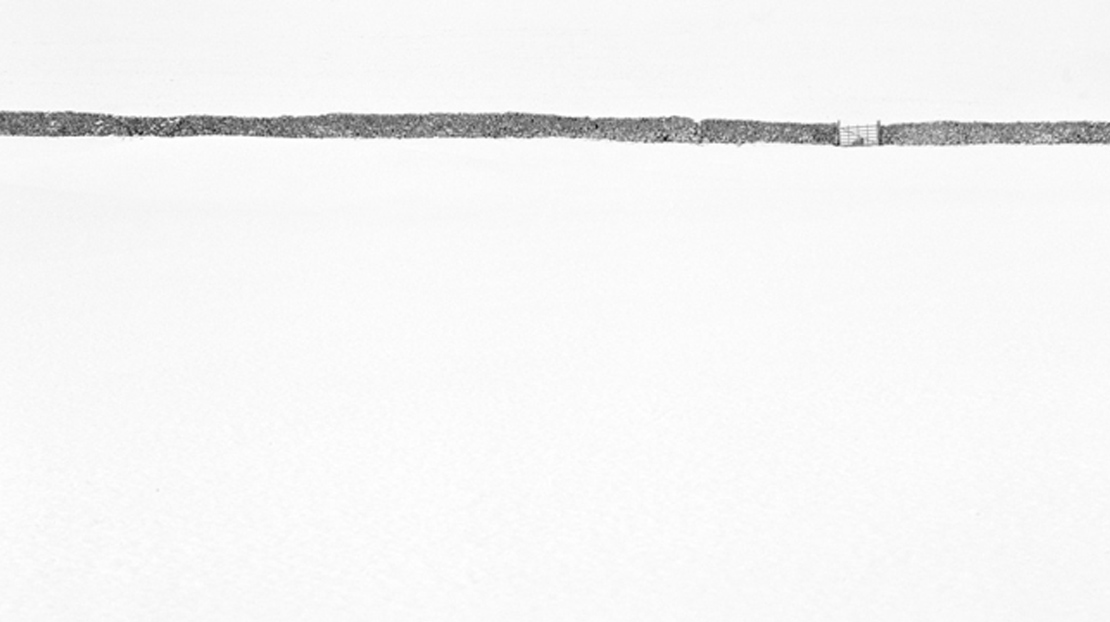
Today, Tony showed me around the area a bit and we managed to fire a few frames. I have included some here. All are jpegs made on the Fuji X-Pro1.

I will try, as time allows, because the clients come first, to blog each day and post a few images, to keep you up to date on our adventure. Hopefully there will be some aurora shots to show you as the week too. Clouds permitting. Watch this space.

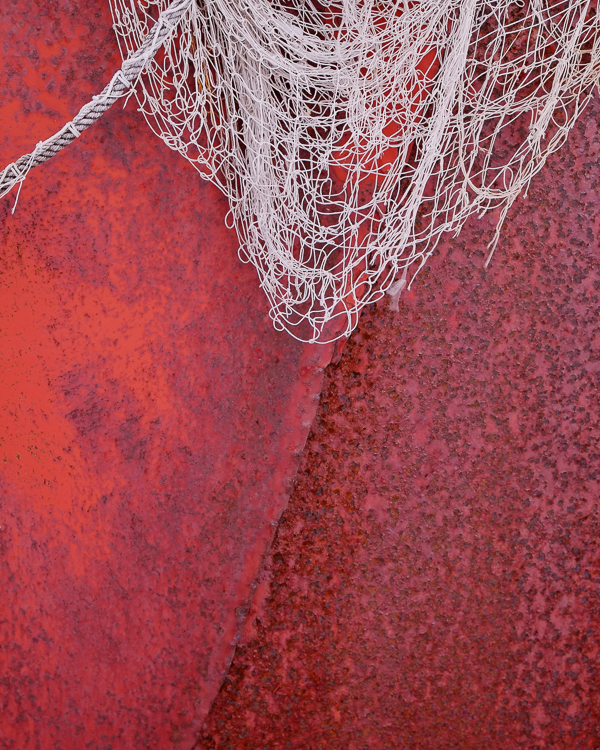
A little detail shot and full credit to Tony for the composition - the boy can spot an image!

A New App from the Maker of the Photographers Ephemeris

new app ephemeris

I was very privileged to be asked by Stephen Trainor earlier this year to be one of the beta testers of a new app he has designed to complement the hugely successful and absolutely essential photographers app, The Photograpers Ephemeris (TPE).


TPE has been around for a while now and is available as a desktop program or as an iOS or Android app. For most landscape and outdoor photographers it has become an essential part of their location planning kit. I couldn’t imagine doing my job without it. I also can’t imagine the brains and ability that has gone into designing such a complex and useful program.

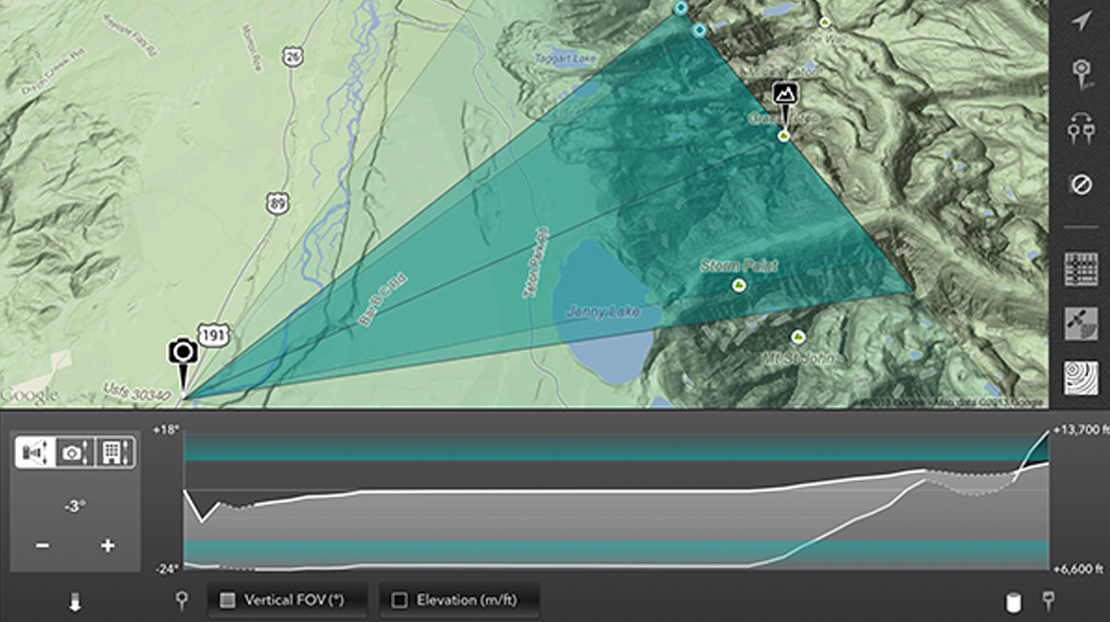
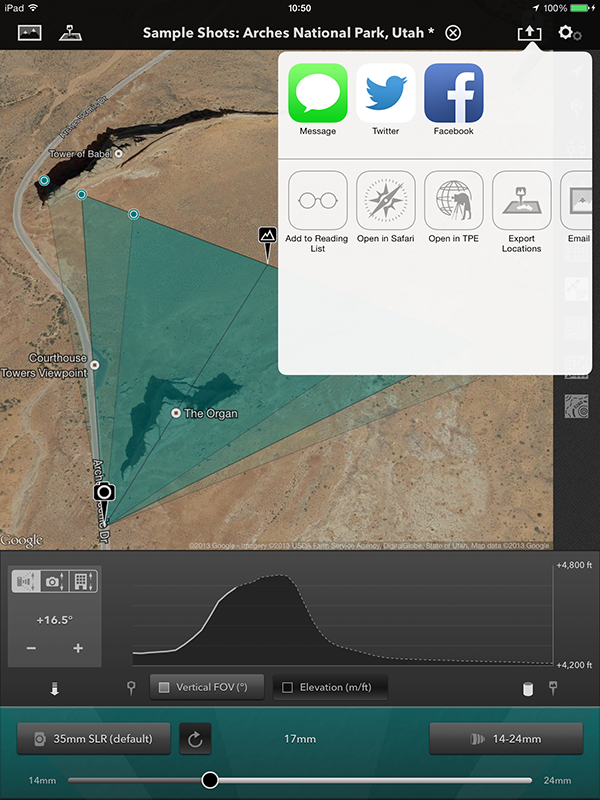
Not content with TPE, though, Stephen has forged ahead and designed a new app for us photographers called, officially, “The Photographers Transit” but it is shortened to “Photo-Transit”. This is an app which again uses Google Maps as it’s foundation. The app then adds the ability to place yourself at any point on Earth and face in any direction. You can then select any lens for your camera (and it takes into account you sensor/film size) and it shows you what field of view you will achieve at any given focal length. This means, no more worrying if you have packed the right lenses for a long hike or a flight where bag weight is critical. It also means you can plan key shots in advance based on your kit. You will know if your lenses have the width or reach you need for the shot you envisage. Or, before arriving at a location you will know exactly where to be to make best, use of your lenses to get the optimum image. This is location planning in real detail.


There is also the ability to look at elevation data in the app to give an idea of how the land rises and falls. This helps with understanding how shadows will appear, when the sun will break the actual horizon and so on. You can also flip from the app over into TPE to work with both apps together which is very useful. The app can be used offline with available data and to help visualise potential images close to roads you can combine the app with Google Streetview. Added to this is the unique ability to save location information as you plan it, or to take images at a location and tie the image together with the map/lens/body/field of view information and save it for future reference. There is also a linked website sharing facility so you can share this data with your friends, camera club members and so on, including sharing via message, email, Facebook, Twitter etc.


I was pleased to be able to grab some time with Stephen in his frenetic schedule to interview him about Photo-Transit and here is what he had to say.


DC: Thank you for agreeing to be interviewed Stephen. Can I ask first about your background and how did you come to design and program TPE?

SJT: Thanks for the opportunity, Doug. Maybe somewhere in my background is the semblance of a career plan, but if there is one, I haven’t found it yet! Over the years I’ve worked in classical music and opera, advertising, theatre engineering, telecoms and consulting, doing a variety of things along the way, including software engineering. I moved to Colorado from the UK in 2007 and started doing more landscape photography. Around a year later I signed up for a weekend workshop in nearby Rocky Mountain National Park . The workshop offered a ton of great advice and information on how to plan a shoot for the best light. Participants were asked to bring a number of items to the workshop, including paper topographic maps, rulers, protractors, calculators, pencils etc. It occurred to me that things in the digital world were by then at the point where all of this could be done in software. When I discovered that no such tool apparently existed already, TPE was born.

DC: Were you surprised at how popular TPE has become? Do you have any idea how many users there are now?

SJT: Very pleasantly surprised, yes! Across the various platforms we now have tens of thousands of monthly active users. The desktop version is downloaded around 75,000 times a year.

DC: Has anyone used TPE in ways you didn’t anticipate?

SJT: We’ve had some uses by archeologists looking for historical sun/moon positioning. Also, I’ve read about it being used by hunters, in the US mainly. Oh yes – and the trainspotters too!

DC: Is developing TPE and other photography apps your full time work, or do you have a ‘day job’?

SJT: I spend around half my time developing apps and the other half I do technology consulting, mostly in the area of digital media and online video.

DC: Are you a keen photographer yourself? If so, what style of photography do you like? Do you have a personal website where we can see your images?

SJT: I am. I like to shoot landscape primarily. I prefer a simple, clean style without too much post-processing. Photos that are “overdone” are all too common nowadays. At the same time, I’ve never much cared for the well-worn line of “my photography is an unaltered reproduction of what my eyes saw that day” and its variants. No matter how little processing is done, that’s clearly untrue, as cameras and photographic media, whether digital or film, just don’t work the same way as the eye. I’m definitely a fan of simpler compositions, although that’s something I continue to struggle to achieve in my own photography! I have a (slightly neglected) website at http://stephentrainor.com

DC: What are some of the technical issues in developing a program like TPE?

SJT: The initial challenge is implementing the various algorithms required to calculate accurate sun and moon data. Nowadays there are a few implementations out there, but the accuracy and sophistication does vary. Not all algorithms account well for factors such as atmospheric refraction, for example. (I certainly can’t take any credit for the algorithms themselves – in that regard, I’m standing on the shoulders of mathematical and astronomical giants!) Maintenance of the software becomes a bigger issue over time as the code ages and grows. I’m currently in the middle of a major modernisation of the TPE for iOS code base, much of which dates from 2009-2010 – the middle ages, in terms of iOS software. Once that’s done, the Desktop version will need to be reimplemented as a web app – all required to keep up with the technology of the day.

DC: What then gave you the idea to develop this new program, The Photographers Transit? (TPT)

The concept of displaying the field of view on a map was a suggestion made independently by a few different TPE users. I liked the idea very much and wanted to think about how to incorporate it into the app. However, after thinking it through, I decided to develop it as a separate app for the primary reason that there would be a lot more inputs required of the user to make it work: which camera? which lens? what orientation? where are you pointing it? etc. One of the keys to simplicity of use in an app is minimising the amount of input you require of the user. I think – and many would agree – that TPE is quite complex enough already without piling on yet more functionality.

DC: What is TPT designed to do for the photographer?

SJT: I think of Photo Transit as a general purpose digital planning tool for outdoor photographers. It provides a mix of digital “surveying” tools that you won’t find elsewhere, so far as I know: a horizontal field of view indicator overlaid on a map and a vertical field of view chart plus elevation profiler that shows what terrain is visible. In addition, we spent quite a lot of time on shot saving and sharing. You can create projects that contain multiple shots and share these easily with friends, colleagues, workshop participants etc. from the app. We were keen to make sure that any information you put into the app is easy to get out of it, so there’s the ability to email shots/projects, view them on a freely available web-site (http://share.phototransit.com) and to export as KML. You don’t need to own PhotoTransit to be able to view shots that have been planned using it. (BTW, ‘we’ is my wife, Alice, who does all of our graphic design, and I…)

DC: How do you see photographers putting TPT to use in their work?

SJT: It’s an advance planning tool, first and foremost: you can use it to build up a list of shots that you’d like to capture on forthcoming trips or shoots, having explored the compositional constraints of the location, your camera and lens ahead of time. Beyond that, I’d like to see photographers using it to share ideas for shots with one another. It provides an easy and complete way to share the physical setup for any stills image. I think it also has an educative role. Many people find numerical values such as field of view or focal length easier to understand when they can be visualized and, like TPE, Photo Transit is a visualization tool.

DC: How does TPT work with TPE?

SJT: Currently, you can open TPE directly from Photo Transit and match the same subject location. The next update to TPE will add the ability to open Photo Transit directly from TPE to go in the reverse direction. We have some further bells and whistles in the works too that will improve the interaction between the apps even more.

DC: What hurdles did you have to overcome to get TPT working?

SJT: Not too many – fewer than for TPE, I’d say. The data model in Photo Transit is definitely more complex (projects, shots, locations, cameras, sensors, lenses), so that took more work. However, many of the harder lessons were already learned with TPE. The Apple maps saga of 2012 cost many hours, but the lessons learned made the mapping choices and implementation for Photo Transit much more straightforward.

DC: Can you give us any clues as to your next project? or is it a secret? or are you still so tired after working to get TPT out that you haven’t had time to think about it yet?

SJT: We have another app in the works that we’re dusting off – it was shelved at the start of the aforementioned maps saga last year. It’s not directly photography related, but more than that I can’t say quite yet. We also have multiple TPE and Photo Transit updates and improvements planned.

DC: Final question, can you recommend websites of any photographers whose work you love? Who are some of your photographic heroes?

SJT: Some names that spring immediately to mind: Bruce Percy (http://brucepercy.com): I think Bruce’s photography was the first that really conveyed to me a sense of personal style. He does a great job of distilling, culling and crafting to achieve a portfolio that has an amazingly consistent ‘voice’. Jack Brauer (http://www.mountainphotography.com): Jack has an incredible collection of beautifully produced photography covering mountains all over the world. He produces wonderful photographs of places that I don’t ever expect I’ll have the strength or fortitude to reach! Guy Tal (http://guytal.com): Guy’s work from around the desert southwest of the USA is probably the most original and distinctive being produced today. He has a great eye for compositional simplicity.

 
You can visit the Photo Transit website HERE and you can follow on Twitter @photoTransit
 

The Fuji X-Pro 1 – Is It a Landscape Photographers Camera? Some Initial Thoughts.

fuji initial thoughts

As followers of my work will know, I have been shooting exclusively wit he Fuji X-Pro 1 for about a month now. My main camera is a Canon 5D mk3 (and I also shoot on film with an ancient and much beloved Hasselblad 500C and wooden Zero Image pinhole camera).

I bought the Fuji primarily for lightweight travel photography, street photography and as a carry anywhere camera. However, as soon as I started to see the results it produced I was keen to see how it performed in my main shooting environment as a professional – the landscape.

First a few caveats. This is not a full frame camera like the 5D mk3, the sensor is smaller and has a lower pixel count. The Fuji has 16 million pixels compared to the Canons 22 million. The aspect ratio of the sensor is the same as the Canon at 3:2. I am also mindful that the range of lenses available for the Fuji is far smaller than for the Canon, but more on this later. So I knew I was not comparing apples with apples.


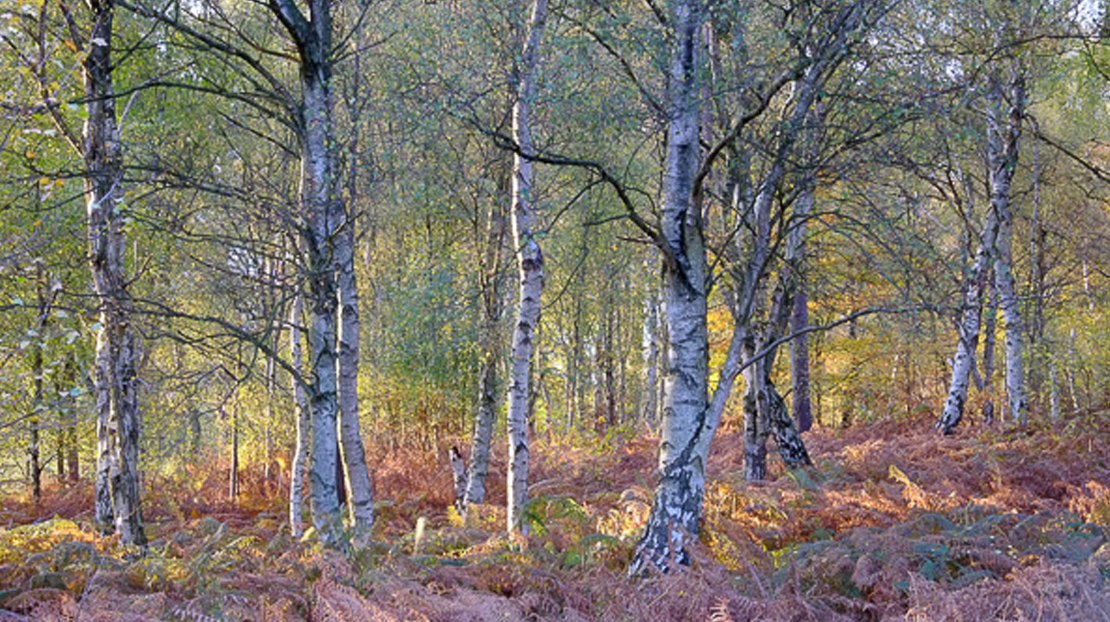
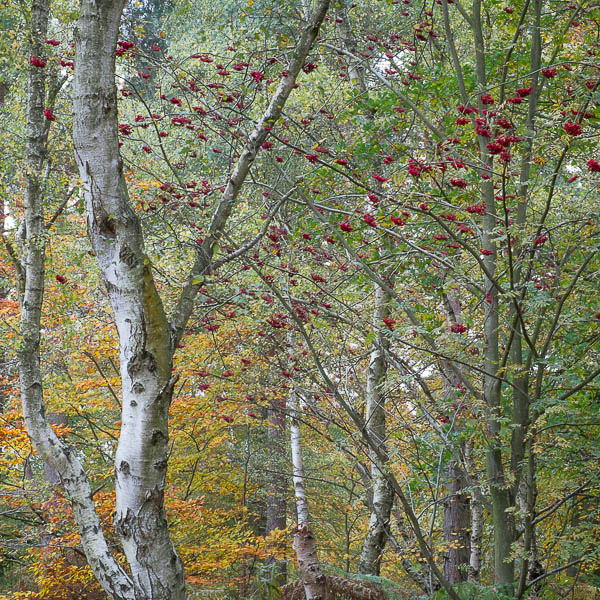
Autumn Woodland. Handheld, ISO1600, f11, 1/30 sec

Having said that, the results shooting landscapes have blown me away. (all the images in the post are taken with the X-Pro 1. Sorry they are all tree images, but it is autumn and it would be rude not to spend my time in the woods. Please also note, all of these images are jpegs either straight out of camera or at most have just had a little high pass sharpening applied for uploading to the web. One or two have had VERY slight contrast tweaks, but that is it. I haven’t had time to really set about working on raw files from the camera yet). The X-Trans sensor is astounding. I am not a techno geek on such matters, but whatever Fuji are doing, long may it continue. The clarity of the files, the rendition of colours and contrast is stunning. I am sure this is partly due to the wonderful Fuji lenses which I see as being on a par with, if not exceeding the quality of the Canon L lenses, and that is saying something.

I am loving the weight and lack of bulk of the Fuji. I have bought a smaller travel tripod to use with it which is more than adequate. It fits in a tiny bag and even with several prime lenses, filters and spare batteries it weighs a minute fraction of the DSLR kit. I have been surprised at how much pleasure this has given me back. I can work for longer and walk further without fatigue and I am much more inclined to have the camera with me, in fact I rarely go out of the door without it. (I am in London as I type this and have it in my jacket pocket with the 18-55mm lens on. Couldn’t do that with the 5D). My feeling is that a lot of photographers as they get that bit older or as aches and pains start will be keen to move to a lighter more portable kit to help them maintain their joy in the field. I also think as the quality of these cameras will mean more will gradually move away from DSLR’s, especially if a full frame version emerges.


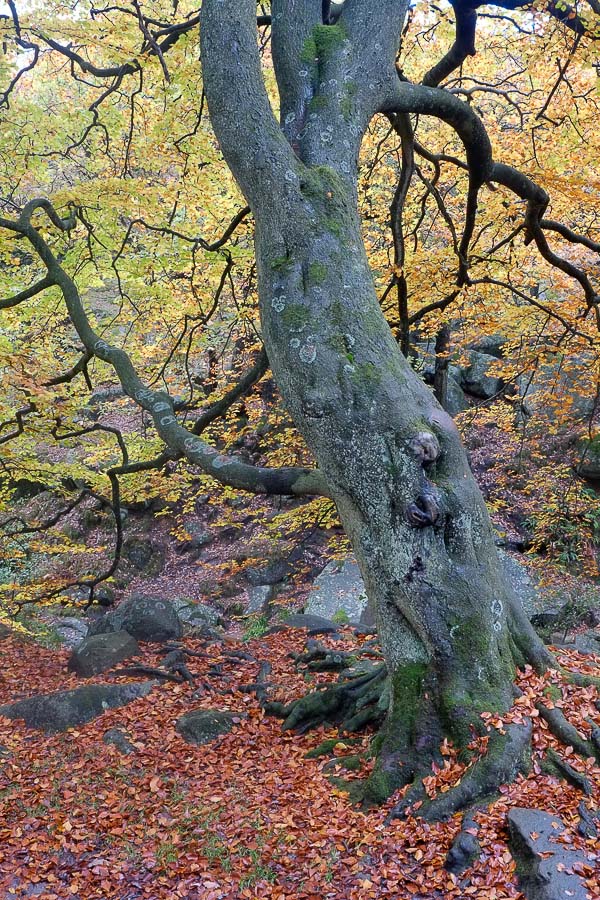
Padley Gorge - Handheld, ISO1600, f8, 1/30 sec


All the images in this article have been taken in the last month with the Fuji using the in camera “film simulation” presets for Astia and Velvia films. (I am sure these will annoy film users as they can’t possibly be anything like true Velvia or Astia, they are just adjustment presets, but he results can still be very nice, just don’t expect them to replace true films by any stretch of the imagination).

I have been shooting with raw plus fine Jpegs switched on. Annoyingly, when Lightroom imports these files it copies them all to the computer but only imports the raws into the Lightroom database. You will find the Jpegs in the same folder, but they won’t show in LR. I tend to go in to Finder (on the Mac, Windows Explorer on Windows) and find the JPEG file I am after and drop it into Photoshop. There I tweak it if necessary and save it as a tiff. This tiff is then imported into LR using the synchronise folder command in the Library module. A bit of a faff, but it works for me. (I have just been sent this tip by great photographer Lizzie Shepherd – In LR, go into Preferences and on the General tab you can tick a box which gets LR to treat jpegs as separate images next to raw files – problem solved, thanks Lizzie!)

I am shooting Jpegs as well as raw files because the quality of the Jpegs is really VERY good. I like the mono conversions the camera does as well as the film presets and these are permanent in the Jpegs whereas they are not saved in the raw files. The Jpegs also preserve the aspect ratio presets I use in the field. You can set the Fuji to shoot in square format (which I use a lot) and in a 16:9 panoramic format. For portraits and less critical images the Jpegs are often quite sufficient for my needs. For landscapes and images I will use professionally, it’s the raw files I will process.


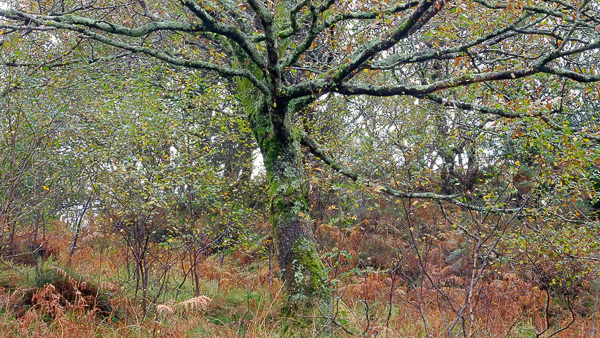
Tree, North Wales. Tripod, ISO200, f22 (in error - rather extreme!) 1.6 sec


A word on some of the niggles I have with the Fuji, because it does have some quirks in the way it needs to be used, especially if you are used to a DSLR, and it has some very irritating “features” too.

Firstly, let’s talk about that battery life. It’s dire. I suspect it’s the electronic viewfinder that’s the culprit but if I am shooting for a day I will go through four batteries. I carry five and still feel nervous. I will be buying a couple more. I just can’t stand having to economise on battery power as I work. The batteries you can get on Amazon for around £12 seem to work just as well as the genuine Fuji ones which sell for £60. Guess which I am buying?

The other really irritating thing is the position of the tripod mount. This really hasn’t been thought through by Fuji. As soon as you fit a quick release plate it partially covers the battery/memory card bay door. Seeing as you have to change batteries every two hours, it is very annoying to have to unscrew the quick release plate every time to do this when simply positioning the tripod thread a few centimeters further away would prevent the issue.

I have found a couple of the buttons on the rear of the camera are easily activated in error. I particularly seem to catch the Q’ menu button. It is placed on a raised part of the body moulding and this makes it prone to being pressed. However, I notice this button has been recessed on the Fuji XE-2 which has just been released which is great (and I love it that Fuji really seem to listen AND RESPOND to customer feedback on these cameras. How many manufacturers ask for feedback but then never implement any of the changes we ask for? 

There are also some quirks in how you use the camera in the landscape. At least I see these as quirks having been used to using a Canon DSLR. The first is the focusing system employed by the Fuji. It works in a completely different way to a DSLR. On a DSLR the focusing sensors are most accurate when they can detect high contrast edges, where light areas but up against dark areas. By locking on to these they can measure distance and achieve focus. However, on the Fuji, such high contrast edges are just what the focus sensors don’t want to lock on to. They are most accurate when they can find a surface with texture, say a tree trunk or the surface of a wall. This takes some getting used to but I have found when the Fuji does lock focus I get a higher proportion of sharp shots compared to using autofocus with the DSLR. It is very accurate.


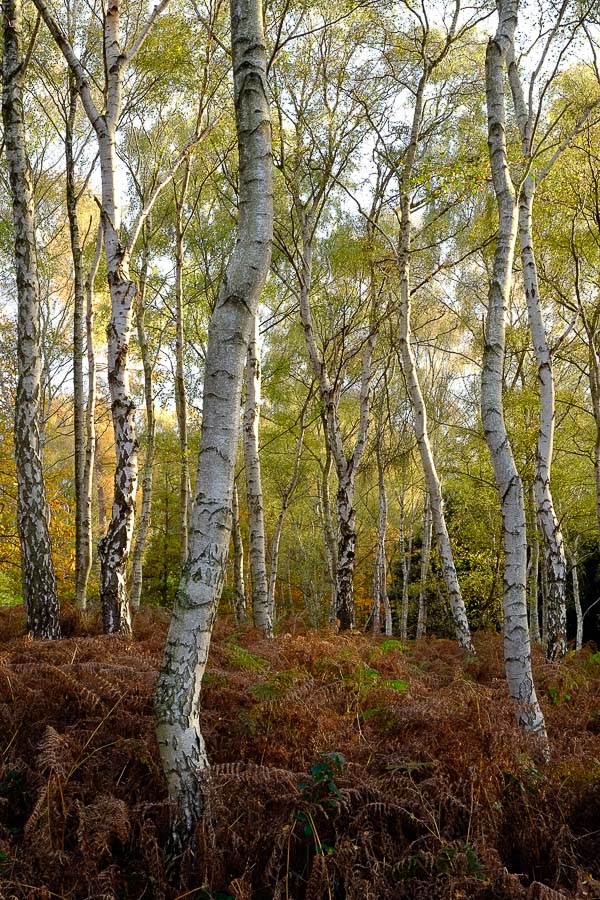
Silver Birch - Clumber Park. Tripod, ISO200, f16, 1/4sec


This leads me to another change I make in my workflow when making landscape images with the Fuji compared to the Canon. With the Canon I use Live View focusing with the lens on manual and love this approach. It is very accurate and allows for checking of depth of field with ease. However, on the Fuji, I have found It easier and more effective to have the lens set to auto focus but to press the AF button on the rear of the camera and select the AF point I want it to use. This locks the focus accurately for me and at f11/f16 I am getting excellent depth of field. With the sensor size of the Fuji, I am now experimenting with shooting wider, f8/f11 to see if this maintains sufficient depth of field while getting me closer to the sweet spot of the excellent Fuji lenses. My next experiment is to try back button focusing with the Fuji. I understand you can switch the lens to manual focus but still use the BBF button to focus and this sounds like it might be a good system.

Now I am used to how the Fuji works I have developed a modified workflow and have found I can already work at speed in the field with it, enabling me to stop thinking too much about camera operation and focus more on capturing changing light and composition which is much more important to me.


Tran Hows, Dawn - Tripod, ISO200, f16, 0.5 sec


I am finding the light meter on the Fuji to be very accurate and so, as opposed to how I work with the DSLR where I shoot in full manual, I have been using aperture priority and then tweaking the exposure after checking the histogram using the exposure compensation dial on the top of the camera. This is working really well for me. Other than in really low light or very contrasty light, though, I am tending to find the light meter is pretty accurate.

I have now used the Lee Filters Seven5 system on the Fuji and love it. If you have the full sized Lee system you can save a lot of money by just buying step up rings as it works fine. It’s a bit big, but the cost saving is significant. However, if you can afford it or if you are new to Lee Filters the purpose designed system is a delight. Small, beautifully made and balanced it is the perfect match to cameras of this size. As always with Lee, you get what you pay for and the optical quality and clarity of the grads is superb. Positioning the grads using the live view screen is a doddle and they do the job just as designed.


Padley Gorge - Derbyshire. Tripod, ISO200, f9, 1/5 sec


I have been trying a vari-ND filter for my ICM shots with the Fuji and have been pleasantly surprised with it. It is very convenient being able to dial in the amount of neutral density effect you need and being a screw on filter it is better suited to ICM work than using a Lee holder. I also have a Tiffen screw on 10 stop filter but have to try this out, so no verdict as yet, but I see no reason why it shouldn’t be perfectly fine.

I am taking delivery of the brand new 23mm f1.4 lens on Monday (it has since arrived. Sadly the first lens had two scratches on the front element but the replacement was fine) and am excited to try this out. If it is as good as the 35mm it will be a terrific lens. I must add, my next lens purchase, which surprises me to say it, will be the XF 55-200mm. (since typing this on the train I have caved in and flexed the plastic and am now the proud owner of said lens). The last few weeks have made me realise how much I use a long lens in my landscapes. I often have my 100mm macro on my Canon (both as a macro and as a landscape lens) and I also carry the 70-200mm which I use a lot in my landscapes. I had anticipated shying away from long lens for the Fujis I imagine it might look a bit ungainly, but I have really missed the reach of a longer lens.I have also bought the 60mm macro, partly because (great excuse) my wife now has the XE-2 and she loves macro photography, but of course, we can share 🙂

I am travelling to Norway in two weeks to co-lead an aurora workshop with Antony Spencer for Light and Land. I will be taking my 5D kit, but the Fuji is coming with me too. This will be a great test for it, both as a landscape camera but also the ultimate test for long exposure high ISO shooting, with the 5D to compare it to. It will also be interesting to see how it copes with the low temperatures north of the arctic circle. (All bar two days of the trip we will have no daylight at all as the sun won’t rise above the horizon – we will be living I a world or twilight and darkness for 10 days). Note to self. Buy even more batteries for the Fuji.

I will try and find time to blog from up there to let you know how it goes as well as posting some images. Watch this space.


Clumber Park - Tripod, ISO200, f18, 1/3 sec


Customer Images from Skye Trip

skye trip

I had a lot of positive comments about my daily trip report blog which I posted while leading a workshop in Glencoe and Skye a few weeks ago. To follow this up I thought it would be nice to show you a few of the images made by members of the group. They have picked some of their personal favorites to show you here. I am always fascinated how several photographers can be at the same location at the same time and yet they capture the place in quite different ways.

(I plan to run this expedition workshop again next year for a small group of six photographers so if you would like to be added to the no-obligation shortlist to hear about dates, prices and itinerary ahead of it being announced on my website or in my regular newsletter, please email me using THIS LINK. )

The first set are by Charlotte Gilliatt, who is also to be hugely congratulated for getting two images into this years Landscape Photographer of the Year book, including Urban View Runner Up. You can see more of her work at her website HERE.

Next up is Keith Purchese (who doesn’t have a personal website).

And now a selection of images from photographer Kevin Gibbin. You can also see his website HERE.

And finally, a selection of images from John Birch, whose website (and superb blog) can be found HERE.

I hope you have enjoyed seeing the fine images from some of the group. We had a great time, as you can read in my trip reports written each day on my blog while we were up there (Here and for the next few posts).

I plan to run this expedition workshop again next year for a small group of six photographers so if you would like to be added to the no-obligation shortlist to hear about dates, prices and itinerary ahead of it being announced on my website or in my regular newsletter, please email me using THIS LINK.

Talk for the Royal Photographic Society

RPS


I feel very privileged, and a bit frightened, to have been invited by the Royal Photographic Society in the East Midlands to be one of two speakers at their annual “Landscape Spectacular” event on 17th November.

I am to join talented and creative photographer, Peter Paterson , who is a Fellow of the RPS. We will both be giving lectures on landscape photography and also fielding questions from the audience.

The event is open to non-members of the RPS so I would love to see you there. Please come up and say “hello”. The price is £10 and you can also pre-book for a three course buffet lunch for £7.95. Full details can be found on the RPS website HERE.

I will be giving a talk illustrated by my images. It will be based around themes encouraging creativity and breaking free from conventional approaches to composition and camera techniques as well as a look at classic landscape imagery and techniques. I aim to make it stimulating, encouraging, motivating and practical – it certainly won’t be one of those ‘this is where I went on my holidays’ style presentations, you can be sure of that!

I will be taking a selection of my prints too that you will be able to have a look at (and get hold of, to really inspect).

I will be available during lunch too, so come and have a chat and I will be happy to answer questions you have on any aspect of photography and image processing.

It would be great if you would share this blog post among your photography friends, club and contacts in case they may be interested. I am sure it will be an interesting and engrossing day that will help you move forward in your photography.

“Sea Fever” – The New Book from David Baker

Sea Fever David Baker

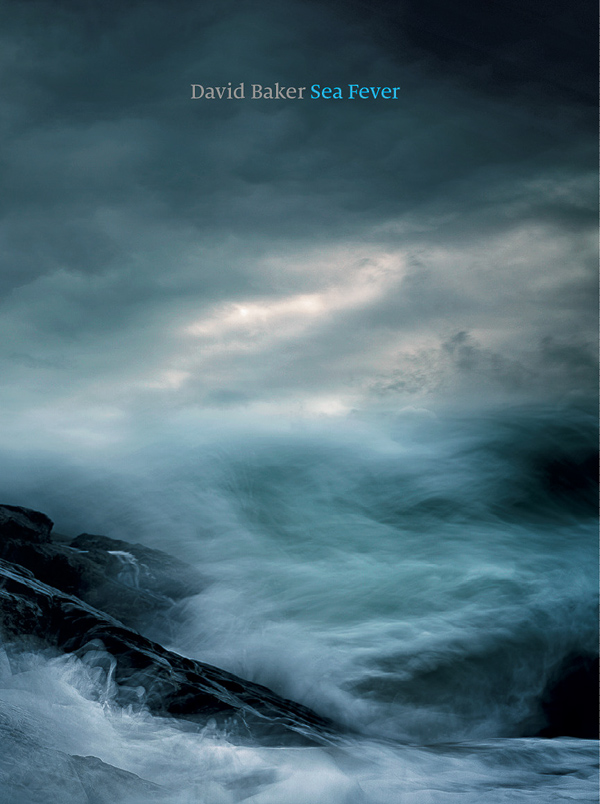
"David Bakers - "Sea Fever" Cover


David Baker, or Milouvision as many of his online followers will know him, has been photographing and blogging for years (www.milouvision.com). Building his following and honing his skills with the camera, he has risen to real prominence over the last couple of years, first winning Outdoor Photography magazines “Outdoor Photographer of the Year 2012” title, followed by three successful exhibitions and the 2012 Landscape Photographer of the Year “Your View” category winner, culminating now in the publication of his first book, “Sea Fever”.

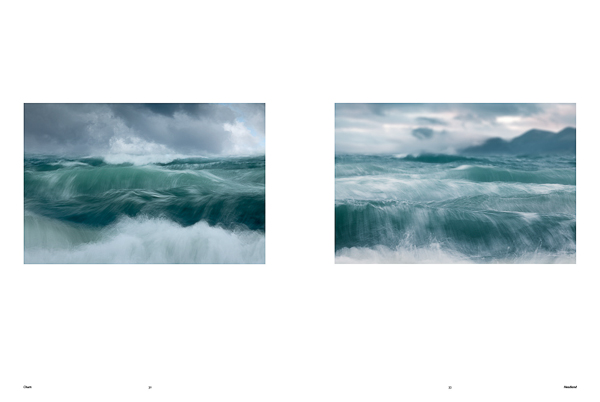
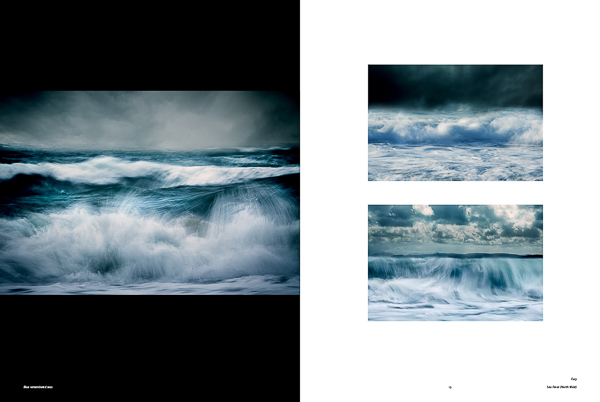
Published by Triplekite Publishing, Sea Fever is a collection of 26 of Davids stunning signature coastal wave images.

So, what are you to expect when you receive your copy of “Sea Fever”?

The first thing that will strike you is the stunning cover image, a taste of things to come. The image is one which was on display at the Masters of Vision exhibition at Southwell Minster ( http://mastersofvision.co.uk/david-baker/ ) this summer and it is a fitting image to lead us into the book. An image full of power and drama.
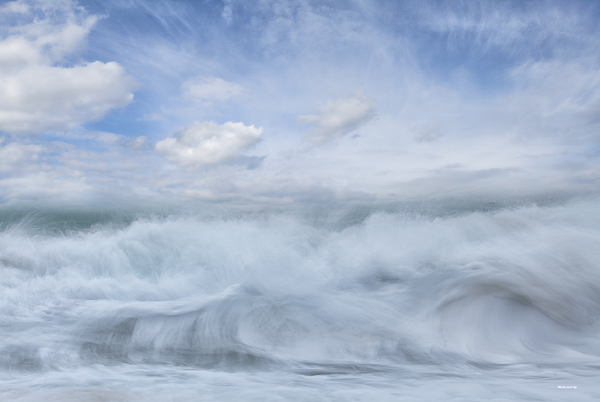


Inside, the foreword has been written in a beautiful alliterative style by accomplished landscape photographer, Pete Bridgwood. To quote Pete as he describes how David approaches his image making of the sea,

“He has a rare ability; to completely concentrate his creativity, to focus his intentions and develop a deep relationship with his subject…. it is immediately evident that this is no dalliance, no brief fling; this is an aching, impassioned love affair”

This gives an idea of the intensity and depth of the images that reveal themselves as we turn the pages. David also gives a brief introduction to his approach to making the series of images.
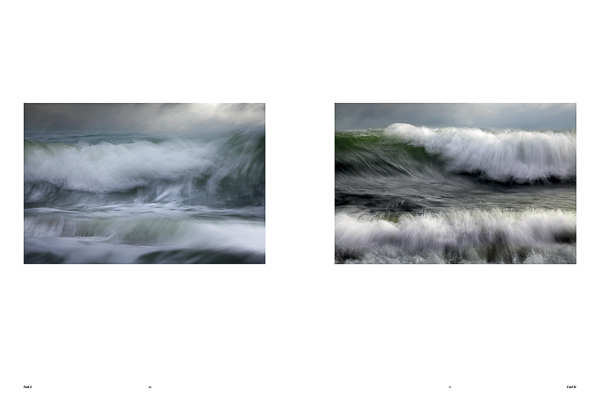


The book is printed in portrait format, an unusual choice for a book based mainly around landscape orientation images. However, the images that are shot in portrait orientation display well and then many of the landscape orientation images are displayed (by Dav Thomas, who has done a great job with the layout and design of the book) spread across two pages, often bleeding off of the edges to give the greatest impact. Others are often given wide margins, lots of ‘breathing room’ and this is pleasing to the eye. The fact that Triplekite have decided on such a generous page size means this all works well. Nothing feels cramped or stifled in any way. The images are the stars.

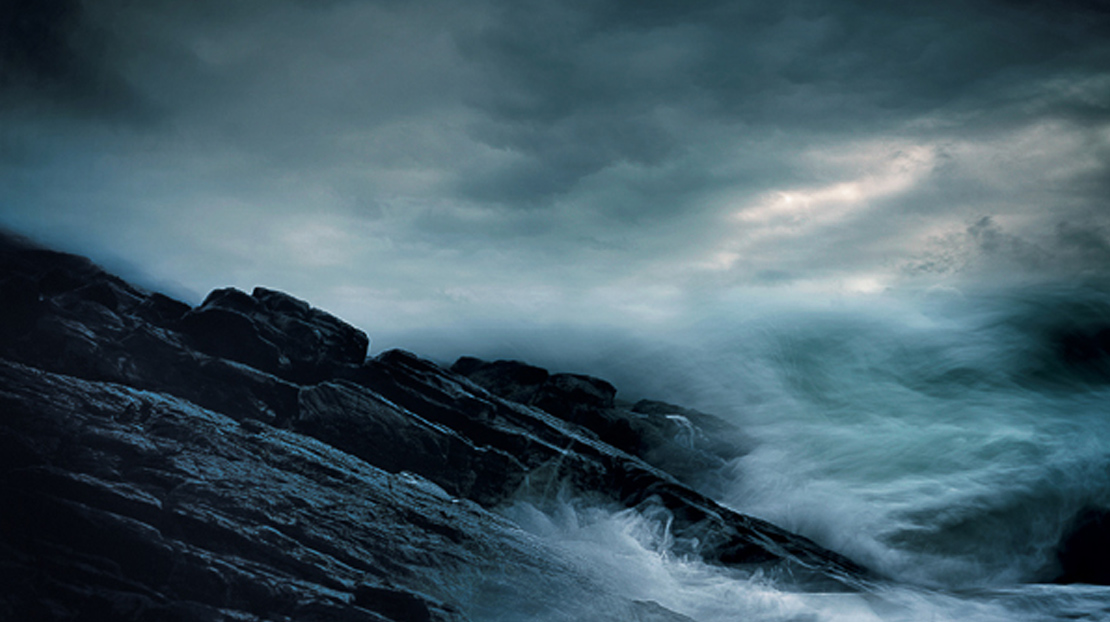
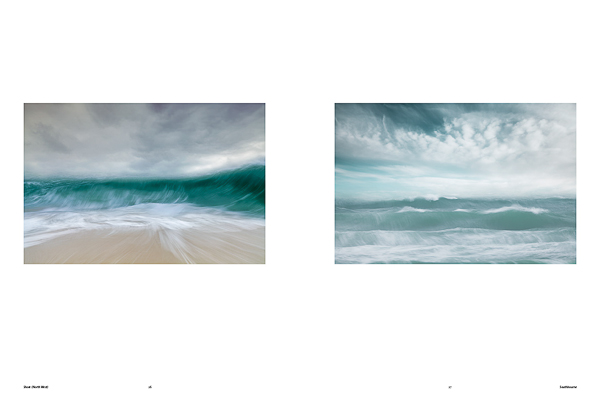
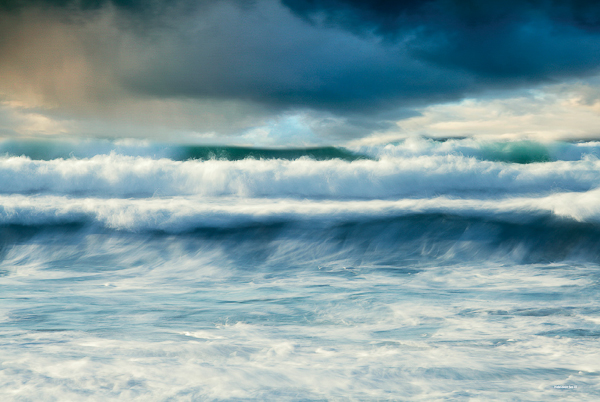
Davids “Sea Fever” images captured the imaginations of lovers of seascapes as soon as they began to appear. (and I have already seen a few ‘Sea Fever’ wannabes imitating the style! I suppose imitation is the sincerest form of flattery?). They have a power and transcendent beauty which seems to connect with all who have a love (and respect for) the sea. By slowing the shutter just a little he retains enough detail in the waves to show the power, movement and flow of the waves while softening the effect and merging the waves into the sky. There is no real, defined horizon in his images – they become almost ‘as one’. In fact, the skies are not playing ‘second fiddle’ to the waves but enhance and complement them perfectly, almost becoming part of the waves themselves.
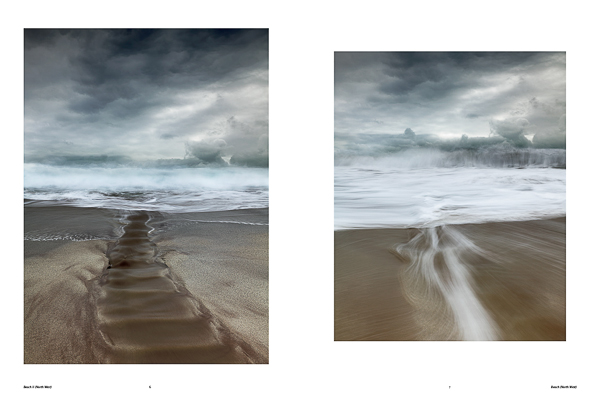


Every image in the book is just beautiful. Some are full of stormy ominous power, others gentle light and gracious delicacy. There is not a weak image in the portfolio and I would love to have any of these on my walls at home. Each has a mesmerising quality to hold our interest for many years.
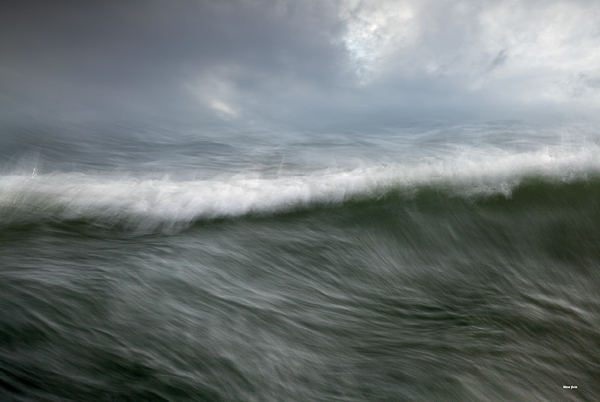


I had the opportunity to interview David a few days ago about the book and his work and thought you might enjoy his comments.

D: First of all, let me congratulate you on the publication of your first book, “Sea Fever”, I have seen an advance pdf copy and it looks stunning. How did you feel when you first saw the design?

DB: Many thanks! Yes, a great feeling to see the flow of images due to Dav’s design skills.

D: How did the book project come about?

DB: I was fortunate to be one of the exhibitors at Masters of Vision which opened in late July 2013 and during that weekend I met David Breen (Triplekite Publishing) and Dav Thomas. I knew of David’s photographic work and of course of Dav’s book. In early August David emailed suggesting a book based on the Sea Fever project part of which had been exhibited at MoV. A really good day!

D: How did you decide to focus on such a tight project as “Sea Fever”? Was it more difficult, do you think, than doing a retrospective on your work, or would that have been harder?

DB: I’ve held previous exhibitions which have been a selection of my favourite images and at the time of MoV I had just completed a show of the Ridge Trees project and was in the midst of Sea Fever so it seemed natural to show what I was passionate about.

D: How did you find the process of selecting the images for the book? Was the choice difficult? How did you go about narrowing down the selection?

DB: There wasn’t a huge selection anyway as I’m a ruthless editor. But for the book I provided the required number plus an extra 25% I think and then Dav undertook the skilful design.

D: Without giving away too many secrets can you give us an idea of how you make the “Sea Fever” style images? What kit do you use? Shutter speed etc?

DB: I experiment with a variety of shutter speeds and focal lengths whilst trying to look for relationships between the waves and ideally clouds. I aim to have at least a line of foreground or central wave across the frame. I try to take a painterly approach if that makes sense as I want the images to say this is how it feels to be at the shoreline with the battering wind full of salt, the spray, the thump of the waves, the sense of vulnerability. How can an hour at the shore be captured in an image?


D: How long have you been working on the “Sea Fever” project? How long did it take to perfect the style of the images?

DB: I was in the Outer Hebrides in March 2012. During my previous trip in February 2008, I had taken mostly long exposure shots (as during this time the B+W 10 stop filter featured in many a photoblogger’s work) but during March not one long exposure shot was made. Feeling a little ‘unsettled’ I started taking shots during the closing days of the trip to capture the sea’s power in a way I had not undertaken before.

The first image, Hebridean Sea III, was uploaded to my photoblog in late April 2012 and that was that. Nothing happened in terms of development of the project until August of that year when another image was processed. I hadn’t realised I had a potential project but something must have been percolating away as in March 2013 onwards I started experimenting in acquiring images to compliment Hebridean Sea III.

D: Do you like working on projects? Or do you prefer more random ways of working? If you prefer project working, what benefits do you see working that way?

DB: It’s only during the past couple of years that a project based approach has been developed. I worked up one called Ridge Trees which concentrated on the New Forest and was defined by three attributes – dawn, mist and geography. Whilst the structure of a project is appreciated, I’m not restricted to just that type of work.

D: Why the sea? What draws you to photographing it so intensely?

DB: Good question! I usually mumble something about energy, and change. It’s not something that I’ve nailed down yet, and I’m not sure I want to. I’m not a great deconstructor (in an image sense) although I written a little about this aspect in the book.

D: Have you always been interested in photography? What is your photographic ‘history’?

DB: At 15 I wanted to be an architect. My dad had introduced me to an architect client and despite the then (1978) 33% unemployment in the industry, I was keen on pursuing architecture as a career. Despite good grades, events didn’t entirely pan out as planned, and after dithering about a course at Salisbury Art College and flirting with a technical drawing apprenticeship, I joined the Civil Service. It’s fair to say that there’s been little creativity work-wise since. I’ve always had a great love of art (especially sculpture) so I guess the creative ‘urge’ has always been there albeit mostly dormant.

I started using a small compact digital camera in about 2003/04 documenting visits to stone circles, dolmens and standing stones. A friend subsequently talked about his new digital SLR and suggested that I also buy one, so in January 2005, trying to engage a creative aspect of myself, I also bought a 300D.

From a technical aspect, almost immediately I wondered what I had let myself in for. I started reading magazines, books (fortunately Southampton has an excellent library) and looking at other images in various exhibitions and photoblogs. In the spring of 2005, I began posting images on a web forum and as a consequence a photoblog was started in late 2005.

Why photography? It was accessible and there was an immense amount of support and inspiration from the photoblog community.


D: Who would you say was your first inspiration in photography? And who do you find inspirational now?

DB: Just after I started using a SLR, I saw a photograph in Outdoor Photography of a Hampshire beach at sunset by Guy Edwardes and the sea looked fantastic drawn over the shingle beach. The wave trails looked ethereal and a week or so later I attempted the same and that was that, I was caught and I’ve been a seascaper ever since. Current inspiration is from a wide variety of sources.

D: What does photography do for you? What do you get out of it that drives you to pursue it as a passion?

DB: I guess it’s the conduit for a creative aspect that must be present in myself.

D: Have you ever hit a creative block? If so, how do you get over it?

DB: I get very keen on my work and then very disappointed by it very rapidly. I then go off to make more images. And then the process starts again.

D: What camera equipment do you currently use?

DB: 5D2, 24-70 and 70-300 lenses, Lee filters, Gitzo tripod and a RRS ballhead. The camera, lenses and filters all fit in a Billingham bag. There’s no need to march huge distances for my work, and I’m (hopefully) finished with the days of rucksack wrestling against a rapidly incoming tide.

D: Is there a piece of kit you really couldn’t live without? A favourite piece of equipment?

DB: For years I used the Canon 17-40. Everything was at 17mm and hang the consequences. That used to be nailed to my 300D and then to the 5D. Now, I think the 70-300 zoom is used significantly more than ever. Almost everything is on the tripod too.

D: Is there any piece of equipment you lust after and would love to own?

DB: I was considering the Gitzo Ocean tripod.

D: I know you are a keen and active photoblogger and Twitter user. Why do you love photoblogging? What do you enjoy about Twitter and the photographic community on there?

DB: The immense amount of support and inspiration from the community plus the free exchange of ideas, links to work, exhibitions, and the occasional meet-up.

D: Would you describe yourself as a “Landscape/seascape Photographer” or do you enjoy other genres of photography?

DB: I’m a seascape/forest photographer really. I really like looking at the landscape big views plus the more intimate landscape compositions and also the very experimental ones. I also really like looking at street work (especially if there’s humour present).

D: What advice would you give to young or new photographers to help them make progress with their passion?

DB: Believe in the value of your talent and your images. Experiment, and have fun. If considering a project, make sure it’s personal to you, and choose a subject which will allow access to create the images you want. Think about the story and how the work will be shown – book, exhibition or blog.

D: What software do you use to process your images? Does much work go into processing the “Sea Fever” images?

DB: For ages (and ages…), I used RawShooter Essentials (which became Lightroom I think) as I loved the ease of use, and the mono images it could produce. During the last year I’ve used Canon DPP for the Raw files. I make no corrections in DPP aside from using the lens profiles and the auto-dust correction (the principal reason for moving from RSE). Everything else in undertaken in PS, and I use Bridge as a catalogue.

D: What is the URL of your website so readers can have a look at your work?

DB: milouvision.com (although some project highlights are also at dbphotographic.com).

D: So, finally David, what next? More “Sea Fever” images or is the project complete? Do you have other projects on the go? Any other plans?

DB: I’m not sure at present. It took a few Ridge Trees and Sea Fever images to realise I had the makings of a project so I’m sure something will present itself soon.
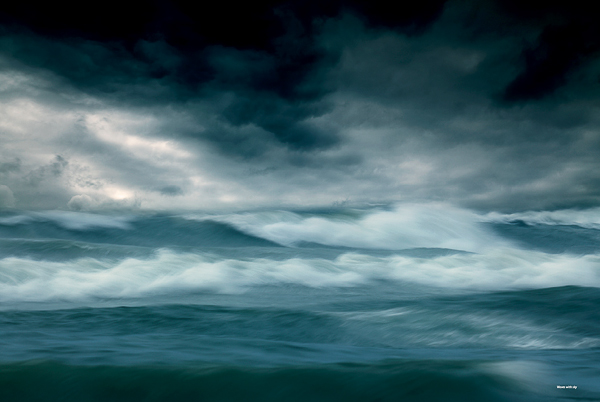


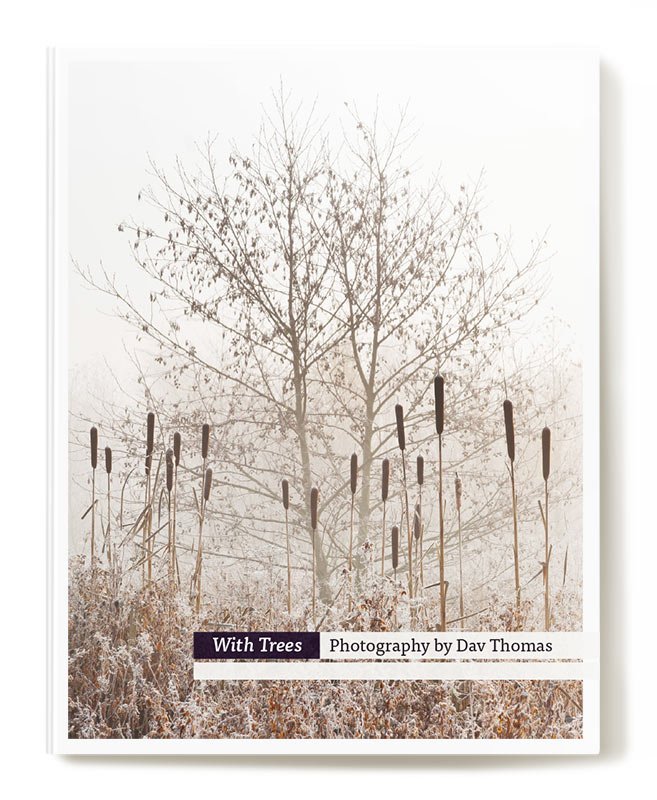
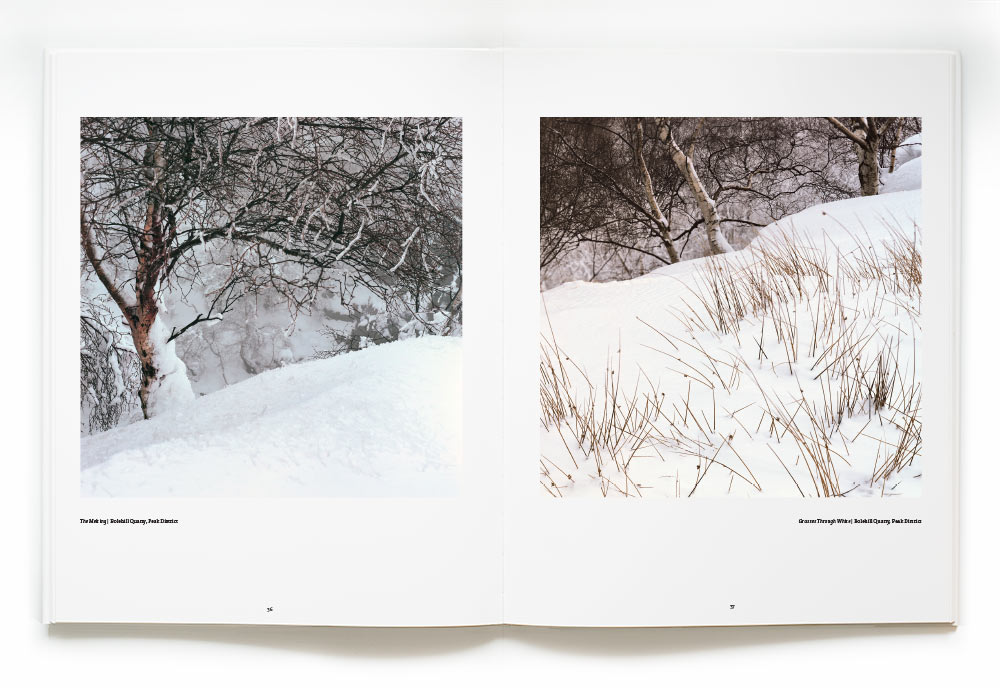
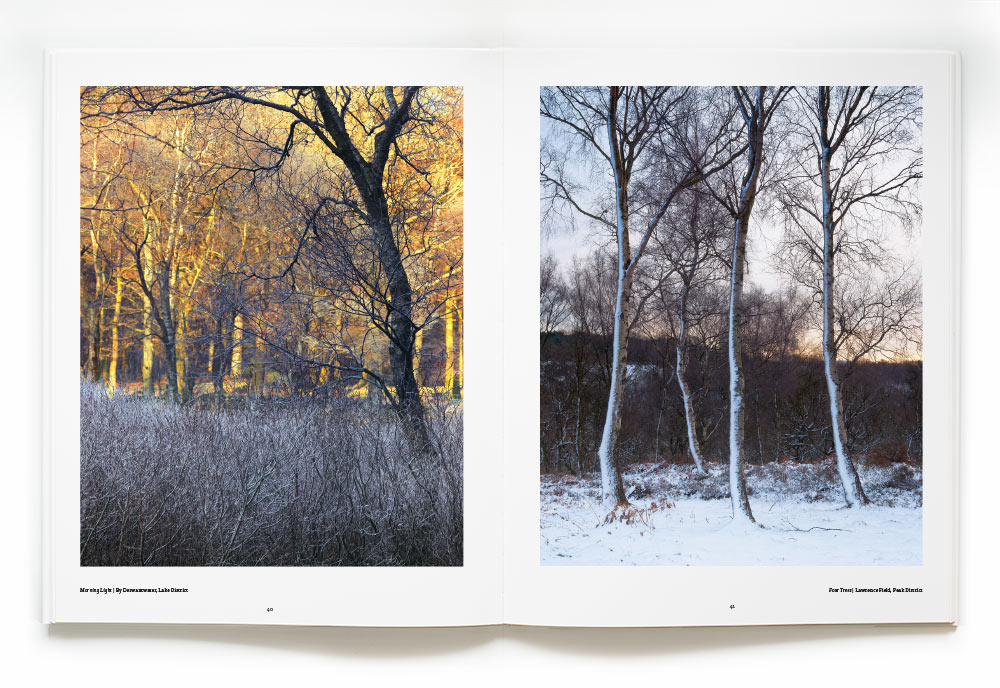
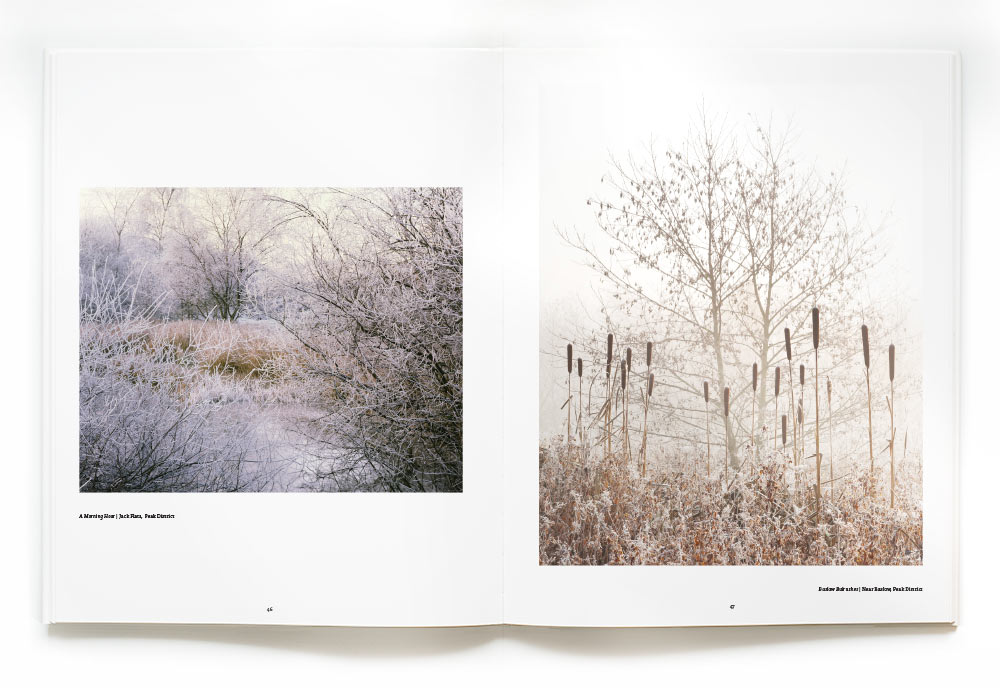
The soft back book itself is outsized at 410mm x 305mm and is being printed in Malta by the same high quality printers who printed Dav Thomas’s acclaimed “With Trees” book. The paper used for this book is 170 gsm Valletta Silk and it is being printed using the same Sublima 240 lps screen process as with Dav’s book which yielded spectacular print quality.

There will be two versions. For the serious collector there is a very limited edition of 50 which will be individually signed and numbered by David and comes complete with limited edition A3 print for £85. The standard edition is £25. The price excludes P&P of £8.50 (UK) or £23.50 (International). You can pre-order your copy HERE.
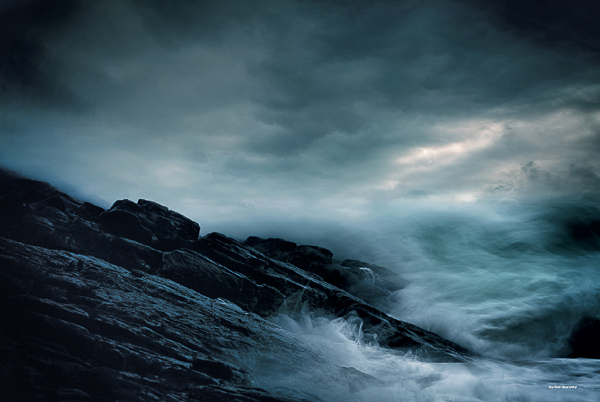


The attention to detail and print quality achieved for Dav’s book by Triplekite must inspire confidence that “Sea Fever” will look stunning when it arrives. (this review is based on seeing an advanced pdf copy, not a full print copy). David Breen and Dav Thomas seem to have started the company as they mean to continue. The fact they are both keen photographers first and have a passion for photography is reflected in the way they are putting the images ahead of profit. So many photography books are churned out by large publishing houses and treated much the same as cookery books and other books with pictures in. Often the paper and print quality is disappointing and doesn’t reflect well on the photographer whose work is often outstanding when seen in the flesh. With Triplekite the quality of the images comes first above everything, so the paper and print process choice has to be able to display the images at their very best. Attention to detail is seen at every step of the process, from the selection of the photographer and the images, to Dav’s design and layout right through printing and even into the packaging. It is a refreshing change to see a publisher who seems to care more about the photography than the bottom line.

I have a feeling many photographers around the world are going to beating down Triplekites door asking to be considered for their next book. But I also know Triplekite are putting their customers first by being very selective in those photographers work they choose to publish. Triplekite seem to have a tight focus on exactly where they are going with future publications to hold true to their vision for the company. This can be seen in the latest announcements that the next two “Portfolio” books will be by the wonderful Paul Kenny and Marc Wilson respectively. They have also announced a third series of books entitles “Land|Sea”, each of which will feature a small portfolio of work by five photographers carefully selected and which will build into a collectible library of great landscape work. 2014 Looks to be an exciting year for lovers of fine photography.


“Sea Fever” is the first in Triplekites new innovative “Portfolio” series, designed to be project based. Being focused on such a tight project with all of the images shot in a very similar style and with a common technique some may find they desire a greater variety of images, but that is not the purpose of this type of book. Its focus is its asset and it is a great example of how, as photographers, our work can get so much stronger if we focus on a tight themed project. While smaller and lower in cost, it will still adhere to Triplekites philosophy of making the images shine through large page sizes and superb print quality. These books are an ideal way to showcase the talent and work of some of the Worlds finest photographers. I can see the series becoming very collectable.

I, for one, pre-ordered the book as soon as I heard it was to feature Davids “Sea Fever” series and look forward to getting my signed copy and print. Having now seen the pdf proof I am even more excited. A firm delivery date is yet to be announced but is expected to be around mid to late November.

For lovers of fine land and seascape photography and especially if you love really fine photography books this is another ‘must-have’ (and what a great gift, even for non-photographers) from Triplekite. Order your copy HERE
 

Exclusive First Interview with Landscape Photographer of the Year Winner 2013 Tony Bennett

LPOTY 2013 Tony Bennett

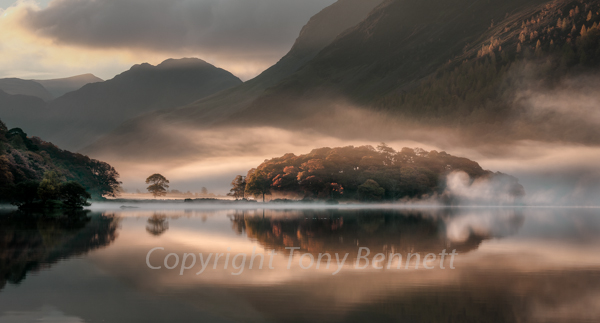
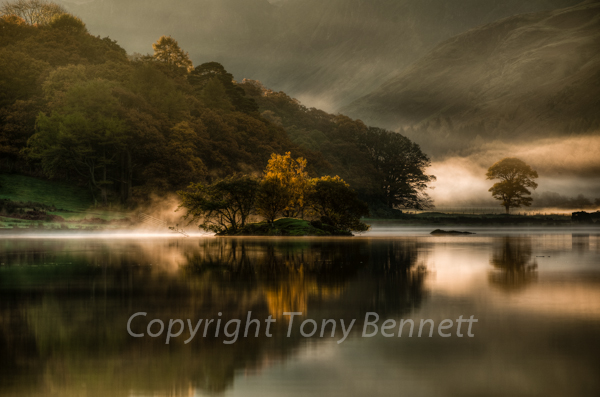
Mist and Reflections - The winning image by Tony Bennett in the Take-a-View Landscape Photographer of the Year competition 2013

After a long and nail biting wait wait for the photographers who had images shortlisted in this years Landscape Photographer of the Year competition the announcement was made at the weekend that Derby based photographer, Tony Bennett had won the overall prize with his image “Mist and Reflections” (above). I was especially delighted for Tony as I know him as a customer who has been on my workshops (although I take absolutely no credit for his win. Tony is a long established photographer who has been making images for many years).

For many landscape photographers in the UK, the LPOTY competition is the “Holy Grail” of photography competitions and many aspire to have an image feature in the book which showcases the successful photographs, published by the AA and available here on Amazon To have a picture in the book is quite something considering around 20,000 images are entered each year and just a couple of hundred at most feature in the book. To have an image Highly Commended, receive a judges choice or to win a category is an even higher honour. Many must be very disappointed each year.

Last years competition was sadly marred by controversy over the originally selected winning image which had to be disqualified for excessive manipulation. This year, with a new Technical Director, Tim Parkin, addressing the selection and checking process hopes are high that the standard of images in the book and subsequent exhibition at the National Theatre in London starting in December (Free to attend and a must see event) will be higher than ever. From what I have seen of the images which have received awards, the standard does seem very good indeed. There are some truly outstanding images already revealed and this has whetted the appetite for the book

I got in touch with Tony as soon as I found out about his win and was delighted that he agreed to give me an exclusive interview for you to enjoy here, along with his winning image and some other images from his portfolio. I hope you will enjoy visiting his new website too. But first, here is the interview I conducted just yesterday with Tony.

D: First of all, let me congratulate you on your wonderful success in winning LPOTY 2013. Your image is stunning and a deserved winner. How did you feel when you heard you had won?

T: I was totally overwhelmed. Charlie Waite phoned me whilst I was in the car and the next mile passed as a blur. It was beyond my most optimistic hope. It took several days for the realisation to dawn upon me that i had actually won. I knew my image was good, but being good is not enough; you have to hope that the judges not only think it is good, but the best. That is the difficult part. And I knew that many very good photographers had entered the competition with some truly excelllent images.The competition was fierce.

D: Can you describe the morning when you made the image?

T:That morning was just magical; one of those mornings that happen so infrequently but are always remembered. With a friend, Sarah, we left the hotel early and raced to the lake side. The dawn was just beginning to break. We set up our tripods at the water’s edge and for the next hour and a half, just captured as many images of the ever-changing scene as we could. Did I say it was magical? It was. We eventually had to get back to the hotel for a late breakfast, but by that time the real mood of the scene had changed to mere normality, the mist had virtually gone, the sun was up and the lake surface was disturbed – no longer the glassy mirror it had been.

D: Have you entered LPOTY before (and if so, had any previous successes) or was this your first time?

T: No. This was my first time.

D: Why do you think entering competitions like LPOTY is a good thing for photographers and photography?

T: These competitions offer a challenge to photographers to produce their very best work. All too often, our images stay on the hard drive and don’t get the finishing attention they should. When you enter a competition, you owe it to yourself to offer the very best you can. This can take time and effort, but sometimes, as in my case, it proved worth every effort, including that early morning start.

D: Have you always been interested in photography? What is your photographic ‘history’?

T: I have been interested in photography since my 20’s. (I am now well retired!). I have spent many hours in the darkroom trying to produce the ‘perfect’ B&W print, without success! I have also done some wedding and industrial photography back in the film days, but my first love has always been landscape images. Up to this time, I have only entered club competitions and our local N&EMPF annual competitions. This is the first ‘real’ external competition that involved a prizes. (memo to self: must enter more!)

D: who would you say was your first inspiration in photography? And who do you find inspirational now?

T: I can’t remember any one initial inspiration that has driven my photography. Today, undoubtably, Sebastiao Salgado i find truly inspirational.

D: What does photography do for you? What do you get out of it that drives you to pursue it as a passion?

T: I love the great outdoors and capturing beautiful images.

D: What camera equipment do you currently use?

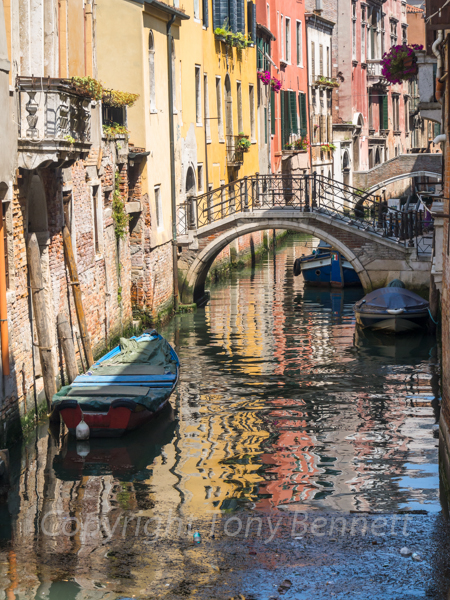
T: I currently use a Nikon D700 with the 16-35mm lens, and the 24-120mm lens. For the winning image I used my 70-200mm lens; that lens trio, plus an old macro lens, covers all my photographic needs. Recently I have bought an Olympus EM-5 and found it to be very useful on a recent trip to Venice on the hottest day of 2013! It was light and easy to carry and produces pretty decent images that can be enlarged to about A3 size.

D: Is there a piece of kit you really couldn’t live without? A favourite piece of equipment?

T: Strangely, it is my very sturdy and stable tripod.

D: Is there any piece of equipment you lust after and would love to own?

T: I would love to have a Nikkor 24mm tilt shift lens.

D: I know you are a keen and active member of the Derby City Photographic Club. What do you enjoy about being part of a photography club?

T: I enjoy club photography for the personal friendships I have made and my friends’ support for my photography. (They are always there with honest criticism!) I also relish the challenges the competitions offer. Our Club is a great social as well as a photographic club. We have excellent speakers who challenge, stimulate and entertain.

D: Would you describe yourself as a “Landscape Photographer” or do you enjoy other genres of photography?

T: I have done studio portraiture, and wedding photography (many years ago). I like to think of myself as a landscape photographer. Perhaps I can, now!

D: What advice would you give to young or new photographers to help them make progress with their passion?

T: Join a camera club and GET INVOLVED. Don’t just turn up, enjoy the proceedings, then go home. You only get out of any activity in proportion to what you are prepared to contribute.

D: What software do you use to process your images?

T: I use Lightroom primarily and use Photoshop for any post processing that can’t be done in Lightroom. Topaz plugins are very useful to extend the scope of LR and PS. I also use Photomatix Pro for HDR images and Helicon Focus for focus stacking of macro shots.

D: I see you have a new website, Tony. For those who are keen to see your work, what is the URL?

T: www.inspirational-images.com (Don’t forget the hyphen). It is my first website, put together in rather a hurry in view of my competition win. It is still a bit clunky, so please excuse that. It will be added to and improved as time goes on.

D: So, finally Tony, what are your plans now you have won the competition? And do you have any plans for spending your prize money?

T: The last few days have been rather hectic, but eventually, I guess, things will return to normal. I have no plans to spend the prize money at the moment. When things settle down I think I might just treat myself to a new lens, or camera, even.

D: Thank you for your time in being interviewed, Tony, especially as I know you are suddenly in great demand. I am sure my readers join with me in wishing you well and we hope you enjoy all the exposure that comes from your win.

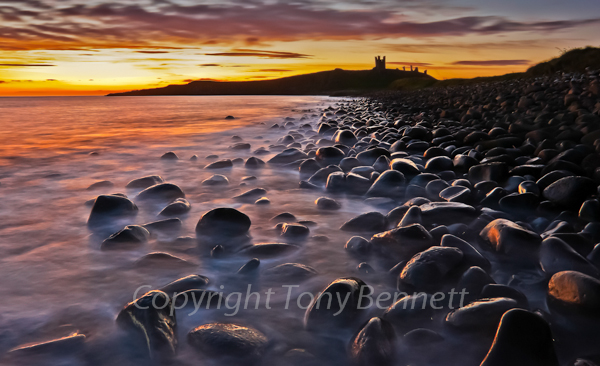
Here are some more of Tony’s images and you can see more of his work at his website, www.inspirational-images.com You are also able to buy prints of his winning image.


First Impressions of the Fuji X Pro 1 – A Day on the Streets

first thoughts

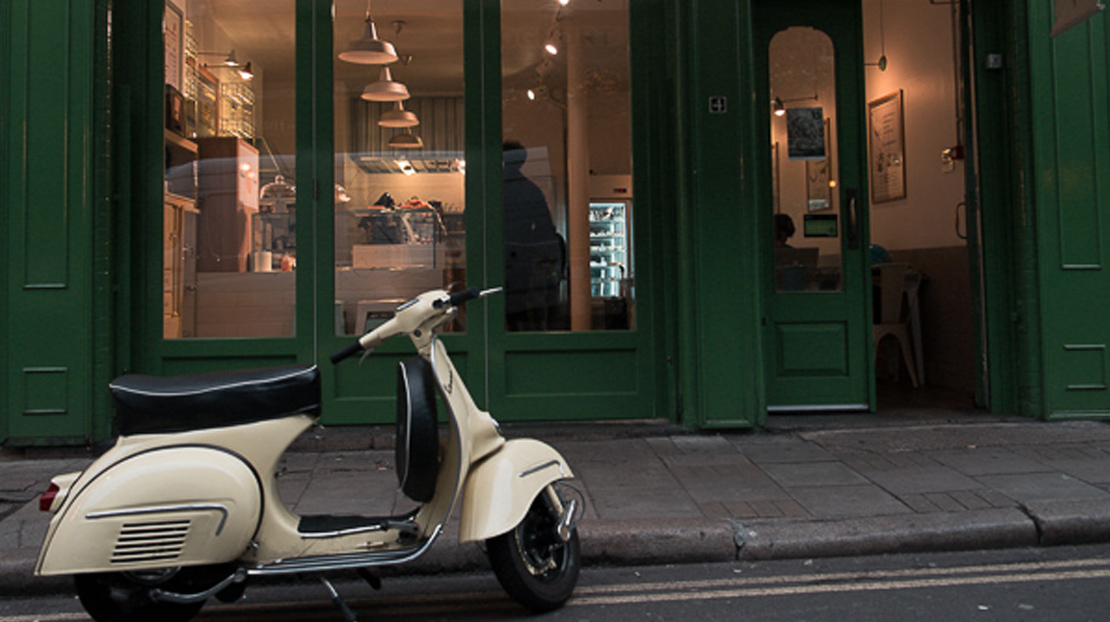
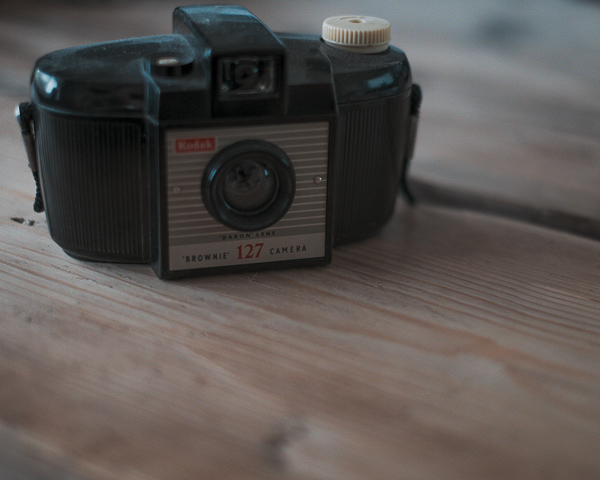
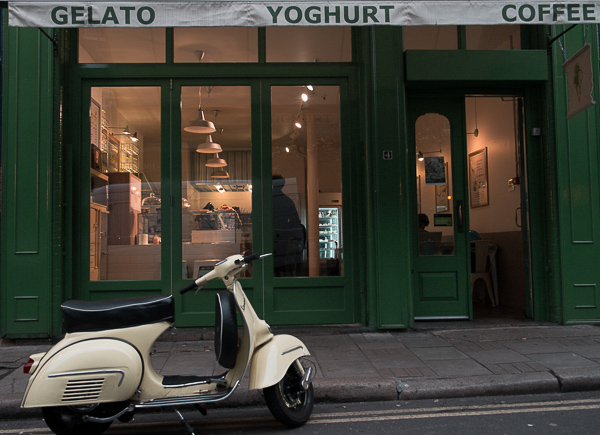
and, no, this is not the Fuji X Pro 1, but a shot I took with it 🙂

I have taken the plunge and bought a second hand Fuji X Pro 1. Why? A number of reasons. I needed a smaller camera system for some trips that could produce high quality commercial images but without the weight and bulk of my DSLR system. I had also had a chance to use the X Pro and it’s sibling the X100sa nd both had blown me away both in terms of usability and in the ‘filmic’ quality of the images the sensor and lenses produce. I also hold my hands up and unashamedly admit to being seduced by the beautiful retro styling and the superb build quality of the Fuji’s. I have some workshop ideas for the camera too, so there were commercial considerations in my mind also.

As I bought second hand I didn’t have a choice of lenses. The kit I bought came with the 35mm f1.4 prime (which I would have chosen even if I was buying new) and the 18-55mm zoom lens which I probably wouldn’t have gone for, rather erring towards a set of primes. However, the zoom is by no means a ‘kit lens’, this is a full on, high quality piece of glass which is solidly made and performs incredibly well. So I may well hold on to it. Only time will tell.


I have had the camera just three days and today was the first real outing for it. So my comments here are based purely on this first days shooting and my feelings may modify with time. I am writing this on the train home so I have only seen the images on the back of the camera, and we all know how deceptive camera monitors can be! I will review the images when I get home to add some to this post and may have to add some paragraphs once I have seen the images full size.

But that aside, what are my initial thoughts on the X Pro?

Let’s look at the camera from a number of angles. Remember, I have been doing fast moving hand held street photography with it today, so my comments are based on this. I will blog about how it performs as a landscape camera once I have used it for that purpose.

So, firstly, what is it like ‘in the hand’? It is not a compact camera. With one of the Fuji lenses attached it has some weight but is quite usable one handed. I have the extended grip fitted (this is not a battery grip but it just makes the grip for the right hand bigger and more comfortable, especially if you have big hands – it costs about £75 as an extra). I also have fitted a leather wrist strap which I am delighted with. I can let go of the camera if necessary knowing it is secure on my wrist. I much prefer this to a neck strap. 


I also fitted a ‘thumbs up’ which is a small £5.99 accessory which slides into the hot shoe and provides an anchor for your thumb. It is designed to aid stability when shooting one handed (as street photographers often do). I have found these very useful on other cameras but today, on the larger X Pro, I found the distance from the right hand edge of the camera to the Thumbs Up was too large. I just didn’t find my thumb naturally sat in the groove and so I can see me removing it as unnecessary for me.(an overnight afterthought – I may try removing the hand grip and seeing if I prefer using the camera with the Thumbs Up and without the grip as removing the grip moves your thumb closer to the Thumbs Up. It also reduces the bulk of the camera somewhat.)


I did find my thumb kept activating the Quick Menu button inadvertently as it is placed right where the heel of my hand and my thumb naturally rest on the camera. This is not a major issue, but as I lifted the camera to my eye I had to press the shutter button half way to clear them I to see my shot which slowed me down a bit – a disadvantage when street shooting, without a doubt.


All of the controls are beautifully placed and you soon find you can adjust just about all the settings without taking the camera away from your eye. This is aided by the very sophisticated electronic viewfinder (EVF) which shows the menus as you access them through the eyepiece just as if you were looking at the rear screen. It also shows you your last shot, which is a nice feature too.


You can flick to the optical viewfinder (OVF) and this shows you a wider view than the lens sees, which many street photographers love. They can see people before they enter the frame and antipate when to fire the shutter. However, you have to get used to the fact you are not looking through the lens when you do this and the framing is slightly different to what the lens sees. You can still overlay technical information, like shutter speed and aperture etc into the OVF which is very useful.


The aspect ratio of the sensor is the same a s a full frame sensor, 3:2, but the sensor is not full frame. It is smaller. How’re the image quality is reputed to be amazing at 16mp and capable of exhibition quality prints at A3+ and above. Pete Bridgwood has exhibited prints from his X Pro to great acclaim. (Petebridgwood.com)

Other aspect ratios can be set including my beloved 1:1 as well as vararious rectangular ratios including panoramic modes. The raw files will always be imported at full size, no matter what aspect ratio y select but Jpegs will maintain the ratio you choose. This applies to the film simulation modes Fuji have built into the camera too. So you can shoot as if using Velvia, Astia or other film types along with some gorgeous mono styles utilising colour filters. I particularly like the mono mode with the red filter applied. In orders o maintain what I see on the monitor while maintaining the greatest flexibility with my files I have set the camera to shoot in fine JPEG and raw. Thus I can refer to the JPEG to see what I saw on the camera screen and use the JPEG if the file size etc suffices of my needs or use it as a reference to convert the raw to mimic that look back in the digital darkroom.

Another nice feature, shown to me today by Tim Allen, ( http://www.timallenphoto.co.uk/ ) is you can, in camera, take any raw file and apply any of the film or crop effects and save a copy as a JPEG. We quite enjoyed playing with this, taking shots we liked and experimenting with different versions in camera. The raw file remans untouched, of course, and you will have the various JPEG versions when you gets home.


You can set seven custom presets on the Fuji. I have used these straight away and found myself flipping between them all the time today. I programmed in various mono settings at different ISO settings etc and also a couple of Astia settings as these are my favorites already. It saved me messing about in menus and I could quickly grab the set up I needed for a particular set of images.

If you are a DSLR user you have to change the way you use the camera. Firstly, the autofocus is much slower than a DSLR, but apparently more accurate (I can’t verify or deny this yet, it’s what I have read). The autofocus works differently. Whereas with a DSLR we are used to locking on to high contrast areas, points where light and dark areas touch, with cameras like the Fuji this is exactly what you don’t want to do. The focus works best when aimed at surfaces with texture. This takes some getting used to, but is very effective once you do. The fact the focusing is slower is just something we have to accept for now. Fuji have issued several firmware updates (and it is easy to update the firmware for your body and each of your lenses, and ought to be done to get the very best from your system) and these have, apparently, improved things, but it is still slower and less responsive than a DSLR.


Now let’s talk battery life. I was surprised at how quickly the X Pro eats batteries. I am used to a Canon 5D mk3 which can go all day on one battery, two at most. I burned through two and run out of power nearly tw hours before my time to head home had come. I could have done with at least one more battery, probably two to be on the safe side. Now, I was shooting continuously, using the screen, and working the camera really hard. Nonetheless, it is obvious this is a power hungry beast. I will be ordering two more batteries when I get home. One other things about the batteries, they get to the point where they show red, quarter remaining then all of a sudden the camera just shuts down. The first part of the battery discharge gauge takes some time to fall then the last half goes really fast. Beware. It’s like a car with a. Fuel gauge that says full for ages then drops like a stone!


I really enjoyed using the camera. It is not tiring in the hand, it’s black body is unobtrusive and the 35mm lens is exquisite. I have a feeling more primes will be in the offing. There is a 56mm f1.2 due in January which sounds very nice indeed.

The camera was a dream to carry all day, with a spare lens and filters in my bag. It was so liberating not to have my big rucksack with all the DSLR kit. Will it replace my DSLR? I doubt it, but I am no ruling it out. I wil see what the image quality is like. I will see how it performs as a landscape camera from a usability point of view. I am not wedded to the DSLR by any means. If the Fuji proves it’s worth and can produce the quantity and size of files I need, I see no reason to carry on with the big DSLR kit. However, if it falls short, I am happy to run two systems and use whichever suits the job at hand ( but I will be reaching for the Fuji as often as possible due to its lightness and portability).

If you are considering the Fuji X Pro 1 then you really ought to be take a very close look at the X E-1 too (and the XE-2 which is rumoured to be released any day now). It takes all the same lenses. The sensor and many other specs are identical but it is smaller and lighter and may well be a wiser choice for you. Take a close look, see what you think.


I am excited to get home tonight and look at the images I have. Let’s hope they live up to my expectations.

(Added the day after) I have now had a chance to look at my images. first things first. I need to work on my skills as a street photographer!  I can see I missed some opportunities, sometimes by a fraction of a second. I am going to have to concentrate harder when doing this type of photography. I also have some images I am moderately happy with, especially as this was my first day out with a new camera I was totally unfamiliar with.

I have put a few images from the day into this post. Most were shot with the 18-55 lens, wide open although a few towards the end of the day were shot with the 35mm. I wish in hindsight I had used the 35mm more. I. Used this wide open too. Most of the images were shot at ISO1600. The day was dull and I wanted to ensure a decent shutter speed. I ignored the histogram, this is not landscape photography (as long as I wasn’t clipping the highlights). I just let Aperture Priority do it’s job for me. I have not run any noise reduction on these files, just tweaked them a little in Lightroom, and I have not sharpened the files either. I wanted to show them more as the camera produced them.

So, that’s my initial thoughts. No doubt, I’ll have more to say as I get used tot he camera. I have another day out with it next week on the south coast. A different environment and a different style of shooting to look forward to.


A BIG thank you to Tim Allen ( http://www.timallenphoto.co.uk/ ) for organising the day and our walking route and to both Tim and Valda Bailey ( www.valdabailey.co.uk ) for being such good company on this day out in London. I am sure their images will be way better than mine.

Skye Expedition- Day Seven

skye day 7

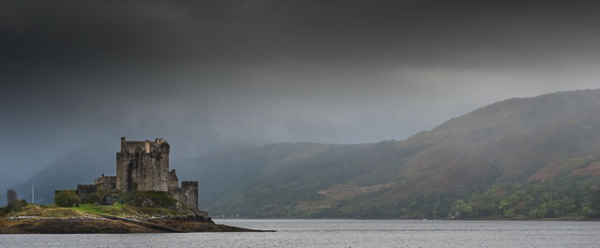
Eilean Donan Castle

Day seven of our expedition to Skye, a day to move on, a day to start heading south again.

The group were up again an hour before sunrise to take on the mighty Sligachan river outside the hotel before breakfast and a frosty sunrise ensure clear views of the Cullin and a chance to capture the raging river and rapids.

Once packed up and checked out we headed off of the island across the Skye Bridge and was soon at Dornie, home of the photogenic Eilean Donan Castle, probably the most photographed castle in Scotland, if not the World (and rightly so). The way it sits out in the Loch, reached by a stone bridge with three perfect arches, its placement beneath the peaks and out in the loch as well as its classic Scottish Keep shape make it a wonderful subject. (I wish I could say the same about the quality of the cafe, but sadly the minuscule pot of tea and so-called “Whiskey Fruit Cake, which I think had just had a whiskey bottle waved at it rather than pouring any of its content into the mix, had certainly succumbed to the tourist trap disease. Disappointing as every other eatery we had used in Scotland was superb).

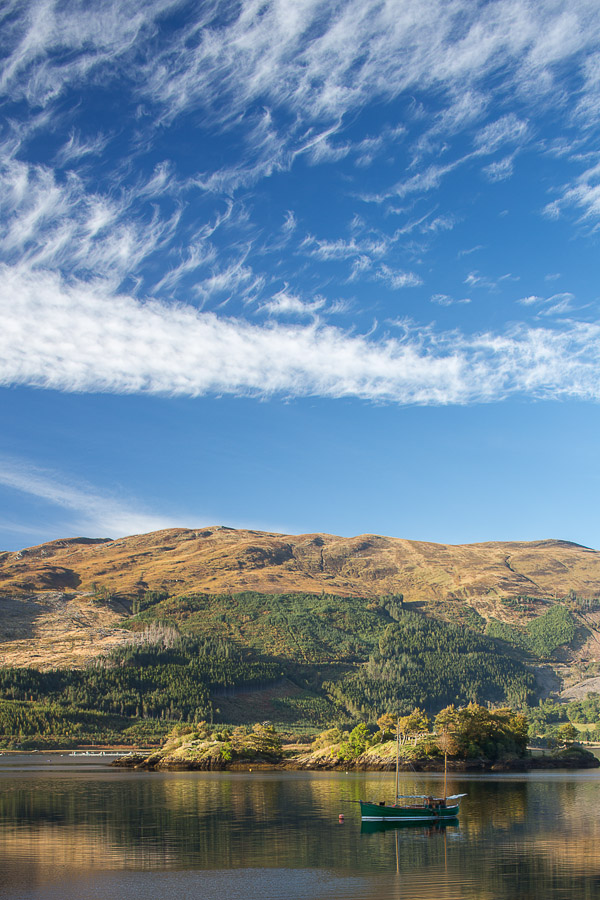
The long drive from here to Glencoe is never arduous. The scenery is just too wonderful for it ever to become a chore, especially as at this time of year the autumn foliage is starting to form up. A quick fill up with diesel in Fort William and then, en-route to our hotel in Glencoe village, a fortuitous glance over to the loch and I glimpsed an old wooden sailing boat, its reflection mirrored in the loch with the evening light illuminating the hills beyond, capped by cirrus clouds. A quick U-Turn had us all piling out of the van with our gear to capture this idyllic view before the light went off the hills. It was amazing. We had only been there for a few minutes before several other vehicles full of photographers began to stop and jump out to see what we were shooting. They soon joined in framing up the scene, although one group of what looked like nature photographers going by the camouflage gear and length of their lenses just said ‘Oh, its only a boat”.

Our final night was spent enjoying a great meal together reliving the glories of the week, its incidents, its highs and lows, the ‘in’ jokes and great things we had experienced. As always seems to happen on these trips, friendships are forged which last years and this is often of even greater value than the images made or the new things learned.

Day eight saw us make the dash back to Edinburgh airport for the first drop off and then the long drive back home. There is always a quietness in the van on the way home. Perhaps a bit of melancholy at the trip being over, perhaps some meditating on the experiences of the week and, to be honest, going by the snoring, quite a bit of catching up on lost sleep 🙂

I am already planning several new trips like this one (a couple more extensive to some amazing locations) for 2014 and 2015. If you would like to be added to the no-obligation shortlist, please send me an email or use the “contact me” form on the right hand side of this page. Most of these trips book up from people on the shortlist so they never make it on to my website or into my regular newsletter. I hope you can join me on my next adventure!

The Fearsome Cullin - Isle of Skye

Skye Expedition – Day Six

skye day 6

Day six. The Big One. Any landscape trip to Skye necessitates a dawn shoot at the Old Mano of Storr. It is not a huge distance from the road, but the ascent is hard for all but the fittest. With a camera bag and tripod it is even harder. Add to this the fact the ascent has to be made in total darkness and it is a tough climb. In order to be in position up there an hour before sunrise you need to be leaving the car park at the base about an two and a half to three hours before sunrise. So we left our hotel at 04:30. The group were rewarded for their efforts with the most dramatic of light up there – a snow shower blowing across the Storr was side lit by the warm rising sun with an amazing glow of light full of drama. It made all the effort worthwhile and the group was ecstatic as, back at sea level, we enjoyed a well earned breakfast in Portree.

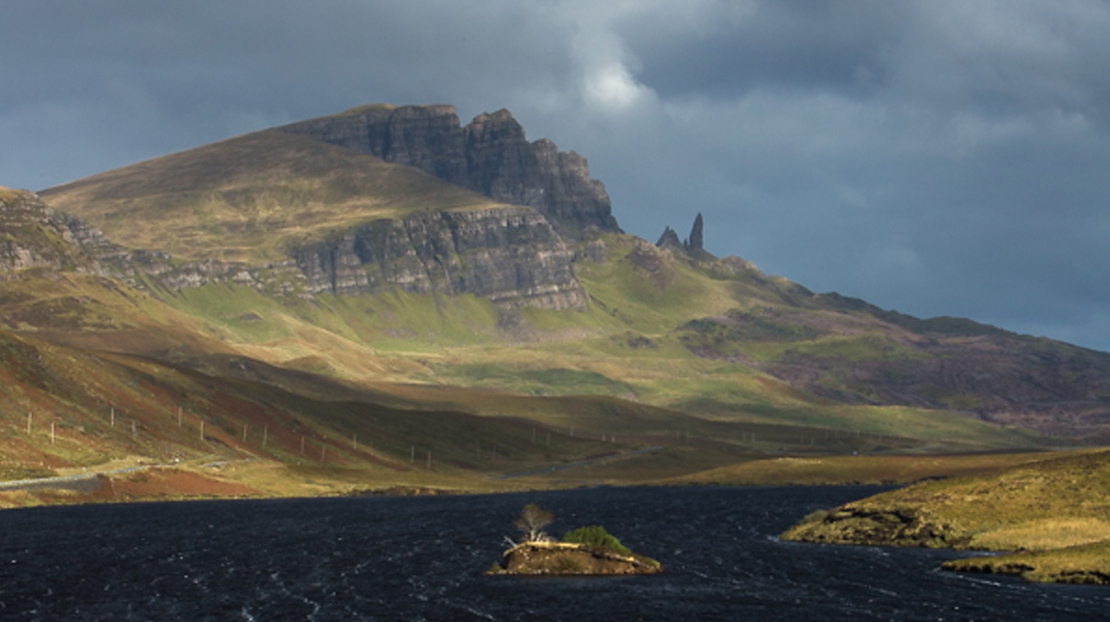
From Portree we headed back towards the Storr and got some great images of it in the distance shot across a loch, with a small island in the middle, lit by the morning sun. The wind driving rows of bubbles across the lock providing great leading lines. It was a bonus location and good to view the site of the mornings climb from a new perspective.

From here, we moved on to the Quiraing, further along the Trotternish Ridge above Staffin. Again, the late morning light worked for us and we made images of the prehistoric ridge, bathed in pools of golden light playing across the landscape. The famous Rowan tree (site of my lost Lee polariser last year – if you find it, its mine!) was also a popular image. To cap off our time there we marvelled as a Golden Eagle swooped around the view, spiralling on the thermals and effortlessly covering huge distances with a few strokes of its wings. It was a truly breathtaking sight and a lovely end to the morning.

By this time we had been out photographing for ten and a half hours so we headed back to the hotel for a break but some of the group wanted a Lightroom session so we set up in a lounge and had a couple of hours tuition with a drink before heading out to our sunset location.

This was to be Neist Point Lighthouse. There is really just one main composition here, but if the light is good, what a composition! And the light was REALLY good, the best I have ever had there. We made it just in the nick of time, in reality we should have arrived half an hour earlier. It was one of those evenings that as we drove to the location the light was so good, everything was photogenic. Very frustrating, but we had to keep our goal firmly in mind.

It was a happy group back at the hotel that re-lived the days glories over another great meal.

Skye Expedition – Day Five

skye day 5

Day five dawned and looked, again, unpromising, but is an example of how the weather up in Scotland can be deceptive. Again the group headed out to shoot the Sligachan river below the Cullin. There was not a star in the sky and the cloud hung low over the ridge. It had the makings of a dead loss. However, the old adage that the “harder I work, the luckier I get” proved true. Very gradually the clouds began to move and the light rose spectacularly. The diligence and effort of the group was rewarded with some great images of the Cullin with the mighty falls of Sligachan in the foreground, and all before breakfast.

Our next destination was the misleadingly named “Fairy Pools”. These are found in Glen Brittle on the opposite side of the Cullin Ridge to our hotel. Misleadingly named, because once up there, the effect is not dainty but dramatic. The river gushes off of the mountains and tumbles through an amazing series of pools and waterfalls. This is a place to devote at least several hours to if you visit. The Cullin wrap around you the closer you get and have a dark, ominous feel. The pools are full of amazing turquoise and green colours in the water. In summer they can reduce to a trickle but at this time of year the flow is perfect. The compositions are endless and absorbing.

It was here I met my nemesis. The group had gone on ahead of me and I was plodding up alone (my broken ankle, though fixed, is still not 100%). At one point on the path in to the falls there is a stream to cross. What, for most people, would be a straightforward hop, skip and jump across some rocks, bought flooding back to me the place of my fall back in January. The rocks were slab like, running in water. The jumps just uncomfortably wide. I had my newly acquired walking poles and after much debate with myself, including walking up and down the river side looking for alternate safer crossing points, I braced myself to cross. I got to the half way point but the final two moves were just too risky. I feared for my footing and the memories of three months being unable to walk forced me to decide to withdraw rather than risk another fall. It was hard to admit defeat. You really feel a wuss. I have crossed that stream before without a thought and I knew the images above were going to be great but I just couldn’t take the risk. There is also a tendency after a fall to be over cautious and this can lead to falls – not trusting your bodies balance and ability to keep you upright. I just didn’t feel I could trust myself to make the leap and so I missed out on the location. Not a nice feeling. Next time I come back here, when my ankle is stronger, I am determined to get back up to the Fairy Pools.

We headed off afterwards to The Old Ship Inn in Carbost. The Carrot cake there was simply astounding. I have eaten a lot of Carrot cake in my life (way to much, if the truth be told) but this was BY FAR the best. It was so good we decided to book a table to go back for our evening meal.

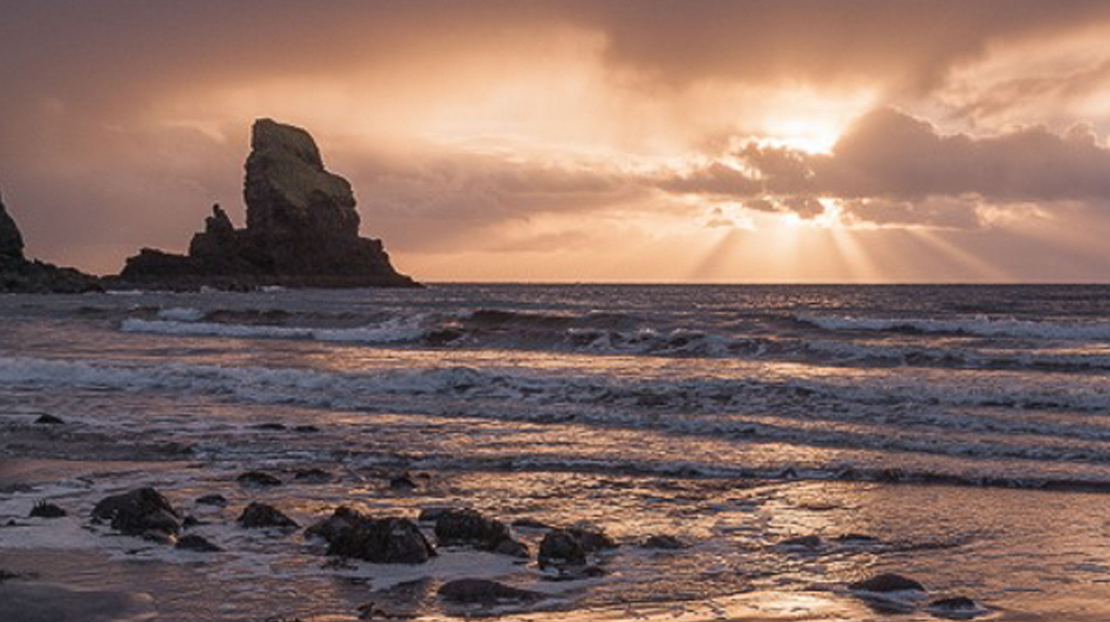
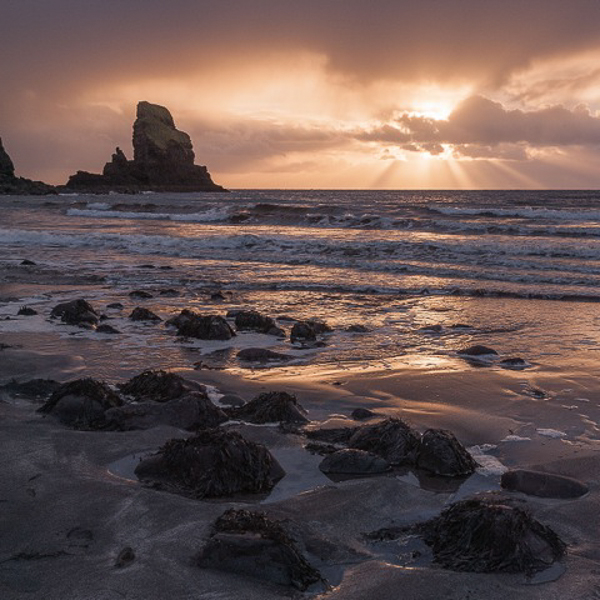
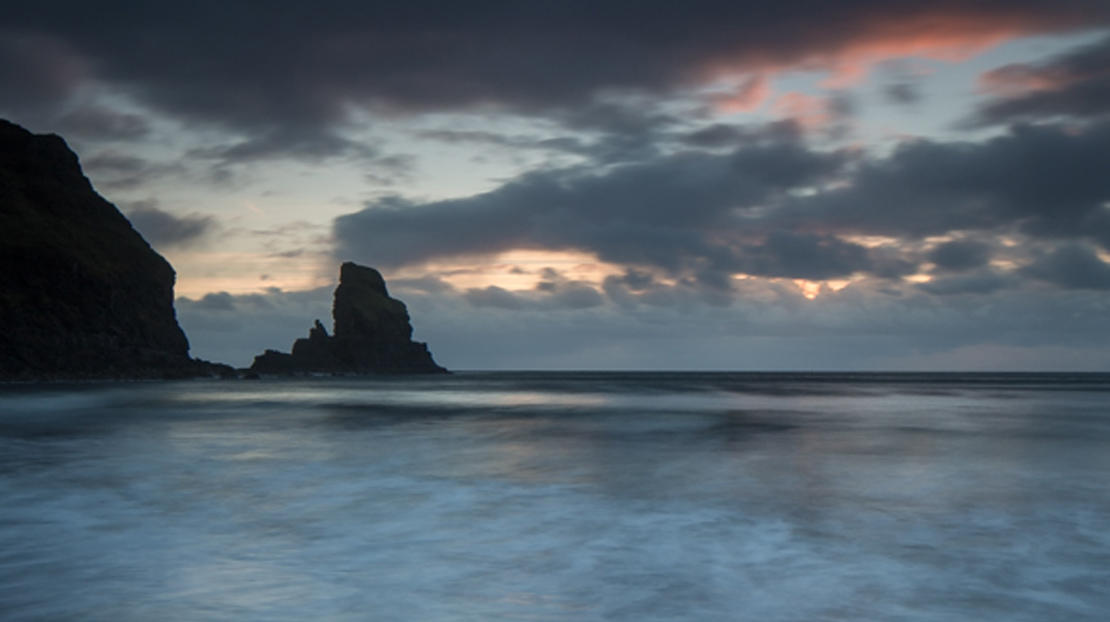
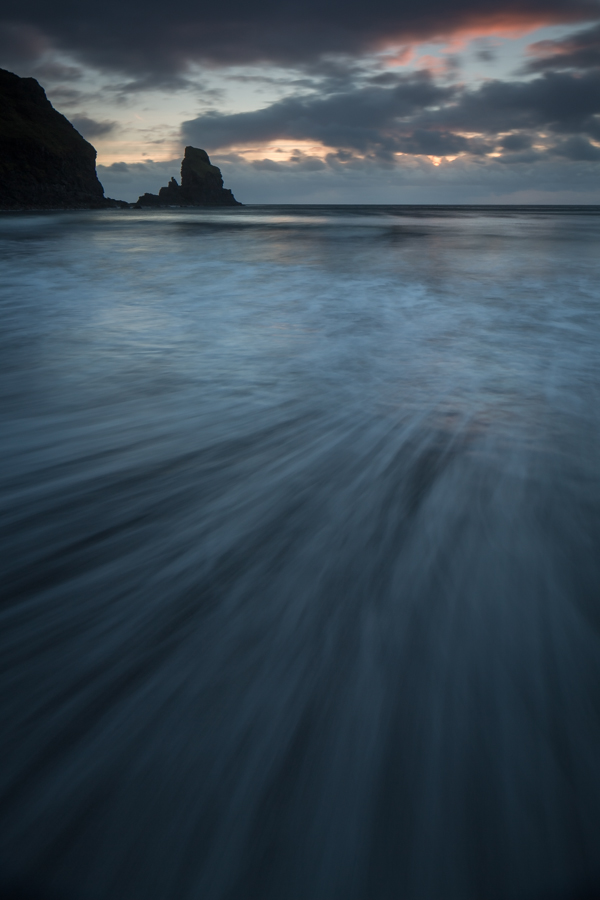
Our final destination was Talisker Bay and here we worked the wonderful dual coloured sand and boulder field, along with the rock stack and the ‘Icelandic’ waterfall pouring over the cliff face. Sunset was beautiful, especially after the sun has moved below the horizon, the deep blues really suiting the drama of the location. A great day in the field.

Skye Expedition – Day Four

skye day 4

We gathered outside the hotel only to be greeted with murky skies and drizzle but to make the most of what light there was and to get something out of the herculean effort we had put into getting up, we set up to make some images. Rather than work against the conditions and get frustrated with rain on the filters, I suggested the group leave the tripods behind, choose a lens with a tubular lens hood, crank up the ISO and shoot the layers of hills with light emerging through the swirling cloud. The conditions really lent themselves to moody black and white images.

At least we were only minutes from the hotel and a sumptuous cooked breakfast where we planned the day ahead.

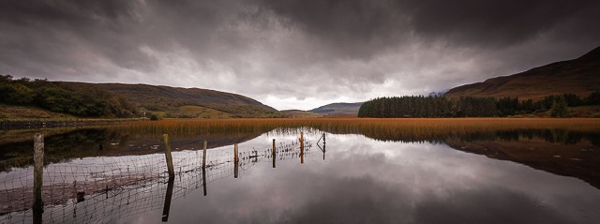
We headed off onto the road to Elgol. Our first stop was the ruined Kirk at Loch Cil Chroisd. Here is a small stone built church with an ancient graveyard. The roof has long gone but the walls are lichen covered and inside ferns grow from the walls. Outside an ancient Ivy grows up, entwined through the stone wall. A great photographic subject. A short distance further on is Loch Cil Chroisd which has a stunning reed bed. We spent some time here photographing the reeds and a fence which drops into the water. We fended off the usual enquiries from passers by asking which rare bird we were photographing. Why do people always seem puzzled when you explain to them you are photographing the landscape?

We were also approached by a photographer who had driven for thirteen hours with his friend to Skye to take photos. He asked if anyone knew anything about Canon cameras and the group, helpfully (!), pointed him in my direction. He thrust his camera at me and asked if I could help fix it as it seemed to have stopped working. I asked what the problem was and initially said that “it was just like that this morning”. “Just like that” described the way it was locked up, with nothing functioning. I did the usual things, power off and on again, removed the battery and put it back in. No improvement. I then put my eye to the eye piece and couldn’t see anything through it. My first thought was the lens cap was on, but, no, it was off. It was then he said, “I ought to mention it got a bit wet yesterday”. Ahhh! I sensed more was going on here. But why no image in the viewfinder. I removed the lens to find there was no mirror on the mirror mechanism. I looked up at him. He looked back. I raised my eyebrows. He said, “oh, yes, a little mirror thing fell out yesterday. My girlfriend looked it up on the Internet and it said that it had to go back to Canon to have that fixed but I wondered if you could fix it or if it would work without it”. I replaced the lens, handed it back to him and told him that his girlfriend, and the Internet were right. The camera was dead and did need a professional repair. I do wonder sometimes.

Our day ended at Elgol. The Cullin were shrouded in cloud but this came and went, revealing and concealing the peaks. Showers were sweeping across the scene backlit by the sun, giving us some wonderful photographic opportunities. The temperature is dropping here now as forecast and we certainly felt it, exposed on the rocky beach at Elgol. It became evident that the weather was closing in again and that, while the sun was going to set, we weren’t going to see it. So it was back to the hotel for a meal and bed.

The weather is set to change tomorrow. The morning might be showery but northerly winds are bringing broken clouds (and a possible chance of seeing the aurora and even a dusting of snow on the Cullin) and much colder temperatures. It will be exciting to see what images this leads to.

Skye Expedition – Day Three

skye day 3

Yesterday Scotland bit back as it often does. Perhaps it feels the need to just remind us, after a day as good as yesterday, that it is still in charge and we should not get complacent. We awoke to driving rain and very low cloud and this continued throughout the day. Scotland is capable of throwing significant amounts of rain at you and I suppose we shouldn’t complain. After all, it is the weather here that goes a long way to forming the land into what it is that makes it so attractive to us as landscape photographers.

If any days was going to be wet, this was the best one for us as we were moving on from Glencoe up to Skye. After checking out we descended from the Kings House Hotel up on Rannoch Moor down Glencoe (stopping for a brief visit to the site of my fall last January which resulted in my broken leg and ankle. I grabbed some iPhone images but most definitely didn’t attempt to re-cross the river!). With little hope we detoured to Stalker Castle but on arrival the rain miraculously eased and blessed us with an hour or so of just the odd spate of drizzle. It was enough, coupled with a sufficiently high tide, to capture some great long exposure images of this castle which sits on its own island out in Loch Linne. A second benefit of a visit to Castle Stalker is the chance to pop in the cafe, which has nice views over the castle and serves exceedingly good cakes.

From there the rain returned and battered us all the way from the Castle to Skye. Even our stop at Eilean Donan Castle was hampered by rain. We were more than pleased to arrive at our base for the next four nights, the Sligachan Hotel which sits nestled under the mighty Cullin mountains. All this rain means the rivers and waterfalls are raging and the shooting over the next few days look interesting. The forecast is for the rain receding, temperatures dropping (with a chance of a dusting of snow on the tops of the Cullin) and some rising winds.

The next few days look interesting!

Skye Expedition – Day Two

skye day 2

From Outside the Hotel


Day two kicked off with everyone meeting in reception at 06:00 and promptly going straight back to bed. This was not a revolt against shooting sunrise, it was in recognition that the driving rain and wind meant that while the sun was going to rise, we were not going to witness it.

So, take two, we met for breakfast at 08:00 and tucked in to the full Scottish. Oh, yes. the VERY full Scottish. Well, you can’t concentrate on photography if you are hungry can you?

We started the day with a few images close to the hotel (the image above was taken right outside the hotel) before heading to the obligatory honey pot location of the waterfall below Stob Dearg. I have to say the light playing across the hills here was stunning and we spent almost two hours working the location (as numerous photographers came, grabbed the standard shot and fled back to their cars). It is a cliche location, no doubt about it. But it is so because it is stunning. I couldn’t bring myself to photograph it so helped the group with camera techniques and composition, before finding a couple of small ‘vignette’ style images I was much happier with.

The clouds today kept parting, allowing golden light to play across the hillsides. At this time of year up here the moorland grasses are turning a striking golden yellow and orange colour. The Rowan trees are laden with berries, the Larches are turning a soft gold and the broad leaved trees are moving swiftly into their autumn colours. its a great time to be here. Yes, you are likely to encounter showers, but these can be brief and the light before and after is sublime.

The rest of the day was spent meandering down the full length of Glen Etive. This glen with its river, waterfalls, woodlands and views of the surrounding hills is a wonderful playground for the landscape photographer. We really took our time, working each location thoroughly, experimenting with compositions.

We also got chatting to some canoeists who ran some rapids and waterfalls for us An interesting photographic diversion requiring a totally different set of camera skills. In addition to the landscape images we also squeezed in a session at the famous Glen Etive ‘Bike Shed” (if you have been there you will know what I mean). We also found a wonderful old barn and did detail images of the doors and windows.

By the time we got to Loch Etive, around 16:00 the midges decided to appear. We fought on bravely for an hour but eventually they beat us off and we headed back to the hotel for some well deserved pints of the local Scottish Stag bitter. This primed the way for most of us to order Haggis in a Drambuie sauce with “Tatties & Neeps” (Google it). it was, frankly, awesome 😉

Charlotte bought her new pride and joy down to the bar, a Fuji X100s and this prompted a lot of interest as we made some portraits of each other, without flash, trying the different film emulation modes. Its a cracking camera and made me all the more keen to get home to take delivery of the Fuji X Pro 1 I have bought second hand, which arrives a couple of days after I get home. My favorite mode was the mono setting with the red filter enabled. It is an easy camera to use and, along with the retro styling, makes just great looking images with a lovely ‘feel’ to them. Very impressive. Charlotte had to pry it out of my hands.

The forecast for Monday is heavy rain around dawn and for much of the day, so it may be limiting photographically (however, in Scotland as elsewhere, it can lead to wonderful glimpses of light and atmospheric images for those who brave the conditions). We have the drive to Skye so it is not a full on photographic day like yesterday, but I do have some great locations planned so it will be interesting to see what we get, photographically.

Skye Expedition – Day One

skye day 1

Rannoch Rain


So, what is a week long photography expedition with me like? Well, this week I am taking a group of six clients up to Rannoch Moor, Glencoe and Skye so I thought, if time allows, I would try and blog to give you a flavour of what a trip like this is like.

The craziness began at 02:00 yesterday. I met with three of the group, Keith, Kevin & John (names haven’t been changed to protect the guilty). The reason for the early start? I had the idea that we could squeeze in sunrise at Bamburgh in Northumberland en-route to picking up the rest of the group at Edinburgh airport.

I had hired a nine seater VW mini bus which is providing luxurious travel for the week. By having a nine seater we have loads of room for luggage and a couple of spare seats so everyone can spread out.

Needless to say after a bit of initial banter, my companions were soon snoring soundly as I ate up the miles on the A1 northbound and they awoke as we approached that iconic beach an hour before sunrise to be greeted with good levels of cloud and a receding tide – perfect conditions. An hour and a half later all had some great images in the bag and an appetite had been generated so it was off to a local cafe for breakfast.

The great thing about eating together on workshops is that as photographers get together the conversation naturally revolves around our shared passion and all sorts of conversations develop. I almost always learn things during these chats. You hear the names of other interesting photographers work to explore, you hear of post processing techniques to try, interesting tips about gear or locations and so on.

We had a text from Charlotte who had, courtesy of BA, been overbooked on her flight and would now be arriving a couple of hours later than expected into Edinburgh. Never one to pass up an opportunity I quickly held an emergency planning meeting and we decided to add an extra location, speeding off to Lindisfarne. Here we had a really enjoyable hour and a half shooting detail shots around the old fisherman’s huts in the harbour before hitting the A1 again. Needless to say my companions were soon asleep again.

Peter, Leonie & Charlotte were picked up at Edinburgh without a hitch and off we headed on the M9 and A84, stopping to refuel ourselves at the “Green Welly Stop” at Tyndrum. Then it was up onto Rannoch Moor and to our hotel, The Kings House Hotel. Is there a better location for a hotel?

Checked in we were straight back out and shot the sunset close to the hotel, which has a river running behind it with views over the moors to Glen Etive, Glencoe and Stob Dearg. What a great start to the trip.

Then it was time to meet for a couple of pints of Highland beer before tucking in to a great meal and bed. The group are already gelling and enjoying banter and great engaging photographic chat. You always find on these trips that “in jokes” unique to each group develop and its fascinating to each persons thoughts and feelings on different photographic subjects. This group is no different. I predict a great week. The first day is always tiring due to the travel but today the fun really starts. A full day out with the camera. I’ll let you know how it goes. But now, I must get down for breakfast (sunrise was cancelled due to wind and rain, but more of that in the next post).

The images here are a couple I rattled off using multiple exposure techniques on my 5D mk3.

End of Day - Rannoch Moor

Aspect Ratios

aspect ratios

3:2, 1:1, 5:4, 16:9 and so on. When we get a camera it comes complete with an aspect ratio. Indeed, some now come with a switch or menu item to simulate various aspect ratios, but basically our sensor size, film size, glass plate or paper negative gives us our aspect ratio.

And off we go and play with it.

It becomes our frame. The border we work within. It confines our vision and gives structure to our images. In fact, I struggle to think of anything which has a greater overall influence on our compositions than the aspect ratio of our chosen camera. It has a tendency to dictate to us how we compose our images. 

But we don’t have to be limited by the ratio we are given by the camera. In fact I would put it more strongly than that. Our choice of aspect ratio shouldn’t be determined by our sensor ratio or film size. Rather, it should be governed by our subject matter and composition. We should be looking at our image making in the opposite way than most of us do. 

It is so easy on location to work exclusively with the frame we are presented with, trying to fit the components before us into our rectangle. But in many cases this does not produce the strongest image. It is harder, but it is worth the effort, to look more closely at what the key elements of our image are and then visualise what aspect ratio best contains them.

This means either having a good visual ability to frame the scene in our head, or, it is very worthwhile to carry some of those cardboard frames in different ratios through which we can view the scene and examine carefully the possibilities. We may have seen photographers using them and thought they look a bit pretentious or silly, but in fact, this approach works really well. We can both use frames with different aspect ratios and move them closer to our eyes or further away to simulate the effect of shooting at different focal lengths. We can then select the appropriate lens and frame the image, admittedly using the ratio of our camera, but placing objects in the frame in readiness for cropping the image later.

Some photographers are using compact cameras with aspect ratio switches to make test shots, experimenting with framing options before setting up and framing accordingly with their main camera (Joe Cornish, for example, is seen doing this in his superb video, “With Landscape in Mind”  http://tinyurl.com/8z9k9dc  , if you haven’t bought the DVD yet, I really recommend you do.)

You might feel you can just frame up the image with your sensor aspect ratio and crop later (and you can) but a more thoughtful and considered approach will nearly always lead to a better image. 

Something I notice when teaching my workshops is, relatively, how rarely most camera users think in portrait orientation. Most cameras are designed in landscape orientation and so it is much easier to work that way. But so many images are stronger in the vertical.

How do you decide? Personally, I look at the “shape” of what I am photographing. Does the interest spread width ways, or does it run vertically? Is what is off to the left and right of interest, or is it dull? How best can I fill the frame with interest? Or, conversely, if working on a minimalist image, which orientation gives the greatest feeling of space or places the space in the most effect place in the frame?

Many landscapers choose a camera with a ‘full frame’, that is with a 3:2 aspect ratio mimicking the ratio of 35mm film cameras. This gives a bright viewfinder and a feeling of space and ‘width’ which landscapers tend to want. However, and this is just my personal view, this aspect ratio tends to give slightly long, thin images, especially when viewed in portrait orientation. Sometimes this can be used to advantage such as when shooting wide sweeping landscapes. But I find it often makes for a more pleasing composition with better balance to crop these images to the 5 x 4 format used by the large format camera users. This gives a closer ratio between the width and height which seems, to my eye at least, to be sensibly weighted without the stretch of the 3:2. I have seen full frame users who mask off the live view screen on their camera with tape to a 5:4 ratio to help them compose this way.

Mr. Hasselblad had a different view on aspect ratios. He felt, rightly in my view, that the most sensible ratio for a round lens was 1:1, the famous square frame of the Blad. This makes the best use of the image projected by the lens. The square format is one photographers seem to either love or hate. For me, it is my favorite format. It suits my love of symmetry and it gives a certain ‘constraint’ to images which is hard to describe, but when used well, images in 1:1 seem well balanced. For me they have a purity about them. I am delighted to see many modern digital cameras will allow a 1:1 view on the live view screen, cropping the image for you in camera.

So I would urge you to consider the final crop/aspect ratio right at the beginning of the composition process, not as an afterthought later. While sometimes after the event, when we view our images on the large screen of our computer we do become aware of images within images, or more pleasing crops, I am convinced it will lead to stronger images in the majority of cases if we make this choice a conscious creative decision as we place key objects in the frame. If this is something you don’t currently do, try it, see what you think.

Going Back

going back

Following on from the theme of my last post I wanted to tell you about a conversation I had recently.

A photographer asked me recently where I was planning to photograph in the coming months. When I told him he explained how he had no interest in going to those locations because he had already “done them”.

“Done them”

On chatting further, it became apparent he viewed locations much like a twitcher views rare birds. As something to be acquired. Ticked off. And once visited to be of no consequence. Been there, done that, what’s next? A teenager with a low boredom threshold.

Is it me, or do locations have more to offer than that? Are they not radically different as the seasons change, as the weather changes, as the light changes? 

Even with the honeypot locations, is there not more than one way to portray them? I saw Terry Gibbins image of Bamburgh Castle a few months ago, shot in the snow, and now a print of it sits proudly in my studio. It’s magnificent. So different from the usual “Sunrise at Bamburgh” that I and seemingly every other photographer who has visited Northumberland has shot.

To really get under the skin of a location, to really have a chance of capturing it at its finest, in all it’s guises, it needs to be visited over and over again. We need to get to know it. To understand how the weather, light and seasons affect it. In fact, it is hard to really build a fine body of work on a location without living close to it, to allow repeated visits, reacting at short notice to fast changing conditions.

Look at Ansel Adams. He spent most of his life photographing Yosemite. Yes, Yosemite is spectacular, but how many people go there once, photograph it and never return. “Oh yes, I’ve ‘done’ Yosemite”. It is no wonder Adams made amazing images of the place. He had great raw materials in the natural wonders of the place. But much more than that, he worked hard there. He put in the hours. He toiled. I’m sure his archives, alongside the classics we gasp at, also have their fair share of so so images of Yosemite from the less than wonderful days he witnessed there. But he still went out on those days and worked his patch. 

He himself said that “any photographer worth his salt has 10,000 bad negatives under his belt”. He was certainly a master photographer, but he also put in the hours in one place and it produced the goods. His idea of “doing” Yosemite was to devote a lifetime to it.

Take a modern example or two. Joe Cornish took a hill. A hill many had admired for years. Some had no doubt made images of it, good images. But Joe has devoted himself to this local hill, just up the road from his home. You can’t say “Roseberry Topping” to a landscape photographer in the UK who knows his stuff without mentioning Joe in the same breath. The hill is pretty, but Joe, through his devotion to it, has made it iconic. Would as many others go there to photograph it as do, if it wasn’t for Joes images? How many of us would belt past it going to and from the coast without giving it a second glance? be honest? Joe, however, has photographed it from hundreds of angles, distances in all weathers, seasons and in all types of light. I’m sure there must be a book there! Now, do we say, “oh it’s alright for him, having a hill as good as that on his doorstep”. But I would bet that wherever Joe lived he would find something, a local patch, and he would work it and find deep beauty in it. A small copse. A little field. A stream. Anything. He would work it. And then others would follow.

Look at Dav Thomas. Relentless, year in year out, working the woodlands near his home. Photographing what most landscapers recoil from as too difficult. Woodlands. But he has stuck at it. Toiled. Grafted. Made it his. Now he has a superb body of published work gaining international recognition. All through working his local patch.

So if we want to produce really fine work, rather than dashing about ticking off locations (Corfe in the mist, tick, Nanven boulders at sunset, tick, Elgol sunset, tick) lets devote ourself to working a patch. Look locally. It doesn’t have to be a “hero location”. How many of us who think our area is devoid of opportunity have bought our OS map and walked every footpath, bridleway? investigated the rivers and streams, lanes and byways, hills and woodlands, fields and shorelines? (I’m not saying, don’t visit and shoot the honeypots, the hero locations. They are well photographed for good reason. I photograph them. Beautiful images can and are made there. I’m just urging an opening of he eyes to the wider possibilities. Don’t limit yourself to these places).

If you need more convincing, more inspiration, Take a look at the work of Iain Sergeant. Particularly his series, The Pool, here. This is, I think, a stunning example of a photographer showing how beauty can be found in the ordinary places close to home. Iain saw a small pool of water just a couple of meters across within minutes of his home, surrounded by plants and proceeded to record it. The finished project is sublime. So simple. So beautiful. Not a hero location and right on his doorstep.

If we can identify a spot, visiting it and revisiting it, over and over we begin to open our eyes and start to see what we didn’t see before. Its tough at first. we shoot the obvious and think there is nothing left. Thats when the work begins. We have to stop looking and start seeing. We put in the hours. We graft. We will churn out some dross, no doubt, but gradually, just occasionally an image that pleases will be created. Over time a body of work we will be proud of will emerge. 

That has to be more satisfying than, visit, tick. Visit, tick. We are photographers. Not collectors.

Seeing for Ourselves

I read an unattributed quote recently. The gist of it was this;

“The photographer who is able to look at the work of another, admire it and not be tempted to imitate it has finally begun to mature”

It seems to me there is a lot in this. As photographers, most of us love and seek out the work of others. I spend hours each week looking at photographs. The quality of what I find often amazes me. Some shocks me. A lot is awful, but then that’s only my opinion which is only of worth to me, and some makes me smile. I do like images which make me smile.

Why do we look at the work of others? Stimulation? Inspiration? Motivation? Plagiarism? Entertainment? There are lots of reasons, most valid, some shady. I sometimes refer to Cole Thompson, a photographer who has taken a conscious decision to avoid the work of others as much as he can. His reason? He doesn’t want his work to be influenced by anything he sees others doing. I can understand his motive and even admire it. His work certainly shows an individual style, so hard to achieve in the world of millions of images, but I don’t think I would want to work that way. I want to be inspired by the work of others.

Inspired, yes, but when does inspiration become plagiarism? When does what we see another doing affect us in such a way that what we do is head out and try and replicate it?  I think there can be merit in the beginner, the learner, in duplicating an image they love. If, and it’s a BIG if, their entire goal is not to pass the image off as their own, but simply to gain an understanding of technique and light, and that they very openly attribute the image to the originator.

Those of us with commercial customers also have to produce the ‘classics’ (as we would prefer to think of them, but ‘cliches’ is a much better description.) our customers demand them. However, in our personal work, we have the freedom to break from this strait-jacket.

It seems so sad, then, when photographers seem to get locked in to simply going from location to location producing identikit images. Reproducing what has been done before by others and Often to a much higher standard. Where is the real sense of accomplishment in that? Where is the craft? The art?

How much better to reach a point in our development as photographers when we can admire what others do, be inspired by their work and then head off and do something quite different. Let it influence us, but not direct us.

It takes a certain amount of creative courage to do this. An explosive sunset at a beautiful location is guaranteed to please the crowd. Showing our audience something different, showing them the world in a different way often leads to a deafening silence. Most of us can’t stand the silence and soon go back to the crowd pleasing. Doing what everyone else does.

So why not, as a private project, set about photographing something as you see it. Not as you have seen others see it? Those who like the results will truly like it. There might be fewer of them, but their appreciation for the way you have shown them the world will be more sincere than the “wow, great shot” crowd. You may start to become a leader, not a follower. You might become the inspiration. How much more fulfilling that would be?

A famous photographer, I forget for the moment who, talking to photographers once said, “don’t show me what you see, show me what you feel”. Sound advice.

Adobe announce new Creative Cloud package for photographers

Adobe caused a huge amount of anger, resentment and upset with its surprise announcement some months ago that along with launching its Creative Cloud service it would no longer be releasing any of its Creative Suite products (including Photoshop) in any other format in future. No more downloadable version to own. No more DVD’s.

Basically, the Creative Cloud allows you to have any of the Adobe Creative Suite program’s installed on your computer and for this ‘privilege’ you pay a monthly subscription. It was a brave move by Adobe to make this move so decisively. I believe this model is the one all major software manufacturers will want to move us to in order to guarantee cash flow into their coffers. Anything other than a complete termination of supplying the software by other means will mean few would opt for this system. We naturally don’t like it. We don’t own the software, we are leasing it. We have no way to decide if we want to upgrade or not.

Hence the anger amongst many of Adobes customers. But perhaps I ought to be more specific. The anger was chiefly raised among lone users, hobby photographers, one person businesses and so on. Adobes main customers,  graphics companies, design agencies, large academic institutions and so on, were delighted with the plan on the whole. The pricing works for them, access to all the programs, free updates and monthly pricing works well for business, it helps with cash flow and budgeting.

For most small users it was a disaster. Adobe had not thought through the impact on these small users who only use Photoshop and Lightroom. For us the model is hugely overpriced. The outcry was massive. It took Adobe by surprise. It led to lots of bad publicity. 

It seems Adobe listened to the outcry. They have just announced a new level of membership aimed at users of just Photoshop and Lightroom. 

This is how it will work. If you have bought a legitimate copy of Photoshop CS3 or above you will qualify. Between now and the end of the year you will be able to subscribe to the Creative Cloud. In the US the price is $9.99 per month. In the UK I thought it would be jacked up to £9.99 but in fact it will be £8.78 per month and it starts in two weeks time.

For this you will get unlimited use of Photoshop CC, Lightroom 5, all updates which are released as soon as they are available, 20gb of Cloud storage, a free Pro Behance portfolio website and free support. If you already subscribe to the Photoshop only version of the Cloud you will be moved automatically to this new level when it goes live.

For those who now feel aggrieved that this offer is just for those who have bought CS3 and above please spare a thought for those who have. They have spent in excess of £600 on the program and then upgrades have added more to this investment. It is only right that they be compensated for this outlay and loyalty to Adobe. We don’t yet know how much the subscription will be for those who are currently Elements users or who have never bought a legitimate copy of Photoshop. I estimate £12 to £14 a month, but this is only my guess.

For those who qualify for the £8.78 price point I feel this is an exceptionally good deal. Do the maths. How much do Dropbox charge for 20gb of storage? You can’t by just 20gb but 100gb, the lowest amount is $9.99 a month so 20gb has to be worth $2 a month. A Behance Pro site, which is a good portfolio site, costs $99 a year – so those two features alone cover the subscription. Now most of us wouldn’t go for a Behance site, but if you currently are paying for a Smugmug, Clikpic or other site you might use this to save that subscription and move to Behance (which is professionally recognised and viewed by many creatives). If you are paying for Cloud storage you could save that cash and use the Adobe space instead.

Besides this you are getting £600 plus of Photoshop and the very latest version of Lightroom along with all future updates. Already Photoshop CC has some great new features and no doubt over time more will follow. How much do you spend on Photoshop and Lightroom purchases and upgrades over, say, three to five years? Add it all up and I think the subscription represents good value.

Even if you don’t have CS3 or a newer version of PS, decide you want to buy in to the Creative Cloud and have to pay, say £12 or £14 a month, I still believe it represents good value for money.

I think, despite our reluctance to accept the leasing model, we are going to have to get used to it. Other software companies will soon follow Adobes lead. Microsoft is already offering, but not forcing, a Cloud edition of Office. The others will follow. It makes sense for them and they have us where they want us. We can resist for a while by not upgrading but gradually the new features will draw us in. Or, our current computers will get old, our version will not run well on new operating systems, file formats will change. Bit by bit it will become impossible to resist for all but the most determined.

In the meantime hopefully this news from Adobe will cheer some up who were rightly aggrieved by Adobes heavy handed and thoughtless first offering of the Creative Cloud. I think they should be given credit for at least listening to and responding to what their smaller and less profitable customers said. Quite refreshing in today’s corporate world.

 
Here are some FAQ’s to help explain things further, taken from Terry Whites excellent tech blog
 
Q: What is the Photoshop Photography Program Offer?
A: This offer includes access to Photoshop CC and Lightroom 5, plus feature updates and upgrades as they are available, 20GB of cloud storage for file sharing and collaboration, a Behance ProSite, and access to the full library of video tutorials in Creative Cloud Learn.
This offer is available to customers who own a previous version of Photoshop or Photoshop Extended product, version CS3 or later (CS3.x, CS4, CS5.x, or CS6). Suites do not qualify. Requires annual commitment, billed monthly.
Offer valid through December 31, 2013 and is available in countries where Creative Cloud is purchased directly from Adobe.com. This offer is not available in China, Vietnam or Turkey.
Q: Can I get Adobe Bridge CC with the Photoshop Photography Program Offer?
A: Yes. Bridge CC is available for download and use as part of your Creative Cloud membership.
Q: I am already a Creative Cloud member; do I qualify for this offer?
Existing Creative Cloud members who wish to transition to this offer must own a previous version of Photoshop or Photoshop Extended product, version CS3 or later (CS3.x, CS4, CS5.x, or CS6). Suites do not qualify.
Those who meet the qualifications have two options:
Creative Cloud Single App members for Photoshop CC who already completed the qualification process when they originally signed up for their membership will be automatically transitioned to this new program when it ships, with the additional benefits and lower ongoing price.
All other Creative Cloud members who meet the qualification requirements may contact Adobe Customer Service to discuss transitioning their membership to this new offer.
Q: I own an earlier version of Lightroom but not Photoshop. Do I qualify for this Photoshop Photography Program offer?
A: Only customers who own a previous version of Photoshop CS3 or later qualify for this offer.
Q: Will the cost of my membership increase?
A: This price is not a special introductory price for your first year only; it is the standard price for this level of membership. Customers who sign up by December 31, 2013 will be able to continue their membership at the same price. But if you cancel your membership in the future, you will not be able to re-join at this special price.

Why Usability is More Important than Image Quality To Me and Why I Wouldn’t Buy Nikon.

usability

Lets get one thing really clear at the outset. This post is not a Canon verses Nikon post. I am a Canon user and this post will go some way to explaining why, but right from the beginning lets be clear, If image quality is the most important factor to you in camera choice right now, as a DSLR buyer then go right ahead and get yourself a Nikon D800. It is amazing. What you read in the reviews is right about the quality of the files it produces. Here, at last is a DSLR which produces files very (very) close to medium format quality. You will not be disappointed by the images you get from it as regards the way it handles colour, contrast or detail. You will be able to crop into images heavily and still be able to produce wonderful prints. It is a ‘game changer’.

Would I buy one? No.

Is that because I am biased? No.

Is that because I am heavily invested in Canon EOS lenses? No.

Is it because, in reality, I like blurry, soft, images and, in fact love analogue images more than digital? No.

Why then?

One word. Usability.

I work with workshop participants weekly. I work with every make of camera on the market they bring along. Every model. Without exception, Canon DSLR’s are the most user friendly cameras on the market today.

Let me give you some examples of issues I have with Nikon’s in particular which make them unusable FOR ME (but you might be fine with).

1. Exposure simulation in Live View. In both Canon and Nikon systems as you adjust the aperture or shutter speed while in Live View the monitor will get brighter or darker to simulate this for you, just as a helpful approximation, the affect of those changes on your image. Slow down the shutter speed and the screen gets brighter. Speed it up and it gets darker and so on. Except, and it baffles me as to why, but the Nikon designers decided tht this really useful feature should stop working when the shutter speed exceeds 2 seconds (6 seconds on some models). Yup, thats right. Do they think it is of no help to see what’s happening when light levels are so low that we need exposures longer than 2 seconds? What on earth possessed them to BUILD THIS IN? Canons on the other hand simulate the exposure right up to 30 seconds. Usability.

2. I would love a Nikon designer to explain to me why they decided you can’t see the light meter gauge superimposed on the Live View screen. You have to turn Live View OFF, and either put your eye to the eyepiece or switch on the “Quick Info” menu to see the Light Meter gauge. Baffling. Needless to say on the Canon it is viewable in Live View.(UPDATE: apparently, you can see some sort of light meter gauge by pressing the OK button in LV on some Nikon bodies, high end it seems, but not all. I will have to see exactly what this looks like next time I have a Nikon in my hands to assess)

3. Another completely unforgivable omission on a Nikon that I find unacceptable is that while you can focus in Live View mode, manually or automatically, you cannot use the depth of field preview button in Liew View to check you have focused on the correct point and have everything you require in sharp focus.  Whereas, of course, you can on the Canons, even the most basic models.(UPDATE; I have, since writing this, found out that on the D3 and D800 models depth of field is simulated constantly in Live View. This seems to me to be a great feature. The only thing I would say is, in using D3’s and D800’s, the graniness of the monitor compared to those used by Canons is so bad that I hadn’t noticed that this was, in fact the case. So although I applaud the ‘feature’ It would be good, now, to improve the sharpness of the monitors on these cameras to make the feature useable)

By the time I get to point three I find that a Nikon is so frustrating to use I just refuse to consider buying one, no matter how good the image quality is over a Canon. I know that at some point Canon will release a full frame body which will rival or exceed the D800 in image quality. In the meantime I also know the 5D mk2 and 3 still exceeds any requirements for image quality my customers have ever required already, so they are not poor cameras. I can wait. I am baffled by those who have sold their (in my opinion) superior L EOS lenses  and bodies to jump on the D800 bandwagon, seduced simply by image quality. 

They certainly do have amazing, stunning image quality. No doubt about that whatsoever. But I wonder how many are secretly fuming and regretting the move. Furious that they didn’t realise how poorly designed the Nikon’s are and how frustrating they are to use to to those who are used to the amazing usability and functionality of Canons EOS range? I wonder how many stand behind the D800 in low light in turmoil wondering if they have the depth of field they need? Remembering how easy it was to check on a Canon? Annoyed about yet again having to turn off Live View and turn on another screen just to make exposure adjustments, while reminiscing at how easy it was back in the day when they had a Canon? And more money in their bank account?

If you are a Nikon owner, please don’t get me wrong. They are superb cameras that will give you years of great service. If you have never owned a Canon you probably haven’t even noticed these issues and have no problems using your camera. My comments are aimed more at Nikon themselves or these design flaws and at Canon users, especially high end 1ds and 5d users who are being seduced away from Canon by the IQ of the D800. It is these I am urging to think again.

(UPDATE:Since writing this, I have have had others raise issues to do with Nikons being difficult to operate with gloves on, compared to Canons, issues to do with how complex and baffling their menu systems are, that in Live View the D800 drops to just 4 frames per second, the inexplicable AF/MF switch on Nikons etc, etc, etc. I am sure there are many more. For me the functions I have mentioned are just those that would affect the way I use a camera the most. All cameras have their foibles and I know Canons have some of their own too. I also wanted to add that if you don’t use a camera in the way I do, maybe the features I have discussed may have no impact on your choice of body manufacturer, which is fine. I just felt I had to flag up certain things about Nikons which most users do not become aware of until after they have spent a huge amount of money buying into a system of bodies and lenses and are pretty much tied into for the foreseeable future. I just wanted you to go in with your eyes open).

So if you are thinking of switching systems, think long and hard. Don’t just consider IQ. Think about usability and functionality. If you are thinking about buying a DSLR for the first time, think about the same things too. The decision you make now will tie you in to a system, potentially for many years to come. 

It’s not all about megapixels. It’s about usability, so that operating the camera becomes simple and invisible. Thus your mind is free to concentrate on what is really important. Composition. Timing. Light. Art. Not faffing about with a bit of kit that just frustrates you.

New Dropbox Style Cloud Based Service with 20gb Free Space

Copy

As followers of my blog are aware, I am a keen backer up of my files and advocate using off site cloud based services, such as Dropox, Skydrive, Googledrive etc.

Each of these companies gives its users a small amount of storage space for free to get them used to using the cloud. They also hope that soon we will want more space and so sign up for their paid service. Here you pay for how much space you require per month.

I use all of these services, just accessing the free space each gives. I find Dropbox is very user friendly, especially as they have free apps to help you access your files from your smartphone, tablet and computer as well as via a browser. If you would like to try Dropbox, please CLICK HERE to get your free space and the I will get some extra space for referring you, thank you.

I also want to tell you about a new service called “Copy”, which is being very generous in the free space they are giving us. Currently you get 15gb free when you sign up. But even better, if you use THIS LINK to sign up you will get an extra 5gb of free space. You need to send back the confirmation email to confirm your email address and download the Copy app to manage your space. This will activate your free space.

I use this space to back up my important files and also to share large files with friends, family and customers (you can send them links to files you want to share). While 20gb is not enough to back up all our photos and music, in most cases, it is usually ample for backing up all of our other documents and files so at least these are protected.

I find cloud storage is also useful when away from home. You can access files you have uploaded from any computer which has web access from anywhere in the world. It has saved me many times. (for example, I copy all my flight tickets, hotel reservations, scans of my passport, airport parking details, travel insurance, emergency contact numbers etc to the cloud before a trip. If anything gets lost or stolen, you can recover the details from wherever you are).

I hope you find these links useful and get your stuff backed up safely.

“With Trees” by Dav Thomas, a Review

With Trees, Dav Thomas

In 1961 a very young Bob Dylan recorded “Blowin in the Wind” and within months his life had changed forever. After seeing “With Trees” I have a feeling life won’t ever be quite the same for Dav, either.
 
So here we are in the lull before the storm. I think it’s true to say that, outside of UK landscape photography circles, Dav is largely unknown. But amongst us he already has a reputation for quietly doing his own thing with no other purpose than to make beautiful images. If Dav tweets a link to a new image on his website, Twitter goes quiet for a while as we all click to see what he has achieved this time. Then the retweets and plaudits begin, such is his reputation.
 
So when it was rumoured that Dav would like to “do a book”, many urged him forwards and since then the landscape photography community in the UK has held its communial breath and waited. The waiting is almost over.
 

Cover

"With Trees" by Dav Thomas - Book Cover


Davs reputation is largly built around his images of trees and woodlands and so it was natural that they should be the basis for this book. I haven’t seen a physical copy of the book itself for this review as it is currently being printed in Europe, but knowing Dav and his attention to detail it will be beautifully finished and presented.
 
So what can we expect as regards the presentation of the book and its technical specification? The book is quite large, bigger than many photography books at 270 x 345mm with 112 pages. The hardcover is to be printed directly, so no dust jacket, and the cover is matt laminated. There will be 88 photo plates.
 
Dav and David are pushing for real quality with this book by opting for 170 gsm paper for the inner pages. This quality is further emphasised by the fact that they have opted to go for the more expensive but infinitely higher quality stochastic litho printing which is very close in quality to fine ink jet printing as opposed to using dot pattern printing employed in more cheaply produced photography books.


There are to be a very limited run of 30 luxury limited edition books, signed and numbered, which come with three of Davs signed prints (you can’t choose which, but if you know his work, this shouldn’t be an issue). These prints are limited to the book making this a very good value purchase for those fortunate enough to secure one. The prints will be made on 310 gsm Photorag paper at 195 x 245mm, each individually signed and numbered. This edition also comes in a foil blocked slip case at £125 plus postage.
 
There is also a special edition of the book limited to just 50 copies which comes with one of Davs signed prints (print specification as above) which will not be available elsewhere. (Again you cannot choose which print) These books will be signed and numbered by Dav and also come in a foil blocked slip case. The price for this edition is £75 plus postage.
 
The standard edition of the book, pre-ordered, will also be signed. These are priced at £40 plus postage.
 
The book is now available to pre-order now (from 28th April 2013) from the website http://www.withtrees.co.uk and for those who do pre-order and pay in advance for their copy are to be rewarded with a gift of an additional signed print. These won’t be available once the book goes on general release, so a very good reason to pre-order your copy.


The book is being published by David Breen at the newly formed Triplekite Publishing and I interviewed David recently about the project. (This interview took place about a week before the book went on pre-release).

Is your background in photography?
 
I am not that sure I would describe what photography means to me as a “background”much as a passion. I have had numerous cameras over the years, but for a long time I “took” some photos as opposed to “making” an image. Quite a few years ago I stumbled into landscapes and it felt natural and to be something I could become knowledgeable about.
 
For me, my photography passion is not just about making an image myself, I am genuinely fascinated and enthralled by the genre in its entirety. I probably started to become somewhat proficient myself about the same time as my 3 children arrived. So as I should have been practicing more and developing, I found an equal lack of time.
 
So I am possibly more versed in the output of other people’s photography than my own. I have also always had a borderline obsession with books and learning, which is my career, so naturally the genre of the Photo Book became a real interest and active collection.
 
How did the project between you and Dav come about?
 
I have had a few ideas for books over the last few years, associated with photography mainly and the organic aspects of corporate structure and politics as another, not surprisingly I think one of those will be a little more interesting to produce than the other. Parking the delights of comparing plants to large corporates to one side, I started to look for a photographic related book project. This is where twitter, some fortuitous coincidence and going with your instincts combined. I knew of Dav and his work through twitter and I decided for many reasons to try out working with film. I got amazing help over many days of many people, but most notably Tim Parkin and Dav. Between them 140 characters and the odd email, they taught me zone metering and off I headed to Padley Gorge. As I parked up in Surprise View car park I saw a fella wandering around the woods with a square of cardboard in front of his face, coincidence meant I met Dav Thomas, who was as helpful in real life as online. A few months later a bunch of people were asking, encouraging, cajoling Dav to publish his own book via twitter and it seemed a natural question to ask if he would like some help to do so.
 
Why did you think it was worth backing a book by Dav?
 
Oh, that’s a tough question, there are so many reasons and so few of them all that logical. I would love to say its because I have years of experience on photo book publication and can spot real, undiscovered talent, but that would be a lie. And to say I think this will be a huge commercial success would be a lie too. Probably the closest I can get to explaining it is to say, I believe his work has a unique feel to it which can be appreciated by both photographer and non, in equal measure. And that doing this, gives me the opportunity to fulfill a personal goal, business goal and to help someone else, helped me, in the process. Which is not to say I don’t think it will be a commercial success, or that it won’t lead to other things.
 
What were your first thoughts about the book when you saw Dav’s early proofs?
 
Shock, amazement, satisfaction and relief. Shock that he had achieved so much in such a short period of time, I was expecting a book layout with maybe ten percent of the images in it for illustrative purposes, what he sent looked almost finished. Amazement at just how good it was, and that every page turn seemed to reveal another gem. As well as the images which he hadn’t shown publically, those a little different. Satisfaction that my gut instinct was looking to be proved right, and relief that Dav and I wouldn’t be working the car boot sales of Northern England for the next couple of years.
 
Do you have a background in publishing?
 
This will be the first book my company has published, which is a business goal of mine achieved. When we get to send that first edition off to the national archive of the British Library, which is a legal requirement, it will be a very special moment to me personally and I expect Dav also. But to say I am completely new to publishing isn’t exactly the full story either. I have worked for nearly 20 years in the field of professional learning and development and in that time have supervised and been responsible for the publication of many things. So the process of it isn’t new. My company today also has a fledgling business channel in greetings cards and calendars from other photographers known to me.
 
What difficulties have you encountered in the process, and how have you overcome them?
 
We have been lucky so far in this respect as Dav is also a graphic designer, so the book layout etc. is down to him. With that experience comes many print contacts and support. I think we are also in that fortunate position of it being our first, so we don’t know what mistakes we are making, and are therefore not precious about changing our decisions. The quality of the finished book is always the deciding factor. At the end of the day, Dav has put his faith and trust in Triplekite to help him to produce as good a book as we can of his work. We believe we are working with a photographer of high enough quality and potential that we can truly make something great. The rest as I so often say “is just noise”.
 
We are planning to have the book in the UK, in our possession during July of this year, and launch at the Masters of Vision Exhibition where Dav is exhibiting.
 
Will you be selling through book shops, through online retailers or just through Davs website?
 
We are still very much in the planning stages where this is concerned, initial pre orders with the “thank you” print, will be sold direct. We are still in ongoing planning & in some cases discussions with numerous retailers, both independent and larger. We do however only have 600 copies in the first edition, so its very much dependent on how the pre orders and initial sales go.
 
How are pre-sales going at this early stage, is much interest being shown in the book?
 
So far we have only really soft launched it to friends via twitter, Facebook and Davs website. Support has been incredible and we are truly appreciative of all the support. To show how much that support means, we changed our pricing strategy by asking anyone who cared to contribute to tell us how much the book should be. Its fair to say that we dropped the price of one edition, kept the price of another the same, and chose to ignore the opportunity to raise one price based on the feedback given.
 
If the project is a success, do you think you would like to be involved in another photography book?
 
I think so yes, ISBN numbers are bought in blocks of ten so I have 9 remaining, 8 if I include the “Organic Organisation book. But all joking aside we have spoken about other titles with some people. The attention, resource, energy and focus right now, is about making this book as good as it possibly can be.
 
If so, any hints as to photographers you might like to feature, or is that all under wraps at the moment?
 
I think it would be unfair and commercially unwise to talk about any particular photographer. There are of course names who are producing great work right now but are yet to be published, these artists spring to mind when asked, but who knows. It may not even be a monographic work. The other answer is of course that we are open to ideas and approaches, talking about possibilities costs nothing, but rarely is anything made that hasn’t started with a conversation. There will be many, many photographers out there with great skill who we have no idea even exist right now.
 
Have you considered publishing a book of your own images?
 
Of course I have… I have a project called “18 months” which is a journal of hotel room images I have stayed in during my recent business life… and if I ever find a desire to own 600 copies of my own book I will definitely be publishing it. My commercial side suggests to me I will be better off publishing other work, or a “set of 6 postcards” of my own. 😉


So what are my impressions of the book?
 
The first thing I saw was the cover image of Bullrushes in the Frost, which is a particular favourite of mine. In fact, I have a print of it on the wall of my studio. It. Is a fitting image to set he tone for the rest of he book.
 
Inside we find a foreword from David Ward, which again says much about the book and even more about Dav and his work. David would not put his name to any book that did not show the very highest of standards in photography.
 
Turning a few pages soon confirms that Dav spends most of his time photographing in mist, frost and very subtle light. If you are a lover of intense sunrises and post apocalyptic colours then this is not the book for you.
 
Most of the images are made in the Peak District close to Davs Sheffield home, although interspersed among them are images from Scotland, the Lakes and elsewhere. Using, mainly, a 5 x 4″ large format film camera, Davs images reveal intense detail and subtle colour and tonal detail. He works with a number of film types and these seem to be chosen to work well with Davs chosen subtle light and colour palette.
 
It is evident from close inspection that Dav takes great care when scanning his negatives or transparencies to maintain the subtleties the film has captured. He then maintains this subtlety by going gently with the sliders and controls in the software. Just because a slider goes to ten, he certainly doesn’t feel the need to push it to ten. There is a lesson there.
 
For many of us, to wander into a woodland with our camera is to come out in a cold sweat. For many it is not long before we wander back out again in search of a nice easy beach, some lovely boulders or a comfy lake. The confusion, tangle and chaos of the woods can be intimidating. Where are the flowing lines? The foreground interest? The fore, middle and background all neatly delineated? Where is the sky? The horizon? Minimalism? No chance. Simplicity? In your dreams! And yet, here is Dav Thomas making it look effortless. The chaos is tamed. The tangle, untangled. The confusion, simplified. It can’t be as simple as he makes it look.
 
A close examination of the images reveals that he doesn’t just point his lens at just any old tree. He obviously takes enormous care in searching out his subject and then dignifying it by carefully placing all the elements so carefully in the frame. And all this in fast changing light with a large manual camera with no instant feedback screen and histogram. This is evidence of a master at work.


While many images in the book are shot and revel in the colours of autumn, Dav doesn’t rely solely on this season to make his images. We find many are also shot in spring and through winter. If anything, I get the feeling Davs camera lies undisturbed for the summer. I failed to find any images which were clearly shot in the warmer months.
 
If anything comes close to competing with the trees which are the star of he show, it is the weather. Frost, mist and various types of subtle light show off the trees to best effect. I also suspect Dav has an affinity or grasses and bracken too as they often feature as strong elements in he images.
 
I was pleased to be able to interview Dav recently about the book. Here is what he had to say.


Dav, can you tell me a bit about your photographic background?
 
I’ve more or less always had photography in my life, it was a passion ignited by my cousin who taught me how to print my then rubbish black and white photos in his darkroom when I was about 10, he also gave me his hand-me-downs, allowing me to set up my own darkroom. I studied photography a bit at art college, but then became a graphic designer by mistake! I carried on with photography using medium format cameras, mainly alongside my graphic design business, offering product photography as part of the service. I became interested in landscape photography about 6 years ago – it was part of a plan I had to get fit (which didn’t work!).
 
For those interested, what sort of kit do you use for the images in the book?
 
I almost exclusively shoot film for my landscape work (are trees landscapes? Maybe treescapes might be a more appropriate term!). Soon after taking up landscape photography I followed the obvious route and ‘went digital’ and sold all my medium format kit, processing equipment and drum scanner. It didn’t take me long to realise I’d made a big mistake though; digital just wasn’t cutting it for me. So I returned to film, only bigger – I took up large format.
 
The vast majority of images in the book are shot on 4×5 film, either with a Linhof Technikardan s45 or a Chamonix 045. Most images are made with a Nikkor 300mm lens, which is equivalent to about 80mm in 35mm terms. There are a few images made with a digital camera – my Sony a900, a few medium formats (a Hasselblad 500c/m) and a couple of 35mm film camera images. There’s even an image in there taken with my iPhone!
 
Why do you prefer to make most of your images on film?
 
There’s a number of reasons; firstly, and I suppose most obviously, is the quality you get from film, particularly large and medium format. The quality isn’t confined to size and detail; for me the real benefit is the tonality of film – it brings a scene to life and by utilising different film stocks I am able to render scenes differently. Increasingly, I’m using negative film, which gives me a huge dynamic range and its tones are soft and understated, which I prefer in my images.
 
Secondly, the large format camera pushes me to work in a certain way – it’s a much more pondered way of working than with a 35mm film or digital camera. I do the majority of my visualising before the camera even comes out the bag – I work the scene slowly, it’s almost like stalking an animal (probably, I’ve never actually stalked an animal!); hunting down the best angle, working out how the image can be distilled to its important compositional parts.
 
The way the image is viewed on the ground glass is also important to me. Being under the dark cloth focuses the mind, cutting out any external influences, allowing me to totally concentrate on the composition of the image.
 
Why trees?
 
Good question! I’ve always had a love of trees I think, I have great memories of playing for hours in the lightly wooded area near my house as a child. The wonderful feeling of having an area of woodland to myself remains today, without sounding to New Age; it’s almost like being a fleeting guest amongst their midst. I started off with landscape photography much in the same way as most other people; views, the seaside, foreground interest and wide angle lenses. I soon realised this wasn’t reflecting ‘me’ and my connection with the landscape, I started exploring more local ‘wowless’ locations and inevitably this lead me back to woodland. I’m fascinated by the textures of not only the trees themselves, but also the grasses and mosses that go along with them, and of course the changing atmosphere as the seasons change.
 
I must say I gain great pleasure in finding a location that no one has ever bothered even looking at before and finding beauty within it. There’s much more pleasure for me in making an image in such a location than I’d get from any honey spot location in the world.
 
Many photographers avoid photographing in woodland. They struggle with the confusion and chaos. How have you overcome this? How do you find your compositions in such a chaotic place?
 
I really enjoy the challenge of finding images in these chaotic environments. I wouldn’t say I have a set formula for making my images in woodland – at least, not one that I consciously think about.  I tend to approach my photos as a graphic designer – I look for an interesting shape, colour or texture that I can use to make a composition, it’s then a matter of working out if I can find a composition with those elements, usually this entails removing as many elements as possible to emphasis the feature that originally drew me in. I’ll do all this before I even consider getting the camera out; using a plastic viewing card to find the composition. One technique I use is to utilise swing on the large format camera to emphasise the relationship between two or more trees, that way I can throw areas of the photo out of focus, drawing the eye into the photo establishing the visual link that I want to portray.
 
You have a reputation amongst landscapers for being down to earth and not ‘arty’ about your images – what is your philosophy about making pictures (if that’s not too arty a question!)
 
I can’t be doing with people forcing the ‘I’m an artist’ thing down people’s throats. There’s no great concept behind my photographs – that’s not to say I’m flippantly taking photos when I go out – I feel a great connection and love for the landscape that I’m photographing and I hope that love comes out in my images. I simply photograph the things that fascinate me, treating the components of the landscape as elements to make graphic compositions with. It’s not for me to tell you my images are art – if the viewer considers them to be art, then all well and good, but I think it’s up to my audience to decide, not me.
 
How did you feel about working with David at Triplekite on the book with this being your first book, and his?
 
I must say, until David approached me about it, I’d never really considered producing a book – I suffer somewhat from self doubt when it comes to my photography, and without the help and encouragement from David (and a number of my Twitter contacts), my photos wouldn’t have made it much further than my website. I’m sure David’s job has been made easier by the fact that I’m able to design and produce the artwork for the book myself, meaning we haven’t had to deal with any third parties.
 
How has the collaboration between you worked?
 
It’s been rather a laid back relationship, but it’s been great to have someone who’s a natural salesman pushing me to get the book moving (I’m not the most organised person!). David’s input about editions, pricing, marketing and the like have been invaluable. David has been busy sorting out the technicalities – ISBN numbers, costings etc. leaving me to concentrate on photo selection, design of the book and the book’s website. I only wish he could write the copy as well – as it’s not a job I enjoy!
 
If this book is a success, do you think you could see yourself working together on other photographer’s books with you doing the design and David handling the publishing side of the business?
 
It would be great to work on the design of other photographer’s books with David and we have discussed the idea of working together further – so hopefully our working relationship will continue.
 
How did you choose which images to go in the book?
 
The difficult part of the selection process was trying to get a flow through the book – I wanted images that worked together and not to have too much of a jar when you turn the pages. The book is roughly organised by seasons, but as I have very few images from the summer months, it is definitely winter heavy! There are a few images that I have not been able to include, just because they don’t fit in with the mood of the book. The layout of the book allows for different sized images, which means I can use some images shot on smaller formats, whilst maintaining the quality of the images; they just appear smaller. The amount of pages in the book was only governed by how many images I had to include so I basically just chose the images that I feel most happy with.
 
I’m very tempted to ask if you are good at everything you do? I know you make amazing Indian food, bake superb bread, you are a talented graphic designer and hand make furniture with your own VW camper interiors business. All this, and you are a master with a camera? Please tell me there is something you can’t do?
 
Haha, well Caryl, my girlfriend, say’s she’ll make you a list of things I’m no good at if you like! I’ve never liked the idea of being just one thing… a designer, a furniture maker or a photographer. I’m passionate about design and love to design furniture, brochures, websites and photos! I consider photography to be an extension of the design process, my photos are designed just as much as a brochure layout or a website design. The downside of this is that I’ve constantly got some creative dilemma going on in my brain, resulting in my inability to switch off and go to sleep – one thing I definitely can’t do well is go to bed and get to sleep at a reasonable time! As you mention, I also love to cook – I’m not one to do things by halves, so if I’m going to take something on, I tend to get obsessed with it; I’ve spent hours on curry forums trying to work out how to master the techniques involved, but like my photography; however hard I try, I never think I’m quite good enough at it!
 
Do you have the images to make another book if this book does well?
 
I certainly don’t have another books worth of tree photos (I’m not sure the world could take another book of tree photos!). So this will be the last proper book from me for a few years I think. I do have some ideas for a very different publication though in the next year or so.
 
I understand the release of the book is to be timed to coincide with the Masters of Vision exhibition. Will some of the images in the book be exhibited?
 
Yes, I all the images in the Masters of Vision exhibition will be images from the book, unless I manage to make 12 new masterpieces before then, which I think is unlikely!
 
What’s next for you, Dav? What are your photographic plans?
 
I have a rough plan for a project, which has a working title of ‘without trees’! I don’t want to get comfortable with my photography and just replicate what I’ve produced before, although I won’t go out of my way to work in new ways and produce ‘art’ for art’s sake. The project I want to work on will be focusing on the Peak Districts moorland which I’d like to cumulate into a hand made, very limited edition, hand printed large format book. Back in my hippy days (!) I used to make my own paper and bind my own books – whilst I won’t be going as far as producing my own paper, it would be great to do my own binding. I see these as being very different images to my usual style, I need to get on and see where it takes me…


Many of the images are well known to those of us who love Davs work. Indeed, it would be like going to a Dylan concert and him not singing “Blowin in the Wind” if they weren’t there. But in amongst them are many new images too, including some wider landscapes for which Dav is less well known. Some photography books are comprised of many strong images but are filled out and somewhat diluted by a proportion of weaker ones. That is not the case with this book. In fact, there is only one image I really don’t “get” and that is more likely to be me rather than the image! In fact, in this book you will see many images I truly feel are “world class”, exceptional and worthy of the very highest praise.
 
I have written a lot of book reviews in the past but this has been the easiest. You may feel I have been a bit gushing about it. I tried, really tried to search for some negatives in the interests of balance, but honestly couldn’t find any. Unless the print quality is awful or the book falls apart, those who buy this book are going to own something I feel is very special. As with many photography books, it is an opportunity for us to own a body of work from a photographer we admire, when we simply could not afford, nor do we have the wall space to by and hang them all as prints.
 
As I said at the outset, I think this is the start of something for Dav. I think we will look back in a few years time and view this book as a milestone. A turning point. As one of the special books in landscape photography that comes along from time to time. It deserves a place alongside Bae, Bien-U’s “Sacred Wood” or Porters “In the Realm of Nature”. As such I think it will quickly become collectible, a classic.
 
I, for one, hopes Dav stays “acoustic” and doesn’t “go electric” anytime soon. The only problem, now, is going to be the “tricky, second album”.
 
To pre-order your copy go to http://www.withtrees.co.uk


Shooting Landscapes Handheld. You Are Joking!

Handheld

Dark Light III – Taken handheld from Rannoch Moor.

I have written some time ago about my thoughts on working with what you’ve got. Basically, the premise of my mantra is, if all you have is a 50mm lens, then shoot with it. If its raining, rather than giving you he technicolor sunrise you envisioned, shoot the rain. You get the idea.

Recently, on the day I broke my leg in fact, I had to work to my own maxim. 

I was leading a workshop up in the snows on Rannoch Moor and Glencoe, in Scotland. On the first day of the trip, just an hour into shooting my tripod head broke. It broke in a major way (and kudos to Manfrotto for replacing it for me straight away once they saw what had happened).

I tweeted about the failure and many of my followers replied with sympathy (and we all like a bit of sympathy). Several said how angry I must be feeling and how it would ruin my trip. I could understand their point of view but I just didn’t see it that way.

Kit fails. You have to get used to that which is why I have back ups or alternatives with me for virtually everything in my bag, including tripods and heads. Except this time. This time I was car sharing and to save space the one thing I hadn’t bought with me was my spare tripod & head. Ironic, huh?

Getting angry about it would have just spoiled the trip, it wouldn’t have actually changed anything. Here I was in the most stunning of locations with amazing light. I was going to work with what I had.

So this meant shooting landscapes, often in low light, handheld. 

So how did I approach this? I was using the Canon 5d mk2 and was happy taking the ISO up to 800 (and in very low light I went to 1600 at times – whatever it took to get the shot). I also went wide with my aperture. So I abandoned my usual preference for f11 (or f16)  most of the time and went wider, right down to f2.8 at times in low light, but often working at f8, all with a view to keeping the shutter speed high enough to get sharp images.

If this hadn’t been possible I would have gone over to shooting ICM (intentional camera movement) images. Again, working with what I had. 

Another approach I adopted was to shoot in burst mode. Firing three frames at least for each image to give me a better chance one would be sharp. It meant I came away with nearly 900 frames fom the day, but it did increase my success rate.

I also moved to auto focus. On a tripod, I use manual focus in Live View mode which is perfect, but hand holding it just isn’t practical to focus manually all day. There is no benefit in it, in fact, auto focus is perfect for just this situation. I use centre point focusing so I have complete control over what I am focused on. So I turn on just the centre focus point. I then point the centre of the lens very precisely at what I want to be my focus point, press the shutter button half way to lock focus and hold it there, reframe and then complete the shot. You can also use the Focus Lock button on the back of the camera in the same way. 

I found I got the best results using my longer lenses, especially the 70-200 f2.8 IS L zoom. This stayed on most of the day. The image stabilisation helped with sharpness and I followed the basic rule of thumb that you need to keep your shutter speed faster than your focal length so I tried to stay above 1/200 sec all day, using ISO and aperture to do that.

Another advantage of using the 70-200mm (and the 24-70 f2.8 L which I also used on the day) was they both have long full tube shaped lens hoods. On the day, blizzards kept blowing through and these hoods really helped to keep snow off the front element of the lens.

When I came to review the images later (and trust me, I had plenty of time to review them, lying in my hospital bed) I realised that broken tripod head had done me a favor.

I had an extraordinarily high “hit rate” for successful images on the day. I took many more that I was happy with than I normally would. I found I was able to react really quickly to the fast changing light up there. As the blizzards were blowing through we had amazing gaps in the clouds with shafts of light and wonderful cloud shapes. On a tripod I would have been faffing about and couldn’t have got half the  images I did. 

I also would have been shooting much wider lenses, 45mm or 24mm, out of habit and on reflection, images at those focal lengths wouldn’t have had the impact I got from the 70-200 lens. (For my wider shots with the long lens I shot several panorama sequences, all handheld, and Photoshop stitches them perfectly. It’s amazing).

I would also have been more likely to have been trying to use my Lee filters. This would have slowed me down even more and with the falling snow caused frustration and even more lost shots.

Yes, that tripod head did me a big favor. Of course, looking at it another way. If it hadn’t failed I would have had it with me later when crossing the river and would have been using it to steady myself so maybe I wouldn’t have fallen and broken my leg… But let’s not speculate.

So, the lesson. If something fails in the field or you forget something, work with what you have. Think laterally. Work around the problem. Find a solution. It might feel uncomfortable, but just do the best you can. Getting angry with yourself or your kit, or giving up and going home don’t help, and you never know, like this occasion, you might just produce something unexpected by approaching the problem with a positive frame of mind.

If its something really bad like leaving all your batteries or memory cards at home, then use your mobile phone camera. If that’s back in the car, then just sit back and enjoy the sunrise. There will always be another.

Dark Light II – Taken handheld at the mouth of Glencoe

Limited Edition Prints. Should I Sell Them? Should I Buy Them?

limited edition

Let me start by saying I don’t issue limited edition prints myself. Although some would argue that I sell so few prints they are all, in fact, limited editions. 🙂

I came across an article this morning commenting on a court case in the US. In the case a very serious collector of limited edition prints by the photographer William Eggleston had complained to the courts because Eggleston (or his estate) had issued a new “limited edition” of a famous print of his, some years after the original edition had sold out. You can read about the case here.
Here is the image concerned, one of Egglestons most famous, Untitled 1970  © Christies Images LTD
(I do love the image and it has become rather iconic over the years).
The basic issue the collector had was that the same image was used, albeit in a different size and using a different print process and this devalued his considerable investment in the original limited edition (his original print reportedly costing him $250,000). 
The judge disagreed, ruling in Egglestons favour, saying that the new edition was completely different from the first. The image was the same but the size, paper and print process (the original edition was dye sublimation, the new one digital) and these differences made the new edition justifiable and in the judges opinion had no effect on the value of the original edition. (It might even be argued that the original edition now gained even more collectibility as elevated above other, later editions).
Egglestons lawyers explained they felt this judgement was good for artists and collectors. Many collectors disagree.
This case raises lots of interesting questions and issues around limited edition prints. I will attempt to deal with some of them here and put my point of view, but I would be interested in your views and comments too as this is a volatile and debatable issue from both the artist and collectors point of view.
Firstly, how do limited editions work (or how are they supposed to work)? The idea is the photographer declares that they will only sell a set number of prints of a certain image. This is done to add kudos and collectibility to the image. It is designed to give a rarity value. 
To claim very high prices for prints, photographers who are collectible will sell very small editions of, say, just five prints. In the most select art photography case, photographers sell the single print in existence along with the negative (these are most often analogue images, not digital, so shot on film or glass plate negatives etc). The print and negative come with a certificate from the photographer stating there are no other copies in existence. This is as close as a photograph comes to being a unique piece of art in the way a painting or piece of sculpture is. Needless to say, from the right photographer, these pieces can  command very high prices.
Editions more commonly run to ten, twenty or more. Michael Kenna issues forty five prints in each of his editions, as an example. The photographer has to decide whether to sell every. Print in the edition at the same price, or to increase the price gradually as the edition gets closer to selling out. This encourages early buyers to invest in editions and creates a perceived (if not real) increase in value, making the prints seem even more desirous and collectible. Michael Kenna, for example starts his editions at around £1300 a print and this rises over time until an edition getting close to selling out has prints selling for £6000 or £7000 each.
Once runs get above fifty prints you have to start to ask yourself if they are truly limited. Owning number 879 of 1000 doesn’t really cut the mustard in my view. Having said that, if you are paying less than £100 for the print, you can hardly complain. As I have shown in previous blog posts, photographers who charge less than £100 a print are actually selling at a loss. They may think they are making a big profit over the cost of paper and ink, but they are ignoring the true costs of making the photograph. You cannot run a photography business full time on print sales and price your work on a cost plus basis. You will soon go bankrupt. It shows a lack of understanding of business and finance. But that is a whole other topic. So having a massive limited edition run is really just a marketing tool to give some perceived value which, if we are truly honest, doesn’t really exist. If we produce 250 prints of a sunset and we are not a collectible photographer is that print really going to increase in value because it is number 139 of 250. Not really. Not if we are honest.
However, in researching this piece I was astounded to read that Peter Lik’s “limited editions” are of 950 with an additional 45 artists proofs. Personally, I feel this is taking limited editions too far and exploiting collectors, but his images almost all sell out and the values often increase. (Many by huge amounts- some collectors of his work have made very handsome profits from selling on his images after editions have sold out). So there are no rules (and no accounting for taste, either). His collectors are obviously happy or they wouldn’t buy and many of his prints sell out before they even hit his shops so demand is huge. (Is this down to the quality of his work, his skill as a marketeer, or investors knowing they can make a return on their investment?)
If we do decide to sell our work as limited editions, and it is a personal decision and can work very well for us, we have to get set up properly. This is a matter of integrity. If you tell people they have a limited edition print, that’s exactly what it should be. You should be able to prove it. So the edition needs to be recorded and documented. A spreadsheet should be kept, forever, and be kept accurately logging every sale and print number. This tends to be okay when we enthusiastically start offering a print. But come five years later and we have only sold five copies of our limited edition of fifty are we still prepared to maintain the records? Lets be honest. Most of us, myself included, don’t sell huge volumes of prints and so editions of these sizes will take years to sell out. For me it would take a lifetime!
Each print needs to be signed by you (with a pen that does not harm the print and does not fade or change colour with age, or with pencil), it needs to be dated (probably) and many photographers go to the added expense of buying an embossing tool of their logo which they emboss into the paper. This adds a feeling of genuiness and quality. It is a good marketing tool and worth the expense if you at going to run limited editions (or even if you are doing open editions).
Hahnemhule also sell a kit with certificates you can print to issue with the print and each has a hologram too, to add genuiness. All this adds weight to your offering and real collectors expect such refinements. They are paying you a lot more for it, after all.
Pricing of limited editions is tricky. What often happens is a photographer sets a price and an edition run of say twenty five and it starts to sell well. They then realise they could have charged more or sold many more. Pound signs in the eyes kick in. They now want to sell more editions and do what Eggleston has done, varying the size or paper to justify the new edition. 
So when you set your price you can adopt Kennas model and increase the price as the edition sells out. He is very upfront about this, so no deception is involved. Early buyers know they are getting a ‘bargain’ while those late to the party pay for being slow off the mark. 
Or, you can decide how much you want to make from an image and be content with that. So you make a nice image and decide to sell twenty five limited edition prints. You decide you would like that image to make you £5000 and so you price each print at £200 each. 
The issue is always one of greed. If a print does well, photographers might start to wish they could sell more. They worry that this steady source of income will soon dry up,when the edition sells out. What if they they don’t take many really popular images. Their income will drop as they realise they don’t have anything quite as good to take its place. This is where true professionals are out constantly shooting, trying to find the next image to replace their better sellers that are selling out. They accept when an edition has gone its gone, just as a painter paints a canvas, sells it and then has to paint another.
An additional layer of complexity comes in the form of poster prints. Although many well known and collected photographers sell limited edition prints at high prices you can also buy poster prints of the same images from them. So, going back to Michael Kenna as an example, but the same would be true of many others, you can buy posters of his images for £20/£30 or so. You can buy his images on calendars and in his books. Now the posters and calendars, while very nice are not printed to the same quality as one of his hand printed darkroom prints, but the image is identical. Does this devalue the limited edition? They do allow mere mortals like me to own an image from a photographer whose work I love and couldn’t afford any other way. How else could I own “Storm Clearing” by Ansel Adams, for example, if it wasn’t for posters?
Recently in fourteen US states a law has been passed to begin to regulate Limited Editions. There is a fascinating blog post by Joshua Kauffman who is a lawyer on this subject. You can read it here . In the article he shows just how some artists and photographers had really pushed their “limited editions”, necessitating the law change. It makes fascinating reading.
I also found a very interesting blog by an artist, Stuart Duffin, on the etiquette surrounding limited edition proofs and it includes some very interesting details about the abbreviations you find on editions which can tell you a lot about what you are actually buying. This too is worth reading here.
I wonder if, for most photographers, issuing limited editions is done more for our own self esteem than or any real value for our customers? It’s much nicer to say the print we are selling is “limited”. It certainly is a useful marketing tool and there is no harm in exploiting that as long as we don’t make any claims, actual or implied, that what our customers are buying is definitely going to become collectible or soar in value. And who is to say it won’t? Every now an then a new talent emerges and their early work becomes hugely valuable. It might just be yours. Customers also like to think they are buying something “limited”, even if subconsciously they realise it is not really of huge or rising value. They just like the feeling that buying a limited edition gives them over a regular print, and if the customer likes this, who are we to deprive them of it.
There are no hard and fast rules respecting LE prints (except in some US states now and that may well increase). So it is down to each of us to decide if we are going to offer them and if we are, how we will operate the system. What is important, in my view, if we o offer LE prints, is that we are totally. Upfront, honest and transparent with our customers so they know exactly what they are getting and what we may possibly also do in the future too.
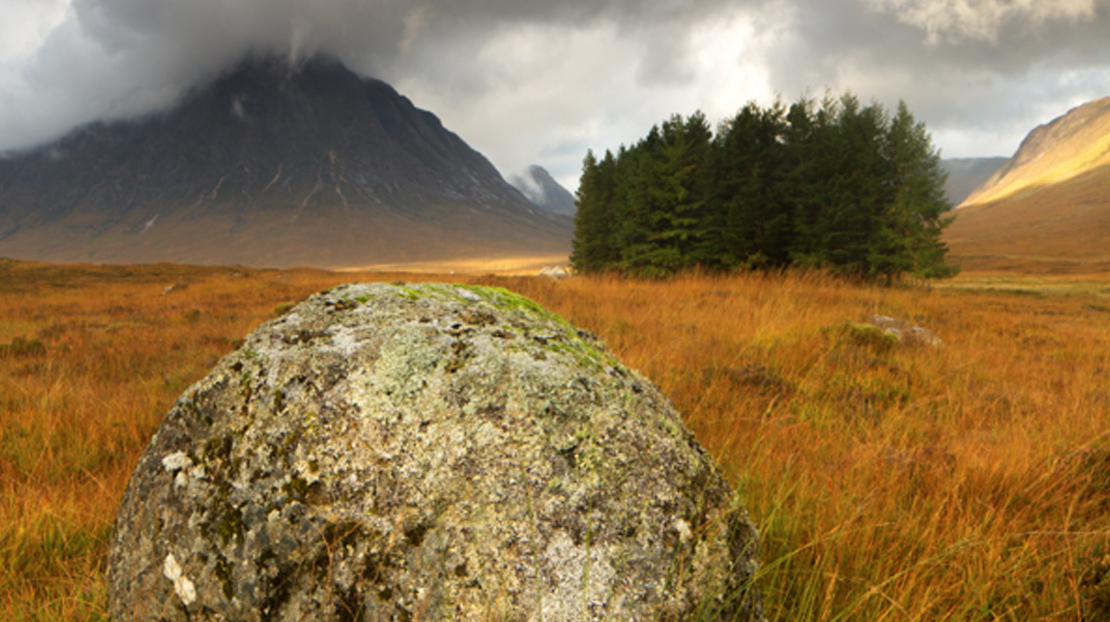
I am not famous enough, nor is my work collectible, so as I said at the outset, I don’t issue limited edition prints of my work. If things change and I suddenly become the Banksy of the photography world I may have to alter how I work, but I can’t see that happening any time soon, if ever.
Now I’d like to hear your thoughts…