Category: Photography Business

Time to Say ‘Goodnight’


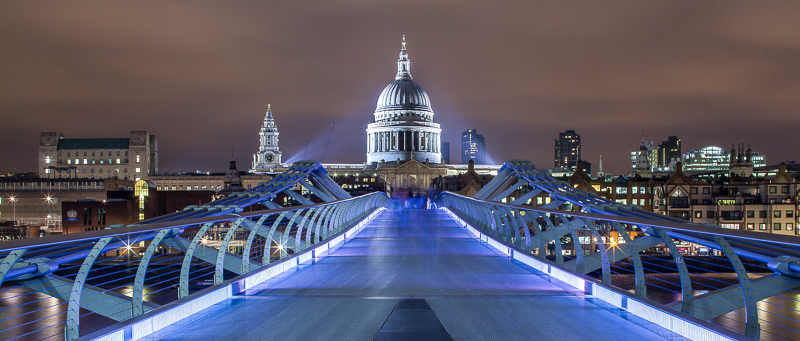
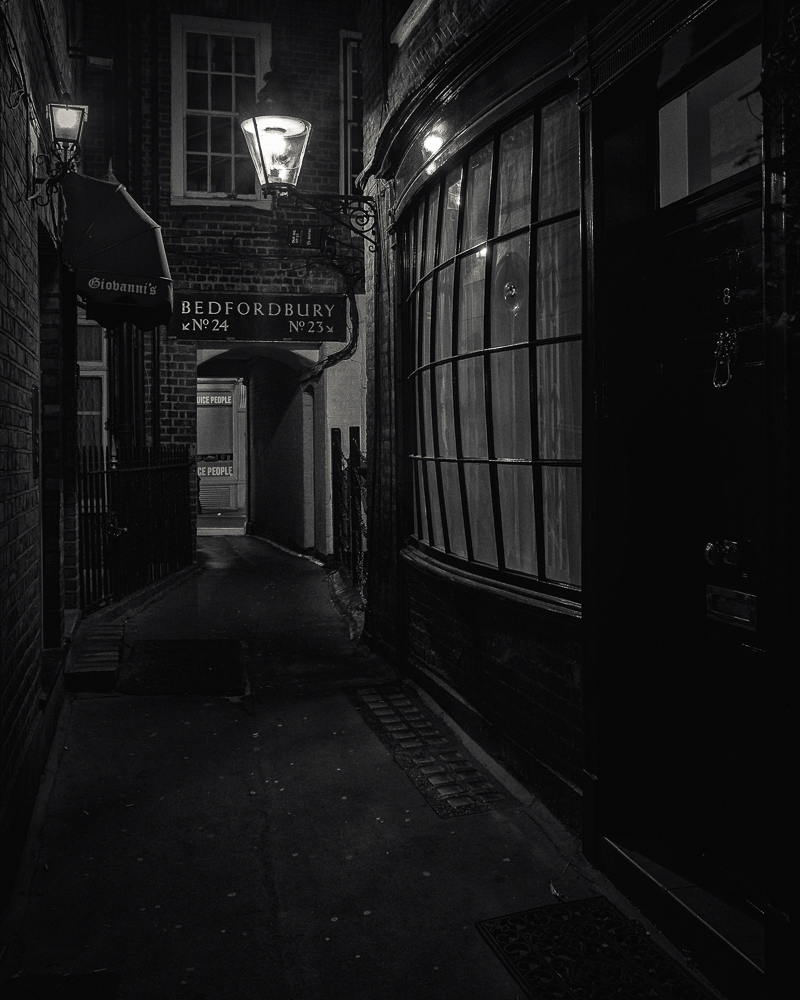
For the last five and a half years I have been running all night photography workshops in London with my good friend, London Black Cab driver and fellow Light and Land leader Terry Gibbins. These led to me developing a winter version based around monochrome night photography and Victorian London with amazing photographer, workshop leader and another good friend of mine Charlotte Gilliatt. On this workshop we also teamed up with Terry and another cabbie, Bobby Pinto to provide the bespoke luxury transportation around the Capital city at night.
 
Both of these night workshops have proved to be incredibly popular right from the beginning, so much so that they have been filling from an email shortlist and have not made it on to my website. Currently over 150 people are waiting to go on the workshops, which is a testament to Charlotte, Terry & Bobby and the wonderful locations we cover through the nights. As far as I know, no one else offers an all night workshop in London with bespoke London cab transport from pick up at the station to dropping off in the morning, with a ratio of just four clients to one teacher. Many of those who came on the workshops have won awards and competitions with images that they have taken on the workshops, as well as having them published in magazines and exhibited.
 
However, five and a half years is a long time. I have done, I think, around a hundred workshops and so, for me, it is time to call it a day and move on to new challenges. But I am delighted the concept is going to continue in the safe hands of Charlotte and Terry. They are also planning new locations too, which is exciting for those of you who have done the workshops before and would like to do them again but fancy something different.
 
I am going to hand over to Charlotte my email list of all those who are waiting for a place on the workshops so she can keep you up to date with places as they become available (but if you no longer want to hear of dates you can always unsubscribe from her mailing list at any time). I want to thank all of you who have been with me on these workshops. I have really enjoyed my nights with you in the city and the adventures we have had. I know some of you have enjoyed them so much you have been with us three times. I hope you get to go again with the new team to new locations.
 
I am still going to be running my own workshops, it is just the night workshops that I am pulling out of. I will keep you up to date with all my new plans through Twitter, Facebook, my newsletter (if you subscribe) and here on my blog. If you would like to sign up for the shortlist to hear of new dates for the night workshops, which Charlotte and Terry will be starting again in April and running right through the summer, as well as new dates for the winter ‘Gaslights and Alleyways’ workshops, please go to THIS PAGE on Charlottes website.
 

Being Interviewed on the Togcast

Some time back I was surprised and humbled to be asked to an interviewee on the excellent ‘Togcast’ podcast which is run by two very capable and nice gentlemen, Sam Gregory and my fellow Light and Land leader, Paul Sanders. (I would highly recommend you use your podcast software on your smart phone to subscribe to the Togcast and listen weekly – it is interesting, entertaining and you get to know many photographers we know from social media so much better.)

You can find more information about the Togcast HERE you can subscribe via Apple podcasts HERE, and you can visit the Togcast website HERE

So it was a few weeks ago, Sam arrived at my home early one morning on a whistle stop tour of the North. He was cramming in several interviews with other far more worthy photographers than me on a marathon journey up ones side of the country and back down the other. Sam has a very engaging manner and I soon forgot I was being interviewed and we nattered away about photography for a couple of hours. I am very grateful to Sam for taking the time in his busy schedule to come and talk to me and I hope you find our chat interesting.

I have no recollection of what we spoke about and I am horrified to think what I must sound like or what I waffled on about. I am certainly not prepared to listen to myself back again. (After all, I have to listen to myself all the time, and that is quite enough, I can assure you).

He not only did an audio interview for the podcast, but he tried out doing a video session too, where we discussed three portfolios of my images in my Lightroom catalogue and he has released this as a separate video.

So, if you have nothing to do. And I mean absolutely nothing to do, if you have cleaned the oven out, sorted all your carpet tacs into jam jars by size, and organised your photo book collection alphabetically, then you might just want to have a watch and listen. But if you still haven’t got around to creosoting the fence, I would probably get that done first. Really.

Here is the video of our discussion of some of my images

And here is the audio Podcast

An Apology

Apology

leaf-scan001-edit-edit-edit-edit-edit

I am writing this blog to apologise. I am apologising about not replying.

You see, almost eleven years ago, when I started teaching workshops I used to say to my students, “if you have got any questions after the workshop, just drop me an email” and this was fine. I enjoy helping people overcome problems they have with their photography, helping them select the right gear or giving some help on good locations to try, so it was no problem to get a couple of emails a month with questions and to answer them.

New Dropbox Style Cloud Service I Am Trying – Sync

Sync

20160208-_DSF8875

I have been looking for a more flexible and better priced service than Dropbox for a while. I think I have found it. It is called Sync. They give you 5GB of free cloud storage, which I am currently testing (and if you USE THIS LINK I think you will get an extra GB, so 6GB in total, and I will get 1GB for referring you – https://www.sync.com/?_sync_refer=de5f7b0 )

The paid service gives you 500GB for $49 a year and 2TB for $98 a year, which is very competitive and will allow me to store virtually all of my data, including all of my images on the service.

What is DACS? and Why you should claim

dacs

There is a way for published photographers (and artists, poets and writers) to receive additional income from their work and I thought it might be useful to put a blog post together about it.

In the same way that the Performing Rights Society monitor radio stations, TV broadcasts, public events and music played in public places in order to make sure musicians are compensated when their work us played, there is a similar organisation in place for creatives whose work appears in print.

Should I Back Up to the Cloud?

cloud

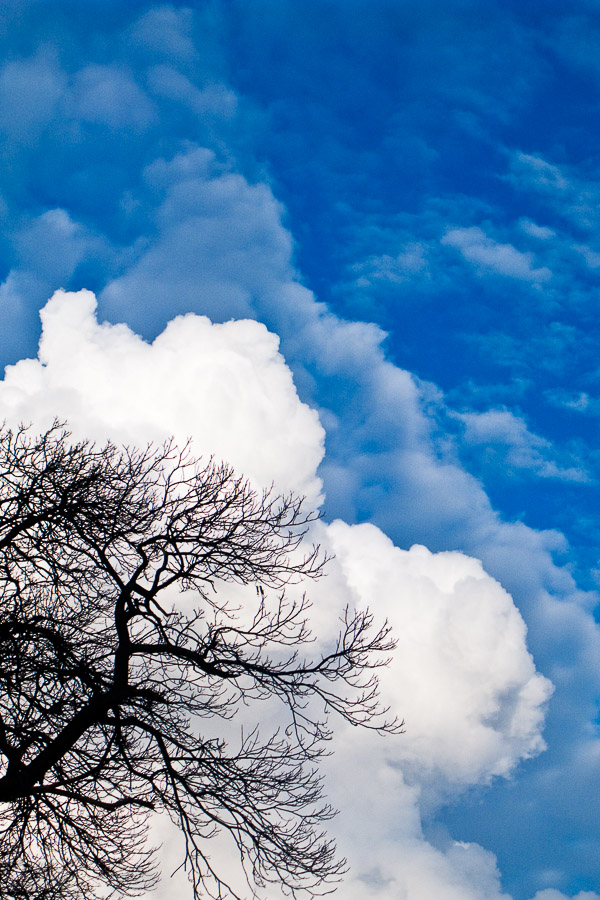
(New information added September 2017 – since writing the post below I have been using Backblaze for about a year now as my cloud back up provider. Zoolz became just too slow and was never fully backing me up – I always had files in my queue, especially after photographic trips, which defeated the object of a cloud back up. I NO LONGER RECOMMEND ZOOLZ. So after doing more extensive research I opted for Backblaze and have found them to be excellent. The cost is about £3.85 UK Pounds a month – less than $5 US Dollars. This gives me unlimited storage. I have just under two terabytes stored with them now. It is always up to date and is very fast. I have had to retrieve a couple of individual files from them and the system works reliably and well. I also like it that they allow you to back up unlimited external USB hard drives. Many other companies do not. If you would like to try their service, please sign up using THIS LINK as it will give you (and me) an extra free month of service from Backblaze at no extra cost to you on top of the free period they offer new customers to test out the service. Thank you).

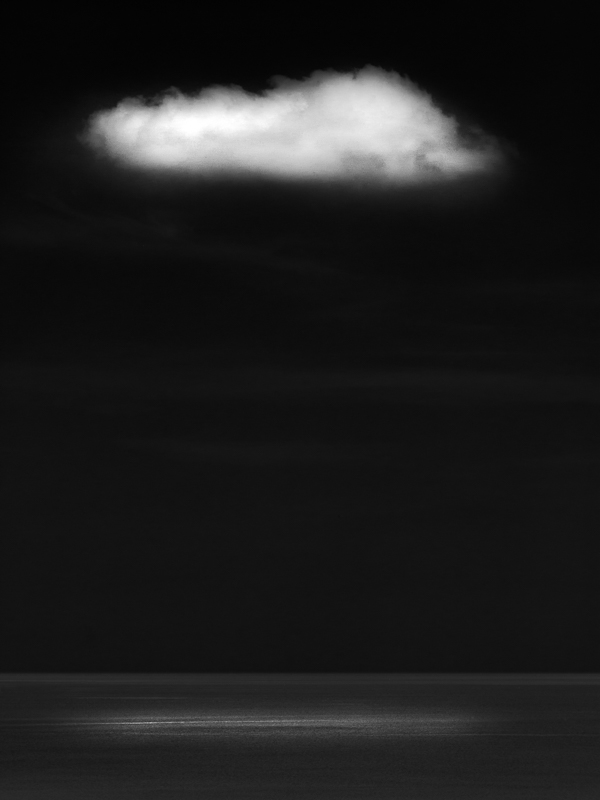
Can I start by just apologising for this being such a long post, but I wanted it to cover the subject in depth and, hopefully, answer everyones questions. (and I have added some cloud type pictures, just to keep it interesting).

With the advent of fast broadband internet access the possibility of uploading large amounts of data to ‘The Cloud’ has finally become realistic for many. (If you live in a rural area, struggling with primeval broadband speeds, I feel your pain. I have only had a fibre optic connection for the last 18 months. Prior to that I was with you in the slow lane, so I know how it feels).

Firstly, what is ‘The Cloud’? Simply put it is a term used to describe data storage on the Internet. Our files aren’t floating in space somewhere, they are actually on hard drives in huge data centres in different parts of the World. These data centres often, for reasons of data security, copy all of the files to more than one location, usually in different countries and continents. If one data centre gets destroyed by an earthquake or invading martians at least your files and photos will be safely stored somewhere else on the planet for you. That is, until the martians land there too.

The bigger and more reliable suppliers of cloud based storage usually have the data in at least three nuclear bomb proof storage centres, each on a separate continent. The data is encrypted using very strong encryption methods and protected behind the most secure firewalls available. These guys are very serious about security. We tend to be paranoid about our bank details, but these data centres often hold the accounts of the largest companies on earth as well as the data of the worlds governments. Frankly, their data security is more important than ours (to them, at least) and so we benefit from security systems designed to protect them.

There are two forms cloud storage can take that I will look at it in this article. Firstly, the type provided by companies that have quickly become well known such as Dropbox and Copy. (Others include GoogleDrive, SkyDrive (incidentally, Microsofts Skydrive have just increased their free offering to 15GB to put pressure on the market leader, Dropbox – this makes them well worthy of consideration for a basic free service, and there are many more). These provide some free tempter storage for us, usually in the region of 2GB. This allows us to store a certain amount of data with them that we want to access from various places. They all provide web browser access to your files and in addition have apps for smart phones and tablets of all flavours. These allow access to your files from these devices too, wherever you have internet access.

I use and recommend people use Copy as their free Cloud based regular storage service. It works in the same way as Dropbox but instead of the measly 2GB of free space you get from Dropbox, Copy give you 10GB free. If you CLICK THIS LINK to sign up you will also get ANOTHER 5GB FREE, giving a total of 15GB free for life. (and I will get another 5GB free as you have used my link and for that I thank you). With Copy you can have a free app on your smartphone and tablet to access your files. You can also access them via any web browser anywhere in the world and you have an app on your PC or Mac to access them too, so everything is synchronised. I have been using it for a year now and the service has been flawless.

The types of files these services are designed to store are those we want regular access to. There is no charge for uploading or downloading files and there are no data limits for how much you transfer, just your storage limit, from the free amount they give you upwards. Many people find they can survive with just the free amount. Others soon find the service so useful that they want to exceed the free storage amount. Here is where these suppliers make their living. They charge for extra storage in packets of space. For example, £7.99 a month or £79 a year (if paid in advance) will get you 100GB of space on Dropbox.

These services also allow you to share files with friends, family and colleagues. This is very useful for files which are too large to email and where you want to share a file or files with a whole group of people. It can also be used to move files between your computers. Users soon find the service indispensable.
The main downside comes with large volumes of data (and for us as photographers, that means our images). For us, 100GB is nothing. In the days when many photographers happily fill 32GB memory cards in a day in their cameras and measure their photo libraries in terabytes it soon becomes prohibitively expensive to back up your entire library to these services. (an alternative to the Cloud for those who don’t want to pay or whose broadband connection is just too slow, is to rotate back up drives to an off site location. Some take one to work with them and leave it there in a safe place and bring back the previous drive to update. Some do the same, rotating drives at the home of a family member or friend. Always the issue with this is remembering to do it. It is surprising how easy it is for weeks or months to go by before we get around to swapping drives. If this happens it makes the system almost, but not quite, pointless).

This is where deep freeze storage comes in. An example of this style of cloud back up service is Amazons Glacier. This service is designed primarily for business users and is difficult for home users to work with, but more on that later.

Amazon have set up Glacier for individuals but mainly for companies who have vast amounts of data. Terabytes are shrugged off by Amazon, Glacier can handle Petabytes. Why ‘deep freeze’? This is because the idea behind this style of service is to upload files that we may never need to access again. We are putting them into deep freeze. This is in preparation for disaster recovery, for the day our house burns down and our computer and all our back up drives get destroyed. We can then pull back all of our data and restore it.

The price for this service is incredibly low. In fact it is hard to imagine how it could get any lower. The current fee is 1 US Cent per GB per month. So you can store 100GB for a year for $12, about £8. Compare that to Dropboxes £79!!!!!!! (Please note, many users are happy with other services, such as Backblaze and Crashplan which offer slightly different pricing structures and which may suit you better – I suggest you also check them out. I haven’t used them, so can’t comment based on experience. I have heard both good and bad about both, but then that is true of just about every supplier of any product or service!)

How do they get the price so low? A number of ways;

Firstly, As you upload the files they go into a queue at Glacier and can take up to five hours to be put into place on their servers. By controlling the flow of data to suit demand, Glacier can control costs.

Secondly, you pay to restore data back to your computer. You are allowed to restore about 20GB per month for free but beyond this you pay to restore data. This emphasises that the service is for cold storage, not the shuffling back and forth of files that Dropbox is used for. Again, by placing this restriction on its clients the price can be kept very low.

Next, it is not user friendly. It is designed to be used by IT departments with techy types who understand this stuff. I managed to work it out using various help files and web sites, but it took some research. I will explain the method later in the article.

Finally, you can’t ‘see’ your files. You don’t have a browser like File Manager or Finder to look at your folder structure and examine your files. Its all more obscure than that. This can be unnerving. Are my files really there?

The process for uploading to Glacier is a pain, frankly. You cannot upload data in packets of more than 4GB. You also need to use a piece of client software to handle the uploading process. I used Arq Backup on my Mac which is shareware and available to buy for a few dollars. This has to be configured to allow it access to your space on Glacier.

Then, to save space on Glacier (even though the storage costs are so low I still wanted to optimise the space – remember you will be paying for it for every month forever, even at one cent per gigabyte per month, over 20, 30 or 40 years with a growing data pile this will add up) I zipped up my folders. This has to be done manually and I grouped the folders into roughly 4GB zip files.

I then directed Arq backup to copy these to Glacier, which it did beautifully. With my BT Infinity 2 broadband connection and an ‘up to 20mb’ (and often faster than that) upload speed, I could upload 80GB overnight. The slow and time consuming part was manually and laboriously zipping folders into 4GB packets.

It was such a painful process that I got bored and was falling way behind schedule. Vital files that ought to have been copied to Glacier sat on my drives waiting to be prepared for Arq. It was one of those jobs that just kept being pushed down my to do list in favour of other ‘more important’ jobs. But with backing up, in reality, this is unacceptable.
This is where a company called Zoolz comes to the rescue. Zoolz are part of Genie, a large and well established organisation, and are based in the UK. They have a Cloud based back up system which uses Amazon Glacier to store our files. The great thing about Zoolz is they have realised how difficult Glacier is for most people to use and so they have designed their own client software for us.

This software allows us to simply click on folders on our hard drives and Zoolz backs them up to Glacier for us. No zipping, no grouping into 4gb packets (you can even upload files that are individually bigger than 4GB). The software also allows you to see all of your folders on Glacier just as if they were on your computer and, with image files (including raw files) you can see a thumbnail of the image which is so useful if you have accidentally deleted a file or files and need to selectively restore them. It is simplicity itself to use it and the client is available now for both Windows and Mac users.

They have a number of pricing plans for home users (and a range of products for business users too) so you can choose which is ideal for your needs and upgrade as your needs change.

Plan One – 100GB for £9.99 per year (£0.83 a month paid yearly in advance) – 1 user (1 computer and 1 external drive connected to that computer, no backup limitations)

Plan Two – 500GB for £34.99 per year (£2.91 a month paid yearly in advance)- 3 users (3 computers with 3 external/network drives connected to those computers, no backup limitations)

Plan Three – 1TB for £49.99 per year (£4.16 a month paid yearly in advance)- 5 users (3 computers with 3 external/network drives connected to those computers, no backup limitations)

Plan 4 – UNLIMITED DATA for £139.99 per year (£11.66 a month paid yearly in advance) – 5 users (UNLIMITED external/network drives connected to those computers, no backup limitations)

These prices are extremely competitive in the current market, especially if you factor in the time cost of manually preparing your files for Glacier by dealing with Amazon direct, along with the ability to view your files etc. I will still be very happy to pay the unlimited option price when my subscription runs out.

So what is Zoolz like to use in practise? As I have mentioned, the selecting of folders and files to back up is simplicity itself. Just click the ‘Data Selection’ option, click ‘select folders’ and then click on the folder or folders on your hard drive you want Zoolz to copy to Glacier for you.
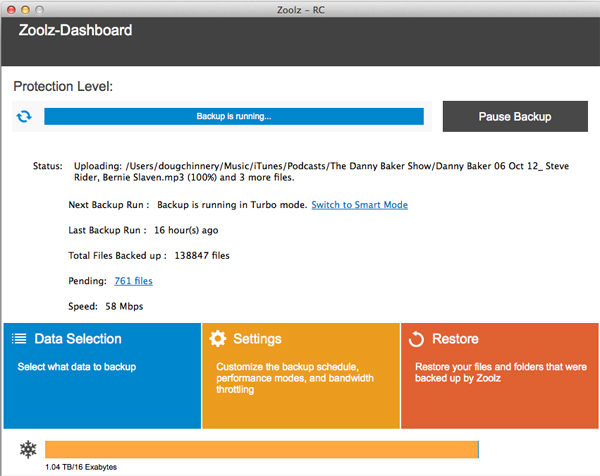
 

The Zoolz Client running in 'Turbo' mode.

As a word of caution. I found the client works better if you select One main folder at a time and allow that to be backed up before selecting another. When I first started I selected my entire pictures folder, my music, my documents – the whole cahoona! That seems to slow things down somewhat! I soon found it better to, say select, the 2013 folder in Pictures and let Zoolz plough through backing up that years pictures before feeding it 2012 and so on.

Bearing in mind I could upload about 80GB a night to Glacier using Arq backup directly, Zoolz is massively slower. Zoolz say the don’t throttle the data flow, but whatever is happening, it is much slower. I rarely managed to get more than 20 or 25GB uploaded in any 24 hour period, let alone overnight.

I am using the Mac client which is actually in late beta so it may run a bit slower and be a bit buggier than the Windows version, so please allow for this (as of this writing in July 2014).
The issue is both that data doesn’t flow at the maximum upload speed of my broadband connection and the software stalls frequently. You will see that it seems to go through a process of ‘analysing’ and then ‘preparing’ each file before uploading it. This runs along fine but for some unknown reason the client will get stuck, usually when ‘analysing’ a particular file when it gets to 100% of that process.

This is not to bad if you are working at your desk and notice it. You can close the client, restart it and off it goes again quite happily. It is much more frustrating if it happens five minutes after you go to bed and when it could have run all night you find in the morning it has only uploaded a couple of files and then been stuck all night.
An amusing ‘feature’ is the client software tells you the upload speed. I was taken in by this on the first day. It will show a figure of say, 12mbps. Out comes the calculator and I worked out my entire backup should take about nine days. None too shabby. I posted this on Twitter and some wise IT types howled with derision at my foolishness. I soon found out why. Firstly, I soon found this speed to be fictitious. Also the speed shown only ever gets faster. Mine now shows 58mbps!!!!! I think what is happening is that the client logs the fastest speed it ever attains, even for a millisecond and proudly proclaims it to you. Don’t be fooled. It is a lie.

I soon realised that even in ‘Turbo Mode’ (more howls of derision) the Zoolz client is only ever using about a third of my upload bandwidth AT BEST, even thought he software warms you that in ‘Turbo Mode’ other upload processes on your computer will be affected as Zoolz will use all available bandwidth. Not on my system it doesn’t.

The alternative upload mode is ‘Smart Mode’. (Still hearing those howls). This is supposed to flex the upload speed depending on what else you are doing on the computer and uploading so that it doesn’t slow other things down. It makes no difference whatsoever if you use this mode, in fact, I think it is even slower.

I have just finished my backup to the Cloud this very day! It ended up being a bit smaller than I anticipated at about 1.1TB. This has taken me about nine weeks. I have had the computer on 24 hours a day and have run it as flat out as I can. Whenever I am at home I pop in to my studio to check progress and make sure it hasn’t stalled. If it has, I restart the software. I couldn’t have done the uploading any faster without sitting at my desk 24 hours a day. It will feel strange to just have it scheduled to update daily now and for me not to have to worry about it or nurse it along.

Restarting the software becomes a bit of a bugbear as time goes on too. This is because the software is designed, each time it starts to check every folder for changes that it has been told to back up. Early on this only takes a minute as you have only selected a few folders, but as the data selected increases so does the time it takes to check it all. At 1 TB it now takes perhaps 15 minutes or more. So every time the software stalls and I have to restart it I then have to wait around, or remember to go back because it doesn’t then commence the back up automatically, it sits waiting for you to tell it to proceed.

This all probably sounds like a nightmare to you, and it is a nuisance, but it has become part of my life over the last two months. The end is in sight for me. I know once it is done then the software will just monitor the folders I have told it to automatically and once every two hours it will just back up all the new or changed files which will be quick and painless. The best thing is I know I will have as secure a backup regime as it is possible for me to have. My images, which are my business and my livelihood are protected against even the most catastrophic hardware failure or disaster/theft. Barring nuclear armageddon or those pesky martians, I am protected.

So despite the shortcomings of Zoolz right now, I still wholeheartedly recommend them. The pricing is excellent and once uploaded the client software is a dream. You may well have much less data than me (and if you are a Windows user, your upload may be much faster as I am using the beta release of the software) I have heard from some Windows Zoolz users who have uploaded a TB of data in just a couple of days, so my experience shouldn’t be taken as the norm.

If you do decide to try the free trial of Zoolz or to subscribe, please use THIS LINK. If you do, I will receive a small payment (you won’t pay any more). If you prefer it if I don’t receive a payment, simply go to www.zoolz.com. I never recommend products or services I haven’t tried myself and don’t use myself. I am always 100% honest about the good and bad about any products I describe.
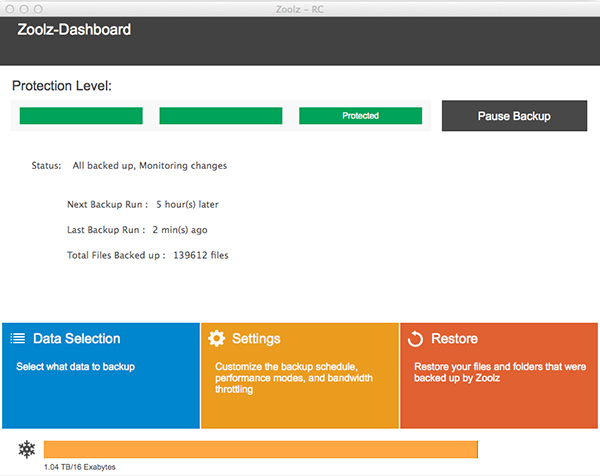
The window I have waited nine weeks to see - my completed Cloud backup to Zoolz.

If you are still with me at this point, well done for getting this far. You might be wondering what my onsite back up system is. It has changed a little since I last blogged about it, so I will, for the sake of completeness just run through it here.

I have a multilayered approach to backing up. The Cloud back up I have described above I view as my disaster recovery only to be used in a worst case scenario. I hope I will never use it.

The question I ask myself, and I encourage you to ask yourself when designing your back up system is, “how much data am I prepared to lose?” The answer will be the basis for how far you go with your back up system. Some people care nothing for their files and pictures, or seem not to, as the don’t or rarely back up. They don’t seem to grasp that EVERY hard drive will one day fail. Its a mechanical, electrical device and has a working life. It might fail in the next 15 seconds or it might run for another five years. We never know, thats the problem.
Those people who are less than diligent about backing up often ay they don’t care if they happen to lose a load of ‘stuff’. That is right up to the day they do and then they suddenly realise how vital a lot of that stuff is to everyday life and also just what sentimental value lies in many of our images. Personally, I think it is foolish and lazy not to back up, but it is a personal decision.

So, you may be prepared to lose a weeks work, so only back up weekly. If you could lose a months work, back up monthly. Personally, I would hate to lose a days work, so I back up continuously.

The next thing is to make your system as easy to use, both in backing up and in restoring data, as possible. A difficult system to use is likely to be neglected. That is pointless.

I am a Mac user and so my first line of defence is built in to all Macs and is called Time Machine. If you have a Mac and are not using it, I strongly urge you to connect an external drive to your computer and switch it on. It is ridiculously simple to use, is completely automatic and does (usually) a great job. It makes a mirror copy of your hard drive (and any other drives connected to your Mac that you want it to copy to. What I would caution is DONT TRUST IT ALONE. It can fail. Mine has. The disk copy can get corrupted and you need to format the drive and start again. But as a first line of defence it is marvellous and has saved my life a couple of times. I had a new iMac delivered which suffered a total hard drive failure three days after delivery. I had just got all my software loaded and configured. Apple sent me a new iMac, I connected the Time Machine drive and 30 minutes later the new machine was fully set up exactly (and I mean EXACTLY) as the other machine was just minutes before it failed. I don’t have to do a single thing. That saved me the best part of three days work configuring, setting up and loading the new iMac all over again. That converted me to Time Machine. I have also deleted odd files by mistake and Time Machine makes it a doodle to restore these in an instant.

It backs up your system completely – every single byte of data. Then it updates this every hour for a day, then it keeps daily backups for a week and then weekly backups for a month and so on and it keeps doing this until the drive you store it on is full. The it just deletes the very oldest files to make space. My 2TB Time Machine drive will hold about 6 months or so of backups of my system and I can go back to any point in that 6 months and restore a file or files, or reinstate the whole computer to that point.

I am sure there must be similar software available for Windows users (but it would be much better to buy a Mac 🙂

That is my first line of defence. But, as I said, I don’t rely on this. I then use a piece of Mac shareware called Superduper. This costs about $20 or so. It is a superb piece of software because it simple clones one drive onto another drive. You can schedule it to do this automatically, or, as I do, you can run it when you want.
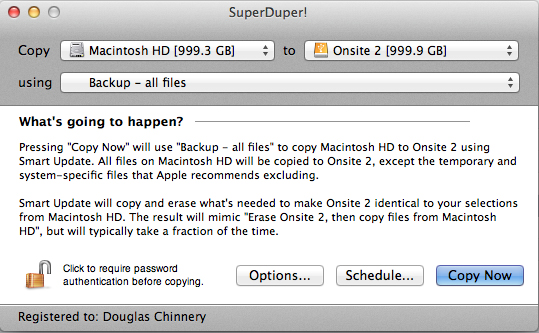
 

Superduper - Super Simple

I copy my iMac drive and my external drives to other drives using it. This makes a mirror copy so when you look at those drives with Finder it is exactly like looking at the original drive. The files aren’t compressed or put into archives in the way many back up programs do. I like to be able to see all my files like this.

To speed the back ups, Superduper uses ‘Smart Copy’. The first time you copy a drive it takes a few hours depending on the size of the drive. However, future copies take much less time as it only adds files you have added, deletes files you have deleted and updates files you have deleted.
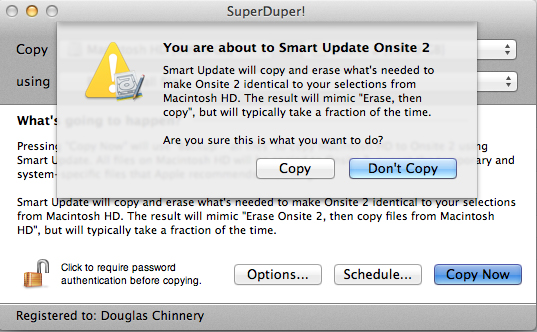
 

Super Duper about to 'Smart Copy'

The disadvantage of this is if you have deleted a file by mistake on your main drive and then run the backup before you realise, it will be deleted form the backup too. This is where Time Machine covers me (and Zoolz). I also copy each of my drives to three other drives and I stagger these rather than doing them all at one, so there is a chance I will still have one which has the file I need on it.

Why do I copy each drive three times, especially as I have Zoolz and Time Machine? Well, I am a bit obsessed with backing up. But also, one of the copies is on to small portable drives which I take with me on the road to connect to my laptop. This means I have all my images and files with me when I am away and can work as normal. This also gives me an off site backup when I am away. If something was to happen to the house, a fire, flood or theft then I would be able to get back up and running quickly without having to resort to Zoolz. The other two drives are at home under my desk and I have two just in case one fails. These drives are a bit older and so I am prepared for them failing. It is so easy to just click the backup no button I don’t find it a chore to run the backups. I tend to run them when I am about to leave the computer, to go down for a meal or when I go to bed. then the backup is complete by the time I am finished.

Superduper has another advantage in that it will, if you want, make the backup of your main drive ‘bootable’. This means if your main hard drive fails you can boot your computer from the back up, keep working until you get a new drive in the computer and restore the Time Machine drive. This again is a massive time and hassle saver when things go wrong.

Some ask me why I don’t use a RAID or NAS system. These are very good and have many advantages. Your data is spread over several drives simultaneously. If one drive fails your data is safe and you can swap out the failed drive. Many units allow them to be connected over the internet so you can access your files from anywhere in the world where you have an internet connection. They are also great as home entertainment systems for streaming music and films around the home.

But I do have some issues with them, although here I have to say I am not an IT expert and so my understanding may not be correct. If a drive fails in a RAID system or something like a DROBO, it is great that your data is safe and you can swap out the drive. However, the weakness in the system as I see it is in the next few days. It can take some days depending on the speed of the system and the amount of data involved for the RAID system to rebuild the volumes. During this period your data is very vulnerable. If another drive fails (or if there is a power cut, flood etc) you will probably loose everything. As I understand it, the only really safe way to work with these systems is to have them backed up to another RAID or NAS. Then you are protected.
I think that, perhaps, RAID users tend to view them as a magic and infallible solution and so often neglect other additional back up methods. At a company I worked for I saw the firms RAID based server lose five drives in one day. This was a system that was under a year old and maintained by professional IT people. An extremely rare occurrence but it just shows complacency is foolish. The firm almost collapsed. Its entire financial system, factory planning system, customer database, artworks, quality system etc etc was all lost – everything. If one of the IT guys hadn’t continued to run each night an ancient manual tape back up (which often failed to work) which fortunately worked the night before the RAID failure the company could easily have collapsed. It took a week for the IT department to rebuild the RAID, restore the tape backup (very delicate) and test everything. Another few days and the firm would have been in serious trouble. Believe me, the MD had a second RAID installed immediately to mirror the first and another backup system put in place too. One bitten…

From a personal point of view, as a not very tecchy person, I find them a bit harder to understand and work with. I like the simplicity of cloned drives that I manage myself and that are all independent of each other. I understand that, it is all very simple and it is easy for me to manage. This I like.

So there it is, what must be the longest blog I have ever written. If you are still reading this you deserve a medal! Now I urge you to think through how protected your data is and if you see holes in your system, then get provisions put in place to deal with them. Data is becoming more and more important. Especially for us as photographers, our images are irreplaceable and their value to us tends to grow over time. Most of us can’t afford not to deal with this stuff, so even though all the above seems like a lot of hassle, in fact, now I have it in place it is really easy to manage and it works so simply. And I sleep well at night.

My final word to you. Hard drives. Don’t trust ‘em. Ever.
Aurora Hunting in Norway, Trip Report – Day Six

aurora hunting day 6

Finally, after six days of trying, we have seen the aurora.

The relief amongst the group was palpable. Everyone is so happy to have achieved our main goal on this trip.

This is the first time I have seen the aurora and I have to be honest, the display we saw tonight is about as low as the aurora gets. Activity was minimal and so we didn’t get the sweeping curtains of light across the sky most of us imagine. For us, the display was just a glow on the horizon. What you see here in the photograph is nothing like what you experience in the flesh. It is the ability of the digital sensor to record light over a long exposure, in this case around 15 seconds, that produces the intense colours. To the eye, the aurora at this level is barely green and you would drive past it thinking it was just clouds or light pollution if you didn’t have guide to point it out to you (in our case, Tony Spencer, who is one of the most experienced aurora guides in the world – this is trip 43 for him).

I have taken images of the aurora with the Fuji X-Pro 1 as promised, using the new 23mm f1.2 lens. I will post images and my conclusions to its performance in another blog post.

I have to say I am delighted to have witnessed this beautiful phenomena and I know I have only seen it at its least impressive. If we had had a full on display I might feel differently, but I got much more pleasure from photographing the hoar frost yesterday. We have just one night to go on the trip so one more chance to see the lights. We leave Kiruna and head back to Norway, our destination is Narvic, via a National Park, so more landscape photography beckons.

Now, if you don’t mind, it is very late and I need my beauty sleep 🙂

A New App from the Maker of the Photographers Ephemeris

new app ephemeris

I was very privileged to be asked by Stephen Trainor earlier this year to be one of the beta testers of a new app he has designed to complement the hugely successful and absolutely essential photographers app, The Photograpers Ephemeris (TPE).


TPE has been around for a while now and is available as a desktop program or as an iOS or Android app. For most landscape and outdoor photographers it has become an essential part of their location planning kit. I couldn’t imagine doing my job without it. I also can’t imagine the brains and ability that has gone into designing such a complex and useful program.

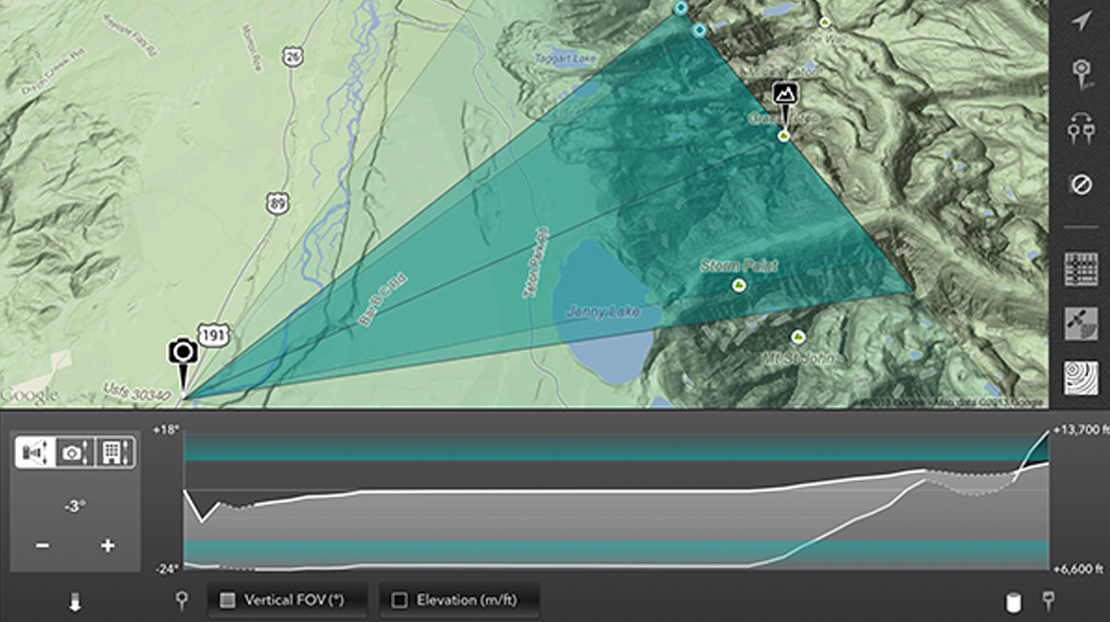
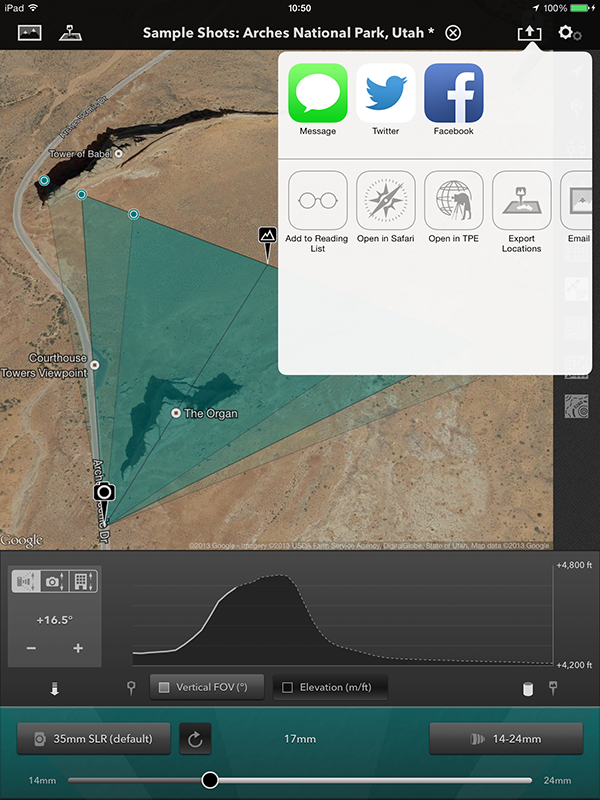
Not content with TPE, though, Stephen has forged ahead and designed a new app for us photographers called, officially, “The Photographers Transit” but it is shortened to “Photo-Transit”. This is an app which again uses Google Maps as it’s foundation. The app then adds the ability to place yourself at any point on Earth and face in any direction. You can then select any lens for your camera (and it takes into account you sensor/film size) and it shows you what field of view you will achieve at any given focal length. This means, no more worrying if you have packed the right lenses for a long hike or a flight where bag weight is critical. It also means you can plan key shots in advance based on your kit. You will know if your lenses have the width or reach you need for the shot you envisage. Or, before arriving at a location you will know exactly where to be to make best, use of your lenses to get the optimum image. This is location planning in real detail.


There is also the ability to look at elevation data in the app to give an idea of how the land rises and falls. This helps with understanding how shadows will appear, when the sun will break the actual horizon and so on. You can also flip from the app over into TPE to work with both apps together which is very useful. The app can be used offline with available data and to help visualise potential images close to roads you can combine the app with Google Streetview. Added to this is the unique ability to save location information as you plan it, or to take images at a location and tie the image together with the map/lens/body/field of view information and save it for future reference. There is also a linked website sharing facility so you can share this data with your friends, camera club members and so on, including sharing via message, email, Facebook, Twitter etc.


I was pleased to be able to grab some time with Stephen in his frenetic schedule to interview him about Photo-Transit and here is what he had to say.


DC: Thank you for agreeing to be interviewed Stephen. Can I ask first about your background and how did you come to design and program TPE?

SJT: Thanks for the opportunity, Doug. Maybe somewhere in my background is the semblance of a career plan, but if there is one, I haven’t found it yet! Over the years I’ve worked in classical music and opera, advertising, theatre engineering, telecoms and consulting, doing a variety of things along the way, including software engineering. I moved to Colorado from the UK in 2007 and started doing more landscape photography. Around a year later I signed up for a weekend workshop in nearby Rocky Mountain National Park . The workshop offered a ton of great advice and information on how to plan a shoot for the best light. Participants were asked to bring a number of items to the workshop, including paper topographic maps, rulers, protractors, calculators, pencils etc. It occurred to me that things in the digital world were by then at the point where all of this could be done in software. When I discovered that no such tool apparently existed already, TPE was born.

DC: Were you surprised at how popular TPE has become? Do you have any idea how many users there are now?

SJT: Very pleasantly surprised, yes! Across the various platforms we now have tens of thousands of monthly active users. The desktop version is downloaded around 75,000 times a year.

DC: Has anyone used TPE in ways you didn’t anticipate?

SJT: We’ve had some uses by archeologists looking for historical sun/moon positioning. Also, I’ve read about it being used by hunters, in the US mainly. Oh yes – and the trainspotters too!

DC: Is developing TPE and other photography apps your full time work, or do you have a ‘day job’?

SJT: I spend around half my time developing apps and the other half I do technology consulting, mostly in the area of digital media and online video.

DC: Are you a keen photographer yourself? If so, what style of photography do you like? Do you have a personal website where we can see your images?

SJT: I am. I like to shoot landscape primarily. I prefer a simple, clean style without too much post-processing. Photos that are “overdone” are all too common nowadays. At the same time, I’ve never much cared for the well-worn line of “my photography is an unaltered reproduction of what my eyes saw that day” and its variants. No matter how little processing is done, that’s clearly untrue, as cameras and photographic media, whether digital or film, just don’t work the same way as the eye. I’m definitely a fan of simpler compositions, although that’s something I continue to struggle to achieve in my own photography! I have a (slightly neglected) website at http://stephentrainor.com

DC: What are some of the technical issues in developing a program like TPE?

SJT: The initial challenge is implementing the various algorithms required to calculate accurate sun and moon data. Nowadays there are a few implementations out there, but the accuracy and sophistication does vary. Not all algorithms account well for factors such as atmospheric refraction, for example. (I certainly can’t take any credit for the algorithms themselves – in that regard, I’m standing on the shoulders of mathematical and astronomical giants!) Maintenance of the software becomes a bigger issue over time as the code ages and grows. I’m currently in the middle of a major modernisation of the TPE for iOS code base, much of which dates from 2009-2010 – the middle ages, in terms of iOS software. Once that’s done, the Desktop version will need to be reimplemented as a web app – all required to keep up with the technology of the day.

DC: What then gave you the idea to develop this new program, The Photographers Transit? (TPT)

The concept of displaying the field of view on a map was a suggestion made independently by a few different TPE users. I liked the idea very much and wanted to think about how to incorporate it into the app. However, after thinking it through, I decided to develop it as a separate app for the primary reason that there would be a lot more inputs required of the user to make it work: which camera? which lens? what orientation? where are you pointing it? etc. One of the keys to simplicity of use in an app is minimising the amount of input you require of the user. I think – and many would agree – that TPE is quite complex enough already without piling on yet more functionality.

DC: What is TPT designed to do for the photographer?

SJT: I think of Photo Transit as a general purpose digital planning tool for outdoor photographers. It provides a mix of digital “surveying” tools that you won’t find elsewhere, so far as I know: a horizontal field of view indicator overlaid on a map and a vertical field of view chart plus elevation profiler that shows what terrain is visible. In addition, we spent quite a lot of time on shot saving and sharing. You can create projects that contain multiple shots and share these easily with friends, colleagues, workshop participants etc. from the app. We were keen to make sure that any information you put into the app is easy to get out of it, so there’s the ability to email shots/projects, view them on a freely available web-site (http://share.phototransit.com) and to export as KML. You don’t need to own PhotoTransit to be able to view shots that have been planned using it. (BTW, ‘we’ is my wife, Alice, who does all of our graphic design, and I…)

DC: How do you see photographers putting TPT to use in their work?

SJT: It’s an advance planning tool, first and foremost: you can use it to build up a list of shots that you’d like to capture on forthcoming trips or shoots, having explored the compositional constraints of the location, your camera and lens ahead of time. Beyond that, I’d like to see photographers using it to share ideas for shots with one another. It provides an easy and complete way to share the physical setup for any stills image. I think it also has an educative role. Many people find numerical values such as field of view or focal length easier to understand when they can be visualized and, like TPE, Photo Transit is a visualization tool.

DC: How does TPT work with TPE?

SJT: Currently, you can open TPE directly from Photo Transit and match the same subject location. The next update to TPE will add the ability to open Photo Transit directly from TPE to go in the reverse direction. We have some further bells and whistles in the works too that will improve the interaction between the apps even more.

DC: What hurdles did you have to overcome to get TPT working?

SJT: Not too many – fewer than for TPE, I’d say. The data model in Photo Transit is definitely more complex (projects, shots, locations, cameras, sensors, lenses), so that took more work. However, many of the harder lessons were already learned with TPE. The Apple maps saga of 2012 cost many hours, but the lessons learned made the mapping choices and implementation for Photo Transit much more straightforward.

DC: Can you give us any clues as to your next project? or is it a secret? or are you still so tired after working to get TPT out that you haven’t had time to think about it yet?

SJT: We have another app in the works that we’re dusting off – it was shelved at the start of the aforementioned maps saga last year. It’s not directly photography related, but more than that I can’t say quite yet. We also have multiple TPE and Photo Transit updates and improvements planned.

DC: Final question, can you recommend websites of any photographers whose work you love? Who are some of your photographic heroes?

SJT: Some names that spring immediately to mind: Bruce Percy (http://brucepercy.com): I think Bruce’s photography was the first that really conveyed to me a sense of personal style. He does a great job of distilling, culling and crafting to achieve a portfolio that has an amazingly consistent ‘voice’. Jack Brauer (http://www.mountainphotography.com): Jack has an incredible collection of beautifully produced photography covering mountains all over the world. He produces wonderful photographs of places that I don’t ever expect I’ll have the strength or fortitude to reach! Guy Tal (http://guytal.com): Guy’s work from around the desert southwest of the USA is probably the most original and distinctive being produced today. He has a great eye for compositional simplicity.

 
You can visit the Photo Transit website HERE and you can follow on Twitter @photoTransit
 

The Fuji X-Pro 1 – Is It a Landscape Photographers Camera? Some Initial Thoughts.

fuji initial thoughts

As followers of my work will know, I have been shooting exclusively wit he Fuji X-Pro 1 for about a month now. My main camera is a Canon 5D mk3 (and I also shoot on film with an ancient and much beloved Hasselblad 500C and wooden Zero Image pinhole camera).

I bought the Fuji primarily for lightweight travel photography, street photography and as a carry anywhere camera. However, as soon as I started to see the results it produced I was keen to see how it performed in my main shooting environment as a professional – the landscape.

First a few caveats. This is not a full frame camera like the 5D mk3, the sensor is smaller and has a lower pixel count. The Fuji has 16 million pixels compared to the Canons 22 million. The aspect ratio of the sensor is the same as the Canon at 3:2. I am also mindful that the range of lenses available for the Fuji is far smaller than for the Canon, but more on this later. So I knew I was not comparing apples with apples.


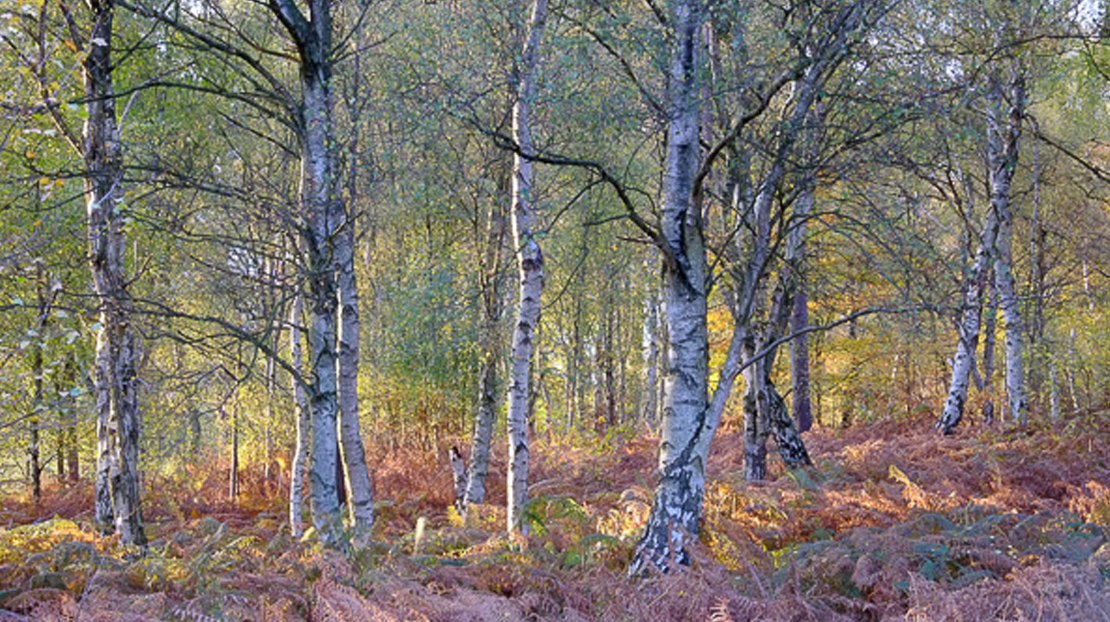
Autumn Woodland. Handheld, ISO1600, f11, 1/30 sec

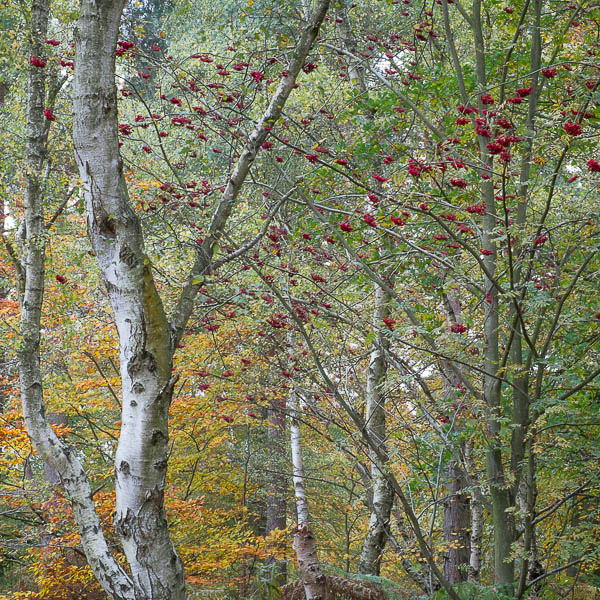
Having said that, the results shooting landscapes have blown me away. (all the images in the post are taken with the X-Pro 1. Sorry they are all tree images, but it is autumn and it would be rude not to spend my time in the woods. Please also note, all of these images are jpegs either straight out of camera or at most have just had a little high pass sharpening applied for uploading to the web. One or two have had VERY slight contrast tweaks, but that is it. I haven’t had time to really set about working on raw files from the camera yet). The X-Trans sensor is astounding. I am not a techno geek on such matters, but whatever Fuji are doing, long may it continue. The clarity of the files, the rendition of colours and contrast is stunning. I am sure this is partly due to the wonderful Fuji lenses which I see as being on a par with, if not exceeding the quality of the Canon L lenses, and that is saying something.

I am loving the weight and lack of bulk of the Fuji. I have bought a smaller travel tripod to use with it which is more than adequate. It fits in a tiny bag and even with several prime lenses, filters and spare batteries it weighs a minute fraction of the DSLR kit. I have been surprised at how much pleasure this has given me back. I can work for longer and walk further without fatigue and I am much more inclined to have the camera with me, in fact I rarely go out of the door without it. (I am in London as I type this and have it in my jacket pocket with the 18-55mm lens on. Couldn’t do that with the 5D). My feeling is that a lot of photographers as they get that bit older or as aches and pains start will be keen to move to a lighter more portable kit to help them maintain their joy in the field. I also think as the quality of these cameras will mean more will gradually move away from DSLR’s, especially if a full frame version emerges.


Padley Gorge - Handheld, ISO1600, f8, 1/30 sec


All the images in this article have been taken in the last month with the Fuji using the in camera “film simulation” presets for Astia and Velvia films. (I am sure these will annoy film users as they can’t possibly be anything like true Velvia or Astia, they are just adjustment presets, but he results can still be very nice, just don’t expect them to replace true films by any stretch of the imagination).

I have been shooting with raw plus fine Jpegs switched on. Annoyingly, when Lightroom imports these files it copies them all to the computer but only imports the raws into the Lightroom database. You will find the Jpegs in the same folder, but they won’t show in LR. I tend to go in to Finder (on the Mac, Windows Explorer on Windows) and find the JPEG file I am after and drop it into Photoshop. There I tweak it if necessary and save it as a tiff. This tiff is then imported into LR using the synchronise folder command in the Library module. A bit of a faff, but it works for me. (I have just been sent this tip by great photographer Lizzie Shepherd – In LR, go into Preferences and on the General tab you can tick a box which gets LR to treat jpegs as separate images next to raw files – problem solved, thanks Lizzie!)

I am shooting Jpegs as well as raw files because the quality of the Jpegs is really VERY good. I like the mono conversions the camera does as well as the film presets and these are permanent in the Jpegs whereas they are not saved in the raw files. The Jpegs also preserve the aspect ratio presets I use in the field. You can set the Fuji to shoot in square format (which I use a lot) and in a 16:9 panoramic format. For portraits and less critical images the Jpegs are often quite sufficient for my needs. For landscapes and images I will use professionally, it’s the raw files I will process.


Tree, North Wales. Tripod, ISO200, f22 (in error - rather extreme!) 1.6 sec


A word on some of the niggles I have with the Fuji, because it does have some quirks in the way it needs to be used, especially if you are used to a DSLR, and it has some very irritating “features” too.

Firstly, let’s talk about that battery life. It’s dire. I suspect it’s the electronic viewfinder that’s the culprit but if I am shooting for a day I will go through four batteries. I carry five and still feel nervous. I will be buying a couple more. I just can’t stand having to economise on battery power as I work. The batteries you can get on Amazon for around £12 seem to work just as well as the genuine Fuji ones which sell for £60. Guess which I am buying?

The other really irritating thing is the position of the tripod mount. This really hasn’t been thought through by Fuji. As soon as you fit a quick release plate it partially covers the battery/memory card bay door. Seeing as you have to change batteries every two hours, it is very annoying to have to unscrew the quick release plate every time to do this when simply positioning the tripod thread a few centimeters further away would prevent the issue.

I have found a couple of the buttons on the rear of the camera are easily activated in error. I particularly seem to catch the Q’ menu button. It is placed on a raised part of the body moulding and this makes it prone to being pressed. However, I notice this button has been recessed on the Fuji XE-2 which has just been released which is great (and I love it that Fuji really seem to listen AND RESPOND to customer feedback on these cameras. How many manufacturers ask for feedback but then never implement any of the changes we ask for? 

There are also some quirks in how you use the camera in the landscape. At least I see these as quirks having been used to using a Canon DSLR. The first is the focusing system employed by the Fuji. It works in a completely different way to a DSLR. On a DSLR the focusing sensors are most accurate when they can detect high contrast edges, where light areas but up against dark areas. By locking on to these they can measure distance and achieve focus. However, on the Fuji, such high contrast edges are just what the focus sensors don’t want to lock on to. They are most accurate when they can find a surface with texture, say a tree trunk or the surface of a wall. This takes some getting used to but I have found when the Fuji does lock focus I get a higher proportion of sharp shots compared to using autofocus with the DSLR. It is very accurate.


Silver Birch - Clumber Park. Tripod, ISO200, f16, 1/4sec


This leads me to another change I make in my workflow when making landscape images with the Fuji compared to the Canon. With the Canon I use Live View focusing with the lens on manual and love this approach. It is very accurate and allows for checking of depth of field with ease. However, on the Fuji, I have found It easier and more effective to have the lens set to auto focus but to press the AF button on the rear of the camera and select the AF point I want it to use. This locks the focus accurately for me and at f11/f16 I am getting excellent depth of field. With the sensor size of the Fuji, I am now experimenting with shooting wider, f8/f11 to see if this maintains sufficient depth of field while getting me closer to the sweet spot of the excellent Fuji lenses. My next experiment is to try back button focusing with the Fuji. I understand you can switch the lens to manual focus but still use the BBF button to focus and this sounds like it might be a good system.

Now I am used to how the Fuji works I have developed a modified workflow and have found I can already work at speed in the field with it, enabling me to stop thinking too much about camera operation and focus more on capturing changing light and composition which is much more important to me.


Tran Hows, Dawn - Tripod, ISO200, f16, 0.5 sec


I am finding the light meter on the Fuji to be very accurate and so, as opposed to how I work with the DSLR where I shoot in full manual, I have been using aperture priority and then tweaking the exposure after checking the histogram using the exposure compensation dial on the top of the camera. This is working really well for me. Other than in really low light or very contrasty light, though, I am tending to find the light meter is pretty accurate.

I have now used the Lee Filters Seven5 system on the Fuji and love it. If you have the full sized Lee system you can save a lot of money by just buying step up rings as it works fine. It’s a bit big, but the cost saving is significant. However, if you can afford it or if you are new to Lee Filters the purpose designed system is a delight. Small, beautifully made and balanced it is the perfect match to cameras of this size. As always with Lee, you get what you pay for and the optical quality and clarity of the grads is superb. Positioning the grads using the live view screen is a doddle and they do the job just as designed.


Padley Gorge - Derbyshire. Tripod, ISO200, f9, 1/5 sec


I have been trying a vari-ND filter for my ICM shots with the Fuji and have been pleasantly surprised with it. It is very convenient being able to dial in the amount of neutral density effect you need and being a screw on filter it is better suited to ICM work than using a Lee holder. I also have a Tiffen screw on 10 stop filter but have to try this out, so no verdict as yet, but I see no reason why it shouldn’t be perfectly fine.

I am taking delivery of the brand new 23mm f1.4 lens on Monday (it has since arrived. Sadly the first lens had two scratches on the front element but the replacement was fine) and am excited to try this out. If it is as good as the 35mm it will be a terrific lens. I must add, my next lens purchase, which surprises me to say it, will be the XF 55-200mm. (since typing this on the train I have caved in and flexed the plastic and am now the proud owner of said lens). The last few weeks have made me realise how much I use a long lens in my landscapes. I often have my 100mm macro on my Canon (both as a macro and as a landscape lens) and I also carry the 70-200mm which I use a lot in my landscapes. I had anticipated shying away from long lens for the Fujis I imagine it might look a bit ungainly, but I have really missed the reach of a longer lens.I have also bought the 60mm macro, partly because (great excuse) my wife now has the XE-2 and she loves macro photography, but of course, we can share 🙂

I am travelling to Norway in two weeks to co-lead an aurora workshop with Antony Spencer for Light and Land. I will be taking my 5D kit, but the Fuji is coming with me too. This will be a great test for it, both as a landscape camera but also the ultimate test for long exposure high ISO shooting, with the 5D to compare it to. It will also be interesting to see how it copes with the low temperatures north of the arctic circle. (All bar two days of the trip we will have no daylight at all as the sun won’t rise above the horizon – we will be living I a world or twilight and darkness for 10 days). Note to self. Buy even more batteries for the Fuji.

I will try and find time to blog from up there to let you know how it goes as well as posting some images. Watch this space.


Clumber Park - Tripod, ISO200, f18, 1/3 sec


“Sea Fever” – The New Book from David Baker

Sea Fever David Baker

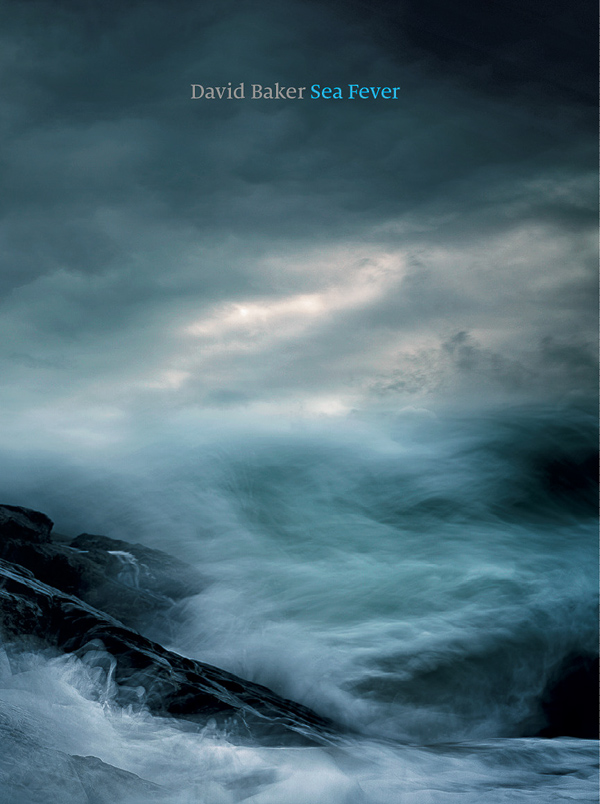
"David Bakers - "Sea Fever" Cover


David Baker, or Milouvision as many of his online followers will know him, has been photographing and blogging for years (www.milouvision.com). Building his following and honing his skills with the camera, he has risen to real prominence over the last couple of years, first winning Outdoor Photography magazines “Outdoor Photographer of the Year 2012” title, followed by three successful exhibitions and the 2012 Landscape Photographer of the Year “Your View” category winner, culminating now in the publication of his first book, “Sea Fever”.

Published by Triplekite Publishing, Sea Fever is a collection of 26 of Davids stunning signature coastal wave images.

So, what are you to expect when you receive your copy of “Sea Fever”?

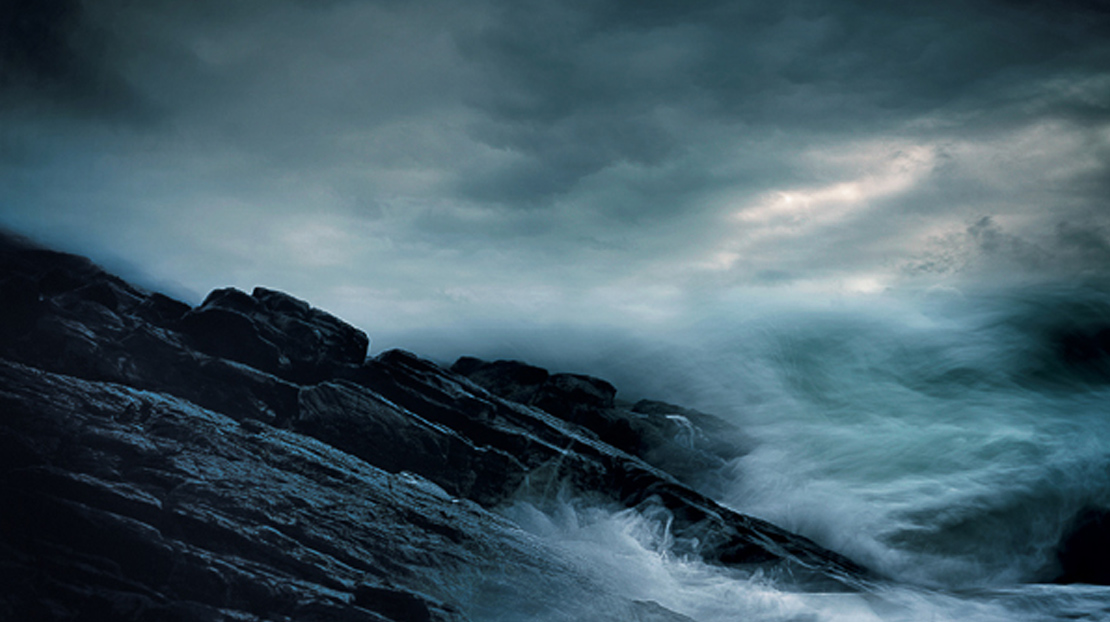
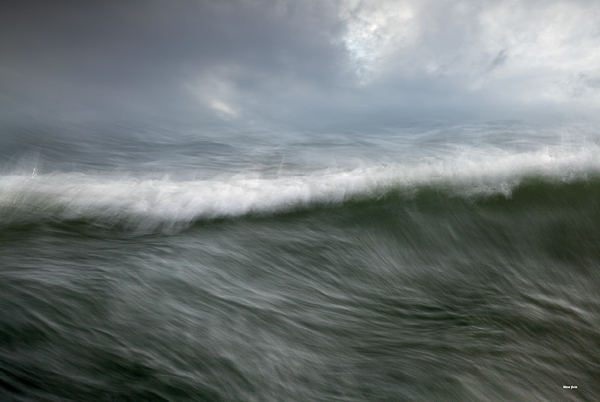
The first thing that will strike you is the stunning cover image, a taste of things to come. The image is one which was on display at the Masters of Vision exhibition at Southwell Minster ( http://mastersofvision.co.uk/david-baker/ ) this summer and it is a fitting image to lead us into the book. An image full of power and drama.


Inside, the foreword has been written in a beautiful alliterative style by accomplished landscape photographer, Pete Bridgwood. To quote Pete as he describes how David approaches his image making of the sea,

“He has a rare ability; to completely concentrate his creativity, to focus his intentions and develop a deep relationship with his subject…. it is immediately evident that this is no dalliance, no brief fling; this is an aching, impassioned love affair”

This gives an idea of the intensity and depth of the images that reveal themselves as we turn the pages. David also gives a brief introduction to his approach to making the series of images.


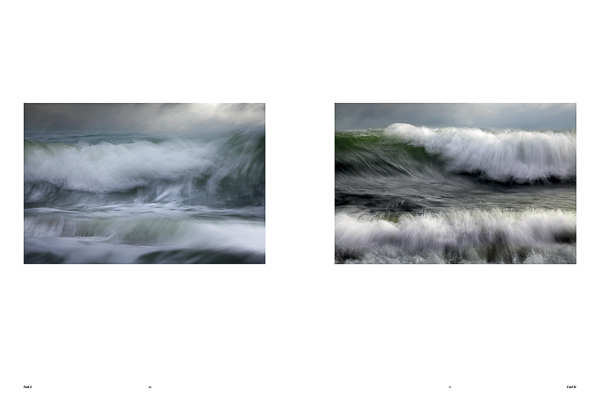
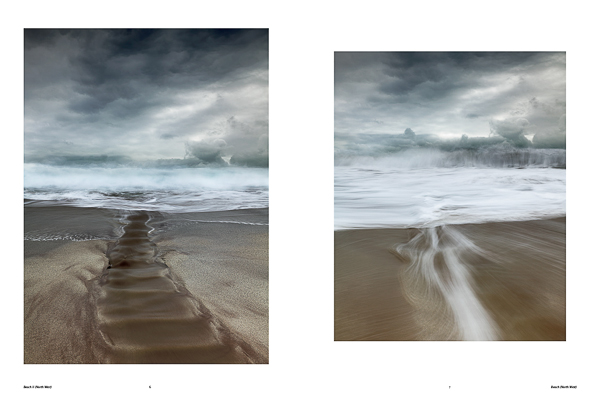
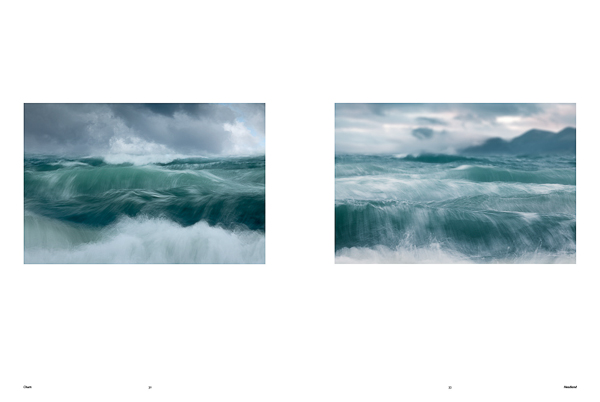
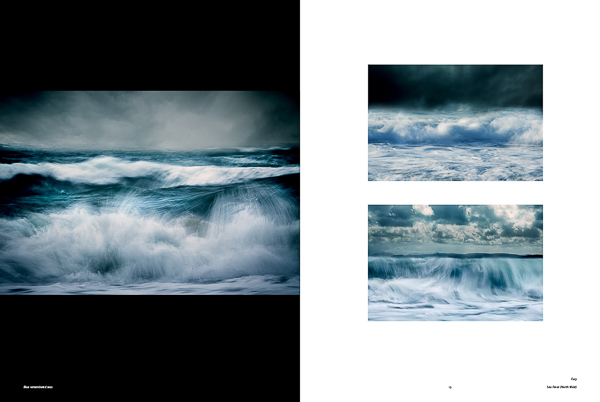
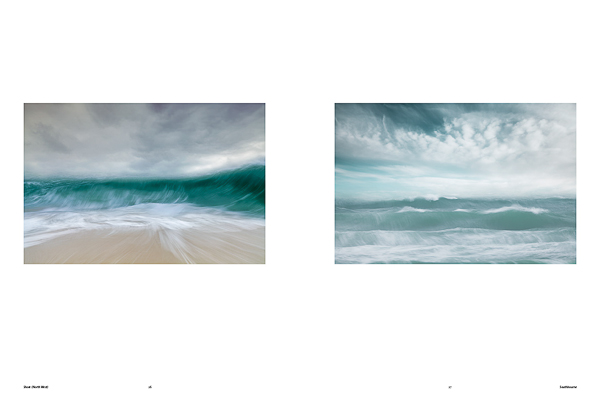
The book is printed in portrait format, an unusual choice for a book based mainly around landscape orientation images. However, the images that are shot in portrait orientation display well and then many of the landscape orientation images are displayed (by Dav Thomas, who has done a great job with the layout and design of the book) spread across two pages, often bleeding off of the edges to give the greatest impact. Others are often given wide margins, lots of ‘breathing room’ and this is pleasing to the eye. The fact that Triplekite have decided on such a generous page size means this all works well. Nothing feels cramped or stifled in any way. The images are the stars.

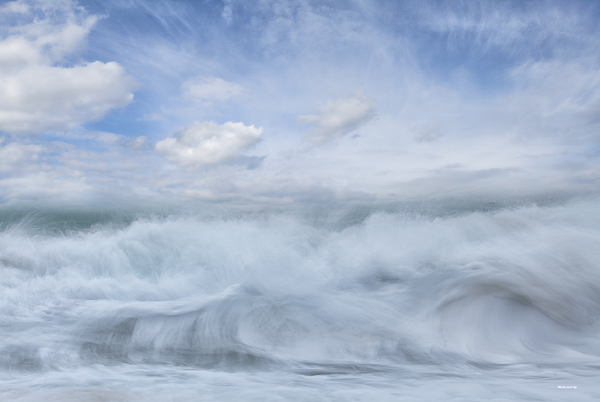
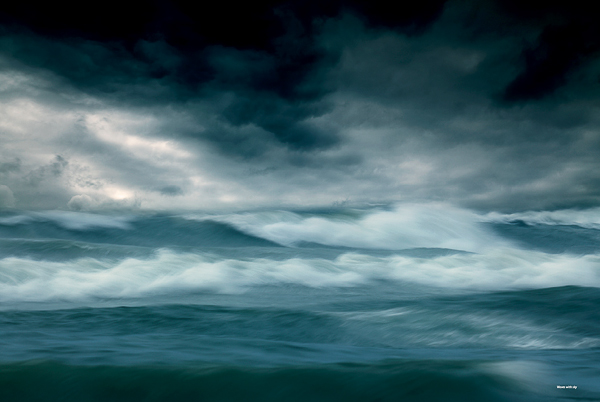
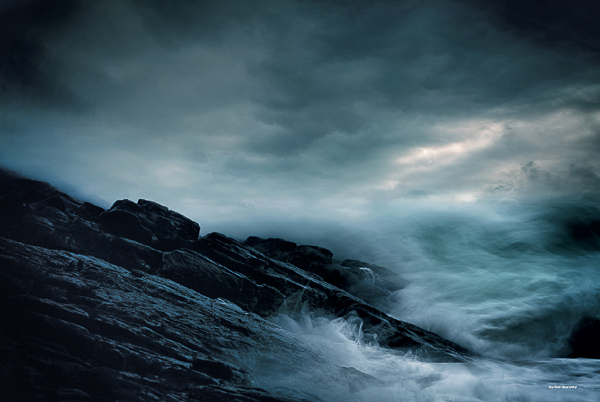
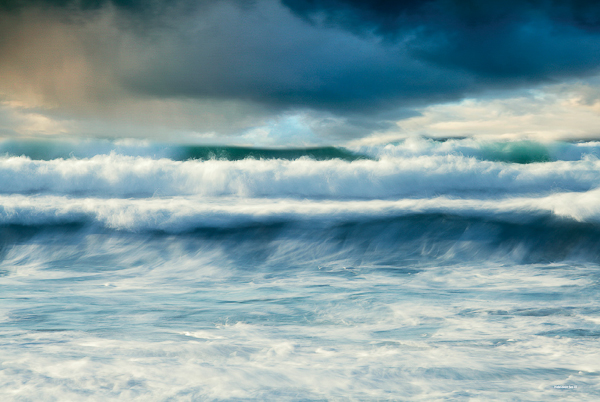
Davids “Sea Fever” images captured the imaginations of lovers of seascapes as soon as they began to appear. (and I have already seen a few ‘Sea Fever’ wannabes imitating the style! I suppose imitation is the sincerest form of flattery?). They have a power and transcendent beauty which seems to connect with all who have a love (and respect for) the sea. By slowing the shutter just a little he retains enough detail in the waves to show the power, movement and flow of the waves while softening the effect and merging the waves into the sky. There is no real, defined horizon in his images – they become almost ‘as one’. In fact, the skies are not playing ‘second fiddle’ to the waves but enhance and complement them perfectly, almost becoming part of the waves themselves.


Every image in the book is just beautiful. Some are full of stormy ominous power, others gentle light and gracious delicacy. There is not a weak image in the portfolio and I would love to have any of these on my walls at home. Each has a mesmerising quality to hold our interest for many years.


I had the opportunity to interview David a few days ago about the book and his work and thought you might enjoy his comments.

D: First of all, let me congratulate you on the publication of your first book, “Sea Fever”, I have seen an advance pdf copy and it looks stunning. How did you feel when you first saw the design?

DB: Many thanks! Yes, a great feeling to see the flow of images due to Dav’s design skills.

D: How did the book project come about?

DB: I was fortunate to be one of the exhibitors at Masters of Vision which opened in late July 2013 and during that weekend I met David Breen (Triplekite Publishing) and Dav Thomas. I knew of David’s photographic work and of course of Dav’s book. In early August David emailed suggesting a book based on the Sea Fever project part of which had been exhibited at MoV. A really good day!

D: How did you decide to focus on such a tight project as “Sea Fever”? Was it more difficult, do you think, than doing a retrospective on your work, or would that have been harder?

DB: I’ve held previous exhibitions which have been a selection of my favourite images and at the time of MoV I had just completed a show of the Ridge Trees project and was in the midst of Sea Fever so it seemed natural to show what I was passionate about.

D: How did you find the process of selecting the images for the book? Was the choice difficult? How did you go about narrowing down the selection?

DB: There wasn’t a huge selection anyway as I’m a ruthless editor. But for the book I provided the required number plus an extra 25% I think and then Dav undertook the skilful design.

D: Without giving away too many secrets can you give us an idea of how you make the “Sea Fever” style images? What kit do you use? Shutter speed etc?

DB: I experiment with a variety of shutter speeds and focal lengths whilst trying to look for relationships between the waves and ideally clouds. I aim to have at least a line of foreground or central wave across the frame. I try to take a painterly approach if that makes sense as I want the images to say this is how it feels to be at the shoreline with the battering wind full of salt, the spray, the thump of the waves, the sense of vulnerability. How can an hour at the shore be captured in an image?


D: How long have you been working on the “Sea Fever” project? How long did it take to perfect the style of the images?

DB: I was in the Outer Hebrides in March 2012. During my previous trip in February 2008, I had taken mostly long exposure shots (as during this time the B+W 10 stop filter featured in many a photoblogger’s work) but during March not one long exposure shot was made. Feeling a little ‘unsettled’ I started taking shots during the closing days of the trip to capture the sea’s power in a way I had not undertaken before.

The first image, Hebridean Sea III, was uploaded to my photoblog in late April 2012 and that was that. Nothing happened in terms of development of the project until August of that year when another image was processed. I hadn’t realised I had a potential project but something must have been percolating away as in March 2013 onwards I started experimenting in acquiring images to compliment Hebridean Sea III.

D: Do you like working on projects? Or do you prefer more random ways of working? If you prefer project working, what benefits do you see working that way?

DB: It’s only during the past couple of years that a project based approach has been developed. I worked up one called Ridge Trees which concentrated on the New Forest and was defined by three attributes – dawn, mist and geography. Whilst the structure of a project is appreciated, I’m not restricted to just that type of work.

D: Why the sea? What draws you to photographing it so intensely?

DB: Good question! I usually mumble something about energy, and change. It’s not something that I’ve nailed down yet, and I’m not sure I want to. I’m not a great deconstructor (in an image sense) although I written a little about this aspect in the book.

D: Have you always been interested in photography? What is your photographic ‘history’?

DB: At 15 I wanted to be an architect. My dad had introduced me to an architect client and despite the then (1978) 33% unemployment in the industry, I was keen on pursuing architecture as a career. Despite good grades, events didn’t entirely pan out as planned, and after dithering about a course at Salisbury Art College and flirting with a technical drawing apprenticeship, I joined the Civil Service. It’s fair to say that there’s been little creativity work-wise since. I’ve always had a great love of art (especially sculpture) so I guess the creative ‘urge’ has always been there albeit mostly dormant.

I started using a small compact digital camera in about 2003/04 documenting visits to stone circles, dolmens and standing stones. A friend subsequently talked about his new digital SLR and suggested that I also buy one, so in January 2005, trying to engage a creative aspect of myself, I also bought a 300D.

From a technical aspect, almost immediately I wondered what I had let myself in for. I started reading magazines, books (fortunately Southampton has an excellent library) and looking at other images in various exhibitions and photoblogs. In the spring of 2005, I began posting images on a web forum and as a consequence a photoblog was started in late 2005.

Why photography? It was accessible and there was an immense amount of support and inspiration from the photoblog community.


D: Who would you say was your first inspiration in photography? And who do you find inspirational now?

DB: Just after I started using a SLR, I saw a photograph in Outdoor Photography of a Hampshire beach at sunset by Guy Edwardes and the sea looked fantastic drawn over the shingle beach. The wave trails looked ethereal and a week or so later I attempted the same and that was that, I was caught and I’ve been a seascaper ever since. Current inspiration is from a wide variety of sources.

D: What does photography do for you? What do you get out of it that drives you to pursue it as a passion?

DB: I guess it’s the conduit for a creative aspect that must be present in myself.

D: Have you ever hit a creative block? If so, how do you get over it?

DB: I get very keen on my work and then very disappointed by it very rapidly. I then go off to make more images. And then the process starts again.

D: What camera equipment do you currently use?

DB: 5D2, 24-70 and 70-300 lenses, Lee filters, Gitzo tripod and a RRS ballhead. The camera, lenses and filters all fit in a Billingham bag. There’s no need to march huge distances for my work, and I’m (hopefully) finished with the days of rucksack wrestling against a rapidly incoming tide.

D: Is there a piece of kit you really couldn’t live without? A favourite piece of equipment?

DB: For years I used the Canon 17-40. Everything was at 17mm and hang the consequences. That used to be nailed to my 300D and then to the 5D. Now, I think the 70-300 zoom is used significantly more than ever. Almost everything is on the tripod too.
D: Is there any piece of equipment you lust after and would love to own?

DB: I was considering the Gitzo Ocean tripod.

D: I know you are a keen and active photoblogger and Twitter user. Why do you love photoblogging? What do you enjoy about Twitter and the photographic community on there?
DB: The immense amount of support and inspiration from the community plus the free exchange of ideas, links to work, exhibitions, and the occasional meet-up.

D: Would you describe yourself as a “Landscape/seascape Photographer” or do you enjoy other genres of photography?

DB: I’m a seascape/forest photographer really. I really like looking at the landscape big views plus the more intimate landscape compositions and also the very experimental ones. I also really like looking at street work (especially if there’s humour present).

D: What advice would you give to young or new photographers to help them make progress with their passion?

DB: Believe in the value of your talent and your images. Experiment, and have fun. If considering a project, make sure it’s personal to you, and choose a subject which will allow access to create the images you want. Think about the story and how the work will be shown – book, exhibition or blog.

D: What software do you use to process your images? Does much work go into processing the “Sea Fever” images?

DB: For ages (and ages…), I used RawShooter Essentials (which became Lightroom I think) as I loved the ease of use, and the mono images it could produce. During the last year I’ve used Canon DPP for the Raw files. I make no corrections in DPP aside from using the lens profiles and the auto-dust correction (the principal reason for moving from RSE). Everything else in undertaken in PS, and I use Bridge as a catalogue.

D: What is the URL of your website so readers can have a look at your work?

DB: milouvision.com (although some project highlights are also at dbphotographic.com).

D: So, finally David, what next? More “Sea Fever” images or is the project complete? Do you have other projects on the go? Any other plans?

DB: I’m not sure at present. It took a few Ridge Trees and Sea Fever images to realise I had the makings of a project so I’m sure something will present itself soon.


The soft back book itself is outsized at 410mm x 305mm and is being printed in Malta by the same high quality printers who printed Dav Thomas’s acclaimed “With Trees” book. The paper used for this book is 170 gsm Valletta Silk and it is being printed using the same Sublima 240 lps screen process as with Dav’s book which yielded spectacular print quality.

There will be two versions. For the serious collector there is a very limited edition of 50 which will be individually signed and numbered by David and comes complete with limited edition A3 print for £85. The standard edition is £25. The price excludes P&P of £8.50 (UK) or £23.50 (International). You can pre-order your copy HERE.


The attention to detail and print quality achieved for Dav’s book by Triplekite must inspire confidence that “Sea Fever” will look stunning when it arrives. (this review is based on seeing an advanced pdf copy, not a full print copy). David Breen and Dav Thomas seem to have started the company as they mean to continue. The fact they are both keen photographers first and have a passion for photography is reflected in the way they are putting the images ahead of profit. So many photography books are churned out by large publishing houses and treated much the same as cookery books and other books with pictures in. Often the paper and print quality is disappointing and doesn’t reflect well on the photographer whose work is often outstanding when seen in the flesh. With Triplekite the quality of the images comes first above everything, so the paper and print process choice has to be able to display the images at their very best. Attention to detail is seen at every step of the process, from the selection of the photographer and the images, to Dav’s design and layout right through printing and even into the packaging. It is a refreshing change to see a publisher who seems to care more about the photography than the bottom line.

I have a feeling many photographers around the world are going to beating down Triplekites door asking to be considered for their next book. But I also know Triplekite are putting their customers first by being very selective in those photographers work they choose to publish. Triplekite seem to have a tight focus on exactly where they are going with future publications to hold true to their vision for the company. This can be seen in the latest announcements that the next two “Portfolio” books will be by the wonderful Paul Kenny and Marc Wilson respectively. They have also announced a third series of books entitles “Land|Sea”, each of which will feature a small portfolio of work by five photographers carefully selected and which will build into a collectible library of great landscape work. 2014 Looks to be an exciting year for lovers of fine photography.


“Sea Fever” is the first in Triplekites new innovative “Portfolio” series, designed to be project based. Being focused on such a tight project with all of the images shot in a very similar style and with a common technique some may find they desire a greater variety of images, but that is not the purpose of this type of book. Its focus is its asset and it is a great example of how, as photographers, our work can get so much stronger if we focus on a tight themed project. While smaller and lower in cost, it will still adhere to Triplekites philosophy of making the images shine through large page sizes and superb print quality. These books are an ideal way to showcase the talent and work of some of the Worlds finest photographers. I can see the series becoming very collectable.

I, for one, pre-ordered the book as soon as I heard it was to feature Davids “Sea Fever” series and look forward to getting my signed copy and print. Having now seen the pdf proof I am even more excited. A firm delivery date is yet to be announced but is expected to be around mid to late November.

For lovers of fine land and seascape photography and especially if you love really fine photography books this is another ‘must-have’ (and what a great gift, even for non-photographers) from Triplekite. Order your copy HERE
 

Adobe announce new Creative Cloud package for photographers

Adobe caused a huge amount of anger, resentment and upset with its surprise announcement some months ago that along with launching its Creative Cloud service it would no longer be releasing any of its Creative Suite products (including Photoshop) in any other format in future. No more downloadable version to own. No more DVD’s.

Basically, the Creative Cloud allows you to have any of the Adobe Creative Suite program’s installed on your computer and for this ‘privilege’ you pay a monthly subscription. It was a brave move by Adobe to make this move so decisively. I believe this model is the one all major software manufacturers will want to move us to in order to guarantee cash flow into their coffers. Anything other than a complete termination of supplying the software by other means will mean few would opt for this system. We naturally don’t like it. We don’t own the software, we are leasing it. We have no way to decide if we want to upgrade or not.

Hence the anger amongst many of Adobes customers. But perhaps I ought to be more specific. The anger was chiefly raised among lone users, hobby photographers, one person businesses and so on. Adobes main customers,  graphics companies, design agencies, large academic institutions and so on, were delighted with the plan on the whole. The pricing works for them, access to all the programs, free updates and monthly pricing works well for business, it helps with cash flow and budgeting.

For most small users it was a disaster. Adobe had not thought through the impact on these small users who only use Photoshop and Lightroom. For us the model is hugely overpriced. The outcry was massive. It took Adobe by surprise. It led to lots of bad publicity. 

It seems Adobe listened to the outcry. They have just announced a new level of membership aimed at users of just Photoshop and Lightroom. 

This is how it will work. If you have bought a legitimate copy of Photoshop CS3 or above you will qualify. Between now and the end of the year you will be able to subscribe to the Creative Cloud. In the US the price is $9.99 per month. In the UK I thought it would be jacked up to £9.99 but in fact it will be £8.78 per month and it starts in two weeks time.

For this you will get unlimited use of Photoshop CC, Lightroom 5, all updates which are released as soon as they are available, 20gb of Cloud storage, a free Pro Behance portfolio website and free support. If you already subscribe to the Photoshop only version of the Cloud you will be moved automatically to this new level when it goes live.

For those who now feel aggrieved that this offer is just for those who have bought CS3 and above please spare a thought for those who have. They have spent in excess of £600 on the program and then upgrades have added more to this investment. It is only right that they be compensated for this outlay and loyalty to Adobe. We don’t yet know how much the subscription will be for those who are currently Elements users or who have never bought a legitimate copy of Photoshop. I estimate £12 to £14 a month, but this is only my guess.

For those who qualify for the £8.78 price point I feel this is an exceptionally good deal. Do the maths. How much do Dropbox charge for 20gb of storage? You can’t by just 20gb but 100gb, the lowest amount is $9.99 a month so 20gb has to be worth $2 a month. A Behance Pro site, which is a good portfolio site, costs $99 a year – so those two features alone cover the subscription. Now most of us wouldn’t go for a Behance site, but if you currently are paying for a Smugmug, Clikpic or other site you might use this to save that subscription and move to Behance (which is professionally recognised and viewed by many creatives). If you are paying for Cloud storage you could save that cash and use the Adobe space instead.

Besides this you are getting £600 plus of Photoshop and the very latest version of Lightroom along with all future updates. Already Photoshop CC has some great new features and no doubt over time more will follow. How much do you spend on Photoshop and Lightroom purchases and upgrades over, say, three to five years? Add it all up and I think the subscription represents good value.

Even if you don’t have CS3 or a newer version of PS, decide you want to buy in to the Creative Cloud and have to pay, say £12 or £14 a month, I still believe it represents good value for money.

I think, despite our reluctance to accept the leasing model, we are going to have to get used to it. Other software companies will soon follow Adobes lead. Microsoft is already offering, but not forcing, a Cloud edition of Office. The others will follow. It makes sense for them and they have us where they want us. We can resist for a while by not upgrading but gradually the new features will draw us in. Or, our current computers will get old, our version will not run well on new operating systems, file formats will change. Bit by bit it will become impossible to resist for all but the most determined.

In the meantime hopefully this news from Adobe will cheer some up who were rightly aggrieved by Adobes heavy handed and thoughtless first offering of the Creative Cloud. I think they should be given credit for at least listening to and responding to what their smaller and less profitable customers said. Quite refreshing in today’s corporate world.

 
Here are some FAQ’s to help explain things further, taken from Terry Whites excellent tech blog
 
Q: What is the Photoshop Photography Program Offer?
A: This offer includes access to Photoshop CC and Lightroom 5, plus feature updates and upgrades as they are available, 20GB of cloud storage for file sharing and collaboration, a Behance ProSite, and access to the full library of video tutorials in Creative Cloud Learn.
This offer is available to customers who own a previous version of Photoshop or Photoshop Extended product, version CS3 or later (CS3.x, CS4, CS5.x, or CS6). Suites do not qualify. Requires annual commitment, billed monthly.
Offer valid through December 31, 2013 and is available in countries where Creative Cloud is purchased directly from Adobe.com. This offer is not available in China, Vietnam or Turkey.
Q: Can I get Adobe Bridge CC with the Photoshop Photography Program Offer?
A: Yes. Bridge CC is available for download and use as part of your Creative Cloud membership.
Q: I am already a Creative Cloud member; do I qualify for this offer?
Existing Creative Cloud members who wish to transition to this offer must own a previous version of Photoshop or Photoshop Extended product, version CS3 or later (CS3.x, CS4, CS5.x, or CS6). Suites do not qualify.
Those who meet the qualifications have two options:
Creative Cloud Single App members for Photoshop CC who already completed the qualification process when they originally signed up for their membership will be automatically transitioned to this new program when it ships, with the additional benefits and lower ongoing price.
All other Creative Cloud members who meet the qualification requirements may contact Adobe Customer Service to discuss transitioning their membership to this new offer.
Q: I own an earlier version of Lightroom but not Photoshop. Do I qualify for this Photoshop Photography Program offer?
A: Only customers who own a previous version of Photoshop CS3 or later qualify for this offer.
Q: Will the cost of my membership increase?
A: This price is not a special introductory price for your first year only; it is the standard price for this level of membership. Customers who sign up by December 31, 2013 will be able to continue their membership at the same price. But if you cancel your membership in the future, you will not be able to re-join at this special price.

New Dropbox Style Cloud Based Service with 20gb Free Space

Copy

As followers of my blog are aware, I am a keen backer up of my files and advocate using off site cloud based services, such as Dropox, Skydrive, Googledrive etc.

Each of these companies gives its users a small amount of storage space for free to get them used to using the cloud. They also hope that soon we will want more space and so sign up for their paid service. Here you pay for how much space you require per month.

I use all of these services, just accessing the free space each gives. I find Dropbox is very user friendly, especially as they have free apps to help you access your files from your smartphone, tablet and computer as well as via a browser. If you would like to try Dropbox, please CLICK HERE to get your free space and the I will get some extra space for referring you, thank you.

I also want to tell you about a new service called “Copy”, which is being very generous in the free space they are giving us. Currently you get 15gb free when you sign up. But even better, if you use THIS LINK to sign up you will get an extra 5gb of free space. You need to send back the confirmation email to confirm your email address and download the Copy app to manage your space. This will activate your free space.

I use this space to back up my important files and also to share large files with friends, family and customers (you can send them links to files you want to share). While 20gb is not enough to back up all our photos and music, in most cases, it is usually ample for backing up all of our other documents and files so at least these are protected.

I find cloud storage is also useful when away from home. You can access files you have uploaded from any computer which has web access from anywhere in the world. It has saved me many times. (for example, I copy all my flight tickets, hotel reservations, scans of my passport, airport parking details, travel insurance, emergency contact numbers etc to the cloud before a trip. If anything gets lost or stolen, you can recover the details from wherever you are).

I hope you find these links useful and get your stuff backed up safely.

Canon 5d Mk 3 Woes and Why I Heard Music

Canon 5dMkIII

Drive by Shooting - Image Courtesy of ©John Birch 2013

Drive by Shooting - Image Courtesy of ©John Birch 2013


I have been using the 5d mk2 quite happily for a couple of years and had seen no reason to upgrade when he mk3 was released. I am not one who always has to have the very latest model of everything, unless there is a very good reason for it.Having a go with customers Mk3’s showed me it was better made, had a better screen and weather sealing and some nice refinements ergonomically such as the grip shape and position of the depth of field preview button. Nice though these things were, they weren’t a huge leap forward and so I contented myself with my faithful mk2’s.
 
That was until a customer, accomplished photographer Valda Bailey, came onto a workshop up in Northumberland in January. (You can view her work on her website, and you should (its really good) HERE ) She is a creative photographer and was experimenting with a feature buried in the menus which is not well known. Exposure blending. Some of you may know Chris Friels work and will have seen he has been using the same feature on portraits. Valda didn’t really show me what she was getting over the weekend until we had breakfast on the last morning when she bought her laptop into the cafe. She asked me to have “a quick look before I delete them”.
 
So I did.
 
What I saw made me stop eating my breakfast.
 
Very little stops me eating breakfast. Cafe on fire. War maybe. Little else. I was astounded. I thought I had got some nice images from the weekend as we had had wonderful light and atmospheric weather but on seeing hers I felt like formatting my cards. The images were astoundingly good. Hang on my wall good. I don’t think she believed me. But I don’t butter people up, I tell them honestly what I think, without being unkind – I believe in constructive comments, but these deserved unbridled praise. I wanted a mk3. I wanted one right there and then.
 
Then I broke my leg.
 
This had two effects. Firstly it meant I would be able to go to Focus on Imaging at the NEC, the biggest photography trade show in the UK, which I would have missed as I was due to lead a workshop on Skye, but the broken leg meant that was now possible. The show is the best place to buy gear at low prices generally speaking. The other, negative, effect was, although I could now go to the show (and be pushed around it in my wheelchair by my mates Carl & John) I was now unable to work and so cash was a real issue. Very frustrating. Until my card provider stepped in with 18 months interest free credit, so problem solved (well, problem delayed, lets not fool ourselves!)
 
And so it was I became the proud owner of a Canon 5d mk3, along with a free battery and 16gb compact flash card, plus £160 cash back from Canon. This bought the price down, effectively, to under £2k. A very good deal. Now at the show there were two companies offering the same deal. Calumet and Cameras Direct (if I remember rightly). However, Cameras Direct were also giving you a free copy of Adobe Lightroom 4 as well, worth around £100 at Amazons prices. So why did I buy from Calumet? Well, I have Lightroom 4. But I could have sold the free copy and made some cash. However, I knew of Calumets reputation. They are known for being suppliers to professionals. Solid. Dependable. They are known for good service, so I opted for them.
 
Boy am I glad I did.
 
On my first trip out with the camera (you can read John Birches blog post about he trip HERE – it’s a great read, and his blog is well worth following generally, well written and authoritative. He knows what he is talking about) I started to see an intermittent fault with the camera. You can see here some images which show the problem.
 
Shutter issue
 
Mirror Issue
 
Blizzard

Winter Wasteland - The shot I was after!

I think either the mirror was not lifting quickly enough or he shutter curtain was sticking, and thus shadowing on images. It would happen to a group of about three or four images and then wouldn’t occur for another hundred shots or more.
 
Straight away I tweeted to Calumet about the issue but to no response. It seems they don’t man Twitter at weekends (this might be something you need to address, Calumet, Twitter is 24 hours). Because I have about 1000 followers on Twitter (you can find me on Twitter as @dougchinnery), most who are photographers, this started to generate traffic as you can imagine with theories about the problem, possible solutions and so on.
 
On Monday morning I emailed the company with a description and images of the problem and a few minutes later, via Twitter, had a tweet asking me to call them. The phone was answered in two rings. This pleased me. A person answered. Still good. I explained the issue and without hesitation she said, “no problem, I will get FedEx to collect it today to bring it back for us to look at”. I was very impressed by the FedEx collection. Most companies tell us to pack it up, drive to the Post Office and send it back to them by Special Delivery at our cost and risk (about £20 to £25 for a camera). I was hoping she would say we will replace it, but accepted they would want to take a look first. A couple of minutes later (literally) I got an email from Laurence at Calumet. He had seen my email and images and said, “we will collect it today and send you a new replacement”. Result.
 
Then things got a bit surreal. Ten minutes after that who should knock at the door but the FedEx man. I hadn’t even boxed up the camera. When I opened the door I told him it felt like I was in a FedEx commercial (his uniform was well pressed and he was smiling and rather TV adverty-looking). All it needed was the sun to come out, birds to start singing and an orchestra to start playing and the cameras could roll.
 
In my rush to pack the camera for him I left the Calumet battery in (not the genuine Canon one) and my 16gb card in he camera. Doh!
 
I won’t bore you with all the details but Laurence at Calumet remained my single point of contact throughout. He replied to every email within two or three minutes. Everything he said he would do he did. He was superb. Whatever you are paying him, Calumet, it is not enough. They got a new camera to me in less than 48 hours. They even went to the trouble and cost of FedEx’ing my battery and CF card back to me. It was all done with courtesy and efficiency. It is, quite simply, the best service I have had from a photography related supplier ever.
 
Needless to say they now have me as a loyal customer. Yes, they may not always be the cheapest. But ask yourself when you buy that lens from a supplier in Hong Kong on eBay that has a fault. Will the hundred quid or so you saved seem like such a good deal when they ask you to post it back to Hong Kong? When Canon or Nikon in the UK won’t honour the guarantee because it is a grey import. (They will fix it, they just won’t do it under guarantee). It is rare these days for modern electronics to fail, but when they do, it’s a pain. I am so pleased I opted for Calumet and will be an evangeliser for them now. I don’t know how the other outfit would have handled my problem, but I can’t see how they could have done any better unless the MD had hand delivered it in his Bentley same day.
 
So, my message is. Consider using Calumet in future, especially for major items (they also do lens and body hire). Also, beware grey imports. They are cheaper for a reason. Often we get away with it, but it only takes one issue with a body or lens to wipe out the savings we have made on several items over the years in hassle and grief, if we ever do manage to get them to sort it.
 
I also love FedEx. And the driver really was like a bloke from an advert. It was a bit surreal. No orchestra though. Shame really. I would have liked to have heard music.
 

Winter tree

Tree in a Blizzard - Shot from the Car

Is Pinterest of Value to Photographers?

pinterest

I have a confession to make. When I first heard of Pinterest I dismissed it quickly as irrelevant. It seemed to me to be a hangout for young women with boards entitled “My Perfect Wedding”, “Cute Kittens” and such things. Boards full of images of people too perfect to exist having weddings that would never happen and then live in houses just to perfect for real people. I left within minutes of logging in.
 

Cute Kittens

Let the nightmare begin. There are a LOT of cute kittens (and puppies) on Pinterest, but you don't have to look at them if you don't want to


That was a couple of years ago. Then, a week or so ago, I can’t remember why, I had occasion to visit the site again. This time I stayed.

Why the change?

This time I thought it through and explored a bit deeper. Certainly, the site is populated primarily by women. 80% of ‘pinners’ are women. Nothing wrong in that, obviously. It’s just that for me, as a man, the kind of things the majority of the ladies were devoting boards to were of no interest to me. As much as I love cute puppies and recipes for homemade eye makeup remover, I wasn’t really looking for that kind of thing. It is this ‘noise’ that had put me off so,quickly on my first visit.

This time, however, I took a deep breath and typed in a search for, imaginatively, “landscape photography”. The results were interesting. Yes, lots of over saturated cliched images, but also I soon found boards created by discerning pinners full of stunning work.
 

Mono photography

But there is also a lot of really good photography to suit any taste and from all genres withn Pinterest. Of course, you can also introduce images from all over the Internet which appeal to you onto your own boards too, to elevate and inform other users 🙂


Spurred on, I searched for creative black and white images. The same resuLt. What really impressed me was that much of what I was finding was from older photographers. By older, I mean photographers working a hundred, fifty or twenty five years ago. The great names like Adams, Sudek, Stieglitz, Rowel, Weston, Maier and so on. You don’t find these on Flickr.

Also there are photographers whose work I have not found through any other channels. I was soon hooked, created my own account and was feverishly creating my own collections.

So how does Pinterest work? The idea is simple. Imagine a pin board on your studio wall on which you pin snippets of information and pictures to inspire you or to help you with a project. In Pinterest you can create as many such virtual boards as you wish. These boards can be public or secret.
 

Pinterest Board screenshot

This is a partial screenshot of one of my Pinterest Boards - this one for images of colour landscape photographs


You can then search within the Pinterest site on the public boards of others and re-pin things which you find interesting or inspiring onto your boards. The origin of these images or items originally is pages on the Internet. The item always retains its link back to the original source page, no matter how many times it is re-pinned. You can go to the source page by double clicking the item. This is really useful, as when you find an image by a new photographer or artist you like you can then leave Pinterest and go and explore their own website.
 
Pinterest Boards

My home page of pin boards. Each board is for images on a different subject, so i can keep my images organised.


You can also introduce new items into the Pinterest site onto your boards by pinning them yourself when you find something on a website you wish to pin to one of your boards. In fact, this is something that more pinners need to do. Around 80% of pinning is ‘re-pinning’ of images from the boards of others, so you do begin to see the same images appearing in searches. More members need to search out new material from the web and pin it to their boards for others to discover. This keeps the site fresh and, if you are prepared to do this, you will quickly find lots of pinners will start to follow your boards as they offer something fresh and new. I have only been active for a few days and already have close to fifty people following my boards.
 
Pin Boards Closeup

A close up image of some of my pin board icons


An interesting side note that I have noticed is that Pinterest has started to drive low volumes of new traffic to my website since I started actively using it. I am guessing this is coming from people who are seeing my images on boards and following them back to their source on my website. It may also come from people checking out my profile on the site and clicking my website link. Don’t get me wrong, the volumes are small at the moment, but noticeable, and growing. I am not recommending using Pinterest as you would other forms of social media to drive traffic to your website or blog. That wouldn’t be an efficient use of your time if it was your sole purpose in doing it. However, I am pleasantly surprised by the effect already and see it as a knock on benefit.

There are also some serious concerns about copyright, which as artists and photographers should concern us. It is up to each user to decide on this issue and if you want to read an article on it you will find one here.

You can follow individual boards of others if you like what they pin and this allows you to see when they add new things to that board in case you wish to pin it to one of your boards (likewise people can follow your boards if they like them). Or you can follow an individual and see everything they pin to all of their boards.

You can also create boards of your own images or pin your own images into your boards and they may get re-pinned by others who like them.
 

Pinning widget

Here is an example of pinning an image from an external website, in this case my own, using the widget you can get from the Pinterest site for your browser. When you are on a web page with an image you wish to pin, just click the "Pin It" button and this dialogue opens (it also allows you to choose which image if several images are on the page), you can add notes and select which of your boards you wish to add it to and then just pin it when done.


I use the site extensively now to collate inspiration for my work. Not only in photography, but I have also found myself researching art as well and learning valuable lessons from it.

I have also found interesting Photoshop tips and have a board to collate ideas for remodelling my photographic office and studio here a home. My wife has fallen in love with Pinterest and is collecting ideas about make up, cleaning solutions, decorating tips, craft making ideas, gardening – the scope is endless. Where I thought it would be a location just for organising my inspirational images, it is fast becoming a location to collate visual information for all sorts of projects and ideas. Some boards are public, others are private. Many designers use boards for design ideas, graphic designers use them to collate new fonts collections or colour themes, gardeners use them for plant and garden layout ideas – the uses are endless. If you search for ideas on the site you will soon find some very, very clever people who have ingenious solutions to problems, people who have ways of recycling items for amazing uses and who seem able to come up with things I would never dream of.

In the screen shot below I typed in “Recycle Pallets” – thousands of ideas came up, these are just a tiny, tiny fraction – just try it – click here
 

Recycle Pallets

Some pallet recycling ideas


I would encourage you to have a look. Why not take a browse at some of my boards and see what you think. I would be interested in hearing your views. You can find my boards here – http://pinterest.com/dougchinnery/ Why not sign up and make a start by following me 🙂

My back up strategy

back up

Lakeland River


It has been a while since I blogged about my backing up strategy and I have made some changes to make my systems more secure, so now seems a good time to update you on how I protect my data.
 
I regularly have friends and customers who tell me stories of how they have lost prized images, even their entire library, due to equipment failure or theft of their computers which they didn’t have backed up. They go pale as they speak about it. Some even break down and cry 🙂
 
If your system experienced a complete failure this minute, how much would you lose?
 
If your computer and the drives with it in the same room were stolen today, how much data would you lose?
 
How would that make you feel. Your wedding pictures. The pictures of your children growing up. The images of your loved ones who have passed away. Those landscapes you toiled so hard to capture. Need I go on.
 
Sobering questions, aren’t they?
 
It is crucial to understand that EVERY hard drive WILL fail. It is just a question of when, and they often don’t give any notice. One minute you are happily using your computer and the next you are looking at a blank screen. As with so many things in life, we think it won’t happen to us or we think we have time to back up next week. You just have to decide how much data you are prepared to lose and tailor your system to protect you to this level.
 
I had a brand new drive in a brand new computer fail completely just three days after buying it. I had just finished setting the system up with all of my programs, settings and data. I had also set up my back up solution and so was fully protected.
 
The issue is many people feel that backing up is a nuisance. They feel they don’t have time. Often, it is also because they don’t really understand how to do it, or how to set up a good reliable system which is easy to run.
 
I can’t afford to lose my data. As a freelance photographer my images are my business. If I lose them, I don’t pay my bills. They cannot be replaced so it that is a great motivation to have a good system in place.
 
So how am I organised and how do I make it easy to have a bullet proof back up solution working for me?
 
My first layer of protection
 
When in the field, especially on longer trips, I copy all my compact flash cards to my iPad. I don’t format the compact flash cards until the images are copied to my computer back at the studio. This gives me two copies of my images while I am away from home. I keep the compact flash cards in a holder with me and the iPad is left hidden in my vehicle. I may also copy the images on to my Mac Book Pro while I am away which then gives me three copies in the field.
 
My second layer of protection
 
My main computer is a 27 inch iMac with a 1tb  drive. I have a 1tb drive attached (I recommend this one – http://tinyurl.com/bs4vhcm – the WD drives have always performed perfectly for me). This is set up to use Apples Time Machine back up system which is built into all Macs. It has saved my life several times and is so easy to use. Just select the drive to back up to and the system backs up every hour. It deletes the oldest back ups once the drive is full. The most data you can lose is one hours work. Frustrating, yes, but not critical.
 
Layer three
 
I also have another two 1tb drives which are kept onsite, but away from the computer (in the hope that if we have a burglary and the computer and back drive which sits next to it are stolen, then this drive may be missed).
 
To copy files to this from my iMac I use a great easy piece of software called Superduper. You will find it HERE
 
(if you are a Windows user I would highly recommend using Microsofts free SyncToy which does a very similar job and is also so simple to use. You will find it HERE. Please note, I stopped using Windows a couple of years ago so this may not work with the latest versions of Windows or other solutions may now be available which I am unaware of).
 
This makes a carbon copy of your entire hard drive. The first back up you run with it takes a while as it is copying every file (as does Time Machine) but subsequent backups are much faster as only files you have added, deleted or changed are updated. This system does not hold on to old copies of files, so you can’t go back to a file which was deleted weeks ago in error  to restore it, like you can with Time Machine. The drive is always a copy of your computers hard drive on the last day you backed up with it.
 
Superduper can be set to run on a schedule so you don’t have to do anything as long as the back up drive is connected to the computer, or it can be run manually at a time you choose (this is how I use it as my drive is hidden and not permanently connected to the computer).
 
It is also fully bootable so in the event of a hard drive failure you can boot your computer using it and get working straight away. If you want to have several carbon copy drives you can. You give each drive a name and Superduper remembers each drive.
 
When I am on the road I take one of the Superduper drives with me. This gives me an offsite backup and it also means I have all my files with me so I can work on the road. If I do this I just have to keep a copy of the changed/added files and update my iMac with them when I get home.
 

Mist in the Woods


The final layer
 
The last layer of protection is the one which gets neglected by most people because it is the most difficult to manage. This is the offsite backup.
 
This protects you in case of theft or the destruction of your property by flood, fire and so on. I wonder how many people have lost all their files this week in the floods?
 
My old system, which was flawed, but better than nothing, was to have a third 1tb drive backed up to using Superduper which I then stored at my parents home. This is fine if you remember/bother to go and get it and update it regularly (and to be honest, this needs to be weekly as a minimum). I just didn’t do this often enough, it becomes too much hassle.
 
Prior to this year my new solution would not have been feasible as my broadband speeds were just too low. I now am blessed with BT Infinity 2 and this makes backing up to a Cloud service easy.
 
There are lots of options out there but most are very expensive for large amounts of data. They are really designed for smaller amounts of file storage and also geared for you to be uploading and downloading the files on a regular basis.
 
Amazon Glacier
 
Fortunately, Amazon has identified this issue and set up a brilliant new service to remedy this. It is called “Glacier”. Anyone can use it, from home users to world-wide corporations and it is purely designed to store large amounts of data you will probably never need again… unless something goes badly wrong with your primary layers of protection which I have described above. You can find it HERE
 
The basic things to know are;
 

  • The cost is very, very low, just $0.01 per gigabyte of data per month for storage, so if you have 200gb of data with them it costs just $24 a year. Compare that with the true cost of buying external drives and then keeping one off site and up to date!
  • There is a fee if you delete backups within 3 months of uploading then
  • There is a fee to download data, although you do get a free allowance per month, but as this is designed for long term storage (in fact, its for data you hope you will never have to download) it is not a major issue
  • Data that is uploaded takes several hours to be processed by Glacier and it takes several hours to start downloading back to you if you need it – this is how they keep the costs so low – so don’t view it like you do Dropbox, for example.
  • You need to break your data down into zip files that are no bigger than 4gb and this is a hassle when you first get set up.
  • You can’t update a backup zip file once it is uploaded. If you make changes to files at your end you need to upload them again and delete the old one if necessary. For this reason I am using it for archives. I back up the files I am working on all the time to Dropbox (or Skydrive etc) Sign up for Dropbox HERE
  • Glacier have yet to release a program to handle the uploading but two free programs are available from others. The Windows one is Fastglacier and the Mac client is Simpleglacier. I use Arc back up which is a paid for program.
  • Your data is encrypted using 128bit encryption keys – so extremely secure. The server farms also sit behind very secure firewall systems.
  • Glacier claims 99.999999999999% protection. The server farms are held in extremely secure bunkers and there are several of them around the planet. Your data will exist in three locations in at least two countries. So you are pretty much protected form everything except Armageddon, when, lets face it, the last thing we will be bothered about are our files 🙂

 
I am currently going through the tedious process of zipping all of my data (images and files) into 4gb batches and doing an upload overnight each night. I can upload about 60gb a night with my connection. I have done several years worth of files and just have 2010 to today still to do. I have just got my head down and started working through this methodically. It has also helped me delete over 200gb of useless and duplicated data which was clogging up my system – a really nice feeling having a spring clean 🙂
 
Once it is all there, plan to upload weekly the latest images although it may end up being monthly. I am expecting to have around 600gb of zipped data on Glacier by the end of 2012 with a cost to me of about £3.75 a month at current rates. I think that is exceptional value.
 
Conclusion
 
This all might sound like the ravings of an obsessive compulsive with a disaster fixation but I have my livelihood to think about and I hold work which is critical to my customers too. You can go as far as you feel you need to in order to get the level of protection you need.
 
As a minimum get Time Machine working for you if you are a Mac user, or something similar if you are a Windows user. I also recommend getting in to the habit of backing up each days work at the end of the day – let it run overnight. in reality, on most days, if you do it daily, an incremental backup will run in a few minutes. As a minimum get into the habit of having a ‘Backup Friday’ or similar so at least your weeks work is protected.
 
I highly recommend you also get set up with Dropbox – you can sign up here – as this will give you 2gb of free storage accessible world wide for regularly used files and for sharing files with friends and family. You can also access it from your iPhone, Smartphone and iPad etc It is brilliant and I use it daily.
 
Alternatively you can have the thrill of being a gambler and live life on the edge and not bother backing up at all (or have that back up you did months or years ago and always mean to get around to updating, maybe next week when your not so busy). Enjoy the ride! Me, as you can see, I am more a belt and braces kind of guy who likes to sleep well at night.

New Exhibition of My Work

Dark Light

New Exhibition - "Dark Light"


I have been to Gainsborough today to hang my new solo exhibition entitled, “Dark Light”

It is being hosted at the Trinity Arts Centre in Gainsborough and is an exhibition of monochrome photographs. The Arts Centre is a council run location dedicated to the promotion of the arts in North Lincolnshire. The gallery space doubles as a mingling and bar area outside the main theatre and so is ideally placed for people visiting for performances to browse the images. If you happen to live in or near Gainsborough I would love you to pop in and take a look, but please don’t make a special journey.

The exhibition consists of 16 images (it was planned for 22, but the gallery didn’t have enough hanging clips to put all of the images up, requiring an on the spot rejigging of my hanging plan – the joys of exhibiting!). Here are a few iPhone images from the venue to give you a feel for what it is like.

Trinity Arts Centre Gallery

Main Wall

Side Wall

The Curved Wall

Here is a quick montage of some of the images on display

Montage 1

Montage 2


If you would like to go and see the exhibition, the gallery is free of charge. Opening times are;

Monday – Closed

Tuesday – Closed

Wednesday – 10.30 – 3.30

Thursday – 10.30 – 3.30

Friday 10.30 – 3.30

Saturday – 9.30 – 2.30

Sunday – Closed

The gallery is also open for performances – see the Trinity Arts Centre web site or Facebook page for details.

The address is

Trinity Arts Centre

Trinity Street

Gainsborough

DN21 2AL

(There is a car park (free) at the back of the centre but its a bit tricky to find. Drive past the centre on your right and go a few more yards to the roundabout where the big Tescos is and turn right. The road bends around to the right as you go around the corner you will see a row of terraced houses ahead on your right. Immediately after them is the entrance to the car park).

If you ever get the chance to hold your own exhibition, what do you need to know?

The first thing is, don’t expect to make a lot of money from sales. Its a sad fact in the UK that most people don’t value photography as art and as a result are very reluctant to put their hands in their pockets to buy images. If you have tried selling prints from your website you have perhaps realised this. True, some do make a good amount of money from print sales but this is usually because they are a big name and their images are of the very finest available or their name alone makes the images collectable. In fact, expect to make a loss if you hold an exhibition. The costs to hold one are high. For a start, many galleries charge you a fee to exhibit, whether you sell or not. They also take a commission on any sales and this can be from 25% to 60% of the sale price. Now factor in your printing costs (whether home printed or outsourced), framing costs and your time getting it all printed and framed. You also have to make labels for each image (mounted on foamex board) as well as writing an artists statement, designing a poster and producing a price list. You have to drive to the venue and spend a few hours hanging the exhibition on your own, the gallery rarely help in this. Then drive home, perhaps drive back for an open evening (for which you provide drinks and nibbles) and drive home again. Then at the end of the exhibition drive back and take it all down and drive home again! You can see why it is difficult to make a true profit if you factor in all of the costs.

Before you exhibit you need to be clear about what the gallery provides and what they expect you to provide. Some of the better ones will provide the drinks and nibbles, for example. Most won’t. Many expect you to provide all of the packaging for any items sold. if people buy prints or framed prints you will probably be responsible for posting them to the buyers unless the buyer is willing to return to collect them.

You need to be clear on insurance. Some galleries provide a certain amount of insurance cover if works are stolen or damaged. Will this cover your work. If they don’t provide cover, you lose if anything happens to a picture or pictures.

Be clear with the gallery too, on what advertising they do for you. Do they have a website and will they use it to promote your exhibition? Do they use Twitter, Facebook etc. Do they have an emailing list and will they use it to mail their clientele? In reality, many galleries are poor at advertising on your behalf. They leave it all to you, so what is your ‘reach’ as regards advertising? Are you on social networking sites and if so are you suing them to promote the exhibition? Do you blog, use Twitter and have a mailing list? If not, who is going to know about the exhibition apart from your close friends? Do you have the gumption to ring the local newspaper and see if they will run a piece for you? Are you up for contacting the photography magazines to see if they will list your exhibition? This is all additional time you need to spend to make the exhibition a success while remembering you are still unlikely to sell any or many prints!

In smaller local exhibitions you are more likely to make sales if your images are of local scenes. Also seasonal scenes sell better, so if the bluebells are out bluebell images sell better, for example. More ‘arty’ and creative work has a lower chance of selling because it will appeal to a smaller audience, however will, perhaps, command a higher price.

This leads us to the age old question of what to charge. You can approach this one of two ways. Most people add up the cost of the paper, ink, frame and so on and then add a bit on top. This is called ‘cost plus’ pricing. If your frame, print etc costs you £25 and you charge £50 it sounds like a good 100% profit. But remember, the gallery will take a huge slice and you are unlikely to have factored in the true costs I have listed above. In reality, if you are charging any less than £100 or more you are making a crushing loss IN REALITY, whatever you are fooling yourself into thinking. The second method of pricing, is to view your work as art. This takes courage and also lessens your chances of selling anything! Here, you think less of the costs involved and place a figure on your work based on the fact you feel it has, and will increase in, value. You are thinking more like a painter or sculptor. So you may value prints at £250 or whatever. This is a brave photographer who takes this approach as sales become even further apart. Ask yourself, would you spend £100, £200 or more on a framed print from a photographer you have never heard of who is relatively low profile? No? Neither will they. Why? Because they think they can go to Ikea and get a very nice framed print for £20 and then when they redecorate they take it to a charity shop or car boot sale and buy another that fits with the new decor. The English do not value photographs as art in the way the Americans do.

So this all sounds very pessimistic. Why on earth exhibit? Good question. If you are in it just to make money, don’t. However, if you want to invest in your profile or want the world to see what you create and are prepared to take criticism as well as plaudits, it is a lovely thing to do. It does bring kudos and respect from fellow photographers. It is also a starting point. I am sure Charlie Waite, Joe Cornish & Michael Kenna went through these early loss making exhibitions. But because they were prepared to put themselves out there and make the investment in time and money gradually, and because they have real talent, they became more successful. Now Joe has his own, amazing, gallery (one of the few UK photographers who make a success of this) and images by photographers such as Charlie and Joe command good prices and have become collectable in their own right – they have broken the glass ceiling so it can be done. One day someone who runs a ‘better’ gallery may walk in and be impressed with your work and offer to represent you long term (this is the route Michael Kenna has taken – working with galleries for years who display and sell his images all year around as well as holding solo exhibitions on top of these). A publisher may see your work and ask you to do a book. A print manufacturer might be scouting for talent. If we don’t promote ourselves, even at a loss, we will never know. If we really want to make something of our images then we should view an exhibition as an investment in ourselves and go in with our eyes open. This saves us from disappointment.

I hope this helps you if you are considering exhibiting. I am not trying to dissuade you at all. I just want you to know what it is really like. If you accept this it can be a very fulfilling and positive experience and if we make some money too, so much the better.

And to finish, heres another image you can see at the exhibition.

Thinking of Winter


A new era at Doug Chinnery Photography

New Era

Things never seem to stay the same, do they? Look at Mars Bars – they are way smaller than they were when we were kids. Its no different in business. To succeed they need to change and adapt. So its time for change here with my photography business.

Since going full time as a professional photographer in 2011 my business has grown and developed much quicker than I anticipated. As many one person businesses find, the work load can become overwhelming and as a result customer service can suffer. My business background is in sales and marketing management and so I know how important it is to give excellent customer service. I have been having to spend increasing amounts of my time at my desk processing paperwork and answering customer questions which means less time doing what I love, which is being creative. I also have loads of ideas about projects that I want to launch, but time is making this impossible. There are also family issues with being a professional outdoor photographer and workshop leader. It is inevitable that you have to spend quite a bit of time away from home. I love being out in the beautiful places in the UK but I would enjoy it a whole lot more if my wife (and Stan, our dog) could be with me occasionally.

Until now, my long suffering and eternally supportive wife, Elizabeth, has worked part time every day as an administrator in the NHS meaning she has to stay home while I go off on various expeditions. However, this week, she handed her notice in at work in order to join me in the business. This 100% growth in staff has a lot of consequences. It will mean when you contact us, initially your enquiry will be handled by Elizabeth. She is an excellent administrator, well organised and efficient so hopefully you will see a faster response to emails. Any photography related questions she will route to me to handle. It also means I will be running more and diverse workshops as I will be freed from much of the mundane business management. You may get to meet Elizabeth (and Stan) on occasional workshops if she comes with me (and she is promising to make her world famous cup cakes and tea in the camper while we go off shooting too, so we will have refreshments on our return). I will also be free to write more blog posts and articles, to increase the amount of personal photography I do and I will have more openings in my diary for one to ones etc.

This is a big change for us. It is a leap of faith to give up a secure job and source of income, but we feel that to look after our customers in the way we want and to develop the business it is an essential progressive move. So, from mid-September onwards you will find Elizabeth on hand to help you in any way she can and I am here too, to help answer your technical and location questions. It also means that, a la David & Wendy Noton, she may well appear in more of my images as the ‘lone figure in the landscape’ (probably with a blurred dog running around her, too).


My wife, Elizabeth

What should I charge for my pictures?

What should I charge

I get asked this question on a regular basis, so I thought it was time to put up my answer for all to see, to save me typing it each time. This type of information is hard to find as most photographers shy away from revealing anything about current market prices for images. I don’t agree with keeping such information so secret. After all, if a buyer wants an image from a photographer they are not taking business from us. In most cases we won’t have an image which fills the brief. I take the same approach to this as I do to location information and techniques, I like to share information and be helpful, not put up the barriers and protect my own little kingdom. I think the world is a much nicer place when people help each other. In fact, if the market price was better known then companies who buy images would be less able to pull the wool over photographers eyes about the value of their images. The information I do keep confidential relates more to contracts, licensing agreements and so on. But helping keen photographers get a fair price for an image is something I am happy to do.

The first thing to say in answer to this question is that there is no answer. Sorry. There is no ‘price’ that is fixed for images, there are just too many variables and in the end you will have to weigh all of the variables up and quote a figure. Ideally you want to gets  price which is fair to you and is set at a level where the potential customer places the order with you feeling they have got a fair deal too. What you are trying to avoid is being paid a pittance for an image from which the buyer profits hugely at your expense or, conversely, quoting a price which is higher than the buyer is prepared to pay and so you end up with nothing. So, beware. In the vast majority of cases, your image is not worth as much as you think it is. Sorry, but thats a fact. If you lose the sale you end up with nothing. We have to have in mind that usually a buyer can get a similar image from someone else. Few images are unique and most image buyers have an idea of what is ideal for their purpose but won’t pay over the odds for that image if another which is almost right is available at a fairer price. They don’t want to have to shop around because time is money for these people, they have found yours and it fits the bill, but if you want too much for it they will move on to someone else.

It is also vital to say these people work to very tight deadlines and won’t wait three days for you to answer an email or send them a file. they expect you to respond and quote within hours in most cases and to be able to ftp a file to them without hassle in the format they need. When it arrives they expect it to be free of dust spots with no chromatic aberration or over sharpening/saturation. Their standards are very high. If you can’t deliver the image as they need it  it is better to say so straight away. Also, don’t expect payment before you send the file, it almost never works that way. In fact, be prepared to wait several months for payment (welcome to the world of the pro-photographer!). Rarely will you get paid in less than three months and it could be longer. You also have to be prepared to trust the buyer. Our whole industry has to work on trust and you may get let down. We have to send our precious full resolution files off to companies we have never heard of and there is little chance of us ever being completely sure how they are being used. You may have been told  the images was going in to a company newsletter when in fact it is off to China and being printed onto a 100,000 T-Shirts or posters for sale. Happily, though, the vast majority of buyers are honest and only use the image as described and pay in full. You probably won’t get a contract for a single image sale. The only evidence you have of the transaction is the email correspondence. You may get a purchase order, but this is rare. However, in reality, what are you going to do if you don’t get paid. Take legal action? I doubt it. We can’t afford to and often the firm you have sold the image to is on the other side of the world. It is just impractical. We have to work on trust and it usually works out well.

So, what about price then? Firstly, you will get approached from time to time to give images for free. They will tell you that they ‘don’t have a budget’ for buying images for ‘this project’. They will tell you they will give you a credit to your website. They will tell you it will lead to ‘great exposure’ for your images. They will tell you they have other projects coming up and will be in touch to buy images for real money soon. They are lying. I only give my images for free to genuine charities. Other wise I ask them if they are getting paid? If they are getting paid, so should I. The ‘credit link’ to your website is valueless. They have no incentive to remember to do it. If they do put a link in, it will be feint and tiny. No one will notice it. (Ask yourself, how often have you noticed and followed a link beside an image in the press? And if you have, how often have you bought an image from that persons site? Exactly). They will not come back with paid work. You have shown you give images away so they may come back for another freebie but in most cases you will never hear from them again. I urge you, never give your images away for free.

The next type of approach comes often as a result of seeing an image of yours on Flickr. Companies have learned they can trawl Flickr and find great images made by keen photographers who will accept a lower rate than a pro who depends on image sales to pay his mortgage. Thats fair enough in a commercial world. It is very flattering to be approached by someone offering real money for one of your images. The fact they are approaching via a site like Flickr means they are probably after a bargain. For most uses, and by this I mean firms who want to use your shot on their website or in a newsletter, a newspaper or magazine or a smaller firm wanting to use an image of yours for an advert or on packaging or perhaps a hotel wanting to make a print of an image local to them, you will rarely get an order if you quote more than £40 or £50 (that’s GB Pounds) in my experience. Some buyers will walk away if you quote that high. They are looking for a bargain. Bigger companies  and publishers might pay more (and I have made £650 for one image from a London marketing firm, but that was a rare deal). try asking them what their budget for the image is. Don’t be afraid to say you are an amateur and have no idea what to charge but make it clear you want them to feel they have got a good deal but at the same time want a fair price yourself. Most image buyers will give you a hint. If the image is to go on a book cover or on product packaging you can ask for more but in all these negotiations I urge you not to be greedy. A bird in the hand is worth two in the bush. The image sat on your hard drive is making no money and in my mind it is better to walk away with £50 than hold out for £200 and not get a reply to your email. If you really wan tho get the market price and the image is on Flickr then make sure you have Getty licensing switched on on your Flickr account. then you can forward them to Getty who will price the image for you based on the customers usage and they will handle the transaction, but you will just get 20% of the sale fee.

Sometimes firms will offer you a price. If it is fair, take it. It will never sound high enough to you and, indeed, they are after a bargain but if you try and negotiate up they are more likely not to even reply to your email. There is a strong chance they will just move on to the next photographer on their list. They don’t have the time or inclination to mess about. If the offer is obviously derisory then ask for what you think is fair (and again, by fair, I mean fair to them as well as you). They may not reply, but like the guys who want free images, it is better not to be taken for a mug. Just remember, offers over £100 for an image use is rare. Once buyers get to that level they will often prefer to deal with stock companies who have the files in high resolution and give a professional service with no hassle. the direct approaches based on your Flickr stream usually come from firms looking for lower value images and you need to accept a lower fee accordingly.

This is the same philosophy I have about stock photography. Many older pro’s knew a time when they could earn six figure sums from stock photography but have seen this plummet with the advent of micro-stock and other internet based stock sites. They complain vociferously that stock is no way to earn a living. However, if we adapt to the market and realise we can make thousands more images now for selling via stock that those guys working in film could never have done, stock is still a viable way to make a complete or partial living for photographers. The market is now a world wide one too. Access to buyers is so much easier and buyers are buying many more images than they used to, they are just paying a lot less for them. Those images on your hard drive aren’t making any money so I feel it is far better to be making small amounts from them that add up than nothing at all. I get emails from photographers complaining that selling via the Getty/Flickr deal only gives them 20% of the sale price – Getty taking 80% – but I feel that if Getty wasn’t selling those images for me I would be getting 0%. I can’t get in front of the image buyers that Getty can. Those images just wouldn’t sell. As a guide I think you can expect to make £1 per image per month that you have with a site like Getty. get 100 images with them and you could make £100 a month. get 1000 images with ten and you could make £1000 a month. Simple. 20% doesn’t sound so bad when you are getting £12,000 a year from images which are just filling your hard drive, does it? The very difficult part is shooting 1000 images that are so good Getty want them and buyers buy them 🙂

There will be photographers who feel you can ask for more than the figures I have mentioned. There will be some who think the figures are too high. As I said at the outset, there is no right answer to this question. Just remember, your image is probably not unique, these guys want a bargain and the image is usually not worth as much as you would like to think it is and there will always be someone who will do it cheaper. These buyers are not big on negotiation, you often have one email to pitch the price right. Don’t be greedy but be fair to them and you. respond very quickly and don’t give the buyer any hassle.

I hope you get the order because it is a nice feeling to get paid for doing what we love and knowing someone liked our image enough to hand over hard cash.


How do I make a business in photography?

I have just read a superb piece by photographer David Noton in his dispatches column. Davids writings are always worthwhile reading. He is a seasoned pro with a ton and a half of experience and enthusiasm. In this article he tells it like it is and I agree with every word. For those thinking about making a living from photography it should become required reading. My experience as a pro is exactly the same as his.

Well, I say ‘exactly’, but that is not strictly true. My career path has a slight difference, but one I think more should consider.

David came out of the Merchant Navy and decided to go to college to study photography before going on to make his career taking pictures. I have never been to college (except to teach photography, ironically). I came at it from a totally different angle and one I imagine many of you will be approaching it.

My background is in sales and marketing management. My college and university studies are in business management. Photography was, and is, a passion. Then came the inevitable plea from a friend to photograph their wedding and this led to more and more job offers. Five years later I earn the bulk of my income from photography. I consider myself a professional. But I am still not a pure professional. I still work for my old firm. I am extremely fortunate to have a boss who allows me time to pursue my photography business. Five years down the line from that first wedding I am at a crunch point. Do I cut my final ties with the business world and take the plunge and become 100% a photography pro?

Read Davids article and consider the risks and challenges. Photography is a precarious profession. The competition from others far more skilled than most of us is fierce. Those paying for our services are paying less and less each year. As a result I have decided to continue as I am for a while longer. It is so tempting to have a romantic view of being a photographer but the whole subject has to be approached with the view of a hard nosed business man, not a romantic. I have a wife who depends on my and a bank who expects me to pay the mortgage on time. My bank manager is not a romantic!

The income from my company gives a measure of stability. I can depend on it and with it comes a car and other benefits (like holiday pay, a phone, sick pay etc The self employed will tell you how much you should value these things if you have them). The economy is unstable at present and as much of my income comes through my workshops I have to be realistic and realise taking workshops is a luxury for my clients, it is something they can quite easily cut back on if things get tight for them. I have managed to wean myself off of weddings and portrait photography. I don’t enjoy it and while it brings in the cash I am pleased to say goodbye to it (my last wedding is next week!… unless people want to pay me a lot more than I have been charging, weddings are the most stressful thing I do and the hourly rate  all things factored in is the lowest I make).

I think  any of you thinking about a career in photography should consider this approach. Maintain a core part time job, whatever that might be, and build a business in photography to run alongside it. At first the money will help you buy kit and get set up. Then it will help pay the mortgage. Maybe one day you will feel secure enough to take the plunge and cut loose altogether and that will be great, but if not, you can do what you love without much of the stress and worry being a full time pro brings. Sure, you can’t say you are a true ‘pro’. Real pro’s will always view you as ‘not quite the ticket’. But they will envy you. You will sleep a little better at night.

Remember, most photographers fail in their businesses. They fail, not because they are poor photographers. Rather they fail because they can’t run a business. As David forcefully writes in his article, you need to be able to sell yourself. Few people are able to cold call. Few can take the rejection. People putting phones down on them. Buyers telling them to get lost or that their work is rubbish. Few are able to cope with boring assignments making ugly things look wonderful. I have had to photograph gas valves. Palletts. Sewers. The romance of photography kind of evaporates when you are stood up to your knees in raw sewerage and then have to plunge your beloved carbon fibre tripod down in to it too… and then try and take images which make it look interesting. Those mornings you imagine standing on some stunning beach photographing the sunrise for money are very rare. More often than not, especially in the early days, you will be on an industrial estate somewhere trying to show enthusiasm to your client whose life is absorbed by magnetic hinge design.

There are few photographers who make it to David Notons position in life. He must earn a considerable amount each year and he gets to go places we can only dream of, but he openly admits he doesn’t feel secure and he now has nine people on his team being at least partly dependant for their financial lives on his shoulders.

I have no doubt I will be taking the big step in the near future, but I won’t do it until I am sure the time is right. I want to do it now. I am a romantic at heart, but I have to be hard-nosed right now. For now having the support of a second income is the best solution. I am patient. I can wait. If you are thinking of building a photography business in whatever field of photography you are keen on, I encourage you to take a similar approach. Have a second source of income until you know the photography business is right for you and that you can survive on what it brings.

How do I re-size images for Alamy?

Many people how to get their images prepared for Alamy, especially their request for 48mb images. It is a bit confusing, so here is my method using Photoshop – but if you use Elements or some other software it may help you too.

The file you upload doesn’t have to be 48MB in itself – but has to be able to be converted by their customer to a 48mb TIFF.

This means you have to upscale the size of the file yourself before sending it as a jpeg.

To do this – Make sure you shoot in RAW (although jpeg, may work – it’s just I always shoot in RAW) and work on the image in Photoshop in 16 bit colour (which you will be automatically if you have opened the RAW file in Photoshop via Lightroom or Canon Camera RAW software) , cloning out dust, tweaking the levels etc (For stock libraries, don’t saturate the colours or do any sharpening – they want their customers to be able to do this to their own tastes/needs).

Then, when all is done, click the Image menu and select Image Size

In that dialog box make sure all three tick boxes are ticked and that ‘Bicubic Smoother’ is selected in the drop down box. Set the resolution to 300 pixels per inch (240 pixels minimum)

In the top width and height windows make the longest edge (depending on if the image is portrait or landscape orientation) around 5000 pixels – you will need to play with this figure to get the right length for your camera – the aim is to get the pixels dimensions figure at the top of the box to 96mb or above – but get as close to 96mb – as the higher you go the more chance there is of the quality deteriorating. Click okay.

Now click the Image menu again – select mode and select 8 bits

This will halve the file size (from 96mb to the magic 48mb). Now save in the normal way as the highest quality jpeg. The jpeg will vary in size depending on the type of image, how many colours in it etc and could be 8mb up to 16mb or more – but probably never above 20mb. The important thing is Alamy can now convert it back to a 96mb TIFF or PSD file for their customer.

I hope this demistifies the process for you?

And I haven’t forgotten I said I would do a tutorial on adding titles to your borders in Photoshop – it’s just this question came up from one of my students and as I had written it all down for him, I thought you could use it too.

Happy shooting!

How do I put a watermark on my photos?

I get asked this a lot by students so here is a post to provide the answer – it works in Photoshop or Elements (and the print and export modules of Lightroom have a custom function to add one also).

Watermarking your images is not a foolproof way to stop people using them without your permission. Some will ignore it and use it anyway. Others will spend a few minutes in Photoshop and remove it – with basic cloning skills it is usually not hard to do.

What watermarking your pictures does do is put off some who would steal your images and just emphasizes that it is against your wishes.

More effective is converting the image to 72ppi and reducing the size to say 1000 pixels on the longest side before uploading them. This makes the image unusable in any printed form. It will still display perfectly on a screen as these work at 72ppi – but printing will be useless. If you are using Flickr to display your images you can also switch off the ‘all sizes’ option in your account preferences which will make it much harder for people to steal your photos.

Anyway, on with the tutorial. There are two ways of doing this – by creating an Action or by making a Copyright brush. I tend to use the brush method.

1. In Photoshop create a new blank document. (click file, new). This should put a blank white page in front of you.

2. Next create a new blank layer

3. Select the Type tool to type your text – in my case I would then select a font and font size and type – Copyright 2010 © Doug Chinnery – (you can hold down the Alt key and type 0169 on the number keypad and this will inset the copyright symbol automatically)

4. When you are happy with it select the Rectangular Marquee tool by pressing the M key and drag a rectangle around your line of text.

5. Then go into the Edit menu and select ‘define brush preset’. When the dialog box opens give your brush a name (not a name like ‘Dave’ or ‘Debbie’ but call it Copyright Brush for example.) Then click OK.

6. Now in your brush presets drop down box you will find your copyright brush at the bottom of the grid. It will looked all squashed up but don’t worry, it will display correctly when you use it.

7. To use it, open a photo you want to copyright and add a new blank layer to it.

8. Select either white or black as your foreground colour – press D to set black and white as the foreground and background colours then press the X key to swap them if necessary. I use white mostly unless the image is very bright so white won’t stand out, then I use black.

9. Press B to get the brush tool selected and up on the options bar drop down the brush toolbox and click on your copyright tool brush at the very end of the set.

10. Use the [ or ] keys to make the brush bigger or smaller

11. Click on your image where you want the copyright info to be.

12. The in the layers palette on the blank layer with your copyright brush info use the opacity slider to adjust how the strong the brush is – you can really fade it out so it isn’t distracting or have it more prominent if you prefer.

13. When you are happy, flatten the image.

14. Remember to save the file with a different name so it doesn’t overwrite your master file – otherwise your original file will have your copyright info plastered across it – not good if you want to print it and hand it on your wall!!

I hope this info is helpful?

If you prefer to use Actions then record the above being done but instead of creating a new document just put a blank layer on a photo, type your copyright info, and set the opacity, flatten the image and then stop the action recording. Then it is just a case of running the action on future images – the only problem with this is that it will put the copyright info in the same place and at the same opacity on every image and sometimes this doesn’t look right., but the choice is yours.

What should I charge for my photography?

This is a big question for all photographers, pro’s and enthusiasts alike.

The answer is not simple. No one can tell us what the answer is. we have to decide for ourselves. However, there are some things to consider before deciding.

To simplify things, lets take the example of selling prints via our website. this is something many photographers want to do and setting up a website is relatively simple.

First, a sobering fact. few photographers sell more than a few odd prints A YEAR through their personal website. Fact. In fact, for those who pay Clikpic or a similar company for hosting their website and providing the website template, few will even recoup the websites costs. Some will, certainly. (I do), but most won’t. There are tens of thousands of fine photographers out there doing the same thing and the chances of someone finding your site, let alone browsing it long enough to find an image the like so much that they are prepared to send you money for it are slim. Sorry, but that’s a fact.

But lets say you want to give it a go. (And I encourage you to do so. I sell through my website and make a small part of my income through direct print sales but the website has far greater value to me in becoming my online brochure to advertise my style and abilities to other potential customers. For me, that is where the value is – in the work it generates).

So, you spend some time building your website and launch it. But the big question is, ‘what should I charge for prints’?’.

There are several ways of looking at this. If you are to look just at what a print actually costs – say a pound or two for something A4 size, three or four pounds for something a bit bigger and add on a couple of pounds for postage, your direct costs are very low. Lets say, ten pounds all in. So do you double it. 100% is a good mark up, surely?. However, sadly many potential customers are already dropping out at the £20 price point. They can get a landscape or flower photograph from Tesco for less than that, framed and ready to hang. Is yours any better in their eyes? And they still have to buy a frame. Of course, yours is unique, not mass produced, but most buyers don’t see it that way. In reality, £20 is hardly worth all the hassle to you of sending the jpeg to a lab for printing, then making up an receipt, keeping accounts, packing the image up and going to the post office to post off and so on and yet already many buyers just won’t pay it. Start charging £30 or £40 a print and buyers laugh and click off to a site which charges £10 for a similar print (trust me, there are thousands of photographers selling good, not great, images at £10 or less)

You also need to factor in that this price model doesn’t take any account of the thousands of pounds you have paid out for gear and computers as well as software plus the travel expenses in getting to the location perhaps several times to get that wonderful light. It may be nice to get the recognition of selling a print and it may be okay to make a few quid but be under no illusions, you are making a MASSIVE loss selling using this model.

If you do factor in your real costs for gear and travel etc then there is no way to price prints sensibly. You would be charging many hundreds of pounds per print.

This is the model I have been using for the last three years. I am having to re-evaluate my approach at the moment because of the points I have just made.

The alternative is to go exclusive. This is the brave step. If your imagery is VERY good and you have absolute belief in its value as art then you can forget the actual raw material cost of a print and go down the art pricing model.

This takes account, not of cost, but of value. This is where what your images are ‘worth’ comes in. if someone truly loves an image or images of yours, how much do they love them? Do they love them enough to INVEST  in them. To stake some of their hard earned money in something they feel they will treasure for years, pass on to their loved ones, in something which has true value.

Buyers willing to do this are few and far between. If you think getting the £20 a print customers onto your website is hard. Getting buyers who will pay £100, £200 or more for a print is far more difficult.

This is where you need to build a name for yourself, a reputation, and you need to develop your own style. It is no good going to Durdle Door and Bamburgh Castle and making a superb image in great light but which is essentially no different to thousands of other equally technically good images of the same places in great light which are on sale on thousands of other photographers websites using the £20 a print model. There is no reason to buy yours.

If you can build a reputation like Charlie Waite, David Noton or Joe Cornish you can charge hundreds of pounds per print on your name alone. Check out their websites and see what they charge! Those who get such a reputation are as rare as, well, as rare as Charlie Waite. Almost none of us will make it.

However, it is possible with masses of hard work, loads of networking, hundreds of fruitless dawns and withstanding loads of rejection to gradually carve out a lesser reputation than the ‘greats’ but a reputation nonetheless. With this kudos comes value. Your prints will acquire a value and you can then learn what that value is and price to it. If you can charge £100 or more a print then things are becoming more realistic from a business point of view.

Some will add perceived value by releasing limited editions and short print runs. I have doubts about this model in many cases, but that is another blog topic.

You can add value by framing the print, but you have to be prepared to organise this and handle all the variety of demands buyers will start to place on you for certain coloured wood frames of different thicknesses and different mount colours and can you do non-reflective glass and can you send it to my sister in Canada, oh and can you do it in two days because we forgot her anniversary and can you…. Customers at this level are paying much more and so demand much more. Are you prepared to deliver this kind of service? What does delivering this level of service mean to you in terms of cost. Cost in both cash terms and in terms of your time?

I am sorry there are no clear answers here, just facts. Cold, hard, facts. If you do decide to go for premium pricing because you feel your images are truly worthy then you need to back this up with premium service, superb quality prints on archival materials delivered with premium packaging. It is no good sullying the image you are building with shoddy communications and packaging. Everything has to reflect the fine art photographer image you aspire to.

A lot will depend on your needs. Are you just looking for the warm glow of knowing someone likes your image enough to pay you a few bob for it and perhaps earning a few quid each month to keep you in memory cards? Or Are you looking to go semi-pro? Not giving up the day job, but wanting to run a small business alongside your day job to bring in a serious contribution to kit or mortgage? Or is your plan to go pro? become a full time photographer? The answer to this question will help you decide on the pricing route you take.

I wish you well in your decision. Whatever that is, why not consider joining me for my ‘making Money From Your Photography’ workshop where I will help you do just that, whatever model you decide to follow? Get in touch with me for details via the ‘contact us’ page on my website.