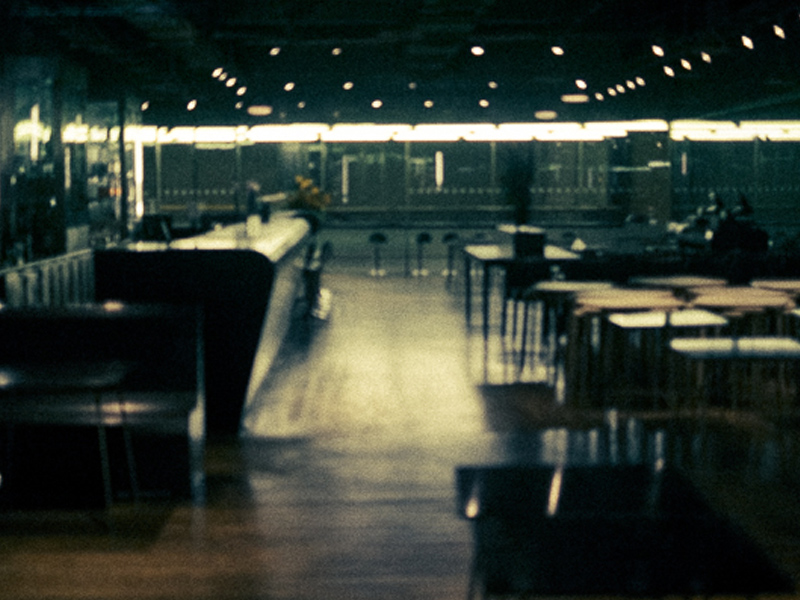
Category: Photography Workshops

Time to Say ‘Goodnight’


For the last five and a half years I have been running all night photography workshops in London with my good friend, London Black Cab driver and fellow Light and Land leader Terry Gibbins. These led to me developing a winter version based around monochrome night photography and Victorian London with amazing photographer, workshop leader and another good friend of mine Charlotte Gilliatt. On this workshop we also teamed up with Terry and another cabbie, Bobby Pinto to provide the bespoke luxury transportation around the Capital city at night.
 
Both of these night workshops have proved to be incredibly popular right from the beginning, so much so that they have been filling from an email shortlist and have not made it on to my website. Currently over 150 people are waiting to go on the workshops, which is a testament to Charlotte, Terry & Bobby and the wonderful locations we cover through the nights. As far as I know, no one else offers an all night workshop in London with bespoke London cab transport from pick up at the station to dropping off in the morning, with a ratio of just four clients to one teacher. Many of those who came on the workshops have won awards and competitions with images that they have taken on the workshops, as well as having them published in magazines and exhibited.
 
However, five and a half years is a long time. I have done, I think, around a hundred workshops and so, for me, it is time to call it a day and move on to new challenges. But I am delighted the concept is going to continue in the safe hands of Charlotte and Terry. They are also planning new locations too, which is exciting for those of you who have done the workshops before and would like to do them again but fancy something different.
 
I am going to hand over to Charlotte my email list of all those who are waiting for a place on the workshops so she can keep you up to date with places as they become available (but if you no longer want to hear of dates you can always unsubscribe from her mailing list at any time). I want to thank all of you who have been with me on these workshops. I have really enjoyed my nights with you in the city and the adventures we have had. I know some of you have enjoyed them so much you have been with us three times. I hope you get to go again with the new team to new locations.
 
I am still going to be running my own workshops, it is just the night workshops that I am pulling out of. I will keep you up to date with all my new plans through Twitter, Facebook, my newsletter (if you subscribe) and here on my blog. If you would like to sign up for the shortlist to hear of new dates for the night workshops, which Charlotte and Terry will be starting again in April and running right through the summer, as well as new dates for the winter ‘Gaslights and Alleyways’ workshops, please go to THIS PAGE on Charlottes website.
 

An Apology

Apology

leaf-scan001-edit-edit-edit-edit-edit

I am writing this blog to apologise. I am apologising about not replying.

You see, almost eleven years ago, when I started teaching workshops I used to say to my students, “if you have got any questions after the workshop, just drop me an email” and this was fine. I enjoy helping people overcome problems they have with their photography, helping them select the right gear or giving some help on good locations to try, so it was no problem to get a couple of emails a month with questions and to answer them.

Hard Proofing Techniques – A Practical Example

Chris Friel
©Chris Friel

©Chris Friel

Today I had a client order for one of Chris Friels prints (the image above) to prepare and thought it would make a good subject for a blog post on hard proofing techniques.

Chris’s images can be very hard to print. He uses strong colours with low contrast and they look best printed on very matt paper. My paper of choice for most of his work is Fotospeeds superb Platinum Etching – a heavy-weight matt paper with a gentle texture which gives landscapes and many other types of images a beautiful feel and ‘presence’. Matt papers do bring with them challenges though. The matt surface reduces the gamut of colours they can display and so it can often take some work to translate what you are seeing on your screen on to the paper, even with a fully colour managed workflow. You can check out Fotospeeds papers on their website HERE – they are a great company to deal with.

Autumn in Snowdonia – Trip Report

Snowdonia

20141105-_DSF1071-Edit

I have just returned from a three day trip to North Wales where I was running a workshop in the Snowdonia National Park. Our base was the fabulous Tan-Y-Foel guest house where we were cared for perfectly by owners Chris & Maria. (If you are planning a trip to Snowdonia I can highly recommend staying at Tan-Y-Foel, the location is breathtaking from its elevated position set away from the road in above a beech forested valley with views to the mountains. The rooms, food and service could not be better and being just outside of Betws-y-Coed it is in the perfect place to explore magnificent Snowdonia – have a look at their website, which will be updated in early 2015 – http://www.tyfhotel.co.uk ) Chris and Maria kindly reserved the whole property for us so we had it to ourselves and this meant we could choose breakfast time to fit with our sunrise shoots – perfection!

My first experiences with Fotospeed papers & lessons learned about soft proofing

soft proofing

"After Hours"

I have long used Ilford Gallerie Gold Fibre Silk as my paper of choice for my monochrome prints and Hahnemuhle 308 Photorag for most of my colour prints. I was happy with the Ilford, but the Hahnemuhle was causing me issues. Despite being a beautiful paper, with a lovely texture, it frequently got jammed in my Epson R2880 printer or picked up roller pinch marks. I also found, despite being air blown before printing, that it would shed fibres after printing, leaving white areas on the image. It is an expensive paper and these frustrations got the better of me.

Working for Light & Land with Charlie Waite and his team of photographers I saw how they used Fotospeed papers. I went to see Charlie’s exhibition, currently on at the National Theatre in London (If you haven’t been, go, it’s wonderful – allow an hour to enjoy it) and he had printed it all on Fotospeed Platinum Etching 285. I was stunned by the prints, being sure the paper choice had enhanced Charlie’s sublime photographs. I was also aware of Joe Cornish high regard for the Smooth Cotton White 300, printing his work on this paper. This encouraged me to investigate their products further.

My first purchase was Platinum Etching 285. From the first image I printed I was hooked. It ran smoothly in the printer without shedding fibres and the colours and tones were a near perfect match to what I was seeing on my screen. The soft Matt texture was ideal for the style of the image.

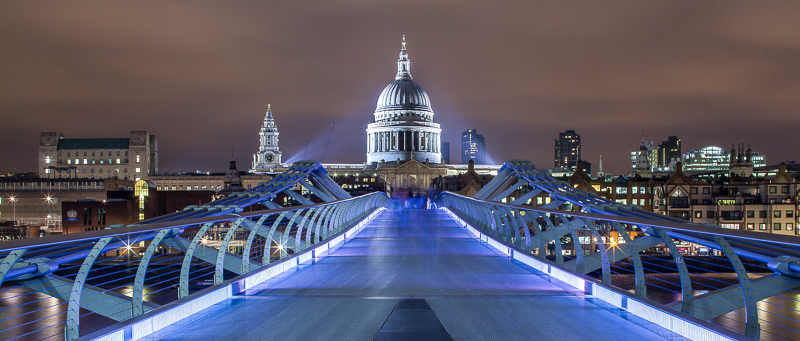
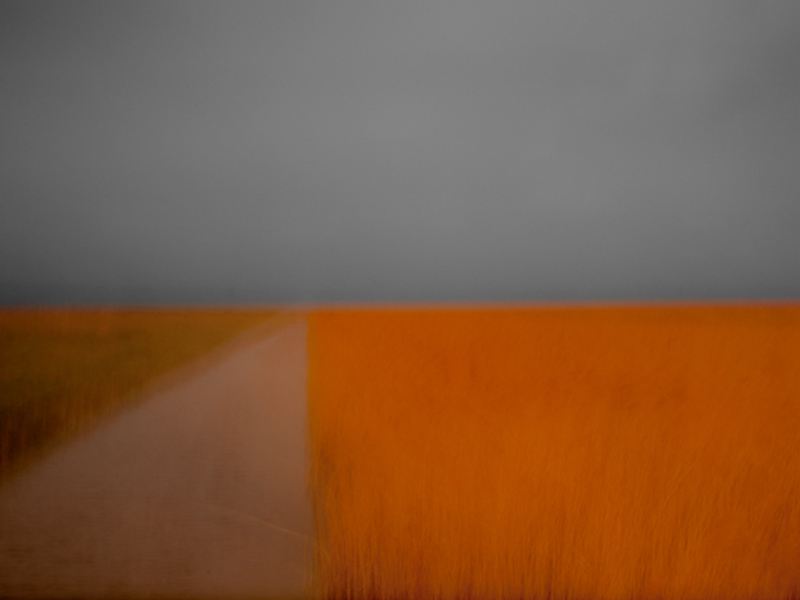
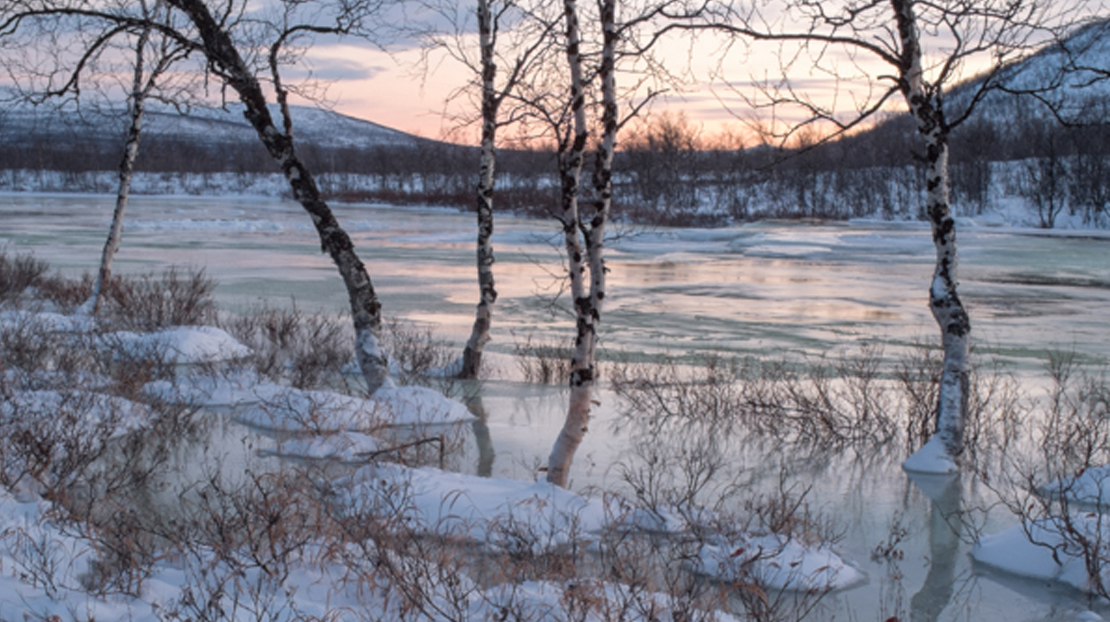
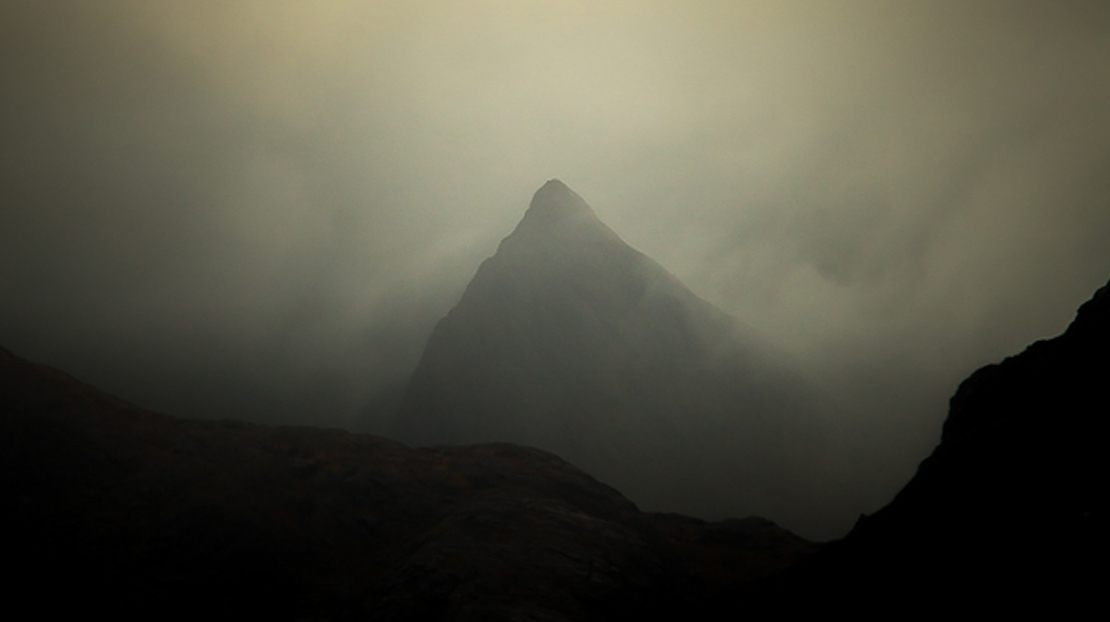
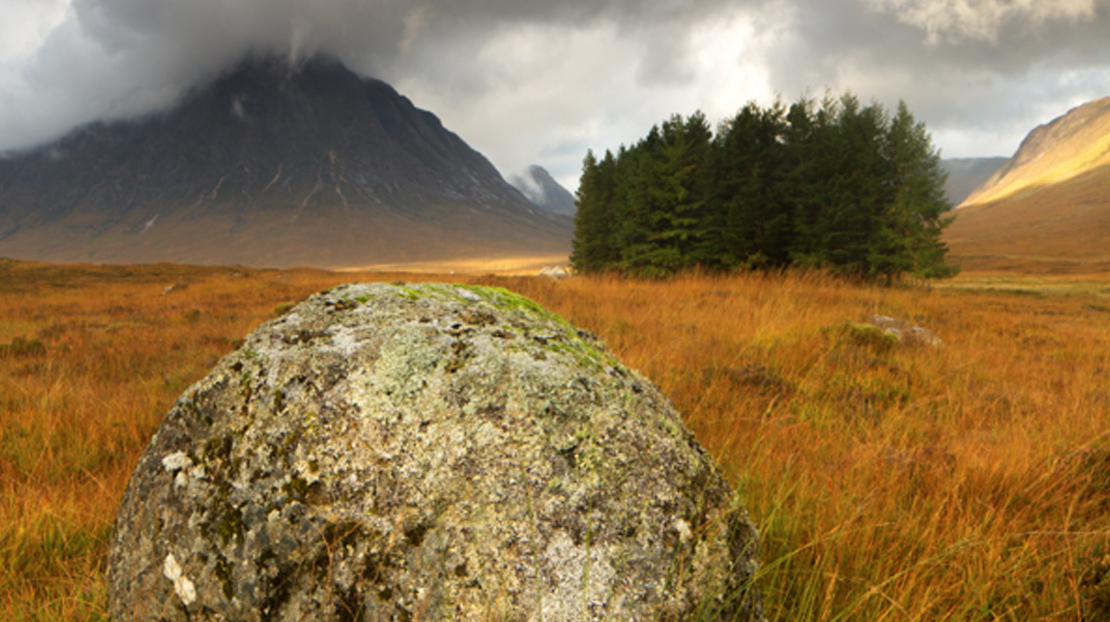
The above image "After Hours", printed on Fotospeed Platinum Etching 285

My next print job with Fotospeed papers was more important. Not only was it for a client, rather than a print for myself, but also the images were Chris Friels, rather than my own. I always feel a greater sense of responsibility printing the work of another photographer, trying to realise their vision for the image.

If you are familiar with Chris’s work you will know he uses extreme dark tones and some intense colours. This makes them challenging to print. This job proved to be true to form. The first image I tried was in grey tones with a very slight magenta/lilac tone. This I felt was the easiest of the three, to get me started.

I always print from Lightroom, loving the controls there. I had no worries over the colours so didn’t soft proof the image and went straight to print. It came out bright magenta. And I mean BRIGHT! My immediate thought was a cartridge had run out, throwing off the colour balance. I replaced three cartridges showing low levels and hit print again. Same result!

mmm... Magenta!

Now I was perplexed. I soft proofed the image but apart from an issue with some deep blacks it wasn’t showing any issues. Then I realised I hadn’t downloaded the ICC profile for the Platinum Etching paper from Fotospeed, I had it set to Hahnemuhle 308 PhotoRag. (I’m ashamed to say) That must be it! I remedied that, hit print again. Same problem. Now I was worried. What was going on.

iPhone shot of my computer screen to show what the image SHOULD have looked like!

I decided to follow Fotospeeds printing instructions (Typical man, only refer to the manual as a last resort). Their instructions apply to Photoshop so I decided to give it a try and did to the letter what they recommend. This got to the root of the problem. It reminded me of a bug I read about somewhere. I had 16 bit output checked in my original prints as I am usually printing from tiffs. However this particular image of Chris’s was shot as an 8 bit JPEG. The Fotospeed instructions showed the 16 bit option turned off, this reminded me of the issue so I deselected it. The print was perfect. Lesson learned.

The three stages - On the right the magenta madness, in the centre an improved print but still a magenta cast. On the left the final print (wrapped for dispatch in archive sleeve - but you can see the colours are matching the original image).

I was on a roll now and moved to the second image. This image was made up of extreme colours so I soft proofed in Photoshop. This showed that almost nothing in the image was printable!!! I tried my usual soft proofing techniques to pull the colours into gamut but they were so far out it ruined the image. The colours differed too much from the original and went very flat, losing vibrancy. Not an option. So I tried changing the rendering intent from Perceptive to Relative (see this post for more details on rendering intents) but this didn’t help either.

Hard to see from this iPhone shot but the left image is printed on Platinum Etching 285, a matt paper (with a beautiful texture but narrower gamut capabilities), the print on the right which is on Platinum Baryta was able to cope with the bright, rich reds in the original file. The Etching muted these to a duller more burnt orange with less vibrancy. Showing that paper choice can affect the appearance of the final print colours & contrast.

My next option solved the problem. I switched the paper (And the ICC profile) from Platinum Etching 285, which is a matt paper, to Fotospeeds Platinum Baryta. Why did I do this? Because matt paper is only able to display a very limited range of colours (a gamut of colours) than lustre papers. Gloss papers can display an even wider colour gamut. So if ever you have issues getting the colours right on matt paper, try moving to a lustre or gloss paper (remembering to switch ICC profiles in your print software). Often this will fix the issue. Fotospeeds Baryta paper had a gamut wide enough that I didn’t have to make any colour adjustments in soft proofing. The image printed beautifully.

Then on to the third and final image, another with extreme colours. This time, using the Baryta paper I soft proofed with no issues and it printed first time.

This whole process taught me several lessons. Firstly, I need to always check I have the correct ICC profile loaded for the paper I am using. Secondly, to use soft proofing to check the paper can handle the colour gamut. If the gamut is an issue, to make changes in software or to move to a different paper with the ability to display a wider gamut of colours.

The big lesson for me, though, was how much easier it was to work on the image to get it right for printing in Photoshop. I hate to say this. I have always loved printing from Lightroom and it does print beautifully. I also like how easy it is in Lightroom to set up page layout templates.

However, I found Photoshop is much better at making colour tweaks to an image to pull colours into gamut without spoiling the whole image. You can be very targeted in the colour ranges you work with, whereas Lightroom doesn’t allow you to be as precise. I Also preferred the way Photoshop displays the image with the papers ICC profile applied to simulate the print. The other thing I liked was sizing the print in Photoshop. So I have moved from being a die hard lover of Lightroom for printing to someone who will use Photoshop for tricky prints in future. I guess it is all about personal preferences and also using the right tool for the job. I definitely think that for difficult prints, Photoshop is the tool to use.

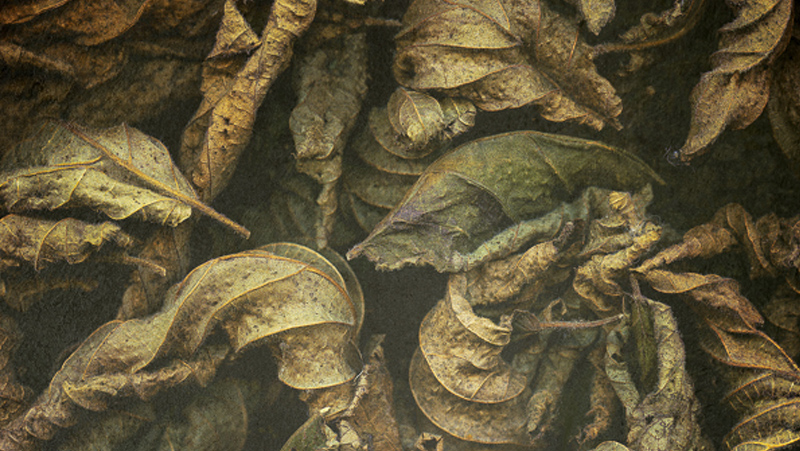
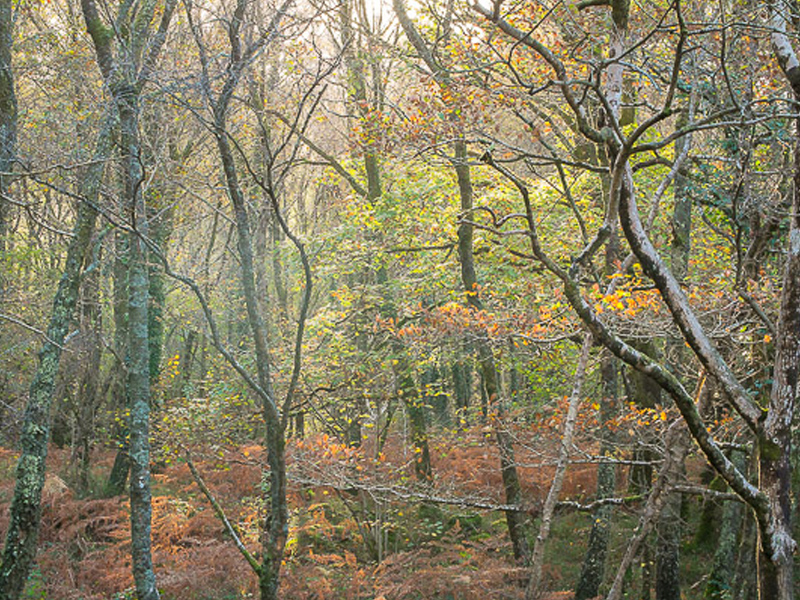
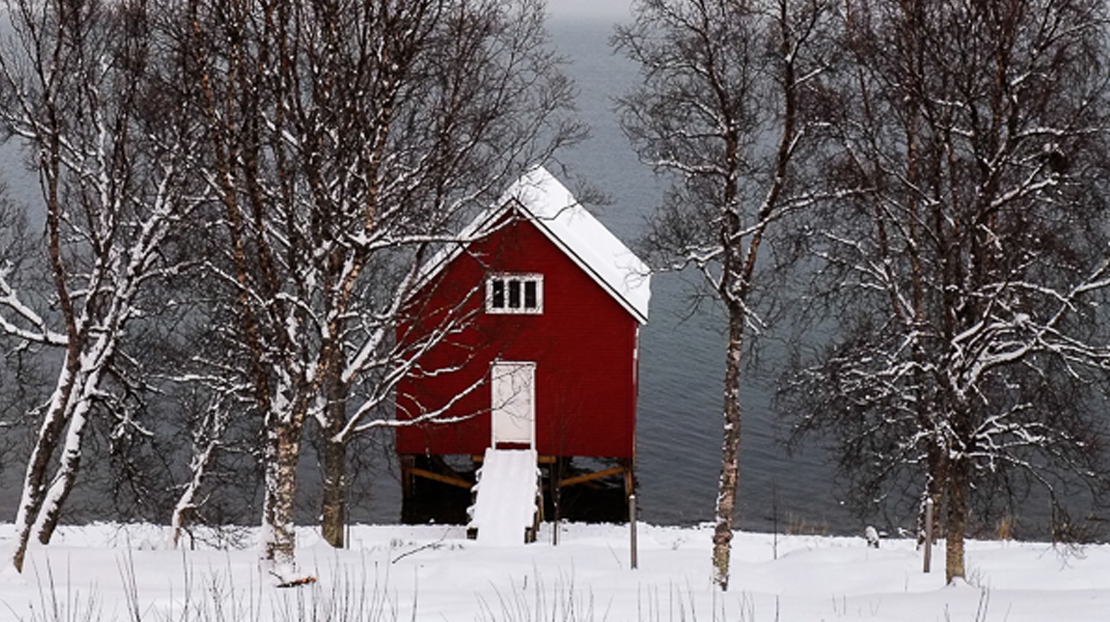
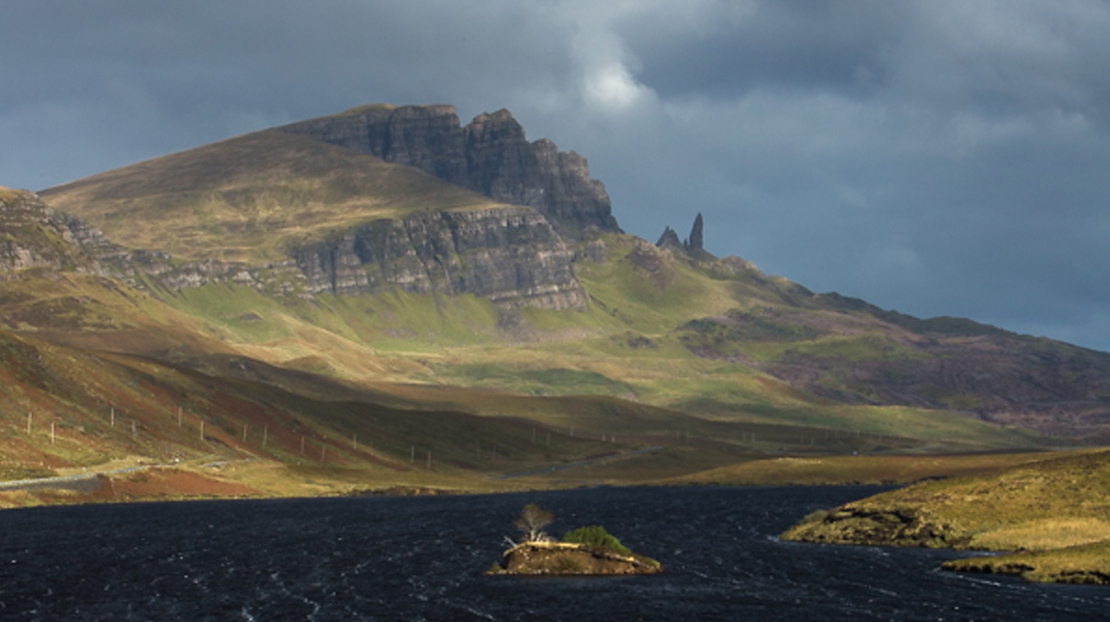
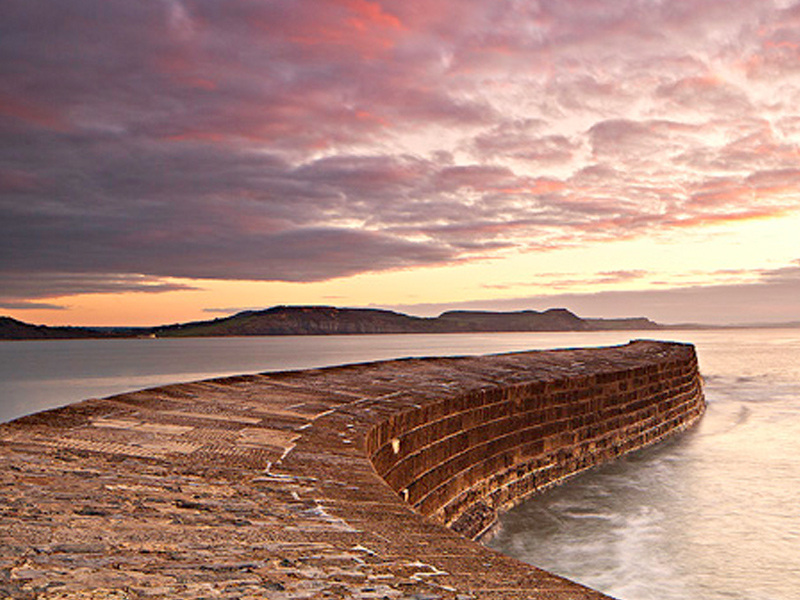
Printed on Platinum Etching 285 - Beautiful subtle tones

(One nice feature I will miss from Lightroom if I soft proof in Photoshop is something the soft proof virtual copy does for us. When we soft proof in Lightroom it offers to create a virtual copy if the file with the soft proofing adjustments, so that our master file remains unchanged. A great thing about this virtual copy is that it embeds the ICC paper profile into itself for the paper we are proofing for. Then when you print it automatically communicates this profile to the printer along with the rendering intent you proofed for. This is clever stuff and a benefit of soft proofing in Lightroom)

A lesson I have learned, which explains a lot, since doing this print job concerns the visible gamut warning in Photoshop and Lightroom. I have always used this thinking it was an accurate warning of colours which the printer would be unable to reproduce on my chosen paper. However, I must admit, I have often found (and told my students) it often is best to go ahead and print even if the gamut warning is indicating an issue with some colours as the resulting print is often fine. I put this down to the rendering intent doing a good job at replacing those out of gamut colours with close replacements. However, further reading has revealed that the gamut warning system used by Adobe is rather old and predates ICC colour management. It was designed for a graphic arts based workflow rather than photography and modern fine art printers actually will have no issues rendering those colours. What is actually of more importance now is the contrast ratio of monitors compared to papers. Many monitors are set to a contrast ratio of 500:1 or similar whereas gloss paper is closer to 200:1 with matt and lustre papers running even lower than that. Soft proofing should focus on correcting contrast issues and tweaking colours to bring them back to a correct state in soft proofing with the gamut warning turned off in most cases. I am going to try this and see how I get on.

I have now switched my studio over to using the Fotospeed range of papers exclusively because I have been so impressed with them. I will blog about each type I use as I put them through their paces and I am pleased to be working closely with the guys at Fotospeed too. They are a long established company and really know their stuff.

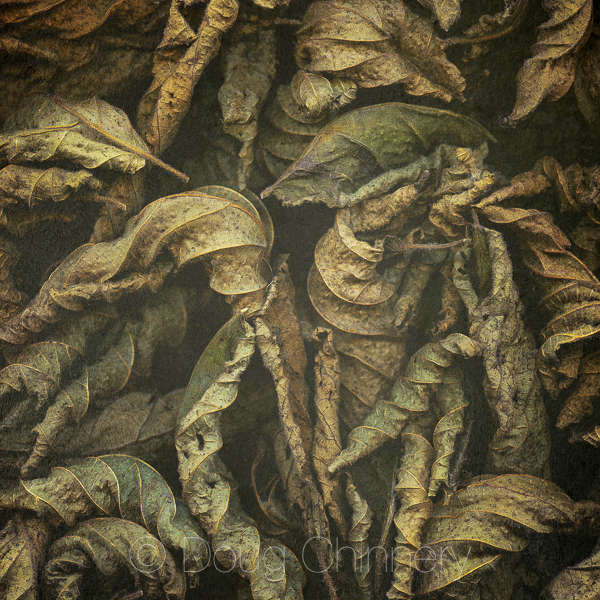
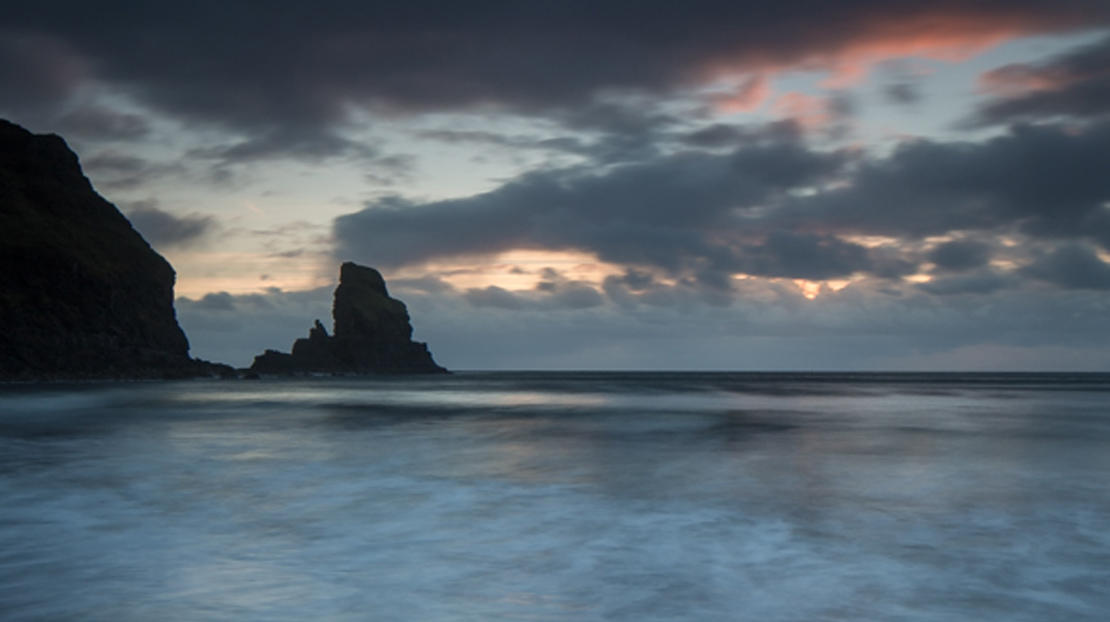
Another printed on Fotospeed Platinum Etching 285 (and its an ICM image so its supposed to look like that 🙂

Soft proofing is a big subject and will make a huge difference to the quality of your prints. It’s one of the things I cover in my Lightroom and Photoshop workshops and will be dealing with on my print workshops with Master Printer, Jack Lowe. The next Jack Lowe workshop is fully booked but if you would like to go on the no-obligation short list to hear of future dates, please just click THIS LINK TO EMAIL ME.

I am pleased to say that from now on in my Lightroom and Photoshop workshops (which I hold in my home studio) you will go home with a free print on one of Fotospeeds beautiful papers (perhaps one of mine, or one of your own) along with the knowledge of how to make beautiful prints of your own work too.

You will find available workshop dates ON THIS PAGE or, please CLICK THIS LINK and drop me an email if you would like more details or would like to book a one to one session with me.

You can find full details about and buy Fotospeed papers HERE – I recommend you give them a try.

The Fuji X-Pro 1 – How did it perform in the Arctic?

fuji x pro

Fuji X-Pro 1. 18-55mm Lens at 18mm, f22 for 30 seconds with Vari-ND filter & tripod. ISO 200

I recently had the chance to take the Fuji X-Pro 1 with me on a workshop I was co-leading up above the arctic circle in the far north of Norway. I thought this would be an ideal opportunity to see how the camera performed in extreme conditions. I also had with me a newly delivered 23mm f1.4 Fuji lens to try out too. The images in this article were all made on the trip and all but the aurora shot are jpegs straight or virtually straight from the camera. If you followed my trip reports from the expedition you will have seen most of these images before (sorry!), but the aurora image with the 23mm lens is new, as are one or two of the others.

The idea of testing the lens here was to see how it performed shooting the “Northern Lights”, the Aurora Borealis, if we had a chance to see it. In theory the fast f1.4 aperture would make it ideal but I was also interested to test the sharpness of the lens and also to get a feel for its width, which although 23mm works out at about 35mm as a full-frame DSLR equivalent.
 

Fuji X-Pro 1, ISO400, 18-55mm Lens at 45.4mm, f6.4, 1/18 sec, Tripod

My main concern before setting off with the camera was battery performance in the extreme cold. I have found with the X-Pro 1, as many others have, that battery life is much poorer than I am used to with my DSLR. Of course, the battery is physically much smaller and the camera is fitted with a great electronic viewfinder (EVF) which must use quite a bit of power, so there are reasons behind this.

My frustrations with battery life are compounded by the fact of how difficult it is to change batteries quickly. I have the extended grip fitted to the camera which I find helps me with handling the camera and this has to be removed for every battery change. But, when shooting landscapes I also have to fit a quick release plate for my tripod and this requires a screwdriver (or coin) to remove it and this is also required to change the battery. The way I work I can easily go through four or more batteries in a days shooting and so this stripping down of the camera every time gets very tiresome. You can imagine how much I was looking forward to the drop off in battery performance in the minus 10 to minus 20 degree temperatures we were expecting.
 

Fuji X-Pro 1, ISO 800, 55-200mm lens at 156.1mm, f8, 1/170 sec, handheld

So, how did the batteries perform? Surprisingly, quite well. In fact, I can’t say I noticed a deterioration over what I am used to. True, when shooting in such cold you tend not to shoot for extended periods, however the camera is cold, even in the bag. But I didn’t have to do more battery changes than normal. For that I was thankful.

How did the camera perform? There were a couple of issues. Bear in mind that at times I was using it at minus 20 degrees and often at well below freezing. The first issue I discovered almost straight away was the Fn button on the top of the camera which is programmable to whatever function you choose (I have it set to allow me to quickly change ISO) became “sticky”. To be honest, as it happened straight away I thought at first I had perhaps damaged the camera during the flight as the body had been in my pocket (with no lens attached). However, when the camera warmed up again later in the hotel the button returned to normal action. The next day, back in the cold, the stickiness returned. I found kit still worked but I had to press it carefully and be patient with it.
 

Fuji X-Pro 1, ISO 200, 18-55mm lens at 34.3mm, f8, 1/40 sec, tripod

This button issue later extended to the AF button on the rear of the camera which allows you to select focus points for the auto focus system. In this case it went beyond sticky and refused to work, but again returned to life on warming up in the hotel.

Apart from these two issues the camera performed flawlessly in the extreme conditions we worked in and produced some images I am very happy with.
 

Fuji X-Pro 1, 18-55mm Lens at 23.3mm, ISO400, f8, 1/25 sec, handheld

What I would say, however, is, that I found myself (contrary to what I have been doing here in the UK since buying the Fuji) reaching for my Canon 5D mk3 first. The Fuji has been my camera of choice since I bought it second hand a couple of months ago and I absolutely love it. But after a couple of days I realised I was favouring the Canon unconsciously over it, whereas since buying the Fuji I had not used the Canon at all except for a commissioned shoot which required it. I analysed why this was and realised that the Canon was much easier to use in the cold. I was wearing a pair of thin Merino wool inner gloves and with the Canon I could keep these on and operate the camera easily. However, the Fuji buttons required I take the gloves off due to the size and positioning of the buttons.

I also found the physical size of the Canon easier with gloves. So it was nothing to do with image quality, but rather the practicalities of usability in the arctic weather. I was also conscious of the button stickiness. The Canon had zero issues. It is a testament to the build quality that it shrugged off minus 20 easily. To give you an idea of what these temperatures are like to work in, my camera bag (and I) were getting frosted up at minus 20. Oh, and I didn’t change a battery in the Canon for the whole trip.
 

Fuji X-Pro 1, ISO3200, Handheld, f5, 1/55 sec, 18-55mm lens at 18mm

So, conclusions on the bodies. If I go to the arctic again the Fuji will stay at home (although it grieves me to say it). It is not ideal for these conditions. If it was my only camera it can handle it, but it is starting to show stress. I would, next time, take the 5Dmk 3 and and mk2 body as my spare body. However, on trips to warmer locations abroad, the Canon will be staying at home and My Fuji will be my travel camera and if my wife, Liz, will let me, her XE-2 body will be my spare body).

Now, thoughts on that 23mm lens. If you have used the 35mm lens you will know how wonderful it is. So you might be wondering if the 23mm is as good? Is it worth adding to your lens stable? Well, my in my opinion, you should. I have only used it a little but I am already blown away by it. It is as sharp, if not sharper. Wide open it is extraordinary. The bokeh is soft and dreamy. On the body of the X-Pro 1 the camera is nicely balanced in the hand (I use the body with the added grip). I am on the train going to London as I type this and I have the lens with me. If time allows I am going to put it through its paces on some street photography – a genre it is made for. I’ll post some images if they are up to scratch.
 

Fuji X-Pro 1 18-55mm lens at 44.4mm, f5, 1/50 sec, ISO3200, handheld

I used it for some aurora images in Norway. For shooting the aurora you have the lens wide open and focused on infinity. I could have done with a wider lens, in reality, to get more of the landscape in the shot. We were in a forest miles from any light pollution and this means total darkness so composing the image is very tricky. More width gives you latitude to crop away the edges if they are a bit messy. But it is not the fault of the lens that it wasn’t wide enough for what I wanted. The wide aperture gave me great speed, so at ISO1600 I was able to make these images at 10 to 20 seconds which is ideal for aurora images of this type. Had we had a more extreme display I think my shutter speed would have been down to a couple of seconds which would have captured the ‘curtain’ effect had we seen it. Even wide open, with the difficulty of focusing on infinity in absolute darkness I was able to get sharp images with surprising depth of field. The X-Pro 1 performs really well at high ISO’s. I pushed some images to ISO3200 and these do show some noise, but nothing that my Nik noise reduction plugin can’t reduce for me.
 

Fuji X-Pro 1, 23mm f1.4 lens, ISO1600, f1.4, 12 sec, tripod (processed raw file)

So, there we have it. A brief run down on the Fuji X-Pro 1 in the Arctic. It survived, but had a couple of issues. Its not ideal for these extreme conditions, but it held its own and I am delighted with the images it gave me. (all the images here were shot on it). As I am blessed with being able to have two camera systems, the Fuji and the Canon, I have the luxury of choice so if ever I get the chance to return it will be without the Fuji. But if I was a sole Fuji user, I would happily take it knowing I would come home with a great set of images.
 

Fuji X-Pro 1, 23mm f1.4 lens, ISO200, f11, 1.2 sec, tripod

Aurora Hunting in Norway, Trip Report – Our Final Day

aurora hunting

Our last day is almost over. It seems unlikely we will be out tonight aurora hunting as our final overnight destination, the town of Narvik back in Norway, is blanketed in thick cloud and it is raining (a novelty after all the snow. The temperature is dropping though so more snow is expected).

Today we left Kiruna in Sweden and headed north with a blazing sunrise behind us (in this part of the world at this time of the year the sun rises briefly and sets in the south – something which feels very strange to those of us so used to it rising roughly in the east and setting generally in the west). As soon as we could we stopped to shoot the light before heading into a national park. Here the cloudless sky soon filled with low heavy cloud bearing snow. Before this had a chance to fall the group spent a productive hour shooting the ice at the side of a lake.
 

Old Volvos never die, they just fill with snow...

After coffee a blizzard began as we climbed a mountain pass. Visibility dropped dramatically. At the top of the pass is the border post with Norway. Here we were met with a queue of articulated lorries. A quick discussion with drivers revealed the descent into Norway had just been closed due to the blizzard. However it became apparent a snow plough was about to attempt to clear the pass and we decided to follow in its wake. What followed was an exciting descent in almost white out conditions. Lorries were stuck on the climb coming from the Norwegian side even though they were fitted with full chains on their wheels. These were extreme conditions. I think the group were relieved to reach the bottom of the pass safely. The alternate route back to Tromso involved a detour of about ten hours driving back across Sweden, up through Finland and across Norway, so we were pleased to make it for that reason too.
 

Tomorrow we make the four hour dash from Narvik to Tromso airport for our flight to Oslo and then on to Heathrow. Then I have a three or four hour drive back home. A long day!

So here are a final few snaps from the trip. I have many more to process but hope you have enjoyed seeing a few as I have blogged while on the road. I will be putting together a blog devoted to my thoughts on how the Fuji X-Pro 1 performed in the arctic (and how its performance compared to the Canon 5D mk3). I will also report back on my thoughts on the new 23mm f1.4 lens. But for now, if you will excuse me, I just have time to pack for my flight and grab a nap before we go for our final meal.
 

Aurora Hunting in Norway, Trip Report – Day Six

aurora hunting day 6

Finally, after six days of trying, we have seen the aurora.

The relief amongst the group was palpable. Everyone is so happy to have achieved our main goal on this trip.

This is the first time I have seen the aurora and I have to be honest, the display we saw tonight is about as low as the aurora gets. Activity was minimal and so we didn’t get the sweeping curtains of light across the sky most of us imagine. For us, the display was just a glow on the horizon. What you see here in the photograph is nothing like what you experience in the flesh. It is the ability of the digital sensor to record light over a long exposure, in this case around 15 seconds, that produces the intense colours. To the eye, the aurora at this level is barely green and you would drive past it thinking it was just clouds or light pollution if you didn’t have guide to point it out to you (in our case, Tony Spencer, who is one of the most experienced aurora guides in the world – this is trip 43 for him).

I have taken images of the aurora with the Fuji X-Pro 1 as promised, using the new 23mm f1.2 lens. I will post images and my conclusions to its performance in another blog post.

I have to say I am delighted to have witnessed this beautiful phenomena and I know I have only seen it at its least impressive. If we had had a full on display I might feel differently, but I got much more pleasure from photographing the hoar frost yesterday. We have just one night to go on the trip so one more chance to see the lights. We leave Kiruna and head back to Norway, our destination is Narvic, via a National Park, so more landscape photography beckons.

Now, if you don’t mind, it is very late and I need my beauty sleep 🙂

Aurora Hunting in Norway – Trip Report, Day Five

aurora hunting day 5

Fuji X-Pro 1, Tripod, ISO 200, 18-55mm lens, f8.0, 1/40 sec - Processed raw file, converted to dng and worked on in Lightroom 5


Another night passes and still no aurora. The tension is now building amongst the group. You can feel the anxiety each evening as we gather over our evening meal to look at the technical data relating to the auroral activity in the atmosphere. Yesterday in the late afternoon the activity suddenly spiked and we thought we would get our first glimpse. However, by the time we got to Kiruna and had our meal the graphs had all flatlined and the sky had filled with cloud. As group leaders we certainly feel the pressure to perform. Although we have absolutely no control over the clouds or the aurora we know just how much the clients want to see it. Not only do we have clients from the UK with us, but also some from the US and others from Australia. What a big investment they have all made in the trip. So we are prepared to drive as far as it takes and work as many hours as it takes if there is any chance at all to deliver the lights for the group. But, we just need that break in the clouds to coincide with some activity up on the edge of the atmosphere.
 

Fuji X-Pro 1, Tripod, ISO 200, 55-200mm Lens, f 11, 1/3 sec


By coming to Kiruna here in Sweden we have moved away from the low pressure system which almost certainly would have meant no aurora up in northern Norway. This evening, so far, we have clear skies (and temperatures already plunging back towards the minus 20 degrees centigrade we experienced last night out in the tundra). As I type, at 17:00 local time, all three key graphs are flatlining. It couldn’t be any worse. There is nothing we can do but keep checking the graphs every few minutes, just hoping for them to leap into life. The more the graphs deviate from a flat line, the more spectacular the display. Right now, we would take a green glow on the horizon, anything!
 

Canon 5D mk3, ISO 200, 24-70mm Lens, f 11, 1.0 sec


That said, the day has not been a dead loss. Not by any means. We headed out into the tundra and forest and spent a brilliant day photographing the most stunning hoar frost. The temperature out there hasn’t risen above freezing for weeks and is mainly staying around minus ten degrees and lower so the hoar frost just builds and builds. As daylight faded the intense cold produced the most stunning blue and pink sky – the perfect foil to the frost.

I have processed up very quickly a few images from the day for you here just to show some of the things we have seen.

Now we are all back in our rooms. Time for a warming shower and a couple of hours sleep. Then a meal… and we all gather around the graph… watching the lines… wishing we had an auroral defibrillator to shock them into life. “Charging, Clear, BANG”.

Come back tomorrow to see if we managed to bring the patient back to life.
 

Canon 5D mk3, ISO 200, Tripod, 70-200mm lens with 1.4 extender, f 45, 13 seconds

Aurora Hunting, Norway Trip – Day Four

aurora hunting day 4

Well, it’s been quite a day. As a group we took the decision last night to leave Sommeroy this morning as the weather forecast for the rest of our trip was dire. A low pressure system was going to dominate the whole of the north Norway coast for the next four or five days. Along with high winds driving snow and quite high temperatures for the time of year it meant that photography would be virtually impossible and certainly photographing the aurora would be almost certainly impossible. The cloud base would be just too low and too dense.

Once this decision had been made we headed off into the storm this morning on the 10 hour drive through Norway, down through Finland and into Sweden. In line with the forecast the storm in Norway was fierce. Gradually as we drove down through Finland the storm abated and the weather improved. We even managed to briefly stop beside a partly iced river to photograph the setting sun. Finally in the dark around 6 pm we arrived at our destination.

We’re now basing ourselves in the Swedish town of Kiruna. This town is surrounded by fast tundra and beautiful pine forest. Even in the headlights of the vehicles we could see the trees were covered in heavy hoarfrost. This will be a subject of our photography tomorrow. On the journey down the aurora activity increased considerably however in the last couple of hours cloud has rolled in and it seems unlikely that we will see a display tonight. But this increasing activity gives us hope that we will see the aurora over the next couple of days. The weather forecast here is much more favourable with clear skies and very low temperatures. In fact just north of here we experienced the lowest temperatures of the trip so far. The temperature gauges in the vehicles dropped below-20°C.

In the picture above of the silver birch trees I used the new 23 mm F 1.4 lens on the Fuji X-Pro 1. This was the first real photograph I have taken with the new lens and it has performed well. The shoot by the river was a bit rushed due to the failing light and us being on a long trip in difficult conditions. The temperature here was around-15° centigrade. (now I have uploaded it , twice, the image seems unsharp on my blog page but the original file and jpeg I am uploading are tac sharp – to be honest, I am too tired to fix it today, not sure what the issue is??? But the original is fine). The second photograph of the old shed door was taking yesterday on the Canon 5D mk3.

So, hopefully, tomorrow I will be able to report that not only have we had a good day shooting the landscape but also we have had our who first opportunity to see and capture the northern lights. But for that, as always, we are in the hands of the weather and solar activity. Certainly coming here gives us our best chance on both counts.

Aurora Hunting in Norway, Trip Report – Day Three

aurora hunting day 3

5D mk3, 24-70mm f2.8 lens, ISO 100, 2.0 sec at f11

The weather today has deteriorated considerably. The temperature has risen a few degrees and it has rained, sleeted and snowed. The wind is stronger and now, at 15:30 in the afternoon as I type this back at our hotel it is dark outside and the wind is howling. The cloud base is very low, there is no way we are going to see the aurora tonight. However, even if the skies were clear, the auroral activity is very low indeed so we might not see it even then. I have a feeling we may have to make a long drive inland to Finland or Sweden over the weekend in search of better weather in order to get a better chance of seeing the ‘Northern Lights’.

So, thats the bad news out of the way. Have we let this put us off? No we haven’t. In conditions like this, it is fairly pointless trying to shoot wide landscapes. However, what the light is perfect for is detail work. With this in mind we headed off intrepidly after breakfast in search of texture and detail. After an hour of driving we found it in a cluster of very old Nordic fishing huts on the shore of a bay facing north into the arctic ocean.

These roughly made wooden huts have been scoured for generations by salt winds, snow and ice and bleached by the sun. Exposed to the wind and rain the layers of paint and rich, deep colours in the wood were extraordinary in todays overcast light. Bedding our tripods in the group spent a happy couple of hours filling memory cards with images full of texture and details.

I made some images with the Fuji X-Pro 1 and more with the 5D mk3. I have shown one from both cameras of the same subject here for comparison. Particularly as the Fuji image is handheld at ISO3200 whereas the Canon images were made on a tripod at ISO100 – interesting to see what you think. I know its not easy to see the differences on a web page, but it makes for an interesting comparison.

I find doing this type of image (which is a favourite style of mine) that I like to get the camera very parallel to the subject surface. I like a flat, rather than three dimensional composition. I also prefer compositions which exclude the sky. I prefer to get close to the shed walls and fill the frame with detail. I work at f8 to f11 in most cases to make sure I get good detail and sharpness. Good focus and tripod technique is essential (especially as we had a blustery wind to contend with).

The Fuji image here is a jpeg straight out of camera using the Astia pre-set. The Canon images are raw files which have had some basic processing done in Lightroom and Photoshop.

Fuji X-Pro 1 image using 18-55mm lens, ISO3200, handheld at f5.6 and 1/40 sec

Canon 5D mk3 image, tripod, 24-70mm f2.8L lens, ISO100, f16 for 3.2 secs

From this location we headed to another which was a partially frozen river in the mountains with small waterfalls, ice edging the flow, with beautiful rocks and lovely silver birches in the snow.

Because of just how short our days are now here, by this time it was getting dark and we headed home in driving sleet and snow to the hotel. Tonight after our meal plans need to be made for the weekend – the aurora needs to be found!

Canon 5D mk3, 24-70mm L f2.8 Lens, ISO100, 6.0 secs at f16

Aurora Hunting in Norway, Trip Report, Day Two

aurora hunting day 2

Last night Tony and I took it in shifts to keep a watch on the skies and the aurora reports but sadly the auroral activity was extremely low and there was nothing to be seen here despite broken cloud. At least the group had a long nights unbroken sleep to get over jet lag.

We headed out after breakfast into great soft pink light (the image above was one I managed to grab from one of the mornings locations). The temperatures here were below freezing all day and are currently around minus 10 a few miles inland. Here on the coast they are a little higher at around minus 2 to 4 but the wind is rising so it feels much colder. No snow has fallen after yesterdays blizzards.

The group were getting used to working in such cold conditions. You soon learn not to let snow get onto your gear. For example, I dropped a body cap into the snow. It would have been crazy to put this on to the body of my camera. The snow melts in the bag then when the camera gets cold the snow then re-freezes causing damage or sticking the cap into place. One member of the group had her tripod head accidentally dropped in the snow. This quickly froze the ball head, which we had to defrost on location.

Keeping yourself warm is key too. As hands get cold it quickly becomes impossible to operate the camera, so, even though it slows down picture making, it is important to wear gloves (only removing them when necessary and putting them back on again as quickly as possible). Hats, gloves and warm coats are all very necessary. Decent boots here are very important. Not only do they need good grip for walking on compacted snow and ice but they also need to have good thermal barriers in the soles to help keep the feet warm when standing by the tripod for long periods. I am wearing North Face Chilkats and they are performing perfectly.

Fuji X-Pro 1, Handheld, 35mm f2 lens, ISO3200, f14, 1/17 sec

At these temperatures the cameras are working well. Batteries do drain more quickly but it is not so cold that this is becoming a real issue at this stage. It is also not so cold yet that we have to put our cameras in poly bags when returning them to the vans to stop condensation forming and refreezing. This becomes an issue when the temperature gets lower – closer to minus 20. Then it is vital to bag and seal the camera body and lenses in sealed poly bags when moving from outside into the van or a building. This helps stop condensation forming. The condensation is not too much of a problem until you take the gear back into the cold when it instantly re-freezes. This kills cameras and when on the front of lens elements will need to be scrapped off, much like scrapping ice off of a car windscreen. Not something you want to be doing with your beloved pro-lenses.

For those interested in how the Fuji X-Pro 1 is performing I have a few things to mention. It is interesting. I am finding the Canon 5D mk3 easier to use with gloves on and some of the scenes are so stunning I am feeling the need to use the bigger sensor. I have noticed the ‘function’ button gets a bit sticky in the cold when it drops very low (I have the button programmed to quickly change the ISO). I haven’t been using it for long periods so I can’t say battery performance has seen a noticeable drop in performance. The image quality continues to be superb.

As we haven’t seen the aurora yet, I can report on how it performs being pushed to capture that!

We covered three locations today. The first was an inland fjord (you can see an image from here at the top of this post). Ice was forming at the edge of the fjord and the pink light in the sky was beautifully subtle. From here we moved to a small frozen lake with a range of jagged mountains behind. The group worked on capturing the snow, ice, small silver birch tree with some stunning Alpen glow on the mountains behind. Our final location was another fjord, with a great jetty to use as foreground with rugged mountains and delicious silvery blue light. Great for a lengthened exposure just to flatten the water a little. My image is shown below. Once we had finished here (which included shooting a lovely fisherman’s hut full of textures and detail) we dived into a coffee shop for some well earned Lattes and chocolate brownies (well, its not all work on these trips, you know!).

Back at the hotel we are now resting in our rooms prior to our evening meal. On an aurora trip its important to use the afternoon darkness to sleep in case we spend the night out shooting the skies. Over the meal we will consult the space weather, cloud cover, and auroral activity reports to see if everything might come together in our favour. Who knows what the night holds. (23:30 update – sadly the cloud has rolled in and although the charts show a little auroral activity it is impossible to see it. Even with no activity we had planned to go out and shoot star trails but with heavy clouds, a rising and biting wind with heavy wind chill this was just pointless, so it is back to bed. There is always tomorrow).

Aurora Hunting in Norway – Trip Report, Day One.

aurora hunting day 1

Its 16:00 here in Sommeroy, north Norway and its been dark for two hours. Outside the hotel a blizzard rages. Visibility is below 50 meters at times. Welcome to Norway!

I’m here co-leading a workshop with famed aurora and landscape photographer Antony Spencer for Light & Land. We have just collected our group of 12 clients from Tromso airport and arrived safely at our hotel about an hours drive away. The journey was interesting to say the least as the blizzard raged. Here in Norway, they leave a thick layer of ice on the roads all winter and just scrape away the excess snow. All vehicles are fitted with studded tyres which grip into the ice incredibly well. Driving this way takes a bit of getting used to at first, but you soon learn.

Tony and I met at Heathrow airport at 05:00 yesterday for our flight. In fact, we were so busy catching up over breakfast that we almost missed our plane. I was the last person to board with seconds to spare. It took me to Oslo to get my breath back 🙂 Oslo was clear of snow and looked beautifully autumnal as we came in to land. It is on a similar latitude to Scotland and so, although it does get cold and snowy later, at this time of year it is much like Scotland. A quick change of planes and we headed north. Much further north. As we descended through the cloud it was apparent we were well and truly in the arctic.

I then had a baptism of fire, learning to drive on ice, in the dark, on the opposite side of the road to the way we drive in the UK. Oh, and a blizzard blew up. I don’t know if Tony enjoyed the drive. I was too busy concentrating to be concerned. Darkness at 14:00 has a weird effect on you. It feels like you should be heading for bed when in reality it is only the middle of the day. From a photographic point of view, this short day is wonderful. Sunrise here is, for the next few days, at around 10:00 – 10:30 (the days are shortening really fast and before we come home the sun will not be rising at all – I will get to experience the 24 hour arctic night) and with sunset at 14:00 we have this soft light for the whole time. Even when it is overcast the water goes a gorgeous steel grey blue, which offset against the snow and mountains is to die for. Its like photographing in a perpetual “golden hour”.

Sommeroy is a beautiful little area of islands, an archipelago that Norwegians visit in the summer. I think they think we are mad coming here at this time of year.

Today, Tony showed me around the area a bit and we managed to fire a few frames. I have included some here. All are jpegs made on the Fuji X-Pro1.

I will try, as time allows, because the clients come first, to blog each day and post a few images, to keep you up to date on our adventure. Hopefully there will be some aurora shots to show you as the week too. Clouds permitting. Watch this space.

A little detail shot and full credit to Tony for the composition - the boy can spot an image!

Customer Images from Skye Trip

skye trip

I had a lot of positive comments about my daily trip report blog which I posted while leading a workshop in Glencoe and Skye a few weeks ago. To follow this up I thought it would be nice to show you a few of the images made by members of the group. They have picked some of their personal favorites to show you here. I am always fascinated how several photographers can be at the same location at the same time and yet they capture the place in quite different ways.

(I plan to run this expedition workshop again next year for a small group of six photographers so if you would like to be added to the no-obligation shortlist to hear about dates, prices and itinerary ahead of it being announced on my website or in my regular newsletter, please email me using THIS LINK. )

The first set are by Charlotte Gilliatt, who is also to be hugely congratulated for getting two images into this years Landscape Photographer of the Year book, including Urban View Runner Up. You can see more of her work at her website HERE.

Next up is Keith Purchese (who doesn’t have a personal website).

And now a selection of images from photographer Kevin Gibbin. You can also see his website HERE.

And finally, a selection of images from John Birch, whose website (and superb blog) can be found HERE.

I hope you have enjoyed seeing the fine images from some of the group. We had a great time, as you can read in my trip reports written each day on my blog while we were up there (Here and for the next few posts).

I plan to run this expedition workshop again next year for a small group of six photographers so if you would like to be added to the no-obligation shortlist to hear about dates, prices and itinerary ahead of it being announced on my website or in my regular newsletter, please email me using THIS LINK.

Talk for the Royal Photographic Society

RPS


I feel very privileged, and a bit frightened, to have been invited by the Royal Photographic Society in the East Midlands to be one of two speakers at their annual “Landscape Spectacular” event on 17th November.

I am to join talented and creative photographer, Peter Paterson , who is a Fellow of the RPS. We will both be giving lectures on landscape photography and also fielding questions from the audience.

The event is open to non-members of the RPS so I would love to see you there. Please come up and say “hello”. The price is £10 and you can also pre-book for a three course buffet lunch for £7.95. Full details can be found on the RPS website HERE.

I will be giving a talk illustrated by my images. It will be based around themes encouraging creativity and breaking free from conventional approaches to composition and camera techniques as well as a look at classic landscape imagery and techniques. I aim to make it stimulating, encouraging, motivating and practical – it certainly won’t be one of those ‘this is where I went on my holidays’ style presentations, you can be sure of that!

I will be taking a selection of my prints too that you will be able to have a look at (and get hold of, to really inspect).

I will be available during lunch too, so come and have a chat and I will be happy to answer questions you have on any aspect of photography and image processing.

It would be great if you would share this blog post among your photography friends, club and contacts in case they may be interested. I am sure it will be an interesting and engrossing day that will help you move forward in your photography.

Skye Expedition- Day Seven

skye day 7

Eilean Donan Castle

Day seven of our expedition to Skye, a day to move on, a day to start heading south again.

The group were up again an hour before sunrise to take on the mighty Sligachan river outside the hotel before breakfast and a frosty sunrise ensure clear views of the Cullin and a chance to capture the raging river and rapids.

Once packed up and checked out we headed off of the island across the Skye Bridge and was soon at Dornie, home of the photogenic Eilean Donan Castle, probably the most photographed castle in Scotland, if not the World (and rightly so). The way it sits out in the Loch, reached by a stone bridge with three perfect arches, its placement beneath the peaks and out in the loch as well as its classic Scottish Keep shape make it a wonderful subject. (I wish I could say the same about the quality of the cafe, but sadly the minuscule pot of tea and so-called “Whiskey Fruit Cake, which I think had just had a whiskey bottle waved at it rather than pouring any of its content into the mix, had certainly succumbed to the tourist trap disease. Disappointing as every other eatery we had used in Scotland was superb).

The long drive from here to Glencoe is never arduous. The scenery is just too wonderful for it ever to become a chore, especially as at this time of year the autumn foliage is starting to form up. A quick fill up with diesel in Fort William and then, en-route to our hotel in Glencoe village, a fortuitous glance over to the loch and I glimpsed an old wooden sailing boat, its reflection mirrored in the loch with the evening light illuminating the hills beyond, capped by cirrus clouds. A quick U-Turn had us all piling out of the van with our gear to capture this idyllic view before the light went off the hills. It was amazing. We had only been there for a few minutes before several other vehicles full of photographers began to stop and jump out to see what we were shooting. They soon joined in framing up the scene, although one group of what looked like nature photographers going by the camouflage gear and length of their lenses just said ‘Oh, its only a boat”.

Our final night was spent enjoying a great meal together reliving the glories of the week, its incidents, its highs and lows, the ‘in’ jokes and great things we had experienced. As always seems to happen on these trips, friendships are forged which last years and this is often of even greater value than the images made or the new things learned.

Day eight saw us make the dash back to Edinburgh airport for the first drop off and then the long drive back home. There is always a quietness in the van on the way home. Perhaps a bit of melancholy at the trip being over, perhaps some meditating on the experiences of the week and, to be honest, going by the snoring, quite a bit of catching up on lost sleep 🙂

I am already planning several new trips like this one (a couple more extensive to some amazing locations) for 2014 and 2015. If you would like to be added to the no-obligation shortlist, please send me an email or use the “contact me” form on the right hand side of this page. Most of these trips book up from people on the shortlist so they never make it on to my website or into my regular newsletter. I hope you can join me on my next adventure!

The Fearsome Cullin - Isle of Skye

Skye Expedition – Day Six

skye day 6

Day six. The Big One. Any landscape trip to Skye necessitates a dawn shoot at the Old Mano of Storr. It is not a huge distance from the road, but the ascent is hard for all but the fittest. With a camera bag and tripod it is even harder. Add to this the fact the ascent has to be made in total darkness and it is a tough climb. In order to be in position up there an hour before sunrise you need to be leaving the car park at the base about an two and a half to three hours before sunrise. So we left our hotel at 04:30. The group were rewarded for their efforts with the most dramatic of light up there – a snow shower blowing across the Storr was side lit by the warm rising sun with an amazing glow of light full of drama. It made all the effort worthwhile and the group was ecstatic as, back at sea level, we enjoyed a well earned breakfast in Portree.

From Portree we headed back towards the Storr and got some great images of it in the distance shot across a loch, with a small island in the middle, lit by the morning sun. The wind driving rows of bubbles across the lock providing great leading lines. It was a bonus location and good to view the site of the mornings climb from a new perspective.

From here, we moved on to the Quiraing, further along the Trotternish Ridge above Staffin. Again, the late morning light worked for us and we made images of the prehistoric ridge, bathed in pools of golden light playing across the landscape. The famous Rowan tree (site of my lost Lee polariser last year – if you find it, its mine!) was also a popular image. To cap off our time there we marvelled as a Golden Eagle swooped around the view, spiralling on the thermals and effortlessly covering huge distances with a few strokes of its wings. It was a truly breathtaking sight and a lovely end to the morning.

By this time we had been out photographing for ten and a half hours so we headed back to the hotel for a break but some of the group wanted a Lightroom session so we set up in a lounge and had a couple of hours tuition with a drink before heading out to our sunset location.

This was to be Neist Point Lighthouse. There is really just one main composition here, but if the light is good, what a composition! And the light was REALLY good, the best I have ever had there. We made it just in the nick of time, in reality we should have arrived half an hour earlier. It was one of those evenings that as we drove to the location the light was so good, everything was photogenic. Very frustrating, but we had to keep our goal firmly in mind.

It was a happy group back at the hotel that re-lived the days glories over another great meal.

Skye Expedition – Day Five

skye day 5

Day five dawned and looked, again, unpromising, but is an example of how the weather up in Scotland can be deceptive. Again the group headed out to shoot the Sligachan river below the Cullin. There was not a star in the sky and the cloud hung low over the ridge. It had the makings of a dead loss. However, the old adage that the “harder I work, the luckier I get” proved true. Very gradually the clouds began to move and the light rose spectacularly. The diligence and effort of the group was rewarded with some great images of the Cullin with the mighty falls of Sligachan in the foreground, and all before breakfast.

Our next destination was the misleadingly named “Fairy Pools”. These are found in Glen Brittle on the opposite side of the Cullin Ridge to our hotel. Misleadingly named, because once up there, the effect is not dainty but dramatic. The river gushes off of the mountains and tumbles through an amazing series of pools and waterfalls. This is a place to devote at least several hours to if you visit. The Cullin wrap around you the closer you get and have a dark, ominous feel. The pools are full of amazing turquoise and green colours in the water. In summer they can reduce to a trickle but at this time of year the flow is perfect. The compositions are endless and absorbing.

It was here I met my nemesis. The group had gone on ahead of me and I was plodding up alone (my broken ankle, though fixed, is still not 100%). At one point on the path in to the falls there is a stream to cross. What, for most people, would be a straightforward hop, skip and jump across some rocks, bought flooding back to me the place of my fall back in January. The rocks were slab like, running in water. The jumps just uncomfortably wide. I had my newly acquired walking poles and after much debate with myself, including walking up and down the river side looking for alternate safer crossing points, I braced myself to cross. I got to the half way point but the final two moves were just too risky. I feared for my footing and the memories of three months being unable to walk forced me to decide to withdraw rather than risk another fall. It was hard to admit defeat. You really feel a wuss. I have crossed that stream before without a thought and I knew the images above were going to be great but I just couldn’t take the risk. There is also a tendency after a fall to be over cautious and this can lead to falls – not trusting your bodies balance and ability to keep you upright. I just didn’t feel I could trust myself to make the leap and so I missed out on the location. Not a nice feeling. Next time I come back here, when my ankle is stronger, I am determined to get back up to the Fairy Pools.

We headed off afterwards to The Old Ship Inn in Carbost. The Carrot cake there was simply astounding. I have eaten a lot of Carrot cake in my life (way to much, if the truth be told) but this was BY FAR the best. It was so good we decided to book a table to go back for our evening meal.

Our final destination was Talisker Bay and here we worked the wonderful dual coloured sand and boulder field, along with the rock stack and the ‘Icelandic’ waterfall pouring over the cliff face. Sunset was beautiful, especially after the sun has moved below the horizon, the deep blues really suiting the drama of the location. A great day in the field.

Skye Expedition – Day Four

skye day 4

We gathered outside the hotel only to be greeted with murky skies and drizzle but to make the most of what light there was and to get something out of the herculean effort we had put into getting up, we set up to make some images. Rather than work against the conditions and get frustrated with rain on the filters, I suggested the group leave the tripods behind, choose a lens with a tubular lens hood, crank up the ISO and shoot the layers of hills with light emerging through the swirling cloud. The conditions really lent themselves to moody black and white images.

At least we were only minutes from the hotel and a sumptuous cooked breakfast where we planned the day ahead.

We headed off onto the road to Elgol. Our first stop was the ruined Kirk at Loch Cil Chroisd. Here is a small stone built church with an ancient graveyard. The roof has long gone but the walls are lichen covered and inside ferns grow from the walls. Outside an ancient Ivy grows up, entwined through the stone wall. A great photographic subject. A short distance further on is Loch Cil Chroisd which has a stunning reed bed. We spent some time here photographing the reeds and a fence which drops into the water. We fended off the usual enquiries from passers by asking which rare bird we were photographing. Why do people always seem puzzled when you explain to them you are photographing the landscape?

We were also approached by a photographer who had driven for thirteen hours with his friend to Skye to take photos. He asked if anyone knew anything about Canon cameras and the group, helpfully (!), pointed him in my direction. He thrust his camera at me and asked if I could help fix it as it seemed to have stopped working. I asked what the problem was and initially said that “it was just like that this morning”. “Just like that” described the way it was locked up, with nothing functioning. I did the usual things, power off and on again, removed the battery and put it back in. No improvement. I then put my eye to the eye piece and couldn’t see anything through it. My first thought was the lens cap was on, but, no, it was off. It was then he said, “I ought to mention it got a bit wet yesterday”. Ahhh! I sensed more was going on here. But why no image in the viewfinder. I removed the lens to find there was no mirror on the mirror mechanism. I looked up at him. He looked back. I raised my eyebrows. He said, “oh, yes, a little mirror thing fell out yesterday. My girlfriend looked it up on the Internet and it said that it had to go back to Canon to have that fixed but I wondered if you could fix it or if it would work without it”. I replaced the lens, handed it back to him and told him that his girlfriend, and the Internet were right. The camera was dead and did need a professional repair. I do wonder sometimes.

Our day ended at Elgol. The Cullin were shrouded in cloud but this came and went, revealing and concealing the peaks. Showers were sweeping across the scene backlit by the sun, giving us some wonderful photographic opportunities. The temperature is dropping here now as forecast and we certainly felt it, exposed on the rocky beach at Elgol. It became evident that the weather was closing in again and that, while the sun was going to set, we weren’t going to see it. So it was back to the hotel for a meal and bed.

The weather is set to change tomorrow. The morning might be showery but northerly winds are bringing broken clouds (and a possible chance of seeing the aurora and even a dusting of snow on the Cullin) and much colder temperatures. It will be exciting to see what images this leads to.

Skye Expedition – Day Two

skye day 2

From Outside the Hotel


Day two kicked off with everyone meeting in reception at 06:00 and promptly going straight back to bed. This was not a revolt against shooting sunrise, it was in recognition that the driving rain and wind meant that while the sun was going to rise, we were not going to witness it.

So, take two, we met for breakfast at 08:00 and tucked in to the full Scottish. Oh, yes. the VERY full Scottish. Well, you can’t concentrate on photography if you are hungry can you?

We started the day with a few images close to the hotel (the image above was taken right outside the hotel) before heading to the obligatory honey pot location of the waterfall below Stob Dearg. I have to say the light playing across the hills here was stunning and we spent almost two hours working the location (as numerous photographers came, grabbed the standard shot and fled back to their cars). It is a cliche location, no doubt about it. But it is so because it is stunning. I couldn’t bring myself to photograph it so helped the group with camera techniques and composition, before finding a couple of small ‘vignette’ style images I was much happier with.

The clouds today kept parting, allowing golden light to play across the hillsides. At this time of year up here the moorland grasses are turning a striking golden yellow and orange colour. The Rowan trees are laden with berries, the Larches are turning a soft gold and the broad leaved trees are moving swiftly into their autumn colours. its a great time to be here. Yes, you are likely to encounter showers, but these can be brief and the light before and after is sublime.

The rest of the day was spent meandering down the full length of Glen Etive. This glen with its river, waterfalls, woodlands and views of the surrounding hills is a wonderful playground for the landscape photographer. We really took our time, working each location thoroughly, experimenting with compositions.

We also got chatting to some canoeists who ran some rapids and waterfalls for us An interesting photographic diversion requiring a totally different set of camera skills. In addition to the landscape images we also squeezed in a session at the famous Glen Etive ‘Bike Shed” (if you have been there you will know what I mean). We also found a wonderful old barn and did detail images of the doors and windows.

By the time we got to Loch Etive, around 16:00 the midges decided to appear. We fought on bravely for an hour but eventually they beat us off and we headed back to the hotel for some well deserved pints of the local Scottish Stag bitter. This primed the way for most of us to order Haggis in a Drambuie sauce with “Tatties & Neeps” (Google it). it was, frankly, awesome 😉

Charlotte bought her new pride and joy down to the bar, a Fuji X100s and this prompted a lot of interest as we made some portraits of each other, without flash, trying the different film emulation modes. Its a cracking camera and made me all the more keen to get home to take delivery of the Fuji X Pro 1 I have bought second hand, which arrives a couple of days after I get home. My favorite mode was the mono setting with the red filter enabled. It is an easy camera to use and, along with the retro styling, makes just great looking images with a lovely ‘feel’ to them. Very impressive. Charlotte had to pry it out of my hands.

The forecast for Monday is heavy rain around dawn and for much of the day, so it may be limiting photographically (however, in Scotland as elsewhere, it can lead to wonderful glimpses of light and atmospheric images for those who brave the conditions). We have the drive to Skye so it is not a full on photographic day like yesterday, but I do have some great locations planned so it will be interesting to see what we get, photographically.

Skye Expedition – Day One

skye day 1

Rannoch Rain


So, what is a week long photography expedition with me like? Well, this week I am taking a group of six clients up to Rannoch Moor, Glencoe and Skye so I thought, if time allows, I would try and blog to give you a flavour of what a trip like this is like.

The craziness began at 02:00 yesterday. I met with three of the group, Keith, Kevin & John (names haven’t been changed to protect the guilty). The reason for the early start? I had the idea that we could squeeze in sunrise at Bamburgh in Northumberland en-route to picking up the rest of the group at Edinburgh airport.

I had hired a nine seater VW mini bus which is providing luxurious travel for the week. By having a nine seater we have loads of room for luggage and a couple of spare seats so everyone can spread out.

Needless to say after a bit of initial banter, my companions were soon snoring soundly as I ate up the miles on the A1 northbound and they awoke as we approached that iconic beach an hour before sunrise to be greeted with good levels of cloud and a receding tide – perfect conditions. An hour and a half later all had some great images in the bag and an appetite had been generated so it was off to a local cafe for breakfast.

The great thing about eating together on workshops is that as photographers get together the conversation naturally revolves around our shared passion and all sorts of conversations develop. I almost always learn things during these chats. You hear the names of other interesting photographers work to explore, you hear of post processing techniques to try, interesting tips about gear or locations and so on.

We had a text from Charlotte who had, courtesy of BA, been overbooked on her flight and would now be arriving a couple of hours later than expected into Edinburgh. Never one to pass up an opportunity I quickly held an emergency planning meeting and we decided to add an extra location, speeding off to Lindisfarne. Here we had a really enjoyable hour and a half shooting detail shots around the old fisherman’s huts in the harbour before hitting the A1 again. Needless to say my companions were soon asleep again.

Peter, Leonie & Charlotte were picked up at Edinburgh without a hitch and off we headed on the M9 and A84, stopping to refuel ourselves at the “Green Welly Stop” at Tyndrum. Then it was up onto Rannoch Moor and to our hotel, The Kings House Hotel. Is there a better location for a hotel?

Checked in we were straight back out and shot the sunset close to the hotel, which has a river running behind it with views over the moors to Glen Etive, Glencoe and Stob Dearg. What a great start to the trip.

Then it was time to meet for a couple of pints of Highland beer before tucking in to a great meal and bed. The group are already gelling and enjoying banter and great engaging photographic chat. You always find on these trips that “in jokes” unique to each group develop and its fascinating to each persons thoughts and feelings on different photographic subjects. This group is no different. I predict a great week. The first day is always tiring due to the travel but today the fun really starts. A full day out with the camera. I’ll let you know how it goes. But now, I must get down for breakfast (sunrise was cancelled due to wind and rain, but more of that in the next post).

The images here are a couple I rattled off using multiple exposure techniques on my 5D mk3.

End of Day - Rannoch Moor

How do I create light trail images?

light trails

Westminster by Night

Have you ever wondered how to go about capturing light trails? They look dramatic and add a dynamic feel to urban images and are easy to capture.

Before I go into technique there is an important factor about this image which lifts it above many light trail shots. The Sky. Its not just a case of shooting at night. In fact the ideal time is a short 15 minute period shortly after the sun has set. For architectural photographers and those after light trails this is the prime time to shoot. If you look at the image you will see the sky is not black, there is still some residual light (twilight) in the sky. In this brief period of minutes the light in the sky balances perfectly with artificial light which is why it is so perfect for capturing architecture and light trails. You can still shoot the light trails when the sky is black but the images won’t be quite as attractive. Have a browse of the finest architectural night photography and you will see the photographer works in this evening twilight period (or gets up early as a similar is experienced some time before sunrise).

Lets say you are in position at the right time. Get there well in advance so you can sort your composition out and get your exposure right before twilight. It is very frustrating to miss the brief twilight window becuase you weren’t in position and set up in time. Needless to say you need to be on a tripod with a remote shutter release. No graduated neutral density filters are needed as the camera can cope with the dynamic range of the image by this time. You may need a standard non-graduated neutral density filter (perhaps a 2-stop) to slow the exposure down if you are getting too short an exposure for the effect you are after (alternatively, you could use a narrower aperture, say, f16. I would avoid using f22 unless I was forced as the image quality will degrade due to ‘diffraction’, but thats another whole issue!)

For these images the lenght of the exposure is as important, if not a little more important, than depth of field. For my shot of Westminster I worked at f11 (which gave me sufficient DOF and kept me close to the sweet spot of the lens (around f8 would be about perfect). At ISO 100 (for the lowest noise possible), this gave me an exposure time of 4 seconds on my 24mm TSE lens. (As I was using a tilt and shift lens, I could have worked at f8 and used the tilt mechanism to give me the depth of field I needed but I was working quickly and didn’t want to complicate matters).

I test out several shutter speeds before the light gets to its best so that I am ready. The speed of the traffic and the brightness of the lights will dictate the length of exposure. Faster moving vehicles need a shorter shutter speed than slower vehicles. In my case, timing was vital. I could have shot when just cars were passing but I found it was worth waiting for a bus to appear as this gave a wider stripe of lights because of the upstairs windows. I fired the shutter, using a handheld remote release, a fraction of a second before the bus entered the frame. A few buses later, I had my image, the light dropped and it was time to head off for more night shots around London.

If you would like to master low light and night photography, why not join me on one of my London Night Workshops. We even have a London Black Cab to drive us around all of the best locations all night. Drop me an email if you are interested as these are selling out before I can list them on my website.

Adventures in Polaroid

Polaroid

Avast, Me Hearties!


As many of you will know, I do like quirky photographs! Among the styles I love is the Polaroid. My dad had one when I was young. Being keen on holding on to his cash, he resented having to pay Boots or Bonusprint to develop his films and so thought Polaroid was the answer. He soon realised the costs were similar, you, in effect, paid up front for the instant development of Polaroids in higher film costs and so once the novelty had worn off the camera rarely came out to play.

Ever since, I have loved the washed out images the Polaroid film produces. There are digital tweaks you can make to imitate the look, but nothing really compares to true Polaroid for that sixties/seventies feel. Like many, I was so disappointed when, in 2008, Polaroid announced they would no longer be making the film – again economics took priority over art. However, a small group of dedicated European Polaroid lovers put their faith in the medium and with great foresight bought the old Polaroid film making machinery that was being sold off. They had no idea how to make the film. No idea of the chemicals involved. Oh, and they had no money.

Kippers by Post

Thus started the ‘Impossible Project”. The name came from the fact that whet they were trying to achieve was deemed ‘impossible’ by everyone they asked but this just seemed to make them all the more determined to succeed. To raise money they started a website along the crowd-funding principle. They asked Polaroid lovers world-wide to commit to buy a certain amount of film if they could make it. Once they had enough pledges they called the money in, bought a load of chemicals and put on the rubber gloves. I am sure it would make a great movie, because, against all the odds they succeeded in making  batch of film. (you can read the full story here). From there, the team have gone from strength to strength and employ 25 people, many of whom originally worked for Polaroid.

Fishing Boat - Whitby Harbour

A few words about the film itself. They make a colour and a mono film. Both are, shall we say, very unpredictable. VERY unpredictable. But it is this unpredictability which makes them so good in my eyes. The film has to be shielded from light in the first few seconds after shooting and can take half an hour to develop (best done in one of the film boxes). In fact, it can continue to develop for the next 24 hours. Sometimes the chemicals don’t mix correctly. The exposure can be all over the place. Flare and other aberrations abound. I am currently using some of the early close to prototype film which they sell at a reduced price and so am experiencing extreme quirkiness. The new generation films they have released this year apparently show greater consistency.

I bought an old Polaroid camera from eBay and adore it. The film packs are expensive (think, about £1.50 an image once postage is factored in) but the packs are well made, quite complex and contain a battery to power the camera and flash, so there is a lot going on. You get eight shots per pack and it is best kept in the fridge (DO NOT freeze the film). The camera is totally retro and I feel like a seventies Dad walking about with it. I used it in Whitby earlier this week sand people were stopping and staring 🙂 It got a great reaction. The Impossible Project have plans on the drawing board to make a new Polaroid camera, so exciting times lie ahead. The project has been such a success that they are opening Polaroid shops in capitals around the world to service customers. I got my film, from Germany, via UPS in a couple of days.

Camera meets Camera

Today I put a pack of the Silver Shade mono film in the camera and am blown away by the results. The tones are beautiful. I can’t wait to use the new generation of mono film they have released. I have one pack but am going to use up the old batch film first. new products in the pipeline will please large format film users as they are working on 10 x 8 and 4 x 5 versions of the film which was used by many large format camera users to test exposures and for quick client approval shots. The possibilities are endless.

On My Desk


I am keen to get out with the camera as soon as possible to continue experimenting. Ideas I have in mind are a trip on a train with just the Polaroid to see what it brings. Also, I would like to try some urban decay as well as ‘seaside’ photography. If you decide to give it a go, be warned, it is addictive and could be expensive but the results can be wonderful. Even the ‘spoiled’ frames can become happy accidents that in their own way are works of art. I enjoy the lack of precision and unpredictability of the Polaroid. I love the retro feel of the images and the tactile nature of holding a Polaroid in your hand to admire it. I already have some which I will frame for my walls. No doubt you will be seeing more of them from me in the near future.

If you fancy dabbling in film photography to see if it is for you, why not consider joining Jonathan Stead and myself on a film based workshop in September. We provide the camera (if you need one), a roll of film and show you how to develop the film cheaply and easily at home (without any need for a darkroom). You can get full details here — Go on, come and try some ‘real’ photography and enjoy the pleasures of analogue.

Me, myself and I

New Digital Photography Workshops for Winter/Spring 2012

digital workshop

Here is the new winter/spring 2012 workshop schedule for my digital photography workshops.

I am introducing a range of new workshops and locations for 2012. You will also see I have teamed up with two more very talented photographers as co-leaders on some special locations. I will be posting full details of these workshops on my website in a few days time and soon you will be able to book and pay online via PayPal. Direct booking via email will still be available.

As a special offer for the new season I am offering the first ten who book and pay their deposits a 10% discount off of the cost of a workshop in the schedule. This does not apply to Capture-to-Computer workshops but will apply to one-to-ones. (just four reduced places now remaining)

If your family or friends are struggling to buy the perfect gift for you, why not suggest they buy you one of my gift vouchers. They can select any value they wish from £10 upwards and it can be redeemed against any workshop, one-to-one or Capture-to-Computer workshop of your choice. If the value of the vooucher exceeds your chosen workshop I will refund the difference or it can be credited towards another workshop. If the workshop exceeds the value of the voucher you can use it in part payment. I even send you a blank greetings card with the voucher with one of my images on for you to present the gift to a loved one.

JANUARY

6th & 7th – ‘Coast & Castles’ Northumberland, with Antony Spencer (now a Light & Land tour leader). Two days photographing the spectacular coast of Northumberland so beloved of photographers like Joe Cornish, including three castle locations. £149 per day or £125 per day if booking both days. Includes breakfast. Does not include accomodation.

13th – Capture-to-Computer’, Yorkshire Coast, Yorkshire Limited to two people & includes breakfast. £149 per person

16th – Black & White Landscapes, Peak District. Includes processing in Silver EfEx Pro & Photoshop. Includes breakfast. £70 per person

22nd – Beginners introduction to your camera, Clumber Park, Nottinghamshire. Three hours approx. Any camera no matter how basic. £35 per person

23rd – Complex Compositions – Bole HIll Quarry, Peak District. Includes breakfast. £70 per person

30th – Peak District (New Locations) includes breakfast. £70 per person

FEBRUARY

11th – Lakeland Landscapes. A day spent photographing classic lakeland locations. Includes breakfast. £70 per person.

18th – Northumberland. A day photographing the finest coastal locations in Northumberland. Includes breakfast. £70 per person.

24th – Capture-to-Computer, Somerset coast. Limited to two people and includes breakfast. £149 per person

25th – Black & White Photography, including long exposures, with co-leader & mono specialist, Paul Wheeler. Weston-Super-Mare. Inlcudes breakfast & ‘how-to’ pdf’s. £99 per person.

29th – Peak District Landscapes, Half day, including refreshments. £45 per person.

MARCH

3rd – North East Coast – Nature & Industry – Saltburn & Paddys Hole. £70 per person including breakfast

5th – Peak Woodlands, Bole Hill Quarry. Includes breakfast. £70 per person

9th – Capture-to-Computer – Yorkshire Coast for Seascapes & Long Exposures. Includes breakfast. Limited to two people. £149 per person

10th – Long Exposures, Yorkshire Coast with long exposure specialist, Noel Clegg. Includes breakfast. £99 per person.

17th – Capture-to-Computer, Spurn Point, Yorkshire. Limited to two people, includes breakfast. £149 per person.

18th – Beginners introduction to your camera, Clumber Park, Nottinghamshire. Three hours approx. Any camera no matter how basic. £35 per person

APRIL

2nd – Peak District Landscapes, with Antony Spencer. £125 per person, includes breakfast.

3rd – Peak District Landscapes, with Antony Spencer. £125 per person, includes breakfast.

10th – Private macro workshop for members of the Nottingham Photographic Society.

13th – Bole Hill Quarry, Peak District woodland landscapes, half day, including refreshments. £45 per person

22nd – Peak Landscapes, half day to sunset, including refreshments. £45 per person

28th – Bluebells in Ashridge Forest, Buckinghamshire with co-leader Tim Smalley. Includes breakfast. £99 per person.

I look forward to seeing you on a workshop soon

Best wishes

Doug

Some recent testimonials from customers;

“Just wanted to say a huge thank you for a fantastic weekend!”

“I thought all the venues were spot on and enjoyed the fact that both of you brought so many different skills and knowledge to the event.”

“Since I started doing “serious” photography about 7 or 8 years ago I’ve been on at least half-a-dozen workshops or courses. I gained more from this one day than I have from all the others put together.”