Tag: software

Hard Proofing Techniques – A Practical Example

Chris Friel
©Chris Friel

©Chris Friel

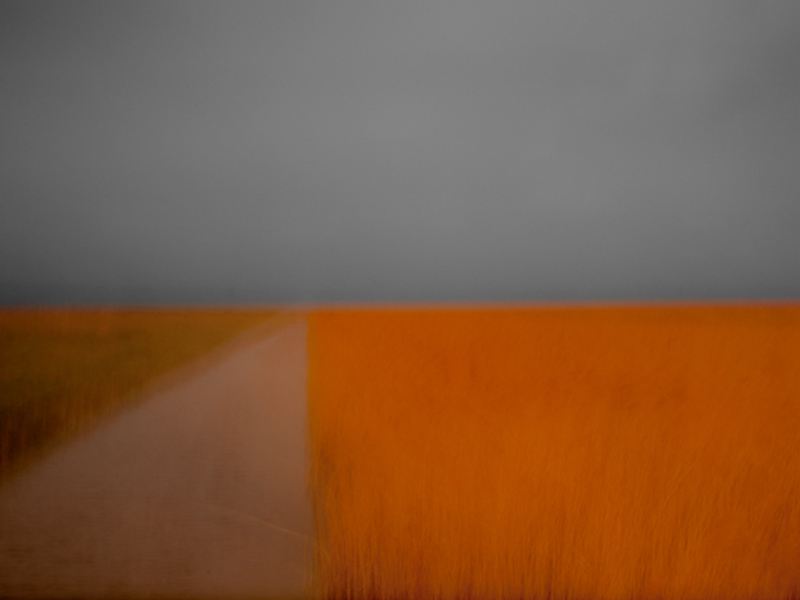
Today I had a client order for one of Chris Friels prints (the image above) to prepare and thought it would make a good subject for a blog post on hard proofing techniques.

Chris’s images can be very hard to print. He uses strong colours with low contrast and they look best printed on very matt paper. My paper of choice for most of his work is Fotospeeds superb Platinum Etching – a heavy-weight matt paper with a gentle texture which gives landscapes and many other types of images a beautiful feel and ‘presence’. Matt papers do bring with them challenges though. The matt surface reduces the gamut of colours they can display and so it can often take some work to translate what you are seeing on your screen on to the paper, even with a fully colour managed workflow. You can check out Fotospeeds papers on their website HERE – they are a great company to deal with.

A New App from the Maker of the Photographers Ephemeris

new app ephemeris

I was very privileged to be asked by Stephen Trainor earlier this year to be one of the beta testers of a new app he has designed to complement the hugely successful and absolutely essential photographers app, The Photograpers Ephemeris (TPE).


TPE has been around for a while now and is available as a desktop program or as an iOS or Android app. For most landscape and outdoor photographers it has become an essential part of their location planning kit. I couldn’t imagine doing my job without it. I also can’t imagine the brains and ability that has gone into designing such a complex and useful program.

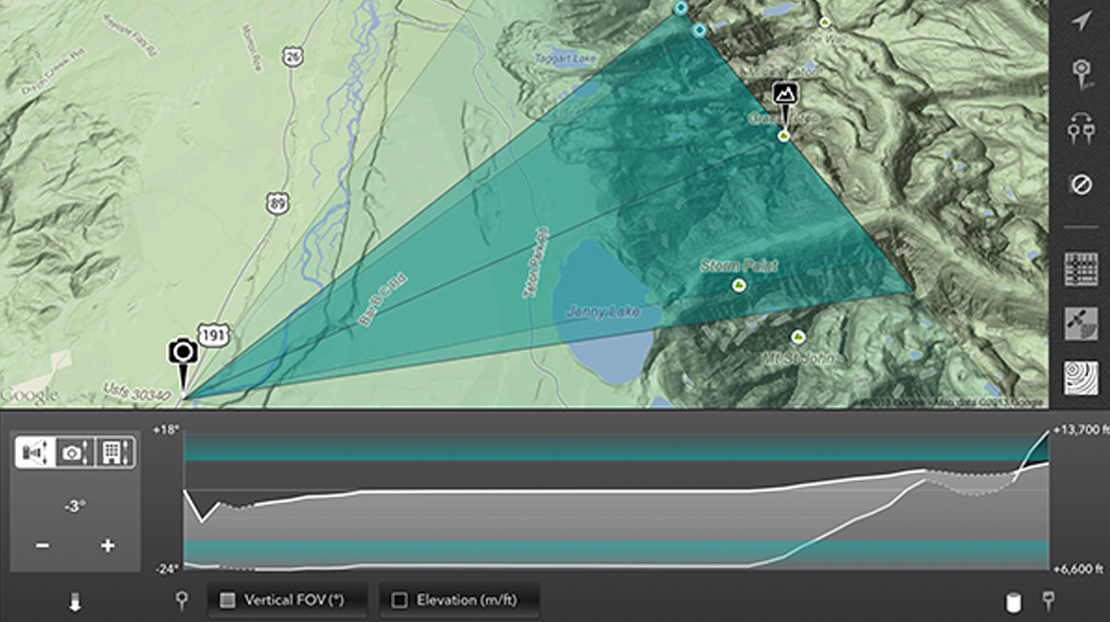
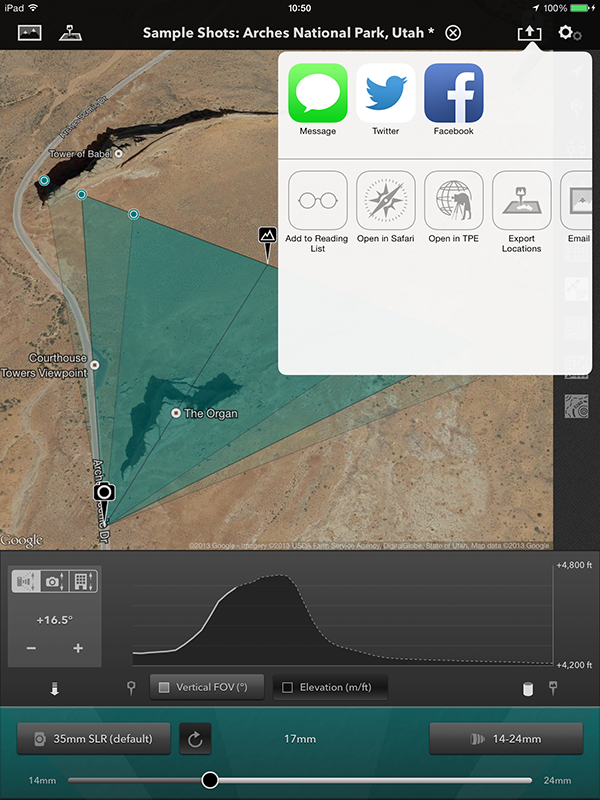
Not content with TPE, though, Stephen has forged ahead and designed a new app for us photographers called, officially, “The Photographers Transit” but it is shortened to “Photo-Transit”. This is an app which again uses Google Maps as it’s foundation. The app then adds the ability to place yourself at any point on Earth and face in any direction. You can then select any lens for your camera (and it takes into account you sensor/film size) and it shows you what field of view you will achieve at any given focal length. This means, no more worrying if you have packed the right lenses for a long hike or a flight where bag weight is critical. It also means you can plan key shots in advance based on your kit. You will know if your lenses have the width or reach you need for the shot you envisage. Or, before arriving at a location you will know exactly where to be to make best, use of your lenses to get the optimum image. This is location planning in real detail.


There is also the ability to look at elevation data in the app to give an idea of how the land rises and falls. This helps with understanding how shadows will appear, when the sun will break the actual horizon and so on. You can also flip from the app over into TPE to work with both apps together which is very useful. The app can be used offline with available data and to help visualise potential images close to roads you can combine the app with Google Streetview. Added to this is the unique ability to save location information as you plan it, or to take images at a location and tie the image together with the map/lens/body/field of view information and save it for future reference. There is also a linked website sharing facility so you can share this data with your friends, camera club members and so on, including sharing via message, email, Facebook, Twitter etc.


I was pleased to be able to grab some time with Stephen in his frenetic schedule to interview him about Photo-Transit and here is what he had to say.


DC: Thank you for agreeing to be interviewed Stephen. Can I ask first about your background and how did you come to design and program TPE?

SJT: Thanks for the opportunity, Doug. Maybe somewhere in my background is the semblance of a career plan, but if there is one, I haven’t found it yet! Over the years I’ve worked in classical music and opera, advertising, theatre engineering, telecoms and consulting, doing a variety of things along the way, including software engineering. I moved to Colorado from the UK in 2007 and started doing more landscape photography. Around a year later I signed up for a weekend workshop in nearby Rocky Mountain National Park . The workshop offered a ton of great advice and information on how to plan a shoot for the best light. Participants were asked to bring a number of items to the workshop, including paper topographic maps, rulers, protractors, calculators, pencils etc. It occurred to me that things in the digital world were by then at the point where all of this could be done in software. When I discovered that no such tool apparently existed already, TPE was born.

DC: Were you surprised at how popular TPE has become? Do you have any idea how many users there are now?

SJT: Very pleasantly surprised, yes! Across the various platforms we now have tens of thousands of monthly active users. The desktop version is downloaded around 75,000 times a year.

DC: Has anyone used TPE in ways you didn’t anticipate?

SJT: We’ve had some uses by archeologists looking for historical sun/moon positioning. Also, I’ve read about it being used by hunters, in the US mainly. Oh yes – and the trainspotters too!

DC: Is developing TPE and other photography apps your full time work, or do you have a ‘day job’?

SJT: I spend around half my time developing apps and the other half I do technology consulting, mostly in the area of digital media and online video.

DC: Are you a keen photographer yourself? If so, what style of photography do you like? Do you have a personal website where we can see your images?

SJT: I am. I like to shoot landscape primarily. I prefer a simple, clean style without too much post-processing. Photos that are “overdone” are all too common nowadays. At the same time, I’ve never much cared for the well-worn line of “my photography is an unaltered reproduction of what my eyes saw that day” and its variants. No matter how little processing is done, that’s clearly untrue, as cameras and photographic media, whether digital or film, just don’t work the same way as the eye. I’m definitely a fan of simpler compositions, although that’s something I continue to struggle to achieve in my own photography! I have a (slightly neglected) website at http://stephentrainor.com

DC: What are some of the technical issues in developing a program like TPE?

SJT: The initial challenge is implementing the various algorithms required to calculate accurate sun and moon data. Nowadays there are a few implementations out there, but the accuracy and sophistication does vary. Not all algorithms account well for factors such as atmospheric refraction, for example. (I certainly can’t take any credit for the algorithms themselves – in that regard, I’m standing on the shoulders of mathematical and astronomical giants!) Maintenance of the software becomes a bigger issue over time as the code ages and grows. I’m currently in the middle of a major modernisation of the TPE for iOS code base, much of which dates from 2009-2010 – the middle ages, in terms of iOS software. Once that’s done, the Desktop version will need to be reimplemented as a web app – all required to keep up with the technology of the day.

DC: What then gave you the idea to develop this new program, The Photographers Transit? (TPT)

The concept of displaying the field of view on a map was a suggestion made independently by a few different TPE users. I liked the idea very much and wanted to think about how to incorporate it into the app. However, after thinking it through, I decided to develop it as a separate app for the primary reason that there would be a lot more inputs required of the user to make it work: which camera? which lens? what orientation? where are you pointing it? etc. One of the keys to simplicity of use in an app is minimising the amount of input you require of the user. I think – and many would agree – that TPE is quite complex enough already without piling on yet more functionality.

DC: What is TPT designed to do for the photographer?

SJT: I think of Photo Transit as a general purpose digital planning tool for outdoor photographers. It provides a mix of digital “surveying” tools that you won’t find elsewhere, so far as I know: a horizontal field of view indicator overlaid on a map and a vertical field of view chart plus elevation profiler that shows what terrain is visible. In addition, we spent quite a lot of time on shot saving and sharing. You can create projects that contain multiple shots and share these easily with friends, colleagues, workshop participants etc. from the app. We were keen to make sure that any information you put into the app is easy to get out of it, so there’s the ability to email shots/projects, view them on a freely available web-site (http://share.phototransit.com) and to export as KML. You don’t need to own PhotoTransit to be able to view shots that have been planned using it. (BTW, ‘we’ is my wife, Alice, who does all of our graphic design, and I…)

DC: How do you see photographers putting TPT to use in their work?

SJT: It’s an advance planning tool, first and foremost: you can use it to build up a list of shots that you’d like to capture on forthcoming trips or shoots, having explored the compositional constraints of the location, your camera and lens ahead of time. Beyond that, I’d like to see photographers using it to share ideas for shots with one another. It provides an easy and complete way to share the physical setup for any stills image. I think it also has an educative role. Many people find numerical values such as field of view or focal length easier to understand when they can be visualized and, like TPE, Photo Transit is a visualization tool.

DC: How does TPT work with TPE?

SJT: Currently, you can open TPE directly from Photo Transit and match the same subject location. The next update to TPE will add the ability to open Photo Transit directly from TPE to go in the reverse direction. We have some further bells and whistles in the works too that will improve the interaction between the apps even more.

DC: What hurdles did you have to overcome to get TPT working?

SJT: Not too many – fewer than for TPE, I’d say. The data model in Photo Transit is definitely more complex (projects, shots, locations, cameras, sensors, lenses), so that took more work. However, many of the harder lessons were already learned with TPE. The Apple maps saga of 2012 cost many hours, but the lessons learned made the mapping choices and implementation for Photo Transit much more straightforward.

DC: Can you give us any clues as to your next project? or is it a secret? or are you still so tired after working to get TPT out that you haven’t had time to think about it yet?

SJT: We have another app in the works that we’re dusting off – it was shelved at the start of the aforementioned maps saga last year. It’s not directly photography related, but more than that I can’t say quite yet. We also have multiple TPE and Photo Transit updates and improvements planned.

DC: Final question, can you recommend websites of any photographers whose work you love? Who are some of your photographic heroes?

SJT: Some names that spring immediately to mind: Bruce Percy (http://brucepercy.com): I think Bruce’s photography was the first that really conveyed to me a sense of personal style. He does a great job of distilling, culling and crafting to achieve a portfolio that has an amazingly consistent ‘voice’. Jack Brauer (http://www.mountainphotography.com): Jack has an incredible collection of beautifully produced photography covering mountains all over the world. He produces wonderful photographs of places that I don’t ever expect I’ll have the strength or fortitude to reach! Guy Tal (http://guytal.com): Guy’s work from around the desert southwest of the USA is probably the most original and distinctive being produced today. He has a great eye for compositional simplicity.

 
You can visit the Photo Transit website HERE and you can follow on Twitter @photoTransit
 

New Digital Photography Workshops for Winter/Spring 2012

digital workshop

Here is the new winter/spring 2012 workshop schedule for my digital photography workshops.

I am introducing a range of new workshops and locations for 2012. You will also see I have teamed up with two more very talented photographers as co-leaders on some special locations. I will be posting full details of these workshops on my website in a few days time and soon you will be able to book and pay online via PayPal. Direct booking via email will still be available.

As a special offer for the new season I am offering the first ten who book and pay their deposits a 10% discount off of the cost of a workshop in the schedule. This does not apply to Capture-to-Computer workshops but will apply to one-to-ones. (just four reduced places now remaining)

If your family or friends are struggling to buy the perfect gift for you, why not suggest they buy you one of my gift vouchers. They can select any value they wish from £10 upwards and it can be redeemed against any workshop, one-to-one or Capture-to-Computer workshop of your choice. If the value of the vooucher exceeds your chosen workshop I will refund the difference or it can be credited towards another workshop. If the workshop exceeds the value of the voucher you can use it in part payment. I even send you a blank greetings card with the voucher with one of my images on for you to present the gift to a loved one.

JANUARY

6th & 7th – ‘Coast & Castles’ Northumberland, with Antony Spencer (now a Light & Land tour leader). Two days photographing the spectacular coast of Northumberland so beloved of photographers like Joe Cornish, including three castle locations. £149 per day or £125 per day if booking both days. Includes breakfast. Does not include accomodation.

13th – Capture-to-Computer’, Yorkshire Coast, Yorkshire Limited to two people & includes breakfast. £149 per person

16th – Black & White Landscapes, Peak District. Includes processing in Silver EfEx Pro & Photoshop. Includes breakfast. £70 per person

22nd – Beginners introduction to your camera, Clumber Park, Nottinghamshire. Three hours approx. Any camera no matter how basic. £35 per person

23rd – Complex Compositions – Bole HIll Quarry, Peak District. Includes breakfast. £70 per person

30th – Peak District (New Locations) includes breakfast. £70 per person

FEBRUARY

11th – Lakeland Landscapes. A day spent photographing classic lakeland locations. Includes breakfast. £70 per person.

18th – Northumberland. A day photographing the finest coastal locations in Northumberland. Includes breakfast. £70 per person.

24th – Capture-to-Computer, Somerset coast. Limited to two people and includes breakfast. £149 per person

25th – Black & White Photography, including long exposures, with co-leader & mono specialist, Paul Wheeler. Weston-Super-Mare. Inlcudes breakfast & ‘how-to’ pdf’s. £99 per person.

29th – Peak District Landscapes, Half day, including refreshments. £45 per person.

MARCH

3rd – North East Coast – Nature & Industry – Saltburn & Paddys Hole. £70 per person including breakfast

5th – Peak Woodlands, Bole Hill Quarry. Includes breakfast. £70 per person

9th – Capture-to-Computer – Yorkshire Coast for Seascapes & Long Exposures. Includes breakfast. Limited to two people. £149 per person

10th – Long Exposures, Yorkshire Coast with long exposure specialist, Noel Clegg. Includes breakfast. £99 per person.

17th – Capture-to-Computer, Spurn Point, Yorkshire. Limited to two people, includes breakfast. £149 per person.

18th – Beginners introduction to your camera, Clumber Park, Nottinghamshire. Three hours approx. Any camera no matter how basic. £35 per person

APRIL

2nd – Peak District Landscapes, with Antony Spencer. £125 per person, includes breakfast.

3rd – Peak District Landscapes, with Antony Spencer. £125 per person, includes breakfast.

10th – Private macro workshop for members of the Nottingham Photographic Society.

13th – Bole Hill Quarry, Peak District woodland landscapes, half day, including refreshments. £45 per person

22nd – Peak Landscapes, half day to sunset, including refreshments. £45 per person

28th – Bluebells in Ashridge Forest, Buckinghamshire with co-leader Tim Smalley. Includes breakfast. £99 per person.

I look forward to seeing you on a workshop soon

Best wishes

Doug

Some recent testimonials from customers;

“Just wanted to say a huge thank you for a fantastic weekend!”

“I thought all the venues were spot on and enjoyed the fact that both of you brought so many different skills and knowledge to the event.”

“Since I started doing “serious” photography about 7 or 8 years ago I’ve been on at least half-a-dozen workshops or courses. I gained more from this one day than I have from all the others put together.”

How do I dodge and burn in Photoshop?

dodge burn


Dodging and burning is a technique which harks back to the days of film and darkroom developing. In the darkroom film users employ strange techniques to darken areas of their prints and lighten others to improve the look of the image. For those of us working digitally it falls to Photoshop to act as our digital darkroom to achieve the same effect.

‘Dodging’ refers to the lightening process while ‘Burning’ is the darkening of areas in the image. I remember which is which by thinking that burning an object blackens it, so burning = darkening. The goal is to introduce contrast into the image in such a way that the impression is of light falling on the subject in very controlled ways, highlighting the beauty or key aspects of the image. In my photograph above (and I have selected an extreme example rather than a subtle one) you will see I have burned the tractor tracks, areas of the clouds and areas of the surface of the wheat. To contrast with this I have dodged areas of cloud and highlighted the light falling on the barn with dodging. I was aiming for a dramatic image.

The biggest tip I can give you with this process is to do it very gradually, to be patient. Most people I see using this technique want to see dramatic effects too quickly and end up spoiling their image by creating a patchy look. The process is simple but it takes time and the vision to visualise the final result before you start. It is not good to approach it in a random way and hope the end result is going to be effective.

Now to the process. Firstly convert your image to black and white using your preferred method, either in Photoshop or a plugin such as Silver EfEx Pro 2. At the conversion stage, beware making the image too contrasty as you are going to tune the contrast carefully using the dodge and burn tools. Open the mono image in Photoshop.

Duplicate the background layer by selecting it in the layers panel and pressing cmd+J (windows = ctrl+J). Always do this and dodge and burn this new layer so that if you make a mistake you can always delete it an start again without spoiling the base layer. The layers panel should now look like the image below.


I decide whether to start with dodging or burning depending on the image but in reality it usually doesn’t matter which you start with as you will be alternating between the two. The image below shows the flyout toolbox from the main toolbox which shows the two tools.


I am going to select the burn tool first. The icon looks like a clenched fist. (don’t ask me why). The next step is to set the burn brush up correctly. This is done on the top toolbar as in the image below.

You will see I have selected a very soft brush and set the hardness to zero. This really feathers the effect and helps prevent hard edges to the burned areas. In the range drop down box you can see I have selected ‘shadows’. This is something important to understand when dodging and burning. The tones you select in this box tell the brush the only tones to affect. So if shadows is selected when you brush over pixels in the image the brush will only darken shadow, the darkest, pixels. It won’t touch mid-tones or highlights. Similarly, if you select mid-tones then only they will be darkened. Shadows and highlights will be unaffected. The same applies to the dodge brush. In most cases the other thing to remember is do not burn highlights and do not dodge shadows. If you do it usually gives the pixels a ‘damaged’ look because the change is too dramatic. Stick to burning shadows and mid-tones and dodging mid-tones and highlights.

The next vital thing to note in the above screenshot is the exposure level I have selected. In the shot above it is at 3%. This is where most people go wrong, they set the percentage too high. I work between 1 and 5%. I never go higher than 5% and rarely use that. I am usual working between 1 and 3%. When you use this setting the effect builds up very slowly and delicately giving you control. If you go higher you loose control and damage the image.

Now size the brush using the [ ] keys as usual and start brushing over the image. Use large flowing strokes. Avoid at all costs scrubbing away wit the brush at small areas as this soon creates a blotchy look. Keep switching between dodging and burning and build both together gradually. Keep changing between working on the shadows, mid-tones and highlights. Keep turning the layer on and off by clicking the ‘eye-con’ on the layers pane so you can see how far you are going and how far you have come. Work towards your pre-visualised goal. Take your time and don’t overdo it!

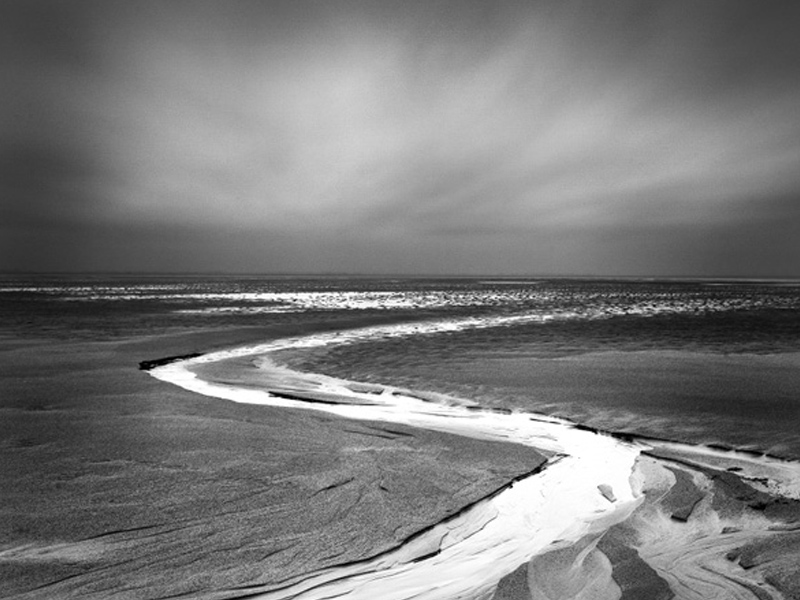
Here is my image. The first screen shot shows the basic mono conversion. The second it the dodged and burned final image. I have created a vignette to draw the eye to the water flow. I have brightened the water to give sparkle and punch and added a bit more drama to the sky.

Most mono film photographers would not consider printing an image without some dodging and burning to enhance it. Read what Ansel Adams wrote about this process as part of his print making to see how important he felt it was. He was a master of the technique. I hope you enjoy practising the effect and feel sure your mono images will improve dramatically as a result.

To learn much more about dodging and burning and all the other aspects of mono image making, why not consider coming on one of my specialist mono workshops where we work on thinking in mono, composing for mono and then processing to make mono images full of drama, light and character. You will find full details on the workshops pages of my website.