Tag: landscape

Autumn in Snowdonia – Trip Report

Snowdonia

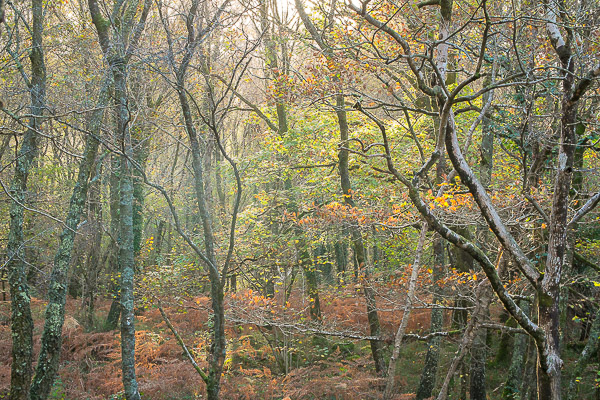
20141105-_DSF1071-Edit

I have just returned from a three day trip to North Wales where I was running a workshop in the Snowdonia National Park. Our base was the fabulous Tan-Y-Foel guest house where we were cared for perfectly by owners Chris & Maria. (If you are planning a trip to Snowdonia I can highly recommend staying at Tan-Y-Foel, the location is breathtaking from its elevated position set away from the road in above a beech forested valley with views to the mountains. The rooms, food and service could not be better and being just outside of Betws-y-Coed it is in the perfect place to explore magnificent Snowdonia – have a look at their website, which will be updated in early 2015 – http://www.tyfhotel.co.uk ) Chris and Maria kindly reserved the whole property for us so we had it to ourselves and this meant we could choose breakfast time to fit with our sunrise shoots – perfection!

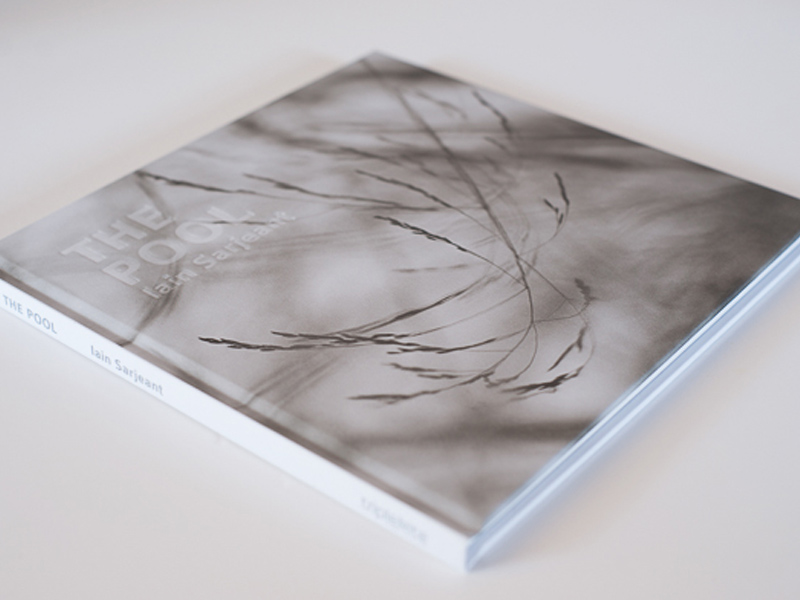
The Pool by Iain Sarjeant

The Pool by Iain Sergeant

From the first time I heard that Iains series, The Pool, was to be published by Triplekite, I was excited. I have followed Iains work for a few years now and The Pool series has become a favorite of mine.

I first came across the work on Iains website a year or two ago and was instantly entranced by its delicate beauty and simplicity. Iain is a full time professional photographer working out of Strathpeffer in Scotland. His work is often characterised by its keen observational quality. Iain is a man who walks around with his eyes wide open and seems to see things where many do not.

The Fuji X-Pro 1 – How did it perform in the Arctic?

fuji x pro

Fuji X-Pro 1. 18-55mm Lens at 18mm, f22 for 30 seconds with Vari-ND filter & tripod. ISO 200

I recently had the chance to take the Fuji X-Pro 1 with me on a workshop I was co-leading up above the arctic circle in the far north of Norway. I thought this would be an ideal opportunity to see how the camera performed in extreme conditions. I also had with me a newly delivered 23mm f1.4 Fuji lens to try out too. The images in this article were all made on the trip and all but the aurora shot are jpegs straight or virtually straight from the camera. If you followed my trip reports from the expedition you will have seen most of these images before (sorry!), but the aurora image with the 23mm lens is new, as are one or two of the others.

The idea of testing the lens here was to see how it performed shooting the “Northern Lights”, the Aurora Borealis, if we had a chance to see it. In theory the fast f1.4 aperture would make it ideal but I was also interested to test the sharpness of the lens and also to get a feel for its width, which although 23mm works out at about 35mm as a full-frame DSLR equivalent.
 

Fuji X-Pro 1, ISO400, 18-55mm Lens at 45.4mm, f6.4, 1/18 sec, Tripod

My main concern before setting off with the camera was battery performance in the extreme cold. I have found with the X-Pro 1, as many others have, that battery life is much poorer than I am used to with my DSLR. Of course, the battery is physically much smaller and the camera is fitted with a great electronic viewfinder (EVF) which must use quite a bit of power, so there are reasons behind this.

My frustrations with battery life are compounded by the fact of how difficult it is to change batteries quickly. I have the extended grip fitted to the camera which I find helps me with handling the camera and this has to be removed for every battery change. But, when shooting landscapes I also have to fit a quick release plate for my tripod and this requires a screwdriver (or coin) to remove it and this is also required to change the battery. The way I work I can easily go through four or more batteries in a days shooting and so this stripping down of the camera every time gets very tiresome. You can imagine how much I was looking forward to the drop off in battery performance in the minus 10 to minus 20 degree temperatures we were expecting.
 

Fuji X-Pro 1, ISO 800, 55-200mm lens at 156.1mm, f8, 1/170 sec, handheld

So, how did the batteries perform? Surprisingly, quite well. In fact, I can’t say I noticed a deterioration over what I am used to. True, when shooting in such cold you tend not to shoot for extended periods, however the camera is cold, even in the bag. But I didn’t have to do more battery changes than normal. For that I was thankful.

How did the camera perform? There were a couple of issues. Bear in mind that at times I was using it at minus 20 degrees and often at well below freezing. The first issue I discovered almost straight away was the Fn button on the top of the camera which is programmable to whatever function you choose (I have it set to allow me to quickly change ISO) became “sticky”. To be honest, as it happened straight away I thought at first I had perhaps damaged the camera during the flight as the body had been in my pocket (with no lens attached). However, when the camera warmed up again later in the hotel the button returned to normal action. The next day, back in the cold, the stickiness returned. I found kit still worked but I had to press it carefully and be patient with it.
 

Fuji X-Pro 1, ISO 200, 18-55mm lens at 34.3mm, f8, 1/40 sec, tripod

This button issue later extended to the AF button on the rear of the camera which allows you to select focus points for the auto focus system. In this case it went beyond sticky and refused to work, but again returned to life on warming up in the hotel.

Apart from these two issues the camera performed flawlessly in the extreme conditions we worked in and produced some images I am very happy with.
 

Fuji X-Pro 1, 18-55mm Lens at 23.3mm, ISO400, f8, 1/25 sec, handheld

What I would say, however, is, that I found myself (contrary to what I have been doing here in the UK since buying the Fuji) reaching for my Canon 5D mk3 first. The Fuji has been my camera of choice since I bought it second hand a couple of months ago and I absolutely love it. But after a couple of days I realised I was favouring the Canon unconsciously over it, whereas since buying the Fuji I had not used the Canon at all except for a commissioned shoot which required it. I analysed why this was and realised that the Canon was much easier to use in the cold. I was wearing a pair of thin Merino wool inner gloves and with the Canon I could keep these on and operate the camera easily. However, the Fuji buttons required I take the gloves off due to the size and positioning of the buttons.

I also found the physical size of the Canon easier with gloves. So it was nothing to do with image quality, but rather the practicalities of usability in the arctic weather. I was also conscious of the button stickiness. The Canon had zero issues. It is a testament to the build quality that it shrugged off minus 20 easily. To give you an idea of what these temperatures are like to work in, my camera bag (and I) were getting frosted up at minus 20. Oh, and I didn’t change a battery in the Canon for the whole trip.
 

Fuji X-Pro 1, ISO3200, Handheld, f5, 1/55 sec, 18-55mm lens at 18mm

So, conclusions on the bodies. If I go to the arctic again the Fuji will stay at home (although it grieves me to say it). It is not ideal for these conditions. If it was my only camera it can handle it, but it is starting to show stress. I would, next time, take the 5Dmk 3 and and mk2 body as my spare body. However, on trips to warmer locations abroad, the Canon will be staying at home and My Fuji will be my travel camera and if my wife, Liz, will let me, her XE-2 body will be my spare body).

Now, thoughts on that 23mm lens. If you have used the 35mm lens you will know how wonderful it is. So you might be wondering if the 23mm is as good? Is it worth adding to your lens stable? Well, my in my opinion, you should. I have only used it a little but I am already blown away by it. It is as sharp, if not sharper. Wide open it is extraordinary. The bokeh is soft and dreamy. On the body of the X-Pro 1 the camera is nicely balanced in the hand (I use the body with the added grip). I am on the train going to London as I type this and I have the lens with me. If time allows I am going to put it through its paces on some street photography – a genre it is made for. I’ll post some images if they are up to scratch.
 

Fuji X-Pro 1 18-55mm lens at 44.4mm, f5, 1/50 sec, ISO3200, handheld

I used it for some aurora images in Norway. For shooting the aurora you have the lens wide open and focused on infinity. I could have done with a wider lens, in reality, to get more of the landscape in the shot. We were in a forest miles from any light pollution and this means total darkness so composing the image is very tricky. More width gives you latitude to crop away the edges if they are a bit messy. But it is not the fault of the lens that it wasn’t wide enough for what I wanted. The wide aperture gave me great speed, so at ISO1600 I was able to make these images at 10 to 20 seconds which is ideal for aurora images of this type. Had we had a more extreme display I think my shutter speed would have been down to a couple of seconds which would have captured the ‘curtain’ effect had we seen it. Even wide open, with the difficulty of focusing on infinity in absolute darkness I was able to get sharp images with surprising depth of field. The X-Pro 1 performs really well at high ISO’s. I pushed some images to ISO3200 and these do show some noise, but nothing that my Nik noise reduction plugin can’t reduce for me.
 

Fuji X-Pro 1, 23mm f1.4 lens, ISO1600, f1.4, 12 sec, tripod (processed raw file)

So, there we have it. A brief run down on the Fuji X-Pro 1 in the Arctic. It survived, but had a couple of issues. Its not ideal for these extreme conditions, but it held its own and I am delighted with the images it gave me. (all the images here were shot on it). As I am blessed with being able to have two camera systems, the Fuji and the Canon, I have the luxury of choice so if ever I get the chance to return it will be without the Fuji. But if I was a sole Fuji user, I would happily take it knowing I would come home with a great set of images.
 

Fuji X-Pro 1, 23mm f1.4 lens, ISO200, f11, 1.2 sec, tripod

The Fuji X-Pro 1 – Is It a Landscape Photographers Camera? Some Initial Thoughts.

fuji initial thoughts

As followers of my work will know, I have been shooting exclusively wit he Fuji X-Pro 1 for about a month now. My main camera is a Canon 5D mk3 (and I also shoot on film with an ancient and much beloved Hasselblad 500C and wooden Zero Image pinhole camera).

I bought the Fuji primarily for lightweight travel photography, street photography and as a carry anywhere camera. However, as soon as I started to see the results it produced I was keen to see how it performed in my main shooting environment as a professional – the landscape.

First a few caveats. This is not a full frame camera like the 5D mk3, the sensor is smaller and has a lower pixel count. The Fuji has 16 million pixels compared to the Canons 22 million. The aspect ratio of the sensor is the same as the Canon at 3:2. I am also mindful that the range of lenses available for the Fuji is far smaller than for the Canon, but more on this later. So I knew I was not comparing apples with apples.


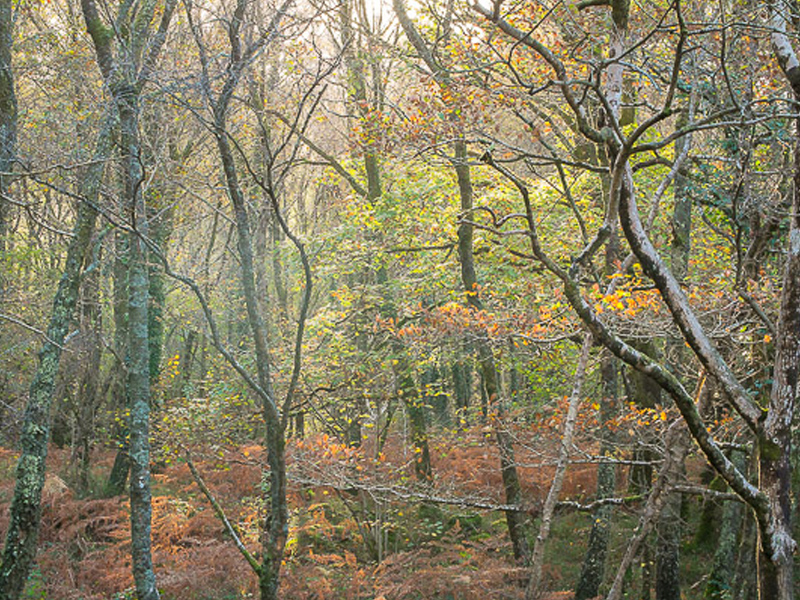
Autumn Woodland. Handheld, ISO1600, f11, 1/30 sec

Having said that, the results shooting landscapes have blown me away. (all the images in the post are taken with the X-Pro 1. Sorry they are all tree images, but it is autumn and it would be rude not to spend my time in the woods. Please also note, all of these images are jpegs either straight out of camera or at most have just had a little high pass sharpening applied for uploading to the web. One or two have had VERY slight contrast tweaks, but that is it. I haven’t had time to really set about working on raw files from the camera yet). The X-Trans sensor is astounding. I am not a techno geek on such matters, but whatever Fuji are doing, long may it continue. The clarity of the files, the rendition of colours and contrast is stunning. I am sure this is partly due to the wonderful Fuji lenses which I see as being on a par with, if not exceeding the quality of the Canon L lenses, and that is saying something.

I am loving the weight and lack of bulk of the Fuji. I have bought a smaller travel tripod to use with it which is more than adequate. It fits in a tiny bag and even with several prime lenses, filters and spare batteries it weighs a minute fraction of the DSLR kit. I have been surprised at how much pleasure this has given me back. I can work for longer and walk further without fatigue and I am much more inclined to have the camera with me, in fact I rarely go out of the door without it. (I am in London as I type this and have it in my jacket pocket with the 18-55mm lens on. Couldn’t do that with the 5D). My feeling is that a lot of photographers as they get that bit older or as aches and pains start will be keen to move to a lighter more portable kit to help them maintain their joy in the field. I also think as the quality of these cameras will mean more will gradually move away from DSLR’s, especially if a full frame version emerges.


Padley Gorge - Handheld, ISO1600, f8, 1/30 sec


All the images in this article have been taken in the last month with the Fuji using the in camera “film simulation” presets for Astia and Velvia films. (I am sure these will annoy film users as they can’t possibly be anything like true Velvia or Astia, they are just adjustment presets, but he results can still be very nice, just don’t expect them to replace true films by any stretch of the imagination).

I have been shooting with raw plus fine Jpegs switched on. Annoyingly, when Lightroom imports these files it copies them all to the computer but only imports the raws into the Lightroom database. You will find the Jpegs in the same folder, but they won’t show in LR. I tend to go in to Finder (on the Mac, Windows Explorer on Windows) and find the JPEG file I am after and drop it into Photoshop. There I tweak it if necessary and save it as a tiff. This tiff is then imported into LR using the synchronise folder command in the Library module. A bit of a faff, but it works for me. (I have just been sent this tip by great photographer Lizzie Shepherd – In LR, go into Preferences and on the General tab you can tick a box which gets LR to treat jpegs as separate images next to raw files – problem solved, thanks Lizzie!)

I am shooting Jpegs as well as raw files because the quality of the Jpegs is really VERY good. I like the mono conversions the camera does as well as the film presets and these are permanent in the Jpegs whereas they are not saved in the raw files. The Jpegs also preserve the aspect ratio presets I use in the field. You can set the Fuji to shoot in square format (which I use a lot) and in a 16:9 panoramic format. For portraits and less critical images the Jpegs are often quite sufficient for my needs. For landscapes and images I will use professionally, it’s the raw files I will process.
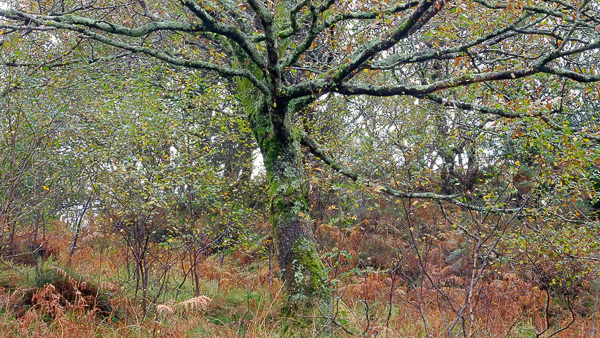
 

Tree, North Wales. Tripod, ISO200, f22 (in error - rather extreme!) 1.6 sec


A word on some of the niggles I have with the Fuji, because it does have some quirks in the way it needs to be used, especially if you are used to a DSLR, and it has some very irritating “features” too.

Firstly, let’s talk about that battery life. It’s dire. I suspect it’s the electronic viewfinder that’s the culprit but if I am shooting for a day I will go through four batteries. I carry five and still feel nervous. I will be buying a couple more. I just can’t stand having to economise on battery power as I work. The batteries you can get on Amazon for around £12 seem to work just as well as the genuine Fuji ones which sell for £60. Guess which I am buying?

The other really irritating thing is the position of the tripod mount. This really hasn’t been thought through by Fuji. As soon as you fit a quick release plate it partially covers the battery/memory card bay door. Seeing as you have to change batteries every two hours, it is very annoying to have to unscrew the quick release plate every time to do this when simply positioning the tripod thread a few centimeters further away would prevent the issue.

I have found a couple of the buttons on the rear of the camera are easily activated in error. I particularly seem to catch the Q’ menu button. It is placed on a raised part of the body moulding and this makes it prone to being pressed. However, I notice this button has been recessed on the Fuji XE-2 which has just been released which is great (and I love it that Fuji really seem to listen AND RESPOND to customer feedback on these cameras. How many manufacturers ask for feedback but then never implement any of the changes we ask for? 

There are also some quirks in how you use the camera in the landscape. At least I see these as quirks having been used to using a Canon DSLR. The first is the focusing system employed by the Fuji. It works in a completely different way to a DSLR. On a DSLR the focusing sensors are most accurate when they can detect high contrast edges, where light areas but up against dark areas. By locking on to these they can measure distance and achieve focus. However, on the Fuji, such high contrast edges are just what the focus sensors don’t want to lock on to. They are most accurate when they can find a surface with texture, say a tree trunk or the surface of a wall. This takes some getting used to but I have found when the Fuji does lock focus I get a higher proportion of sharp shots compared to using autofocus with the DSLR. It is very accurate.
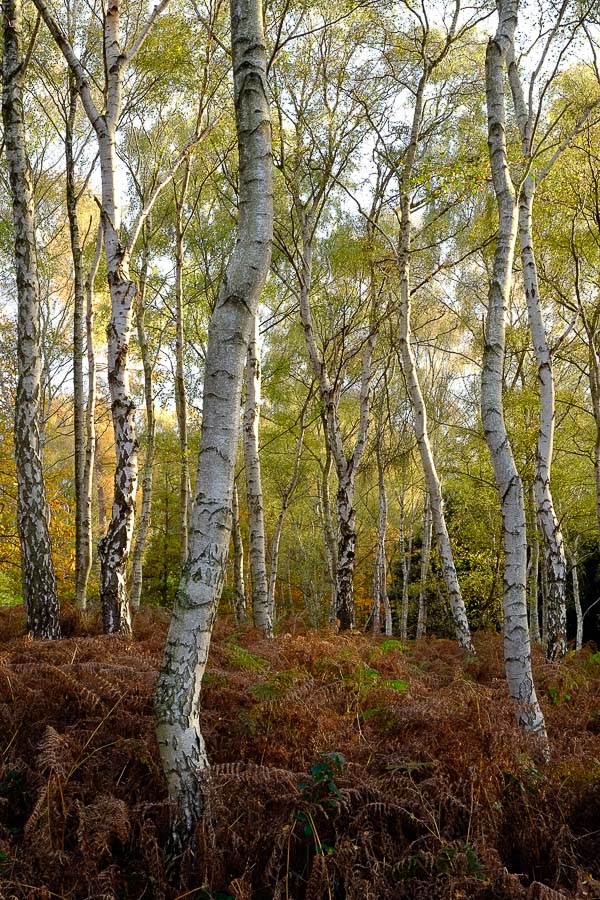
 

Silver Birch - Clumber Park. Tripod, ISO200, f16, 1/4sec


This leads me to another change I make in my workflow when making landscape images with the Fuji compared to the Canon. With the Canon I use Live View focusing with the lens on manual and love this approach. It is very accurate and allows for checking of depth of field with ease. However, on the Fuji, I have found It easier and more effective to have the lens set to auto focus but to press the AF button on the rear of the camera and select the AF point I want it to use. This locks the focus accurately for me and at f11/f16 I am getting excellent depth of field. With the sensor size of the Fuji, I am now experimenting with shooting wider, f8/f11 to see if this maintains sufficient depth of field while getting me closer to the sweet spot of the excellent Fuji lenses. My next experiment is to try back button focusing with the Fuji. I understand you can switch the lens to manual focus but still use the BBF button to focus and this sounds like it might be a good system.

Now I am used to how the Fuji works I have developed a modified workflow and have found I can already work at speed in the field with it, enabling me to stop thinking too much about camera operation and focus more on capturing changing light and composition which is much more important to me.


Tran Hows, Dawn - Tripod, ISO200, f16, 0.5 sec


I am finding the light meter on the Fuji to be very accurate and so, as opposed to how I work with the DSLR where I shoot in full manual, I have been using aperture priority and then tweaking the exposure after checking the histogram using the exposure compensation dial on the top of the camera. This is working really well for me. Other than in really low light or very contrasty light, though, I am tending to find the light meter is pretty accurate.

I have now used the Lee Filters Seven5 system on the Fuji and love it. If you have the full sized Lee system you can save a lot of money by just buying step up rings as it works fine. It’s a bit big, but the cost saving is significant. However, if you can afford it or if you are new to Lee Filters the purpose designed system is a delight. Small, beautifully made and balanced it is the perfect match to cameras of this size. As always with Lee, you get what you pay for and the optical quality and clarity of the grads is superb. Positioning the grads using the live view screen is a doddle and they do the job just as designed.
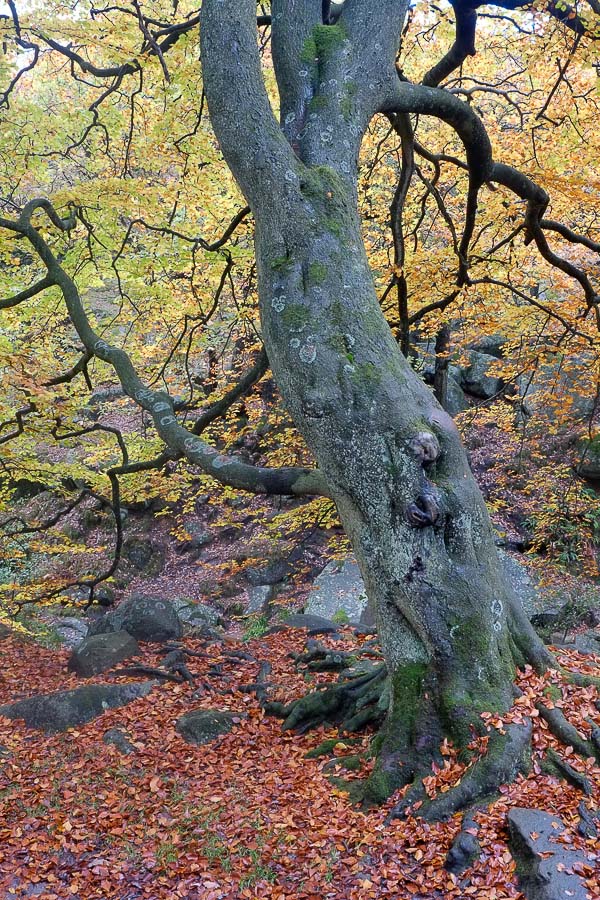
 

Padley Gorge - Derbyshire. Tripod, ISO200, f9, 1/5 sec


I have been trying a vari-ND filter for my ICM shots with the Fuji and have been pleasantly surprised with it. It is very convenient being able to dial in the amount of neutral density effect you need and being a screw on filter it is better suited to ICM work than using a Lee holder. I also have a Tiffen screw on 10 stop filter but have to try this out, so no verdict as yet, but I see no reason why it shouldn’t be perfectly fine.

I am taking delivery of the brand new 23mm f1.4 lens on Monday (it has since arrived. Sadly the first lens had two scratches on the front element but the replacement was fine) and am excited to try this out. If it is as good as the 35mm it will be a terrific lens. I must add, my next lens purchase, which surprises me to say it, will be the XF 55-200mm. (since typing this on the train I have caved in and flexed the plastic and am now the proud owner of said lens). The last few weeks have made me realise how much I use a long lens in my landscapes. I often have my 100mm macro on my Canon (both as a macro and as a landscape lens) and I also carry the 70-200mm which I use a lot in my landscapes. I had anticipated shying away from long lens for the Fujis I imagine it might look a bit ungainly, but I have really missed the reach of a longer lens.I have also bought the 60mm macro, partly because (great excuse) my wife now has the XE-2 and she loves macro photography, but of course, we can share 🙂

I am travelling to Norway in two weeks to co-lead an aurora workshop with Antony Spencer for Light and Land. I will be taking my 5D kit, but the Fuji is coming with me too. This will be a great test for it, both as a landscape camera but also the ultimate test for long exposure high ISO shooting, with the 5D to compare it to. It will also be interesting to see how it copes with the low temperatures north of the arctic circle. (All bar two days of the trip we will have no daylight at all as the sun won’t rise above the horizon – we will be living I a world or twilight and darkness for 10 days). Note to self. Buy even more batteries for the Fuji.

I will try and find time to blog from up there to let you know how it goes as well as posting some images. Watch this space.
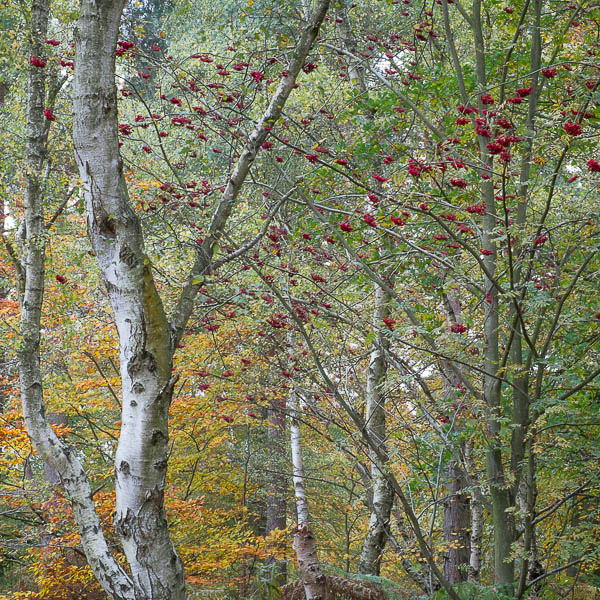
 

Clumber Park - Tripod, ISO200, f18, 1/3 sec


Shooting Landscapes Handheld. You Are Joking!

Handheld

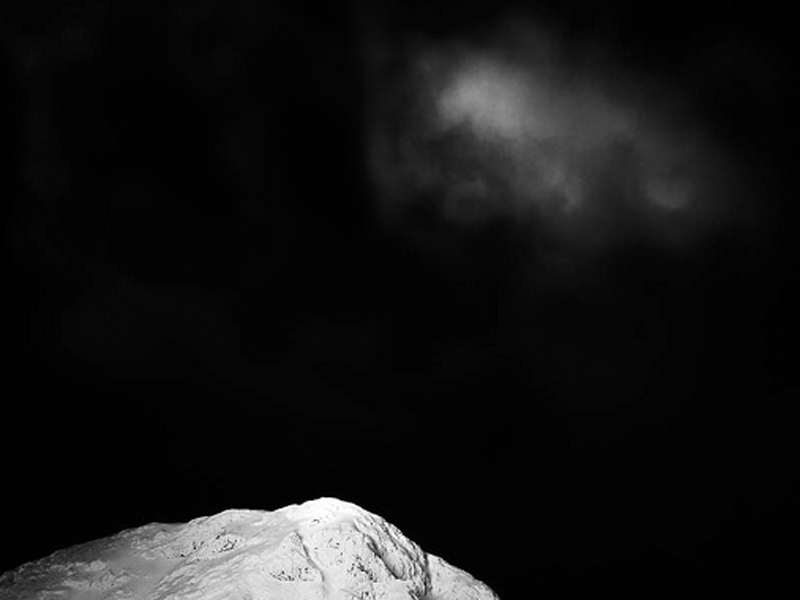
Dark Light III – Taken handheld from Rannoch Moor.

I have written some time ago about my thoughts on working with what you’ve got. Basically, the premise of my mantra is, if all you have is a 50mm lens, then shoot with it. If its raining, rather than giving you he technicolor sunrise you envisioned, shoot the rain. You get the idea.

Recently, on the day I broke my leg in fact, I had to work to my own maxim. 

I was leading a workshop up in the snows on Rannoch Moor and Glencoe, in Scotland. On the first day of the trip, just an hour into shooting my tripod head broke. It broke in a major way (and kudos to Manfrotto for replacing it for me straight away once they saw what had happened).

I tweeted about the failure and many of my followers replied with sympathy (and we all like a bit of sympathy). Several said how angry I must be feeling and how it would ruin my trip. I could understand their point of view but I just didn’t see it that way.

Kit fails. You have to get used to that which is why I have back ups or alternatives with me for virtually everything in my bag, including tripods and heads. Except this time. This time I was car sharing and to save space the one thing I hadn’t bought with me was my spare tripod & head. Ironic, huh?

Getting angry about it would have just spoiled the trip, it wouldn’t have actually changed anything. Here I was in the most stunning of locations with amazing light. I was going to work with what I had.

So this meant shooting landscapes, often in low light, handheld. 

So how did I approach this? I was using the Canon 5d mk2 and was happy taking the ISO up to 800 (and in very low light I went to 1600 at times – whatever it took to get the shot). I also went wide with my aperture. So I abandoned my usual preference for f11 (or f16)  most of the time and went wider, right down to f2.8 at times in low light, but often working at f8, all with a view to keeping the shutter speed high enough to get sharp images.

If this hadn’t been possible I would have gone over to shooting ICM (intentional camera movement) images. Again, working with what I had. 

Another approach I adopted was to shoot in burst mode. Firing three frames at least for each image to give me a better chance one would be sharp. It meant I came away with nearly 900 frames fom the day, but it did increase my success rate.

I also moved to auto focus. On a tripod, I use manual focus in Live View mode which is perfect, but hand holding it just isn’t practical to focus manually all day. There is no benefit in it, in fact, auto focus is perfect for just this situation. I use centre point focusing so I have complete control over what I am focused on. So I turn on just the centre focus point. I then point the centre of the lens very precisely at what I want to be my focus point, press the shutter button half way to lock focus and hold it there, reframe and then complete the shot. You can also use the Focus Lock button on the back of the camera in the same way. 

I found I got the best results using my longer lenses, especially the 70-200 f2.8 IS L zoom. This stayed on most of the day. The image stabilisation helped with sharpness and I followed the basic rule of thumb that you need to keep your shutter speed faster than your focal length so I tried to stay above 1/200 sec all day, using ISO and aperture to do that.

Another advantage of using the 70-200mm (and the 24-70 f2.8 L which I also used on the day) was they both have long full tube shaped lens hoods. On the day, blizzards kept blowing through and these hoods really helped to keep snow off the front element of the lens.

When I came to review the images later (and trust me, I had plenty of time to review them, lying in my hospital bed) I realised that broken tripod head had done me a favor.

I had an extraordinarily high “hit rate” for successful images on the day. I took many more that I was happy with than I normally would. I found I was able to react really quickly to the fast changing light up there. As the blizzards were blowing through we had amazing gaps in the clouds with shafts of light and wonderful cloud shapes. On a tripod I would have been faffing about and couldn’t have got half the  images I did. 

I also would have been shooting much wider lenses, 45mm or 24mm, out of habit and on reflection, images at those focal lengths wouldn’t have had the impact I got from the 70-200 lens. (For my wider shots with the long lens I shot several panorama sequences, all handheld, and Photoshop stitches them perfectly. It’s amazing).

I would also have been more likely to have been trying to use my Lee filters. This would have slowed me down even more and with the falling snow caused frustration and even more lost shots.

Yes, that tripod head did me a big favor. Of course, looking at it another way. If it hadn’t failed I would have had it with me later when crossing the river and would have been using it to steady myself so maybe I wouldn’t have fallen and broken my leg… But let’s not speculate.

So, the lesson. If something fails in the field or you forget something, work with what you have. Think laterally. Work around the problem. Find a solution. It might feel uncomfortable, but just do the best you can. Getting angry with yourself or your kit, or giving up and going home don’t help, and you never know, like this occasion, you might just produce something unexpected by approaching the problem with a positive frame of mind.

If its something really bad like leaving all your batteries or memory cards at home, then use your mobile phone camera. If that’s back in the car, then just sit back and enjoy the sunrise. There will always be another.

Dark Light II – Taken handheld at the mouth of Glencoe

Tips for photographing in the rain

Rain Tips

Wet Day in the Forest

I am sitting in my studio with rain lashing down. April showers is one thing, but this is ridiculous! I thought it might be an idea to post my top tips on photographing in the rain.

Many photographers simply dismiss making images in wet weather out of hand, but in doing so I think they are missing out on some wonderful and different images. Granted, if  the rain is really driving and especially if it is blowing directly onto the lens, it is pretty much impossible to work outside. It is then I look for an indoor location or head home, fire up the iMac and do some image processing with some good music on and a nice hot cup of tea to enjoy.

However, we often get gentler rain or it is blowing in from behind us so the lens stays clear. It could be the rain is coming down vertically or is intermittent. In those circumstances it can be ‘game on’.

The first thing is to protect our gear. Whether we shoot on film or digitally, water and cameras are not a good mix. If our body and lenses are from a pro range, like the Canon 1ds and ‘L’ lenses, they are heavily sealed against water and dust and can perform in extreme conditions, but mid range bodies and lenses down, while having some weather sealing can soon start to be affected (often terminally) by water and dust. I have tried all kinds of camera protectors and to be honest, most are just impractical. At one end there are over designed complex polythene systems with arm holes and gussets, seals, elastic and goodness knows what that take a couple of days and a lot of patience to fit and are then so bulky and restrictive in their desire to totally protect the kit that operating the camera with them fitted is like trying to thread a needle with our hands submerged in a bucket of jelly.

There are other simpler protectors which are so flimsy they are worse than useless.

I do carry a couple of the disposable Optech ‘Rainsleeves’. These are low cost, come in packs of two and are designed to be used a few times and then thrown away. With careful use they can last quite a while. They take up little space in the kit bag and the price is very reasonable. It has to be bad for me to put them on though because, like most rain covers, they restrict us in using the camera. Everything becomes fiddly and a bit of a chore. The worst problem is getting your eye to the eye piece to compose and focus (or, if you use Live View, seeing the monitor clearly as the polythene is not optically clear enough to focus critically). There is a hole in the protector which is designed to go around the eye piece but to fit it you need to take the eye pice rubber off and then re-fit it over the polythene and by this time I am losing the will to live.

A simpler and much cheaper option is to carry a thick polythene bag. I carry one which is big enough to simply pop over the whole of my set up on the tripod. It covers camera, lens and filters. Obviously, you can’t work with this in place but it saves packing up for every shower. As soon as the rain has passed over, just whip it off and got on with the business of making images.

I also carry a cover similar to this one. Bought on EBay for less than £15 it gives good access to the cameras controls and is quick to fit and remove. Focusing and zooming are a bit tight but the cameras body controls are very easy to use, as is the eye piece and screen. I have been using mine for a couple of years and it is stills waterproof. Made from proofed nylon you buy one to fit each lens and body combination (in theory) but I bought one for my longest lens, my 200mm f2.8, and use it on all my lenses – the shorter lenses just have the cover a bit bunched up but it is not an problem for me.

Then, yesterday, on one of my bluebell wood workshops, a client had a new ‘device’ which seems like a brilliant idea to me (Thanks for the tip, Maria!). She was given the idea by photographer, Jeremy Walker. It may sound a bit strange but in really wet conditions yesterday she was able to shoot with ease and keep her kit dry. It was a very large sheet of Chamois leather. Told you it sounds strange. However, it is is not your average Chamois from Halfords. She got this from Skye Skynes – here on this page . Now, when you see the price (£22 delivered in the UK) you will probably have a sharp intake of breath and think I have finally lost my marbles, but before you shake your head and leave this post let me just tell you, these are the most amazing Chamois you have ever seen or felt. Skye Skyns make them from sheep skins on the Isle of Skye and they are very thick – many times thicker than the Chamois I use when cleaning the car. It is also the softest Chamois I have ever felt. The sheet is really big and you just drape it over your camera and lens. In between exposures you can drape it over the front of the lens (and filters) to protect the glass from drops of rain. It absorbs the rain and is perfect for wiping kit dry too. Because it is a sheet rather than something fitted you can double or triple fold it and just drape it over the lens and position it as you wish. As I watched my client work I was impressed with how easy it was for her. The Chamois has another advantage, it makes a great thing to wrap kit in to protect it. So even in dry weather it iso earning its keep in the rucksack. They are washable so when they get grubby they can be spruced up easily. I have ordered mine and can’t wait for it to be delivered, although knowing me it will come the day a long drought starts and I won’t get to use it in anger for months!

A good style of hat to wear in the rain is a hat with a rigid peak, like a baseball cap (but waterproof). This keeps us a bit drier and warmer but also the peak goes over the top of the camera while we have our eye to the eyepiece and helps stop the rain fogging the viewfinder. Absorbent lens cloths (and often several of them are needed for a rain session) are essential for drying fog off of the viewfinder and lens.

I also keep all those little bags of silica gel which come in many products packaging when they are delivered to us, you know the little white sachets with beads in which have ‘do not eat’ written on the outside. Silica gel absorbs moisture. I keep them all and drop a few in my camera bag, to help dry the air in the bag. Every now and then I swap them out, dry the old ones out at home and let the new ones do their job in my rucksack. (I also keep them in my laptop bag, lens cases and so on. Every little helps.

What about drying kit off after the session? I use absorbent cloths to dab the camera and lens dry, getting the worst of the wet off. I then let the kit dry slowly and naturally in a warm spot in the house, but not by direct heat. Then, once dry it needs a clean and polish to get any residue off of the body and glass. For cleaning my lenses I have stopped buying the ridiculously expensive lens cleaning fluid the manufacturers would like us to use. I get a big bottle of lens cleaner from my opticians for £2.75 (and that amount lasts me a couple of years!!). I use it to clean my glasses and honestly can’t see any difference when using it on my lens compared to the stuff sold by camera suppliers. I have a small spray bottle I decant some into to take into the field from the large bottle which stays at home.

That’s enough on keeping the kit dry. What about technique?

Passing Shower - Isle of Harris

Firstly, I don’t tend to use lens hoods for protecting against flare but I do use them to keep rain off of the lens. The two lenses I have which have particularly effective lens hoods are the Canon 24-70 L and the 70-200mm. Both of these come with a lens hood which is a full tube, not ‘petals’ which is more usual on wider angle lenses. These completely shield the lens glass from all but rain which is driving towards the lens in strong winds. The downside is that you can’t use Lee filters. To overcome this limitation I take bracketed exposures and blend them later in Photoshop. Problem solved.

I sometimes carry a golf umbrella which is useful to work under as long as there isn’t much wind. (This is the umbrella I use – designed for use in high winds – CLICK HERE) If the rain is coming in horizontally or the wind is strong, forget the umbrella, it is just impractical. I have been toying with the idea of trying studio lighting clamps to see if I can find one which will lock on to my tripod leg and hold the umbrella over me and the camera so that my hands are free to work. I will let you know if I find one that is suitable.

It makes sense not to fight the rain, so if it is blowing in from a particular direction, see if there are images to be made that will enable you to turn the lens away from the direction it is coming from. I also often head to woodlands in the rain. Trees in leaf will provide good cover although when the leaves get very wet it will start to get through to you, but it is dripping vertically from the leaves and not blowing in to the lens so with some of the protection I describe above we can continue working.

Cromer Pier - Winter Rain

So, there we are, all set up with a protected camera and some techniques to help us keep dry while we shoot. Is there any way we can use the rain to enhance our images? Most certainly.

The first thing to say is that the light as ‘bad’ weather passes or just before it arrives, is often spectacular. Foregrounds can be lit with glorious golden light with a deep black sky (one of the rare occasions that the sky is darker than the foreground). Shafts of light can pour from the clouds and glide across the land or sea. Rainbows decorate the sky. It is the photographer who is prepared to be out in the rain that gets to capture this glory.

In rain I often focus on making detail images, intimate landscapes. In woodland or in amongst the shelter of rocks there are lots of fascinating details which look great when wet. The diffused soft light when it rains is perfect for detail images as there are no strong shadows to contend with and the colours are rendered beautifully. The woods or rocks provide some cover and working on the close landscape provides a nice change from shooting the wider world.

While it is raining keep an eye open for things being back-lit. As the sun emerges from the clouds, wet trees, plants and buildings can glow as the sun catches the wet surfaces. If you want the opposite effect and want to kill reflections and saturate colours, fir a polarising filter and rotate it while looking through the eyepiece and see the reflections disappear. Shooting in the rain is also an ideal time for more creative image making – try shooting through wet glass from inside a car or cafe. The rain blurs the world and creates an impressionistic feel to things. Or go the whole hog and have a go at ICM (intentional camera movement) utilising the low light to lengthen the shutter speed and create images with blur by moving the camera.

If you like long exposures, try shooting them in the rain. If you can keep the kit dry, the effect of the long exposures is to turn the rain into mist and you end up with an image which looks like it has been shot on a misty or foggy day.

A final idea is to shoot puddles and running water. The raindrops create radiating patterns and often the light and colours above the water is reflected in it and yields great creative possibilities.

It has taken me a few days to put this post together. Now, as I finish it, the day is warm and bright. the rain seems a million miles away, but it is forecast again for tomorrow. I find myself hoping it will rain, so I can go out and have a go at capturing something with my camera. I hope you feel inspired to, too.

A Break in the Cloud


New Digital Photography Workshops for Winter/Spring 2012

digital workshop

Here is the new winter/spring 2012 workshop schedule for my digital photography workshops.

I am introducing a range of new workshops and locations for 2012. You will also see I have teamed up with two more very talented photographers as co-leaders on some special locations. I will be posting full details of these workshops on my website in a few days time and soon you will be able to book and pay online via PayPal. Direct booking via email will still be available.

As a special offer for the new season I am offering the first ten who book and pay their deposits a 10% discount off of the cost of a workshop in the schedule. This does not apply to Capture-to-Computer workshops but will apply to one-to-ones. (just four reduced places now remaining)

If your family or friends are struggling to buy the perfect gift for you, why not suggest they buy you one of my gift vouchers. They can select any value they wish from £10 upwards and it can be redeemed against any workshop, one-to-one or Capture-to-Computer workshop of your choice. If the value of the vooucher exceeds your chosen workshop I will refund the difference or it can be credited towards another workshop. If the workshop exceeds the value of the voucher you can use it in part payment. I even send you a blank greetings card with the voucher with one of my images on for you to present the gift to a loved one.

JANUARY

6th & 7th – ‘Coast & Castles’ Northumberland, with Antony Spencer (now a Light & Land tour leader). Two days photographing the spectacular coast of Northumberland so beloved of photographers like Joe Cornish, including three castle locations. £149 per day or £125 per day if booking both days. Includes breakfast. Does not include accomodation.

13th – Capture-to-Computer’, Yorkshire Coast, Yorkshire Limited to two people & includes breakfast. £149 per person

16th – Black & White Landscapes, Peak District. Includes processing in Silver EfEx Pro & Photoshop. Includes breakfast. £70 per person

22nd – Beginners introduction to your camera, Clumber Park, Nottinghamshire. Three hours approx. Any camera no matter how basic. £35 per person

23rd – Complex Compositions – Bole HIll Quarry, Peak District. Includes breakfast. £70 per person

30th – Peak District (New Locations) includes breakfast. £70 per person

FEBRUARY

11th – Lakeland Landscapes. A day spent photographing classic lakeland locations. Includes breakfast. £70 per person.

18th – Northumberland. A day photographing the finest coastal locations in Northumberland. Includes breakfast. £70 per person.

24th – Capture-to-Computer, Somerset coast. Limited to two people and includes breakfast. £149 per person

25th – Black & White Photography, including long exposures, with co-leader & mono specialist, Paul Wheeler. Weston-Super-Mare. Inlcudes breakfast & ‘how-to’ pdf’s. £99 per person.

29th – Peak District Landscapes, Half day, including refreshments. £45 per person.

MARCH

3rd – North East Coast – Nature & Industry – Saltburn & Paddys Hole. £70 per person including breakfast

5th – Peak Woodlands, Bole Hill Quarry. Includes breakfast. £70 per person

9th – Capture-to-Computer – Yorkshire Coast for Seascapes & Long Exposures. Includes breakfast. Limited to two people. £149 per person

10th – Long Exposures, Yorkshire Coast with long exposure specialist, Noel Clegg. Includes breakfast. £99 per person.

17th – Capture-to-Computer, Spurn Point, Yorkshire. Limited to two people, includes breakfast. £149 per person.

18th – Beginners introduction to your camera, Clumber Park, Nottinghamshire. Three hours approx. Any camera no matter how basic. £35 per person

APRIL

2nd – Peak District Landscapes, with Antony Spencer. £125 per person, includes breakfast.

3rd – Peak District Landscapes, with Antony Spencer. £125 per person, includes breakfast.

10th – Private macro workshop for members of the Nottingham Photographic Society.

13th – Bole Hill Quarry, Peak District woodland landscapes, half day, including refreshments. £45 per person

22nd – Peak Landscapes, half day to sunset, including refreshments. £45 per person

28th – Bluebells in Ashridge Forest, Buckinghamshire with co-leader Tim Smalley. Includes breakfast. £99 per person.

I look forward to seeing you on a workshop soon

Best wishes

Doug

Some recent testimonials from customers;

“Just wanted to say a huge thank you for a fantastic weekend!”

“I thought all the venues were spot on and enjoyed the fact that both of you brought so many different skills and knowledge to the event.”

“Since I started doing “serious” photography about 7 or 8 years ago I’ve been on at least half-a-dozen workshops or courses. I gained more from this one day than I have from all the others put together.”