Category: Gear Reviews

“With Trees” by Dav Thomas, a Review

With Trees, Dav Thomas

In 1961 a very young Bob Dylan recorded “Blowin in the Wind” and within months his life had changed forever. After seeing “With Trees” I have a feeling life won’t ever be quite the same for Dav, either.
 
So here we are in the lull before the storm. I think it’s true to say that, outside of UK landscape photography circles, Dav is largely unknown. But amongst us he already has a reputation for quietly doing his own thing with no other purpose than to make beautiful images. If Dav tweets a link to a new image on his website, Twitter goes quiet for a while as we all click to see what he has achieved this time. Then the retweets and plaudits begin, such is his reputation.
 
So when it was rumoured that Dav would like to “do a book”, many urged him forwards and since then the landscape photography community in the UK has held its communial breath and waited. The waiting is almost over.
 

Cover

"With Trees" by Dav Thomas - Book Cover


Davs reputation is largly built around his images of trees and woodlands and so it was natural that they should be the basis for this book. I haven’t seen a physical copy of the book itself for this review as it is currently being printed in Europe, but knowing Dav and his attention to detail it will be beautifully finished and presented.
 
So what can we expect as regards the presentation of the book and its technical specification? The book is quite large, bigger than many photography books at 270 x 345mm with 112 pages. The hardcover is to be printed directly, so no dust jacket, and the cover is matt laminated. There will be 88 photo plates.
 
Dav and David are pushing for real quality with this book by opting for 170 gsm paper for the inner pages. This quality is further emphasised by the fact that they have opted to go for the more expensive but infinitely higher quality stochastic litho printing which is very close in quality to fine ink jet printing as opposed to using dot pattern printing employed in more cheaply produced photography books.


There are to be a very limited run of 30 luxury limited edition books, signed and numbered, which come with three of Davs signed prints (you can’t choose which, but if you know his work, this shouldn’t be an issue). These prints are limited to the book making this a very good value purchase for those fortunate enough to secure one. The prints will be made on 310 gsm Photorag paper at 195 x 245mm, each individually signed and numbered. This edition also comes in a foil blocked slip case at £125 plus postage.
 
There is also a special edition of the book limited to just 50 copies which comes with one of Davs signed prints (print specification as above) which will not be available elsewhere. (Again you cannot choose which print) These books will be signed and numbered by Dav and also come in a foil blocked slip case. The price for this edition is £75 plus postage.
 
The standard edition of the book, pre-ordered, will also be signed. These are priced at £40 plus postage.
 
The book is now available to pre-order now (from 28th April 2013) from the website http://www.withtrees.co.uk and for those who do pre-order and pay in advance for their copy are to be rewarded with a gift of an additional signed print. These won’t be available once the book goes on general release, so a very good reason to pre-order your copy.


The book is being published by David Breen at the newly formed Triplekite Publishing and I interviewed David recently about the project. (This interview took place about a week before the book went on pre-release).

Is your background in photography?
 
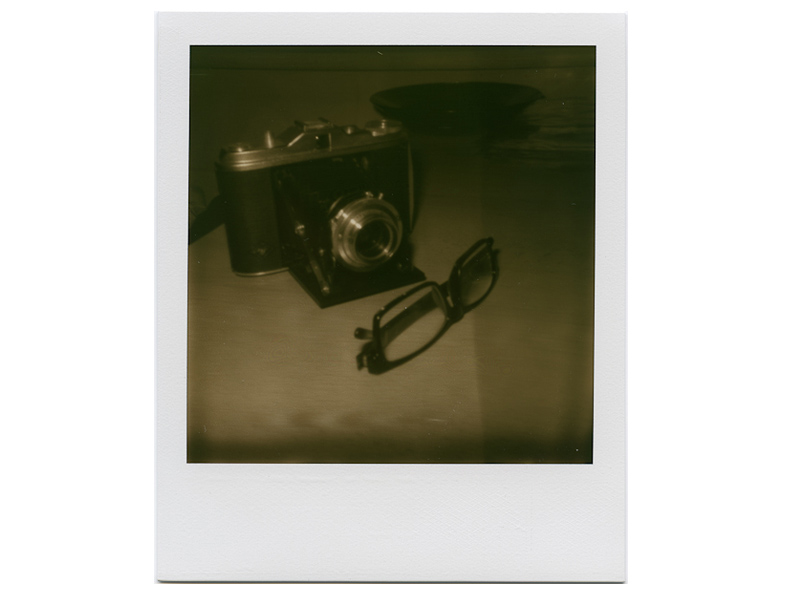
I am not that sure I would describe what photography means to me as a “background”much as a passion. I have had numerous cameras over the years, but for a long time I “took” some photos as opposed to “making” an image. Quite a few years ago I stumbled into landscapes and it felt natural and to be something I could become knowledgeable about.
 
For me, my photography passion is not just about making an image myself, I am genuinely fascinated and enthralled by the genre in its entirety. I probably started to become somewhat proficient myself about the same time as my 3 children arrived. So as I should have been practicing more and developing, I found an equal lack of time.
 
So I am possibly more versed in the output of other people’s photography than my own. I have also always had a borderline obsession with books and learning, which is my career, so naturally the genre of the Photo Book became a real interest and active collection.
 
How did the project between you and Dav come about?
 
I have had a few ideas for books over the last few years, associated with photography mainly and the organic aspects of corporate structure and politics as another, not surprisingly I think one of those will be a little more interesting to produce than the other. Parking the delights of comparing plants to large corporates to one side, I started to look for a photographic related book project. This is where twitter, some fortuitous coincidence and going with your instincts combined. I knew of Dav and his work through twitter and I decided for many reasons to try out working with film. I got amazing help over many days of many people, but most notably Tim Parkin and Dav. Between them 140 characters and the odd email, they taught me zone metering and off I headed to Padley Gorge. As I parked up in Surprise View car park I saw a fella wandering around the woods with a square of cardboard in front of his face, coincidence meant I met Dav Thomas, who was as helpful in real life as online. A few months later a bunch of people were asking, encouraging, cajoling Dav to publish his own book via twitter and it seemed a natural question to ask if he would like some help to do so.
 
Why did you think it was worth backing a book by Dav?
 
Oh, that’s a tough question, there are so many reasons and so few of them all that logical. I would love to say its because I have years of experience on photo book publication and can spot real, undiscovered talent, but that would be a lie. And to say I think this will be a huge commercial success would be a lie too. Probably the closest I can get to explaining it is to say, I believe his work has a unique feel to it which can be appreciated by both photographer and non, in equal measure. And that doing this, gives me the opportunity to fulfill a personal goal, business goal and to help someone else, helped me, in the process. Which is not to say I don’t think it will be a commercial success, or that it won’t lead to other things.
 
What were your first thoughts about the book when you saw Dav’s early proofs?
 
Shock, amazement, satisfaction and relief. Shock that he had achieved so much in such a short period of time, I was expecting a book layout with maybe ten percent of the images in it for illustrative purposes, what he sent looked almost finished. Amazement at just how good it was, and that every page turn seemed to reveal another gem. As well as the images which he hadn’t shown publically, those a little different. Satisfaction that my gut instinct was looking to be proved right, and relief that Dav and I wouldn’t be working the car boot sales of Northern England for the next couple of years.
 
Do you have a background in publishing?
 
This will be the first book my company has published, which is a business goal of mine achieved. When we get to send that first edition off to the national archive of the British Library, which is a legal requirement, it will be a very special moment to me personally and I expect Dav also. But to say I am completely new to publishing isn’t exactly the full story either. I have worked for nearly 20 years in the field of professional learning and development and in that time have supervised and been responsible for the publication of many things. So the process of it isn’t new. My company today also has a fledgling business channel in greetings cards and calendars from other photographers known to me.
 
What difficulties have you encountered in the process, and how have you overcome them?
 
We have been lucky so far in this respect as Dav is also a graphic designer, so the book layout etc. is down to him. With that experience comes many print contacts and support. I think we are also in that fortunate position of it being our first, so we don’t know what mistakes we are making, and are therefore not precious about changing our decisions. The quality of the finished book is always the deciding factor. At the end of the day, Dav has put his faith and trust in Triplekite to help him to produce as good a book as we can of his work. We believe we are working with a photographer of high enough quality and potential that we can truly make something great. The rest as I so often say “is just noise”.
 
We are planning to have the book in the UK, in our possession during July of this year, and launch at the Masters of Vision Exhibition where Dav is exhibiting.
 
Will you be selling through book shops, through online retailers or just through Davs website?
 
We are still very much in the planning stages where this is concerned, initial pre orders with the “thank you” print, will be sold direct. We are still in ongoing planning & in some cases discussions with numerous retailers, both independent and larger. We do however only have 600 copies in the first edition, so its very much dependent on how the pre orders and initial sales go.
 
How are pre-sales going at this early stage, is much interest being shown in the book?
 
So far we have only really soft launched it to friends via twitter, Facebook and Davs website. Support has been incredible and we are truly appreciative of all the support. To show how much that support means, we changed our pricing strategy by asking anyone who cared to contribute to tell us how much the book should be. Its fair to say that we dropped the price of one edition, kept the price of another the same, and chose to ignore the opportunity to raise one price based on the feedback given.
 
If the project is a success, do you think you would like to be involved in another photography book?
 
I think so yes, ISBN numbers are bought in blocks of ten so I have 9 remaining, 8 if I include the “Organic Organisation book. But all joking aside we have spoken about other titles with some people. The attention, resource, energy and focus right now, is about making this book as good as it possibly can be.
 
If so, any hints as to photographers you might like to feature, or is that all under wraps at the moment?
 
I think it would be unfair and commercially unwise to talk about any particular photographer. There are of course names who are producing great work right now but are yet to be published, these artists spring to mind when asked, but who knows. It may not even be a monographic work. The other answer is of course that we are open to ideas and approaches, talking about possibilities costs nothing, but rarely is anything made that hasn’t started with a conversation. There will be many, many photographers out there with great skill who we have no idea even exist right now.
 
Have you considered publishing a book of your own images?
 
Of course I have… I have a project called “18 months” which is a journal of hotel room images I have stayed in during my recent business life… and if I ever find a desire to own 600 copies of my own book I will definitely be publishing it. My commercial side suggests to me I will be better off publishing other work, or a “set of 6 postcards” of my own. 😉


So what are my impressions of the book?
 
The first thing I saw was the cover image of Bullrushes in the Frost, which is a particular favourite of mine. In fact, I have a print of it on the wall of my studio. It. Is a fitting image to set he tone for the rest of he book.
 
Inside we find a foreword from David Ward, which again says much about the book and even more about Dav and his work. David would not put his name to any book that did not show the very highest of standards in photography.
 
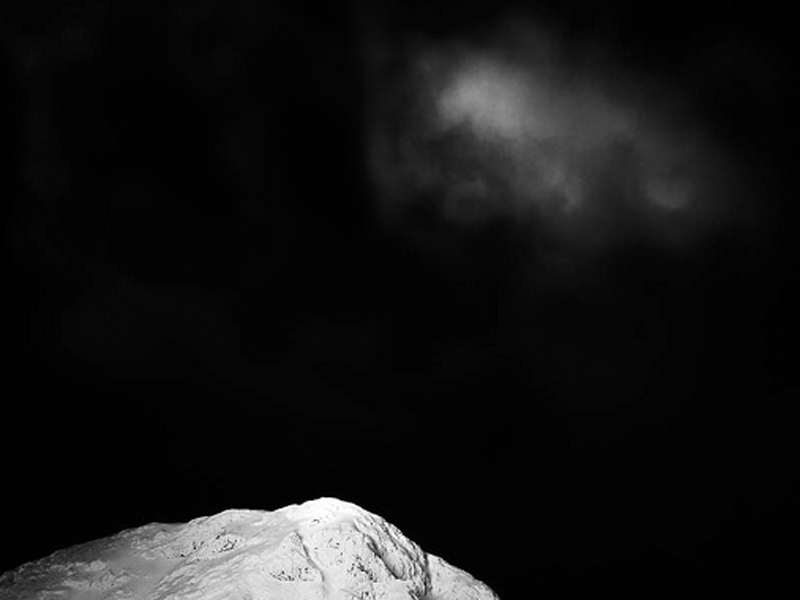
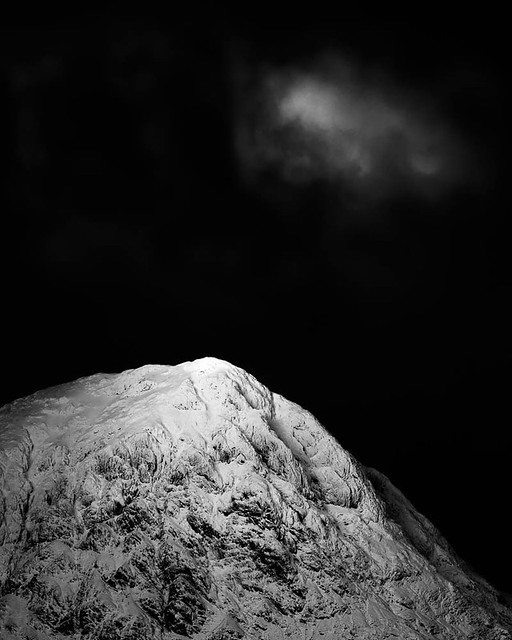
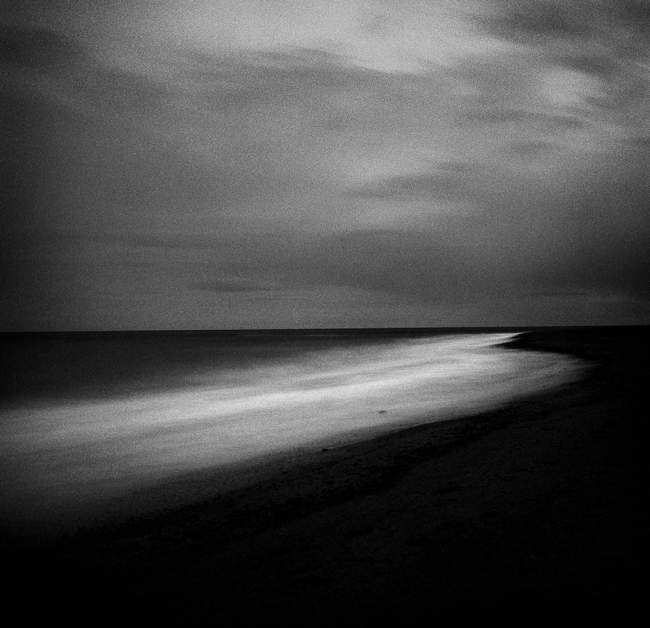
Turning a few pages soon confirms that Dav spends most of his time photographing in mist, frost and very subtle light. If you are a lover of intense sunrises and post apocalyptic colours then this is not the book for you.
 
Most of the images are made in the Peak District close to Davs Sheffield home, although interspersed among them are images from Scotland, the Lakes and elsewhere. Using, mainly, a 5 x 4″ large format film camera, Davs images reveal intense detail and subtle colour and tonal detail. He works with a number of film types and these seem to be chosen to work well with Davs chosen subtle light and colour palette.
 
It is evident from close inspection that Dav takes great care when scanning his negatives or transparencies to maintain the subtleties the film has captured. He then maintains this subtlety by going gently with the sliders and controls in the software. Just because a slider goes to ten, he certainly doesn’t feel the need to push it to ten. There is a lesson there.
 
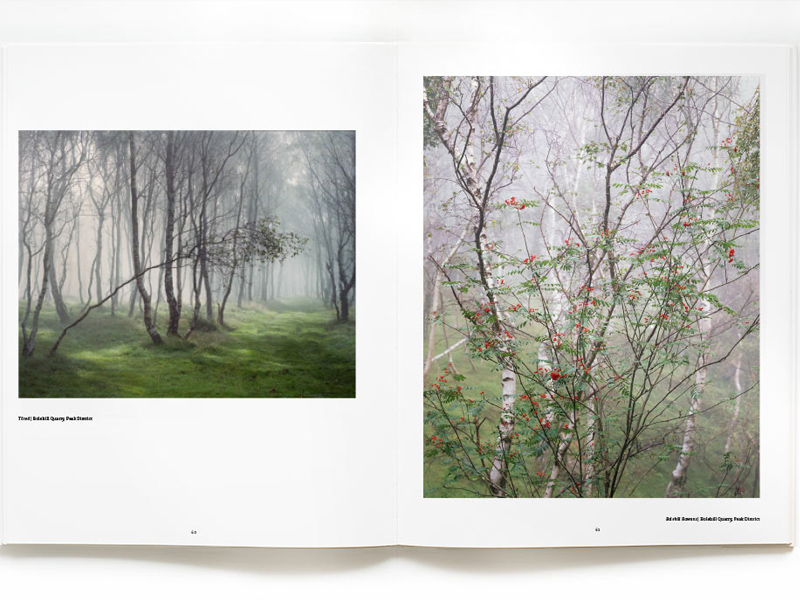
For many of us, to wander into a woodland with our camera is to come out in a cold sweat. For many it is not long before we wander back out again in search of a nice easy beach, some lovely boulders or a comfy lake. The confusion, tangle and chaos of the woods can be intimidating. Where are the flowing lines? The foreground interest? The fore, middle and background all neatly delineated? Where is the sky? The horizon? Minimalism? No chance. Simplicity? In your dreams! And yet, here is Dav Thomas making it look effortless. The chaos is tamed. The tangle, untangled. The confusion, simplified. It can’t be as simple as he makes it look.
 
A close examination of the images reveals that he doesn’t just point his lens at just any old tree. He obviously takes enormous care in searching out his subject and then dignifying it by carefully placing all the elements so carefully in the frame. And all this in fast changing light with a large manual camera with no instant feedback screen and histogram. This is evidence of a master at work.


While many images in the book are shot and revel in the colours of autumn, Dav doesn’t rely solely on this season to make his images. We find many are also shot in spring and through winter. If anything, I get the feeling Davs camera lies undisturbed for the summer. I failed to find any images which were clearly shot in the warmer months.
 
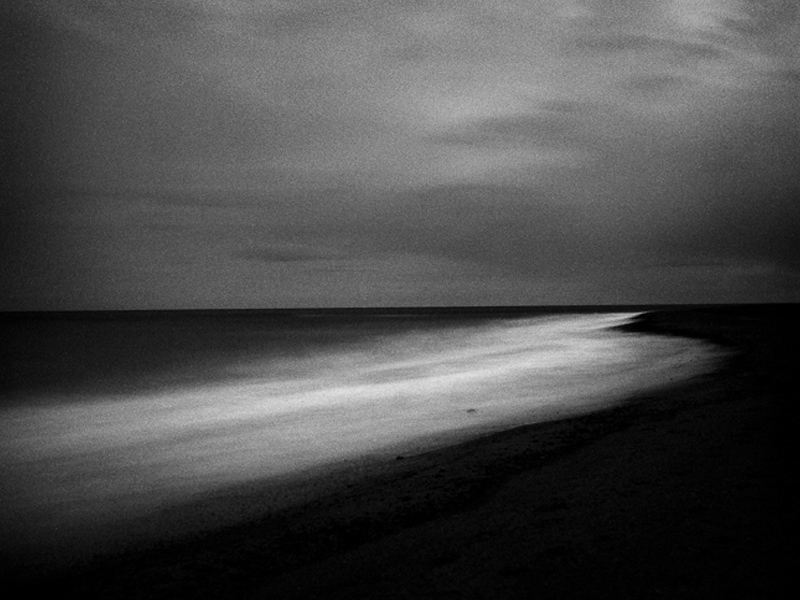
If anything comes close to competing with the trees which are the star of he show, it is the weather. Frost, mist and various types of subtle light show off the trees to best effect. I also suspect Dav has an affinity or grasses and bracken too as they often feature as strong elements in he images.
 
I was pleased to be able to interview Dav recently about the book. Here is what he had to say.


Dav, can you tell me a bit about your photographic background?
 
I’ve more or less always had photography in my life, it was a passion ignited by my cousin who taught me how to print my then rubbish black and white photos in his darkroom when I was about 10, he also gave me his hand-me-downs, allowing me to set up my own darkroom. I studied photography a bit at art college, but then became a graphic designer by mistake! I carried on with photography using medium format cameras, mainly alongside my graphic design business, offering product photography as part of the service. I became interested in landscape photography about 6 years ago – it was part of a plan I had to get fit (which didn’t work!).
 
For those interested, what sort of kit do you use for the images in the book?
 
I almost exclusively shoot film for my landscape work (are trees landscapes? Maybe treescapes might be a more appropriate term!). Soon after taking up landscape photography I followed the obvious route and ‘went digital’ and sold all my medium format kit, processing equipment and drum scanner. It didn’t take me long to realise I’d made a big mistake though; digital just wasn’t cutting it for me. So I returned to film, only bigger – I took up large format.
 
The vast majority of images in the book are shot on 4×5 film, either with a Linhof Technikardan s45 or a Chamonix 045. Most images are made with a Nikkor 300mm lens, which is equivalent to about 80mm in 35mm terms. There are a few images made with a digital camera – my Sony a900, a few medium formats (a Hasselblad 500c/m) and a couple of 35mm film camera images. There’s even an image in there taken with my iPhone!
 
Why do you prefer to make most of your images on film?
 
There’s a number of reasons; firstly, and I suppose most obviously, is the quality you get from film, particularly large and medium format. The quality isn’t confined to size and detail; for me the real benefit is the tonality of film – it brings a scene to life and by utilising different film stocks I am able to render scenes differently. Increasingly, I’m using negative film, which gives me a huge dynamic range and its tones are soft and understated, which I prefer in my images.
 
Secondly, the large format camera pushes me to work in a certain way – it’s a much more pondered way of working than with a 35mm film or digital camera. I do the majority of my visualising before the camera even comes out the bag – I work the scene slowly, it’s almost like stalking an animal (probably, I’ve never actually stalked an animal!); hunting down the best angle, working out how the image can be distilled to its important compositional parts.
 
The way the image is viewed on the ground glass is also important to me. Being under the dark cloth focuses the mind, cutting out any external influences, allowing me to totally concentrate on the composition of the image.
 
Why trees?
 
Good question! I’ve always had a love of trees I think, I have great memories of playing for hours in the lightly wooded area near my house as a child. The wonderful feeling of having an area of woodland to myself remains today, without sounding to New Age; it’s almost like being a fleeting guest amongst their midst. I started off with landscape photography much in the same way as most other people; views, the seaside, foreground interest and wide angle lenses. I soon realised this wasn’t reflecting ‘me’ and my connection with the landscape, I started exploring more local ‘wowless’ locations and inevitably this lead me back to woodland. I’m fascinated by the textures of not only the trees themselves, but also the grasses and mosses that go along with them, and of course the changing atmosphere as the seasons change.
 
I must say I gain great pleasure in finding a location that no one has ever bothered even looking at before and finding beauty within it. There’s much more pleasure for me in making an image in such a location than I’d get from any honey spot location in the world.
 
Many photographers avoid photographing in woodland. They struggle with the confusion and chaos. How have you overcome this? How do you find your compositions in such a chaotic place?
 
I really enjoy the challenge of finding images in these chaotic environments. I wouldn’t say I have a set formula for making my images in woodland – at least, not one that I consciously think about.  I tend to approach my photos as a graphic designer – I look for an interesting shape, colour or texture that I can use to make a composition, it’s then a matter of working out if I can find a composition with those elements, usually this entails removing as many elements as possible to emphasis the feature that originally drew me in. I’ll do all this before I even consider getting the camera out; using a plastic viewing card to find the composition. One technique I use is to utilise swing on the large format camera to emphasise the relationship between two or more trees, that way I can throw areas of the photo out of focus, drawing the eye into the photo establishing the visual link that I want to portray.
 
You have a reputation amongst landscapers for being down to earth and not ‘arty’ about your images – what is your philosophy about making pictures (if that’s not too arty a question!)
 
I can’t be doing with people forcing the ‘I’m an artist’ thing down people’s throats. There’s no great concept behind my photographs – that’s not to say I’m flippantly taking photos when I go out – I feel a great connection and love for the landscape that I’m photographing and I hope that love comes out in my images. I simply photograph the things that fascinate me, treating the components of the landscape as elements to make graphic compositions with. It’s not for me to tell you my images are art – if the viewer considers them to be art, then all well and good, but I think it’s up to my audience to decide, not me.
 
How did you feel about working with David at Triplekite on the book with this being your first book, and his?
 
I must say, until David approached me about it, I’d never really considered producing a book – I suffer somewhat from self doubt when it comes to my photography, and without the help and encouragement from David (and a number of my Twitter contacts), my photos wouldn’t have made it much further than my website. I’m sure David’s job has been made easier by the fact that I’m able to design and produce the artwork for the book myself, meaning we haven’t had to deal with any third parties.
 
How has the collaboration between you worked?
 
It’s been rather a laid back relationship, but it’s been great to have someone who’s a natural salesman pushing me to get the book moving (I’m not the most organised person!). David’s input about editions, pricing, marketing and the like have been invaluable. David has been busy sorting out the technicalities – ISBN numbers, costings etc. leaving me to concentrate on photo selection, design of the book and the book’s website. I only wish he could write the copy as well – as it’s not a job I enjoy!
 
If this book is a success, do you think you could see yourself working together on other photographer’s books with you doing the design and David handling the publishing side of the business?
 
It would be great to work on the design of other photographer’s books with David and we have discussed the idea of working together further – so hopefully our working relationship will continue.
 
How did you choose which images to go in the book?
 
The difficult part of the selection process was trying to get a flow through the book – I wanted images that worked together and not to have too much of a jar when you turn the pages. The book is roughly organised by seasons, but as I have very few images from the summer months, it is definitely winter heavy! There are a few images that I have not been able to include, just because they don’t fit in with the mood of the book. The layout of the book allows for different sized images, which means I can use some images shot on smaller formats, whilst maintaining the quality of the images; they just appear smaller. The amount of pages in the book was only governed by how many images I had to include so I basically just chose the images that I feel most happy with.
 
I’m very tempted to ask if you are good at everything you do? I know you make amazing Indian food, bake superb bread, you are a talented graphic designer and hand make furniture with your own VW camper interiors business. All this, and you are a master with a camera? Please tell me there is something you can’t do?
 
Haha, well Caryl, my girlfriend, say’s she’ll make you a list of things I’m no good at if you like! I’ve never liked the idea of being just one thing… a designer, a furniture maker or a photographer. I’m passionate about design and love to design furniture, brochures, websites and photos! I consider photography to be an extension of the design process, my photos are designed just as much as a brochure layout or a website design. The downside of this is that I’ve constantly got some creative dilemma going on in my brain, resulting in my inability to switch off and go to sleep – one thing I definitely can’t do well is go to bed and get to sleep at a reasonable time! As you mention, I also love to cook – I’m not one to do things by halves, so if I’m going to take something on, I tend to get obsessed with it; I’ve spent hours on curry forums trying to work out how to master the techniques involved, but like my photography; however hard I try, I never think I’m quite good enough at it!
 
Do you have the images to make another book if this book does well?
 
I certainly don’t have another books worth of tree photos (I’m not sure the world could take another book of tree photos!). So this will be the last proper book from me for a few years I think. I do have some ideas for a very different publication though in the next year or so.
 
I understand the release of the book is to be timed to coincide with the Masters of Vision exhibition. Will some of the images in the book be exhibited?
 
Yes, I all the images in the Masters of Vision exhibition will be images from the book, unless I manage to make 12 new masterpieces before then, which I think is unlikely!
 
What’s next for you, Dav? What are your photographic plans?
 
I have a rough plan for a project, which has a working title of ‘without trees’! I don’t want to get comfortable with my photography and just replicate what I’ve produced before, although I won’t go out of my way to work in new ways and produce ‘art’ for art’s sake. The project I want to work on will be focusing on the Peak Districts moorland which I’d like to cumulate into a hand made, very limited edition, hand printed large format book. Back in my hippy days (!) I used to make my own paper and bind my own books – whilst I won’t be going as far as producing my own paper, it would be great to do my own binding. I see these as being very different images to my usual style, I need to get on and see where it takes me…


Many of the images are well known to those of us who love Davs work. Indeed, it would be like going to a Dylan concert and him not singing “Blowin in the Wind” if they weren’t there. But in amongst them are many new images too, including some wider landscapes for which Dav is less well known. Some photography books are comprised of many strong images but are filled out and somewhat diluted by a proportion of weaker ones. That is not the case with this book. In fact, there is only one image I really don’t “get” and that is more likely to be me rather than the image! In fact, in this book you will see many images I truly feel are “world class”, exceptional and worthy of the very highest praise.
 
I have written a lot of book reviews in the past but this has been the easiest. You may feel I have been a bit gushing about it. I tried, really tried to search for some negatives in the interests of balance, but honestly couldn’t find any. Unless the print quality is awful or the book falls apart, those who buy this book are going to own something I feel is very special. As with many photography books, it is an opportunity for us to own a body of work from a photographer we admire, when we simply could not afford, nor do we have the wall space to by and hang them all as prints.
 
As I said at the outset, I think this is the start of something for Dav. I think we will look back in a few years time and view this book as a milestone. A turning point. As one of the special books in landscape photography that comes along from time to time. It deserves a place alongside Bae, Bien-U’s “Sacred Wood” or Porters “In the Realm of Nature”. As such I think it will quickly become collectible, a classic.
 
I, for one, hopes Dav stays “acoustic” and doesn’t “go electric” anytime soon. The only problem, now, is going to be the “tricky, second album”.
 
To pre-order your copy go to http://www.withtrees.co.uk


Shooting Landscapes Handheld. You Are Joking!

Handheld

Dark Light III – Taken handheld from Rannoch Moor.

I have written some time ago about my thoughts on working with what you’ve got. Basically, the premise of my mantra is, if all you have is a 50mm lens, then shoot with it. If its raining, rather than giving you he technicolor sunrise you envisioned, shoot the rain. You get the idea.

Recently, on the day I broke my leg in fact, I had to work to my own maxim. 

I was leading a workshop up in the snows on Rannoch Moor and Glencoe, in Scotland. On the first day of the trip, just an hour into shooting my tripod head broke. It broke in a major way (and kudos to Manfrotto for replacing it for me straight away once they saw what had happened).

I tweeted about the failure and many of my followers replied with sympathy (and we all like a bit of sympathy). Several said how angry I must be feeling and how it would ruin my trip. I could understand their point of view but I just didn’t see it that way.

Kit fails. You have to get used to that which is why I have back ups or alternatives with me for virtually everything in my bag, including tripods and heads. Except this time. This time I was car sharing and to save space the one thing I hadn’t bought with me was my spare tripod & head. Ironic, huh?

Getting angry about it would have just spoiled the trip, it wouldn’t have actually changed anything. Here I was in the most stunning of locations with amazing light. I was going to work with what I had.

So this meant shooting landscapes, often in low light, handheld. 

So how did I approach this? I was using the Canon 5d mk2 and was happy taking the ISO up to 800 (and in very low light I went to 1600 at times – whatever it took to get the shot). I also went wide with my aperture. So I abandoned my usual preference for f11 (or f16)  most of the time and went wider, right down to f2.8 at times in low light, but often working at f8, all with a view to keeping the shutter speed high enough to get sharp images.

If this hadn’t been possible I would have gone over to shooting ICM (intentional camera movement) images. Again, working with what I had. 

Another approach I adopted was to shoot in burst mode. Firing three frames at least for each image to give me a better chance one would be sharp. It meant I came away with nearly 900 frames fom the day, but it did increase my success rate.

I also moved to auto focus. On a tripod, I use manual focus in Live View mode which is perfect, but hand holding it just isn’t practical to focus manually all day. There is no benefit in it, in fact, auto focus is perfect for just this situation. I use centre point focusing so I have complete control over what I am focused on. So I turn on just the centre focus point. I then point the centre of the lens very precisely at what I want to be my focus point, press the shutter button half way to lock focus and hold it there, reframe and then complete the shot. You can also use the Focus Lock button on the back of the camera in the same way. 

I found I got the best results using my longer lenses, especially the 70-200 f2.8 IS L zoom. This stayed on most of the day. The image stabilisation helped with sharpness and I followed the basic rule of thumb that you need to keep your shutter speed faster than your focal length so I tried to stay above 1/200 sec all day, using ISO and aperture to do that.

Another advantage of using the 70-200mm (and the 24-70 f2.8 L which I also used on the day) was they both have long full tube shaped lens hoods. On the day, blizzards kept blowing through and these hoods really helped to keep snow off the front element of the lens.

When I came to review the images later (and trust me, I had plenty of time to review them, lying in my hospital bed) I realised that broken tripod head had done me a favor.

I had an extraordinarily high “hit rate” for successful images on the day. I took many more that I was happy with than I normally would. I found I was able to react really quickly to the fast changing light up there. As the blizzards were blowing through we had amazing gaps in the clouds with shafts of light and wonderful cloud shapes. On a tripod I would have been faffing about and couldn’t have got half the  images I did. 

I also would have been shooting much wider lenses, 45mm or 24mm, out of habit and on reflection, images at those focal lengths wouldn’t have had the impact I got from the 70-200 lens. (For my wider shots with the long lens I shot several panorama sequences, all handheld, and Photoshop stitches them perfectly. It’s amazing).

I would also have been more likely to have been trying to use my Lee filters. This would have slowed me down even more and with the falling snow caused frustration and even more lost shots.

Yes, that tripod head did me a big favor. Of course, looking at it another way. If it hadn’t failed I would have had it with me later when crossing the river and would have been using it to steady myself so maybe I wouldn’t have fallen and broken my leg… But let’s not speculate.

So, the lesson. If something fails in the field or you forget something, work with what you have. Think laterally. Work around the problem. Find a solution. It might feel uncomfortable, but just do the best you can. Getting angry with yourself or your kit, or giving up and going home don’t help, and you never know, like this occasion, you might just produce something unexpected by approaching the problem with a positive frame of mind.

If its something really bad like leaving all your batteries or memory cards at home, then use your mobile phone camera. If that’s back in the car, then just sit back and enjoy the sunrise. There will always be another.

Dark Light II – Taken handheld at the mouth of Glencoe

Canon 5d Mk 3 Woes and Why I Heard Music

Canon 5dMkIII

Drive by Shooting - Image Courtesy of ©John Birch 2013

Drive by Shooting - Image Courtesy of ©John Birch 2013


I have been using the 5d mk2 quite happily for a couple of years and had seen no reason to upgrade when he mk3 was released. I am not one who always has to have the very latest model of everything, unless there is a very good reason for it.Having a go with customers Mk3’s showed me it was better made, had a better screen and weather sealing and some nice refinements ergonomically such as the grip shape and position of the depth of field preview button. Nice though these things were, they weren’t a huge leap forward and so I contented myself with my faithful mk2’s.
 
That was until a customer, accomplished photographer Valda Bailey, came onto a workshop up in Northumberland in January. (You can view her work on her website, and you should (its really good) HERE ) She is a creative photographer and was experimenting with a feature buried in the menus which is not well known. Exposure blending. Some of you may know Chris Friels work and will have seen he has been using the same feature on portraits. Valda didn’t really show me what she was getting over the weekend until we had breakfast on the last morning when she bought her laptop into the cafe. She asked me to have “a quick look before I delete them”.
 
So I did.
 
What I saw made me stop eating my breakfast.
 
Very little stops me eating breakfast. Cafe on fire. War maybe. Little else. I was astounded. I thought I had got some nice images from the weekend as we had had wonderful light and atmospheric weather but on seeing hers I felt like formatting my cards. The images were astoundingly good. Hang on my wall good. I don’t think she believed me. But I don’t butter people up, I tell them honestly what I think, without being unkind – I believe in constructive comments, but these deserved unbridled praise. I wanted a mk3. I wanted one right there and then.
 
Then I broke my leg.
 
This had two effects. Firstly it meant I would be able to go to Focus on Imaging at the NEC, the biggest photography trade show in the UK, which I would have missed as I was due to lead a workshop on Skye, but the broken leg meant that was now possible. The show is the best place to buy gear at low prices generally speaking. The other, negative, effect was, although I could now go to the show (and be pushed around it in my wheelchair by my mates Carl & John) I was now unable to work and so cash was a real issue. Very frustrating. Until my card provider stepped in with 18 months interest free credit, so problem solved (well, problem delayed, lets not fool ourselves!)
 
And so it was I became the proud owner of a Canon 5d mk3, along with a free battery and 16gb compact flash card, plus £160 cash back from Canon. This bought the price down, effectively, to under £2k. A very good deal. Now at the show there were two companies offering the same deal. Calumet and Cameras Direct (if I remember rightly). However, Cameras Direct were also giving you a free copy of Adobe Lightroom 4 as well, worth around £100 at Amazons prices. So why did I buy from Calumet? Well, I have Lightroom 4. But I could have sold the free copy and made some cash. However, I knew of Calumets reputation. They are known for being suppliers to professionals. Solid. Dependable. They are known for good service, so I opted for them.
 
Boy am I glad I did.
 
On my first trip out with the camera (you can read John Birches blog post about he trip HERE – it’s a great read, and his blog is well worth following generally, well written and authoritative. He knows what he is talking about) I started to see an intermittent fault with the camera. You can see here some images which show the problem.
 
Shutter issue
 
Mirror Issue
 
Blizzard

Winter Wasteland - The shot I was after!

I think either the mirror was not lifting quickly enough or he shutter curtain was sticking, and thus shadowing on images. It would happen to a group of about three or four images and then wouldn’t occur for another hundred shots or more.
 
Straight away I tweeted to Calumet about the issue but to no response. It seems they don’t man Twitter at weekends (this might be something you need to address, Calumet, Twitter is 24 hours). Because I have about 1000 followers on Twitter (you can find me on Twitter as @dougchinnery), most who are photographers, this started to generate traffic as you can imagine with theories about the problem, possible solutions and so on.
 
On Monday morning I emailed the company with a description and images of the problem and a few minutes later, via Twitter, had a tweet asking me to call them. The phone was answered in two rings. This pleased me. A person answered. Still good. I explained the issue and without hesitation she said, “no problem, I will get FedEx to collect it today to bring it back for us to look at”. I was very impressed by the FedEx collection. Most companies tell us to pack it up, drive to the Post Office and send it back to them by Special Delivery at our cost and risk (about £20 to £25 for a camera). I was hoping she would say we will replace it, but accepted they would want to take a look first. A couple of minutes later (literally) I got an email from Laurence at Calumet. He had seen my email and images and said, “we will collect it today and send you a new replacement”. Result.
 
Then things got a bit surreal. Ten minutes after that who should knock at the door but the FedEx man. I hadn’t even boxed up the camera. When I opened the door I told him it felt like I was in a FedEx commercial (his uniform was well pressed and he was smiling and rather TV adverty-looking). All it needed was the sun to come out, birds to start singing and an orchestra to start playing and the cameras could roll.
 
In my rush to pack the camera for him I left the Calumet battery in (not the genuine Canon one) and my 16gb card in he camera. Doh!
 
I won’t bore you with all the details but Laurence at Calumet remained my single point of contact throughout. He replied to every email within two or three minutes. Everything he said he would do he did. He was superb. Whatever you are paying him, Calumet, it is not enough. They got a new camera to me in less than 48 hours. They even went to the trouble and cost of FedEx’ing my battery and CF card back to me. It was all done with courtesy and efficiency. It is, quite simply, the best service I have had from a photography related supplier ever.
 
Needless to say they now have me as a loyal customer. Yes, they may not always be the cheapest. But ask yourself when you buy that lens from a supplier in Hong Kong on eBay that has a fault. Will the hundred quid or so you saved seem like such a good deal when they ask you to post it back to Hong Kong? When Canon or Nikon in the UK won’t honour the guarantee because it is a grey import. (They will fix it, they just won’t do it under guarantee). It is rare these days for modern electronics to fail, but when they do, it’s a pain. I am so pleased I opted for Calumet and will be an evangeliser for them now. I don’t know how the other outfit would have handled my problem, but I can’t see how they could have done any better unless the MD had hand delivered it in his Bentley same day.
 
So, my message is. Consider using Calumet in future, especially for major items (they also do lens and body hire). Also, beware grey imports. They are cheaper for a reason. Often we get away with it, but it only takes one issue with a body or lens to wipe out the savings we have made on several items over the years in hassle and grief, if we ever do manage to get them to sort it.
 
I also love FedEx. And the driver really was like a bloke from an advert. It was a bit surreal. No orchestra though. Shame really. I would have liked to have heard music.
 

Winter tree

Tree in a Blizzard - Shot from the Car

Stand Developing Film

stand developing

If you follow me on Twitter (@dougchinnery) or Flickr you will know that in addition to shooting on film for my personal creative work, I have also started developing my own black and white film myself.

It costs about £3.50 to have a mono film processed and supplied in negative strips ready to scan into the computer by a commercial firm. Processing the film myself reduces this to just a few pence per roll.

It was recommended to me to start with a simple process called “Stand Developing”. This is a basic process which is ideal for beginners before you move on to more standard techniques. 

Usually in processing film the chemicals are kept at a instant temperature throughout and the film is ‘agitated’ in the liquid to ensure fresh developer comes in contact with the surface of the film throughout. Then, after a set period (of just a few minutes) the developing fluid is removed and another chemical is added to stop the development, otherwise the film can be damaged. Finally, the film is washed and dried, ready to scan.

Stand development takes a different approach. The developing chemical is mixed with water at a very dilute concentration, I have been using 1:100. The film is then left to stand in this fluid for an hour. As the developer is so dilute it first brings out the highlights in the images and as its effectiveness reduces it slowly brings out shadow detail. By the time an hour has passed it is almost expired and so no stop chemical is required, just water to wash it off the il before the fixing chemical is applied for a few minutes followed by a final rinse.

The developer I use is about the oldest available and is called Rodinol (R09). It has been in use for over 100 years and is readily available. For the fixing and rinsing I use Ilford chemicals. All are safe to be disposed of own the sink after use (although the fix chemical can be stored and reused many times).

People have asked me if you need a dark room to process film and the answer is “no”. The only part of the process which needs darkness is lading the exposed rolls of film into the developing tanks and this is done in a dark changing bag. These have two arm holes so you can out all you need in the bag, seal it, and then load the film in darkness with your hands in the bag. This is a bit tricky for the first couple of times but you soon get used to it. The developing drum will, in my case, take two rolls of 120 film at a time and is cleverly designed to allow you to add and pour out liquids without letting any light into the drum.

So here is the recipe I have been using. Please note this is ONLY for black and white film. Please also note, contrary to developing film by other methods, you can mix film types in the same developing drum with this method. Normally, if you are going to develop several rolls of film together (I have a drum that allows me to do three films at one, for example, to save time) you have to keep the film types the same. So three rolls of Ilford HP5 for example or 3 rolls of Tri-X. 

First, load your film onto a reel in the processing drum inside a changing bag. Then carefully measure out 5ml of Rodinal. I use R09. To measure it accurately I use a small medical syringe with a ml scale on the side. Mix with this 500ml of tap water. (if you are using a drum with more than one roll, use 500ml per roll) There is no need to use warm water for this as you do with most developing processes as the water is standing for so long, warm would go cold anyway. In winter I would add some warm water to the very cold tap water just as a precaution. Pour this into the drum and agitate the drum  for 30 seconds. By ‘agitate’ I mean invert and twist the drum in your hands repeatedly. Don’t just shake the drum but really move the liquid around so it has plenty of contact with the film. At the end of this period of agitation, tap the drum a couple of times on a firm surface to dislodge any air bubbles from the surface of the film and let the drum stand for 30 minutes. After 30 minutes just agitate the drum again 3 times only and then let it stand for another 30 minutes.

Once the last period of standing is up, pour the liquid down the sink but DO NOT open the drum yet. Fill it with cool tap water, agitate 5 times and pour away. Repeat but agitate 10 times and pour away. Finally repeat and agitate 20 times then pour the water away.

Now pour in 500ml (per roll of film) into your fixing solution. I use Ilford Rapid Fixer. This comes concentrated and so I mixed it with water at a ratio of one part fixer to three parts water in a clean storage bottle. Start a stopwatch (I use the one on my iPhone) and agitate for 30 seconds. Tap it and let it stand for 30 seconds. Then agitate it three times, tap it and let it stand for a minute. Repeat the three agitations on each minute until a total of 6 minutes has expired then pour the fixer back into its storage bottle as it can be reused many times.

Then fill the drum with water from the tap, agitate 5 times and pour away, repeat but agitate 10 times and then do it once more but agitate 20 times.

Finally, I fill the drum with a mix of water and a wetting agent. I use a tiny squirt of the Ilford wetting agent (some people just use washing up liquid). The amount you need in 500ml of water is tiny, just a couple of ml. Agitate the drum 40 times and then pour the mix away.

Open the drum and remove the spool with your film on. Do not wash the suds off of the drum under the tap as this will ruin the effect of using a wetting agent (which is to stop the tap water leaving smears on the film due to water hardness). Simply place a finger on each flat surface of the film and run them down its length to remove most of the water and wetting agent suds. Then I use a piece of clean chamois leather and run this down the film to dry it some more. What is vital when you do this is that there is no grit on your fingers or the chamois as this will scratch your film. Hang the film to dry slowly from a line. I use a bulldog clip to clip it to a wire I have put up in my bathroom. As dust free a place as possible is best for this (so not by the dogs bed!)

Once the film is dry you can cut it into frame lengths to suit your scanner. My scanner (an Epson V700) has holders which take two strips of three frames of 120 film so I cut a roll into four strips of three frames per strip. Now you can scan the images in and see what you have.

On reading this it may sound really complicated and long winded. It did to me when I was researching the process. However, once you have developed two or three films you will know the process by heart and be doing it without thinking. It is great to see your images emerge from the drum and to be part of the whole process from capture to final image. It also means I can go out and shoot and within an hour and a half of getting home I have my images in Lightroom – not quite the instant feedback of a digital camera but as close as you can get with film.

This process is about the simplest way to develop black and white film. The process tends to bring out the grain in the film. It also produces high contrast negatives. The blacks are often rich and dark while the highlights bright and punchy. You need to be bear this in mind if you want low contrast negatives which are more ‘subtle’. For these, Stand Development may not be the best choice.

I buy my chemicals from AG Photographic http://www.ag-photographic.co.uk/ They are a small UK firm who give good service and are very helpful on the phone if you have any questions.

If you are just getting in to analogue photography or are interested in trying stand developing as a new tool in your film processing arsenal, I hope you have found this post to be helpful. (the image below was Stand developed)

What filters should I buy?

Landscape photographers fall into two camps. Those who like to get things ‘right’ in camera and, so, use filters to balance exposures, and those who prefer to make two or more exposures on location and then blend them together back in the digital darkroom.


Some will insist one way is ‘correct’ or better than the other but in reality, it’s just a personal choice. I use both methods. When the contrast in brightness between the sky and foreground is really high then I will use the blending option. If the contrast is more manageable, then I prefer to use filters.


I often get asked which filters to buy to get started in using them so I thought a post on what I would suggest might be useful. Filter systems are not cheap so it’s important to make an informed choice and not to buy items you probably won’t need.


The first choice is which system to invest in. This is down to money and is also influenced by how much of your photography is landscape based. If you are only an occasional landscaper (especially if funds are tight) then investing in the best system might not be worthwhile. Even if you do a lot of landscape work, if funds don’t allow, you might not be  able to buy the best but you may still be able to afford a mid priced system which will give you acceptable results.


The system I would strongly recommend avoiding is Cokin. They a very competitively priced and this makes them a tempting option. Please resist unless you absolutley can’t afford/bear to wait and save up for a better system. The filter holders are poorly designed, but, worse still, the filters will create horrible colour casts on your images which you won’t be able to correct in software. Most photographers who do buy into Cokin usually end up ruining so many precious images they sell up and get something better.


The next system which is an improvement over Cokin and is thus a possible option for the occasional landscaper or those on a budget, are High Tech. This newish brand is readily available on EBay and elsewhere, and is priced well. The filters fit the Lee system holders although they have their own holder available too. The downside? Some of the filters still give colour casts, but nothing as bad as Cokin. Optically they are not as pure as the Lee system. It’s always good to realise that our lenses are only as good as the cheapest piece of glass in the system. So if we have invested in some nice Canon or Zeiss lenses, putting cheap filters in front of them makes them much poorer. We might as well have bought cheaper lenses.


This is the reason I don’t have UV filters ‘protecting’ my lenses. Even if you buy the ‘pro’ range filters the glass is unlikely to be as good as the glass used on lenses such as those in the Canon L range. To protect my lenses I use a lens cap. Then I am getting the top performance from my glass. An additional benefit in not fitting UV filters is the reduced chance of vignetting with wide angle lenses when adding your filter system on the front of the lens.


The filter system I use and always recommend (even if it means going without them for a while, while you save up for them) is Lee. They are the best filters available. Lee have very tight quality control and each filter is individually hand made and checked. The process is very labor intensive, they even pour the resin themselves. Lee neutral density filters are truly neutral. No colour casts at all with Lee.


This explains the cost. Getting set up with the Lee system is going to cost you around £300 to £500, depending on what you buy. However, they will last you for many years (or life if you take great care of them) and will fit any future cameras of lenses you buy.


So, what do you need. I will describe the most basic system first. This can be expanded piece by piece as you find what will be of most use to you. Just about everything is available as an individual item so you can build on your starter kit gradually.


The first essential is the adaptor rings. These are bought to fit the diameter of your lens or lenses. If you have a 77mm diameter lens, you have to have a 77mm adaptor ring. These aren’t cheap at £30 to £40 each. Lee used to make two types, standard for non-wide lenses and wide angle (for wide angle lenses, funnily enough). I believe they have now decided to rationalise to just wide angle adapters, which fit all lens types and will help eliminate vignetting. I have one permanently fitted to each of my lenses that I use my filters on, so that I don’t have to keep fitting and removing them. I then use the white lens caps Lee make (a pack of three caps is about £7) and these fit onto the adapter ring, protecting the lens. I then write the type of lens on the front of the lens cap so I can see at a glance which lens is which when I open my camera bag.


The next essential item is the filter holder which clips on to the adapter ring and holds the filters in position, allowing you to slide the filters up and down to position graduations correctly. You can buy these individually but if you are just starting out it is more economical to buy Lees “Digital Starter Kit“. This will give you a filter holder with two slots in, a two stop hard graduated neutral density filter and a two stop Pro-Glass full neutral density filter as well as a lens cloth. All of these items are essentials and the kit gives you a cost saving over buying each item individually.


A good alternative to this is to buy the starter kit Lee produce exclusively for David Noton. It contains the adaptor ring as part of the kit (you select the kit with the adaptor ring you need for your main lens. The only issue has been availability and at the time of writing (19.10.12) they don’t have kits in stock. If it is available it might be a good option for you.


You now have enough to make a start in using filters but you will soon find the limitations of the starter kit. Your next addition will be a three stop neutral density graduated filters for higher contrast scenes. These can also be ‘stacked’ with your two stop grad to give you five stops, but this is rarely needed and if you do need this much filtration I would strongly considering making multiple exposures and blending them in Photoshop rather than using too many ND grads stacked up.


The question I am always asked is ‘should I go for hard or soft grads?” you will notice Lee give you a hard grad in the starter kit. This is because, in reality, the hard grads have quite a soft enough graduation when using digital SLR’s due to the sensor size. The filters were originally designed for medium format cameras and so the soft grads are very softly graduated on a DSLR. So if you are going for one type, go for hard.


Having said that, I carry both. I use hards mostly these days but if I have a scene with lots of things intruding into the sky (like trees, hills etc), it is sometimes best to use softs to really blur the change from the neutral density effect to the clear part of the filter. I would avoid using soft grads at the coast or anywhere you have a level distinct horizon as the graduated area will make the foreground a bit too dark. (a tip when positioning your grads is to hold in the depth of field preview button as you slide it into position. This will make sure the positioning is spot on as you will be seeing the shot as the lens will capture it

Do you need one stop graduated filters? If you want to perfectly balance some exposures, yes. But this is my least used filter and if you need to save cash you can do without it. Some times you may need to use the graduated filter tool in Lightroom later to adjust the exposure of the sky if the two stop filter was a it too strong but this is easily done.


The next filters I would add are the three and ten stop full neutral density filters. The three stop is very useful, as is the two stop you got in the digital starter kit. For extending exposures. They will enable you to make light trail images, to blur waterfalls, create blur effects in breezy woodlands and a host of other great effects.


The ten stop filter, named by Lee the “Big Stopper“, is a tool I use a lot. They will enable you to extend exposures to several minutes to produce the minimal, ethereal shots which have become so popular in recent years (although they are becoming. bit of a photographic cliche). They enable me to make striking images outside of the golden hours when I wouldn’t have been shooting in times past due to the quality of the light.


You need to be aware that although they are thought of as ten stop filters it is impossible for Lee to control the manufacturing process that accurately. So your filter could be anything from about 9.25 to 11 stops in strength. This explains why your exposure times in identical conditions to a friend working beside you with a Big Stopper using identical settings can be quite different. A stop difference in filter strength can mean a two minute exposure for one person and the other needs four minutes to get the same exposure result. Please also note that Big Stoppers are very fragile, made of glass. I am on my fourth! Not a cheap thing to break at around £110 each.


The final filter to add to your arsenal is a polariser. In the Lee system this means buying another adaptor ring which screws on the front of your filter holder. This allows the polariser to be fitted on the outermost position of your stack which is important as it needs to be rotated to get the polarising effect. The adapter ring is another £30 to £40 but his pales into insignificance when you realise the filter is over £200. It is 110mm in diameter which reduces vignetting. It also means you can use one polariser with every lens you have to which you can fit your Lee system. The quality of the filter is very good.too, but nonetheless it’s an expensive item – but one I feel is essential (and I write as someone who has lost one on a mountainside and had to bite the bullet and buy a replacement.) the effect of the polariser is something that no software can replicate and will transform the quality of many images.


A slightly cheaper alternative is to buy a B&W 110mm LINEAR polariser. For digital cameras we should use a CIRCULAR polariser. This doesn’t describe the shape, it describes the way the glass is treated. Linear polarisers are of a older design and can affect the auto focusing of lenses. The lens may not be able to auto focus. I always focus manually so I was able to buy one of these and save myself about £50. Don’t buy one if you might need to auto focus with the filter fitted. The B&W filter fits the Lee holder ring.


The Lee filter holder comes with two slots so you can stack two filters. A useful and low cost improvement of the holder is to buy an extension kit which enables you to dissemble the holder and add one or two more slots. This allows more options for stacking filters. I have three slots in mine which is generally enough.


I also use the Lee filter cloths, they are very good quality and wash beautifully. I keep my filters in the three slot soft filter wraps from Lee and then have a three section Lee pouch. One slot has my hard grad filter wrap, the second my soft grad wrap and the final slot holds my wrap with my two, three and Big Stopper ND filters. I write on the wraps what each wrap holds so I can grab the right one quickly.


Lee do sell filter cleaning fluid which is fine. I, however, buy my cleaning fluid for my filters and lenses from Specsavers. They sell a 250ml bottle for about £3 (compare that with around £5 to £7 or more for the ‘proper’ cleaning fluid sold by lens and filter manufacturers) and I can’t tell any difference from the ‘proper’ fluids. They also sell a pump bottle with about 50ml which I refill from the big bottle and carry with me in my bag for lens and filter cleaning in the field. It works beautifully. I am sure some optical engineer will email me about particulate size or some technical reason I should use the over priced fluid from manufacturers but I would take some persuading to change.


That pretty much covers what you need to get set up with Lee filters. The cost is high, but the results justify this. I hope this helps you get set up. All you need now is one of my workshops to show you how to get the best from them 🙂


If you buy items using the links in this post I will receive a small referral fee but you will not pay more. This helps me in my business and is much appreciated.

Adventures in Polaroid

Polaroid

Avast, Me Hearties!


As many of you will know, I do like quirky photographs! Among the styles I love is the Polaroid. My dad had one when I was young. Being keen on holding on to his cash, he resented having to pay Boots or Bonusprint to develop his films and so thought Polaroid was the answer. He soon realised the costs were similar, you, in effect, paid up front for the instant development of Polaroids in higher film costs and so once the novelty had worn off the camera rarely came out to play.

Ever since, I have loved the washed out images the Polaroid film produces. There are digital tweaks you can make to imitate the look, but nothing really compares to true Polaroid for that sixties/seventies feel. Like many, I was so disappointed when, in 2008, Polaroid announced they would no longer be making the film – again economics took priority over art. However, a small group of dedicated European Polaroid lovers put their faith in the medium and with great foresight bought the old Polaroid film making machinery that was being sold off. They had no idea how to make the film. No idea of the chemicals involved. Oh, and they had no money.

Kippers by Post

Thus started the ‘Impossible Project”. The name came from the fact that whet they were trying to achieve was deemed ‘impossible’ by everyone they asked but this just seemed to make them all the more determined to succeed. To raise money they started a website along the crowd-funding principle. They asked Polaroid lovers world-wide to commit to buy a certain amount of film if they could make it. Once they had enough pledges they called the money in, bought a load of chemicals and put on the rubber gloves. I am sure it would make a great movie, because, against all the odds they succeeded in making  batch of film. (you can read the full story here). From there, the team have gone from strength to strength and employ 25 people, many of whom originally worked for Polaroid.

Fishing Boat - Whitby Harbour

A few words about the film itself. They make a colour and a mono film. Both are, shall we say, very unpredictable. VERY unpredictable. But it is this unpredictability which makes them so good in my eyes. The film has to be shielded from light in the first few seconds after shooting and can take half an hour to develop (best done in one of the film boxes). In fact, it can continue to develop for the next 24 hours. Sometimes the chemicals don’t mix correctly. The exposure can be all over the place. Flare and other aberrations abound. I am currently using some of the early close to prototype film which they sell at a reduced price and so am experiencing extreme quirkiness. The new generation films they have released this year apparently show greater consistency.

I bought an old Polaroid camera from eBay and adore it. The film packs are expensive (think, about £1.50 an image once postage is factored in) but the packs are well made, quite complex and contain a battery to power the camera and flash, so there is a lot going on. You get eight shots per pack and it is best kept in the fridge (DO NOT freeze the film). The camera is totally retro and I feel like a seventies Dad walking about with it. I used it in Whitby earlier this week sand people were stopping and staring 🙂 It got a great reaction. The Impossible Project have plans on the drawing board to make a new Polaroid camera, so exciting times lie ahead. The project has been such a success that they are opening Polaroid shops in capitals around the world to service customers. I got my film, from Germany, via UPS in a couple of days.

Camera meets Camera

Today I put a pack of the Silver Shade mono film in the camera and am blown away by the results. The tones are beautiful. I can’t wait to use the new generation of mono film they have released. I have one pack but am going to use up the old batch film first. new products in the pipeline will please large format film users as they are working on 10 x 8 and 4 x 5 versions of the film which was used by many large format camera users to test exposures and for quick client approval shots. The possibilities are endless.

On My Desk


I am keen to get out with the camera as soon as possible to continue experimenting. Ideas I have in mind are a trip on a train with just the Polaroid to see what it brings. Also, I would like to try some urban decay as well as ‘seaside’ photography. If you decide to give it a go, be warned, it is addictive and could be expensive but the results can be wonderful. Even the ‘spoiled’ frames can become happy accidents that in their own way are works of art. I enjoy the lack of precision and unpredictability of the Polaroid. I love the retro feel of the images and the tactile nature of holding a Polaroid in your hand to admire it. I already have some which I will frame for my walls. No doubt you will be seeing more of them from me in the near future.

If you fancy dabbling in film photography to see if it is for you, why not consider joining Jonathan Stead and myself on a film based workshop in September. We provide the camera (if you need one), a roll of film and show you how to develop the film cheaply and easily at home (without any need for a darkroom). You can get full details here — Go on, come and try some ‘real’ photography and enjoy the pleasures of analogue.

Me, myself and I

Review of Epson R2880 & ColourMunki Calibration System

I am often asked what printer I use. Until a few months ago the answer was, ‘I don’t use a printer’. ( I do have a HP desk top printer but it is only suitable for document printing ). I have always shied away from the complex matter of profiles, calibrating, papers and inks. It just seemed too much hassle. So much easier to upload the files to Loxley Colour in Glasgow and receive the prints a few days later.

I then did a workshop with Scott Kelby and he covered printing, calibrating, colour managed workflow etc in some detail. Scott mentioned that he used the R2880 and R3880 Epson printers and the ColorMunki calibrator. So all fired up, and feeling for the first time that I knew what I should be doing, I took the plunge and invested in the R2880 and ColorMunki.

The set up for both was quick and painless. The ColorMunki set up involves loading the drivers and software and then running the simple calibration program. While it is one of the more expensive calibrators it is superb. it allows you to calibrate your monitor and if you wish to create your own paper profiles. You simply print a test chart and then swipe each strip of colours on the paper with the calibrator and this builds a bespoke profile for your printer, ink and that particular paper combination. So far I have only used it to calibrate the monitor (and the first time you do it, it makes a huge difference) and the software prompts you to recalibrate regularly (I have it set to prompt me to recalibrate every two weeks, although this is probably overkill – it only takes a couple of minutes so it is no burden).

The drivers for the R2880 load quickly and the printer runs a set up routine when you install the ink cartridges for the first time. One cartridge has to be swapped out depending if you are printing on gloss or matte paper. I don’t understand why both can’t be fitted permanently – something for the Epson engineers to sort out.

It has quite a large footprint so you need some desk space to cope with it. But the output tray and the top paper input support fold away into the printer and seal it up to protect against dust. This also means they don’t intrude into your desk space while you are not using it.

It comes with a roll feed mechanism, so you can buy your favourite papers on the roll and print panoramas. It takes all sizes from small envelopes up to Super A3 which is bigger than A3 and is better suited to the 3:2 aspect ratio of full frame DSLR sensors. Super A3 paper is about 13 x 19 inches in size and the printer prints close to the edge. Prints at this size look stunning and are perfect for framing to hang in most homes. I bought some Hanemhule A4 paper but have hardly used any, when you have seen your prints at Super A3 you won’t want to print A4 or 10 x 8!!!

I have been trialing Epsons Archival Matte paper for my colour prints (and next want to try Hannemhule (or however you spell it) 305gm PhotoRag paper. For my mono prints I have been using the stunning Ilford Gold Silk paper.

It was with trepidation that I set about printing my first image. I sharpened it with Nik softwares excellent output sharpened plugin for Lightroom. The monitor was calibrated with the ColorMunki. I had downloaded my paper profiles from the manufacturers for the R2880. I had set up Lightroom and Photoshop correctly for a colour managed workflow. It was time to press the print button.

Breath held, I waited for the paper to emerge. Grinning, I held the print up by my studio window because I could already see the reproduction of what I had on my screen was close to perfect. I had never seen prints of such quality outside of a high end gallery. Colours were faithful, prints were not too dark as they so often are when getting them back from a lab and mono prints are quite frankly, astounding. The R2880 has three black/grey cartridges and they deliver deep rich black and mono tones, especially on the Ilford paper.

I now have loads of my prints on the walls of my home and studio, gradually replacing the substandard prints from various labs that have been up for a while. I have also been printing for customers, their own images, as it is virtually impossible to get labs to print on anything but standard papers.

The K3 inks are as good as everyone says. They are expensive, although my local supplier delivers for free next day and charges around £7.80 per colour. With nine colours, it is not cheap, but the results are worth it. The printer monitors levels and warns you when a cartridge needs replacing, which is just a one minute job. I have always sent my empty HP cartridges off to charities for recycling but they won’t accept the Epson cartridges, although a student on one of my workshops tells me you can order envelopes from Epson themselves to send empty cartridges back to them for recycling (but no charities benefit from this which is unacceptable in my mind).

At £449.99 from Amazon (which is the best price I could find from a reputable supplier and I get free next day delivery) it is not cheap, but it is well engineered and produces results worth the cost. I am already lusting after the R3880. So I am now able to wholeheartedly recommend the R2880 and the ColourMunki.