Tag: landscapes

Aurora Hunting in Norway, Trip Report, Day Two

aurora hunting day 2

Last night Tony and I took it in shifts to keep a watch on the skies and the aurora reports but sadly the auroral activity was extremely low and there was nothing to be seen here despite broken cloud. At least the group had a long nights unbroken sleep to get over jet lag.

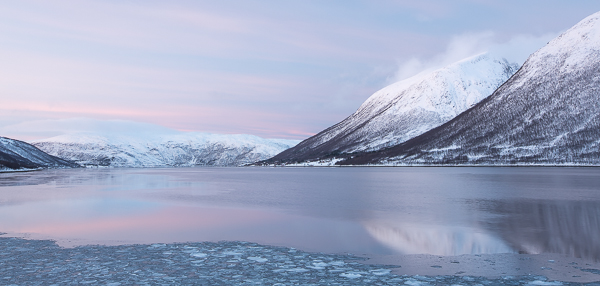
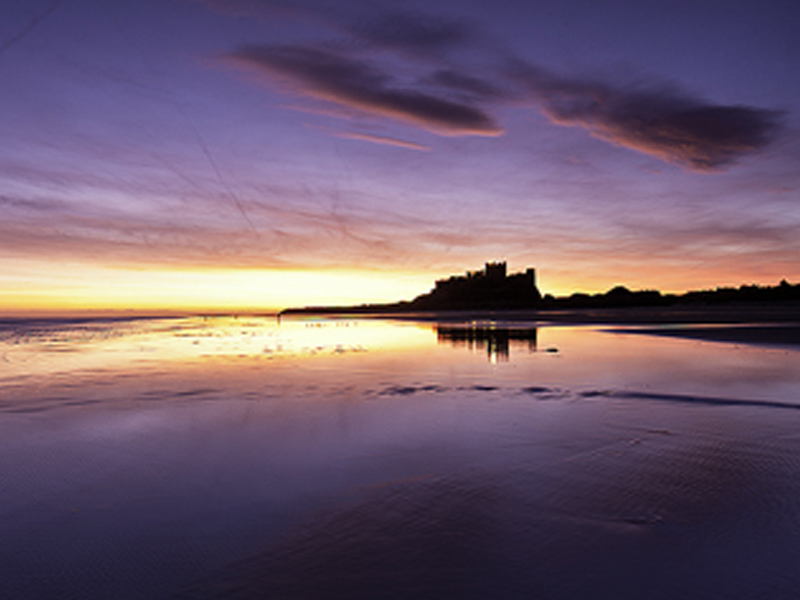
We headed out after breakfast into great soft pink light (the image above was one I managed to grab from one of the mornings locations). The temperatures here were below freezing all day and are currently around minus 10 a few miles inland. Here on the coast they are a little higher at around minus 2 to 4 but the wind is rising so it feels much colder. No snow has fallen after yesterdays blizzards.

The group were getting used to working in such cold conditions. You soon learn not to let snow get onto your gear. For example, I dropped a body cap into the snow. It would have been crazy to put this on to the body of my camera. The snow melts in the bag then when the camera gets cold the snow then re-freezes causing damage or sticking the cap into place. One member of the group had her tripod head accidentally dropped in the snow. This quickly froze the ball head, which we had to defrost on location.

Keeping yourself warm is key too. As hands get cold it quickly becomes impossible to operate the camera, so, even though it slows down picture making, it is important to wear gloves (only removing them when necessary and putting them back on again as quickly as possible). Hats, gloves and warm coats are all very necessary. Decent boots here are very important. Not only do they need good grip for walking on compacted snow and ice but they also need to have good thermal barriers in the soles to help keep the feet warm when standing by the tripod for long periods. I am wearing North Face Chilkats and they are performing perfectly.

Fuji X-Pro 1, Handheld, 35mm f2 lens, ISO3200, f14, 1/17 sec

At these temperatures the cameras are working well. Batteries do drain more quickly but it is not so cold that this is becoming a real issue at this stage. It is also not so cold yet that we have to put our cameras in poly bags when returning them to the vans to stop condensation forming and refreezing. This becomes an issue when the temperature gets lower – closer to minus 20. Then it is vital to bag and seal the camera body and lenses in sealed poly bags when moving from outside into the van or a building. This helps stop condensation forming. The condensation is not too much of a problem until you take the gear back into the cold when it instantly re-freezes. This kills cameras and when on the front of lens elements will need to be scrapped off, much like scrapping ice off of a car windscreen. Not something you want to be doing with your beloved pro-lenses.

For those interested in how the Fuji X-Pro 1 is performing I have a few things to mention. It is interesting. I am finding the Canon 5D mk3 easier to use with gloves on and some of the scenes are so stunning I am feeling the need to use the bigger sensor. I have noticed the ‘function’ button gets a bit sticky in the cold when it drops very low (I have the button programmed to quickly change the ISO). I haven’t been using it for long periods so I can’t say battery performance has seen a noticeable drop in performance. The image quality continues to be superb.

As we haven’t seen the aurora yet, I can report on how it performs being pushed to capture that!

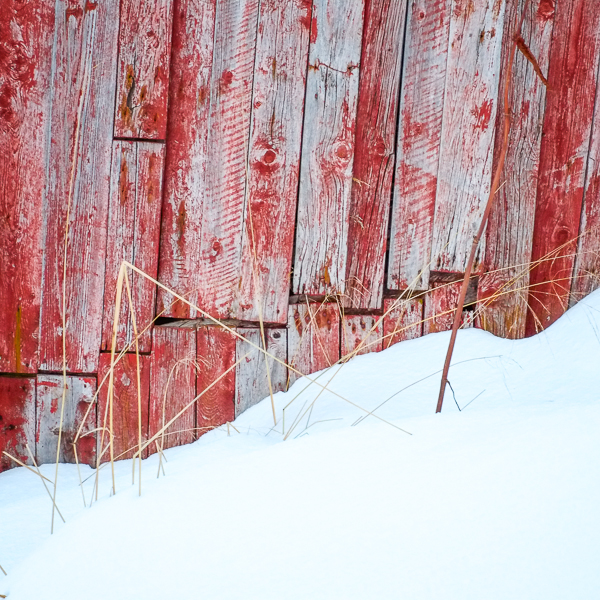
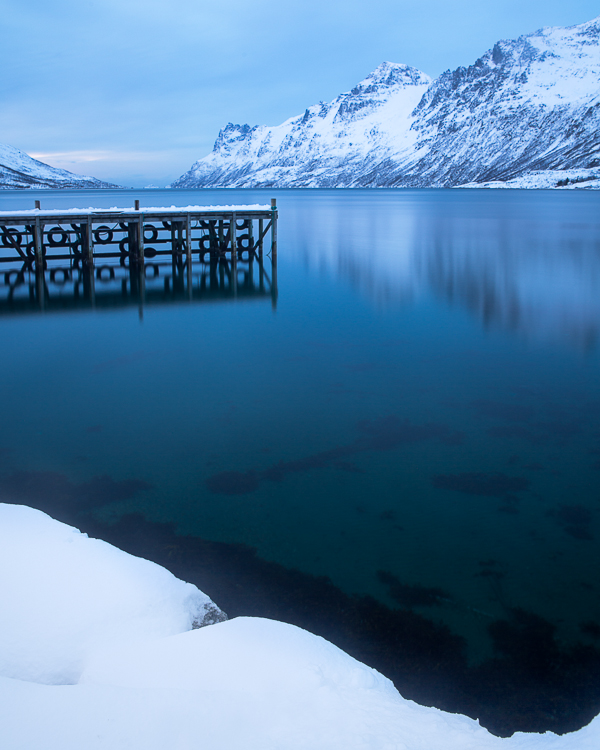
We covered three locations today. The first was an inland fjord (you can see an image from here at the top of this post). Ice was forming at the edge of the fjord and the pink light in the sky was beautifully subtle. From here we moved to a small frozen lake with a range of jagged mountains behind. The group worked on capturing the snow, ice, small silver birch tree with some stunning Alpen glow on the mountains behind. Our final location was another fjord, with a great jetty to use as foreground with rugged mountains and delicious silvery blue light. Great for a lengthened exposure just to flatten the water a little. My image is shown below. Once we had finished here (which included shooting a lovely fisherman’s hut full of textures and detail) we dived into a coffee shop for some well earned Lattes and chocolate brownies (well, its not all work on these trips, you know!).

Back at the hotel we are now resting in our rooms prior to our evening meal. On an aurora trip its important to use the afternoon darkness to sleep in case we spend the night out shooting the skies. Over the meal we will consult the space weather, cloud cover, and auroral activity reports to see if everything might come together in our favour. Who knows what the night holds. (23:30 update – sadly the cloud has rolled in and although the charts show a little auroral activity it is impossible to see it. Even with no activity we had planned to go out and shoot star trails but with heavy clouds, a rising and biting wind with heavy wind chill this was just pointless, so it is back to bed. There is always tomorrow).

The Fuji X-Pro 1 – Is It a Landscape Photographers Camera? Some Initial Thoughts.

fuji initial thoughts

As followers of my work will know, I have been shooting exclusively wit he Fuji X-Pro 1 for about a month now. My main camera is a Canon 5D mk3 (and I also shoot on film with an ancient and much beloved Hasselblad 500C and wooden Zero Image pinhole camera).

I bought the Fuji primarily for lightweight travel photography, street photography and as a carry anywhere camera. However, as soon as I started to see the results it produced I was keen to see how it performed in my main shooting environment as a professional – the landscape.

First a few caveats. This is not a full frame camera like the 5D mk3, the sensor is smaller and has a lower pixel count. The Fuji has 16 million pixels compared to the Canons 22 million. The aspect ratio of the sensor is the same as the Canon at 3:2. I am also mindful that the range of lenses available for the Fuji is far smaller than for the Canon, but more on this later. So I knew I was not comparing apples with apples.


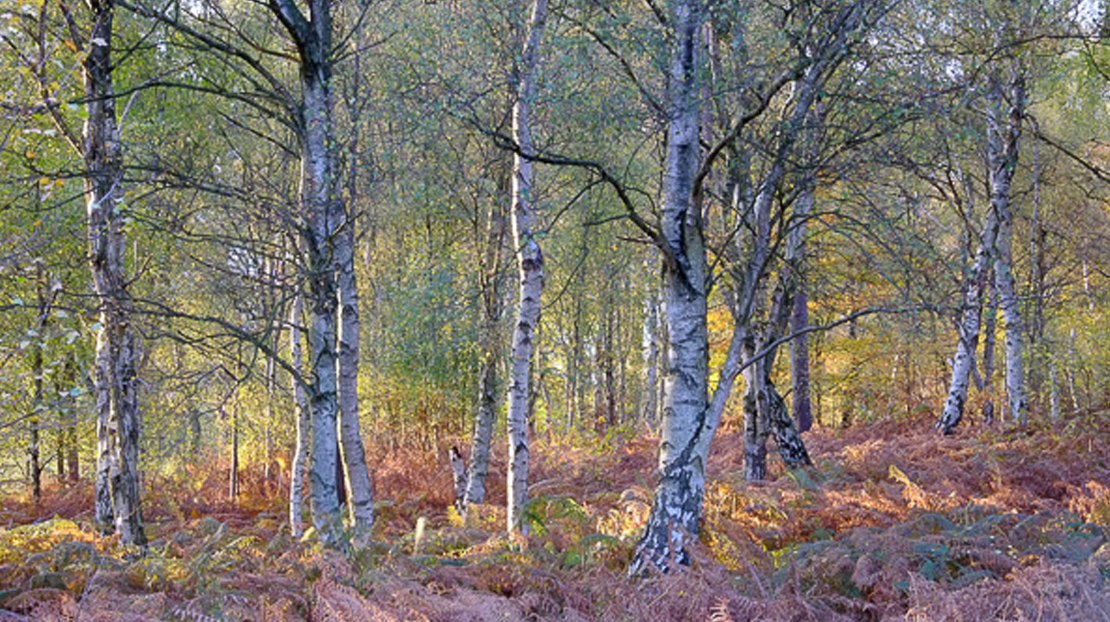
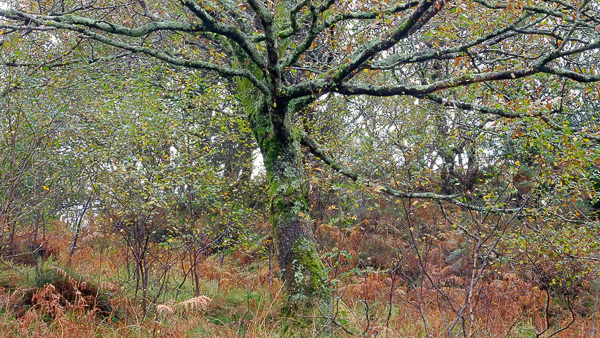
Autumn Woodland. Handheld, ISO1600, f11, 1/30 sec

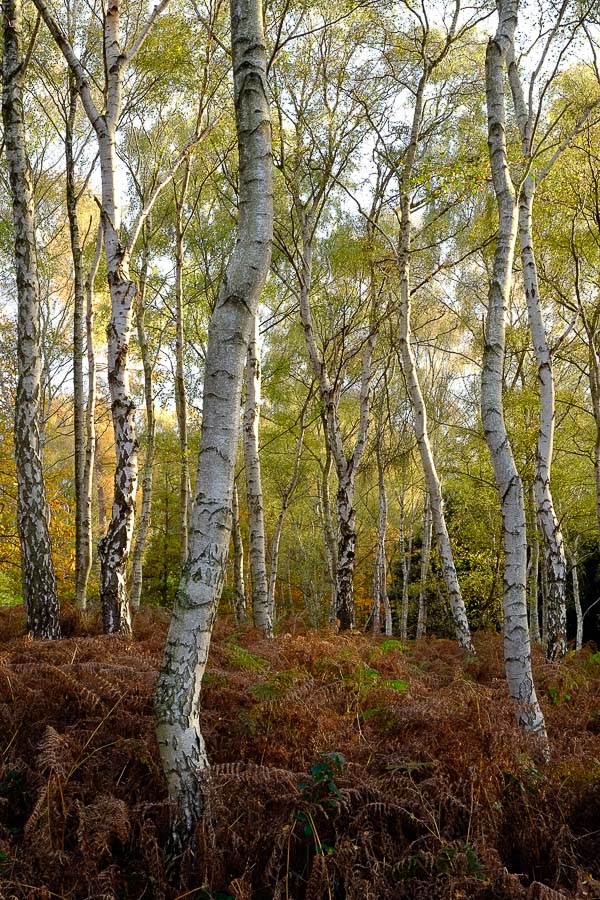
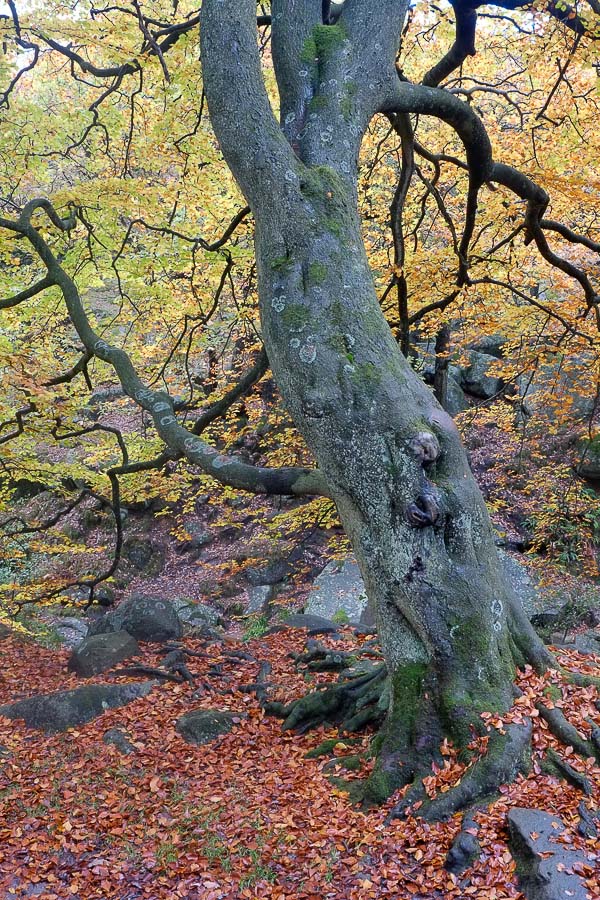
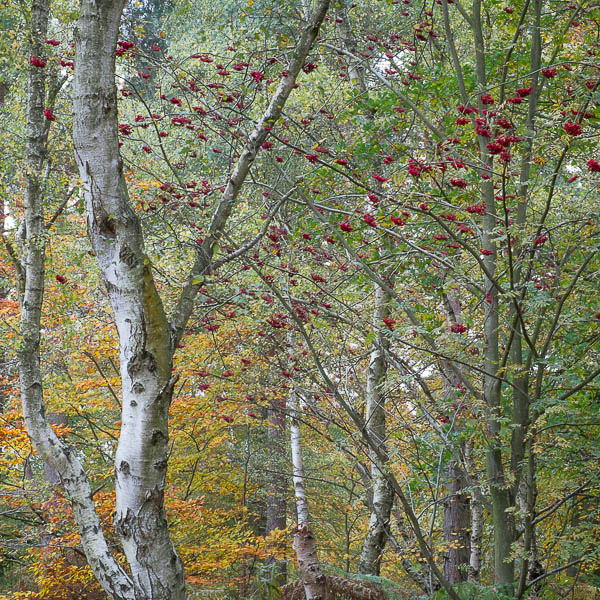
Having said that, the results shooting landscapes have blown me away. (all the images in the post are taken with the X-Pro 1. Sorry they are all tree images, but it is autumn and it would be rude not to spend my time in the woods. Please also note, all of these images are jpegs either straight out of camera or at most have just had a little high pass sharpening applied for uploading to the web. One or two have had VERY slight contrast tweaks, but that is it. I haven’t had time to really set about working on raw files from the camera yet). The X-Trans sensor is astounding. I am not a techno geek on such matters, but whatever Fuji are doing, long may it continue. The clarity of the files, the rendition of colours and contrast is stunning. I am sure this is partly due to the wonderful Fuji lenses which I see as being on a par with, if not exceeding the quality of the Canon L lenses, and that is saying something.

I am loving the weight and lack of bulk of the Fuji. I have bought a smaller travel tripod to use with it which is more than adequate. It fits in a tiny bag and even with several prime lenses, filters and spare batteries it weighs a minute fraction of the DSLR kit. I have been surprised at how much pleasure this has given me back. I can work for longer and walk further without fatigue and I am much more inclined to have the camera with me, in fact I rarely go out of the door without it. (I am in London as I type this and have it in my jacket pocket with the 18-55mm lens on. Couldn’t do that with the 5D). My feeling is that a lot of photographers as they get that bit older or as aches and pains start will be keen to move to a lighter more portable kit to help them maintain their joy in the field. I also think as the quality of these cameras will mean more will gradually move away from DSLR’s, especially if a full frame version emerges.


Padley Gorge - Handheld, ISO1600, f8, 1/30 sec


All the images in this article have been taken in the last month with the Fuji using the in camera “film simulation” presets for Astia and Velvia films. (I am sure these will annoy film users as they can’t possibly be anything like true Velvia or Astia, they are just adjustment presets, but he results can still be very nice, just don’t expect them to replace true films by any stretch of the imagination).

I have been shooting with raw plus fine Jpegs switched on. Annoyingly, when Lightroom imports these files it copies them all to the computer but only imports the raws into the Lightroom database. You will find the Jpegs in the same folder, but they won’t show in LR. I tend to go in to Finder (on the Mac, Windows Explorer on Windows) and find the JPEG file I am after and drop it into Photoshop. There I tweak it if necessary and save it as a tiff. This tiff is then imported into LR using the synchronise folder command in the Library module. A bit of a faff, but it works for me. (I have just been sent this tip by great photographer Lizzie Shepherd – In LR, go into Preferences and on the General tab you can tick a box which gets LR to treat jpegs as separate images next to raw files – problem solved, thanks Lizzie!)

I am shooting Jpegs as well as raw files because the quality of the Jpegs is really VERY good. I like the mono conversions the camera does as well as the film presets and these are permanent in the Jpegs whereas they are not saved in the raw files. The Jpegs also preserve the aspect ratio presets I use in the field. You can set the Fuji to shoot in square format (which I use a lot) and in a 16:9 panoramic format. For portraits and less critical images the Jpegs are often quite sufficient for my needs. For landscapes and images I will use professionally, it’s the raw files I will process.


Tree, North Wales. Tripod, ISO200, f22 (in error - rather extreme!) 1.6 sec


A word on some of the niggles I have with the Fuji, because it does have some quirks in the way it needs to be used, especially if you are used to a DSLR, and it has some very irritating “features” too.

Firstly, let’s talk about that battery life. It’s dire. I suspect it’s the electronic viewfinder that’s the culprit but if I am shooting for a day I will go through four batteries. I carry five and still feel nervous. I will be buying a couple more. I just can’t stand having to economise on battery power as I work. The batteries you can get on Amazon for around £12 seem to work just as well as the genuine Fuji ones which sell for £60. Guess which I am buying?

The other really irritating thing is the position of the tripod mount. This really hasn’t been thought through by Fuji. As soon as you fit a quick release plate it partially covers the battery/memory card bay door. Seeing as you have to change batteries every two hours, it is very annoying to have to unscrew the quick release plate every time to do this when simply positioning the tripod thread a few centimeters further away would prevent the issue.

I have found a couple of the buttons on the rear of the camera are easily activated in error. I particularly seem to catch the Q’ menu button. It is placed on a raised part of the body moulding and this makes it prone to being pressed. However, I notice this button has been recessed on the Fuji XE-2 which has just been released which is great (and I love it that Fuji really seem to listen AND RESPOND to customer feedback on these cameras. How many manufacturers ask for feedback but then never implement any of the changes we ask for? 

There are also some quirks in how you use the camera in the landscape. At least I see these as quirks having been used to using a Canon DSLR. The first is the focusing system employed by the Fuji. It works in a completely different way to a DSLR. On a DSLR the focusing sensors are most accurate when they can detect high contrast edges, where light areas but up against dark areas. By locking on to these they can measure distance and achieve focus. However, on the Fuji, such high contrast edges are just what the focus sensors don’t want to lock on to. They are most accurate when they can find a surface with texture, say a tree trunk or the surface of a wall. This takes some getting used to but I have found when the Fuji does lock focus I get a higher proportion of sharp shots compared to using autofocus with the DSLR. It is very accurate.


Silver Birch - Clumber Park. Tripod, ISO200, f16, 1/4sec


This leads me to another change I make in my workflow when making landscape images with the Fuji compared to the Canon. With the Canon I use Live View focusing with the lens on manual and love this approach. It is very accurate and allows for checking of depth of field with ease. However, on the Fuji, I have found It easier and more effective to have the lens set to auto focus but to press the AF button on the rear of the camera and select the AF point I want it to use. This locks the focus accurately for me and at f11/f16 I am getting excellent depth of field. With the sensor size of the Fuji, I am now experimenting with shooting wider, f8/f11 to see if this maintains sufficient depth of field while getting me closer to the sweet spot of the excellent Fuji lenses. My next experiment is to try back button focusing with the Fuji. I understand you can switch the lens to manual focus but still use the BBF button to focus and this sounds like it might be a good system.

Now I am used to how the Fuji works I have developed a modified workflow and have found I can already work at speed in the field with it, enabling me to stop thinking too much about camera operation and focus more on capturing changing light and composition which is much more important to me.


Tran Hows, Dawn - Tripod, ISO200, f16, 0.5 sec


I am finding the light meter on the Fuji to be very accurate and so, as opposed to how I work with the DSLR where I shoot in full manual, I have been using aperture priority and then tweaking the exposure after checking the histogram using the exposure compensation dial on the top of the camera. This is working really well for me. Other than in really low light or very contrasty light, though, I am tending to find the light meter is pretty accurate.

I have now used the Lee Filters Seven5 system on the Fuji and love it. If you have the full sized Lee system you can save a lot of money by just buying step up rings as it works fine. It’s a bit big, but the cost saving is significant. However, if you can afford it or if you are new to Lee Filters the purpose designed system is a delight. Small, beautifully made and balanced it is the perfect match to cameras of this size. As always with Lee, you get what you pay for and the optical quality and clarity of the grads is superb. Positioning the grads using the live view screen is a doddle and they do the job just as designed.


Padley Gorge - Derbyshire. Tripod, ISO200, f9, 1/5 sec


I have been trying a vari-ND filter for my ICM shots with the Fuji and have been pleasantly surprised with it. It is very convenient being able to dial in the amount of neutral density effect you need and being a screw on filter it is better suited to ICM work than using a Lee holder. I also have a Tiffen screw on 10 stop filter but have to try this out, so no verdict as yet, but I see no reason why it shouldn’t be perfectly fine.

I am taking delivery of the brand new 23mm f1.4 lens on Monday (it has since arrived. Sadly the first lens had two scratches on the front element but the replacement was fine) and am excited to try this out. If it is as good as the 35mm it will be a terrific lens. I must add, my next lens purchase, which surprises me to say it, will be the XF 55-200mm. (since typing this on the train I have caved in and flexed the plastic and am now the proud owner of said lens). The last few weeks have made me realise how much I use a long lens in my landscapes. I often have my 100mm macro on my Canon (both as a macro and as a landscape lens) and I also carry the 70-200mm which I use a lot in my landscapes. I had anticipated shying away from long lens for the Fujis I imagine it might look a bit ungainly, but I have really missed the reach of a longer lens.I have also bought the 60mm macro, partly because (great excuse) my wife now has the XE-2 and she loves macro photography, but of course, we can share 🙂

I am travelling to Norway in two weeks to co-lead an aurora workshop with Antony Spencer for Light and Land. I will be taking my 5D kit, but the Fuji is coming with me too. This will be a great test for it, both as a landscape camera but also the ultimate test for long exposure high ISO shooting, with the 5D to compare it to. It will also be interesting to see how it copes with the low temperatures north of the arctic circle. (All bar two days of the trip we will have no daylight at all as the sun won’t rise above the horizon – we will be living I a world or twilight and darkness for 10 days). Note to self. Buy even more batteries for the Fuji.

I will try and find time to blog from up there to let you know how it goes as well as posting some images. Watch this space.


Clumber Park - Tripod, ISO200, f18, 1/3 sec


“Sea Fever” – The New Book from David Baker

Sea Fever David Baker

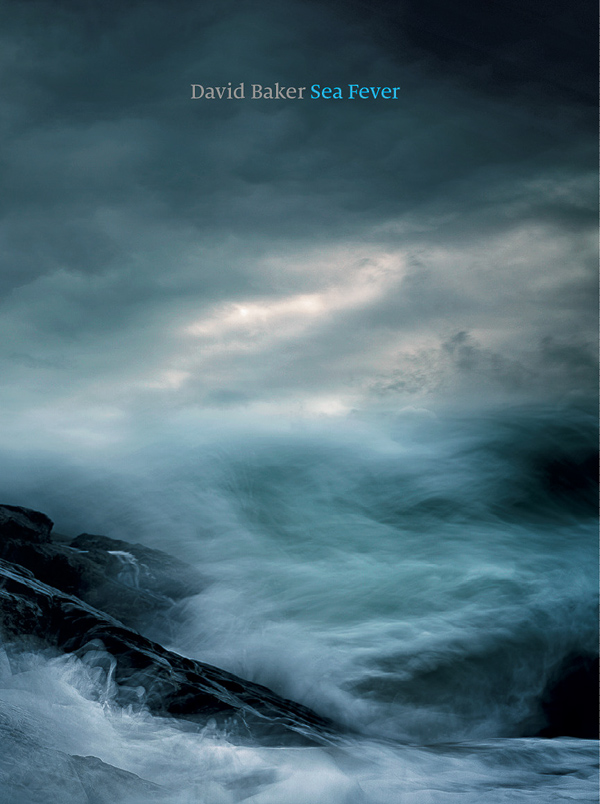
"David Bakers - "Sea Fever" Cover


David Baker, or Milouvision as many of his online followers will know him, has been photographing and blogging for years (www.milouvision.com). Building his following and honing his skills with the camera, he has risen to real prominence over the last couple of years, first winning Outdoor Photography magazines “Outdoor Photographer of the Year 2012” title, followed by three successful exhibitions and the 2012 Landscape Photographer of the Year “Your View” category winner, culminating now in the publication of his first book, “Sea Fever”.

Published by Triplekite Publishing, Sea Fever is a collection of 26 of Davids stunning signature coastal wave images.

So, what are you to expect when you receive your copy of “Sea Fever”?

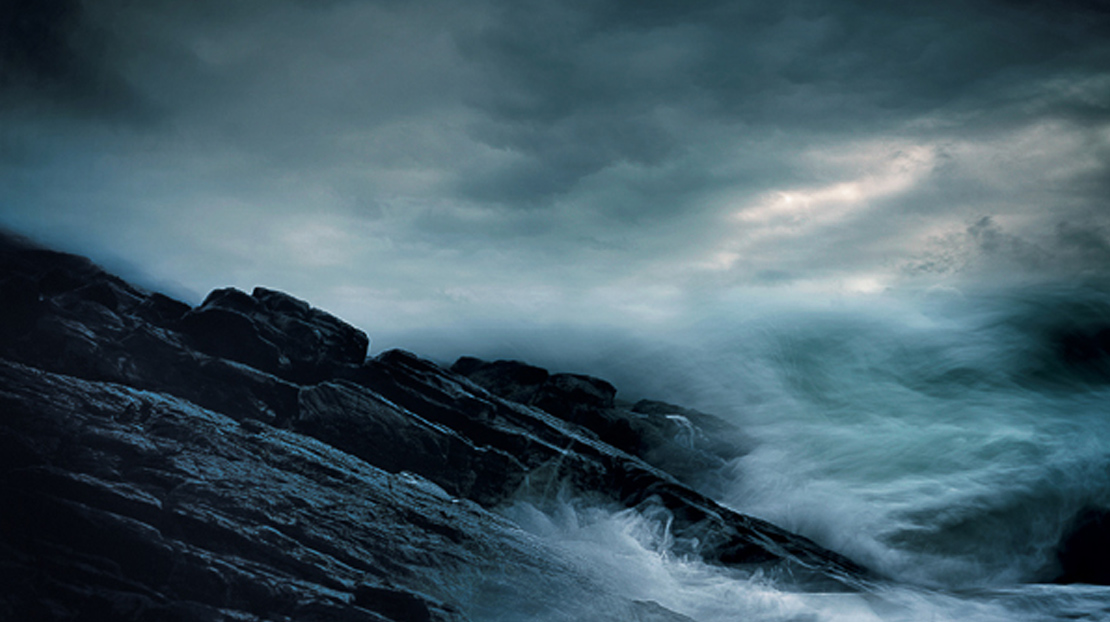
The first thing that will strike you is the stunning cover image, a taste of things to come. The image is one which was on display at the Masters of Vision exhibition at Southwell Minster ( http://mastersofvision.co.uk/david-baker/ ) this summer and it is a fitting image to lead us into the book. An image full of power and drama.
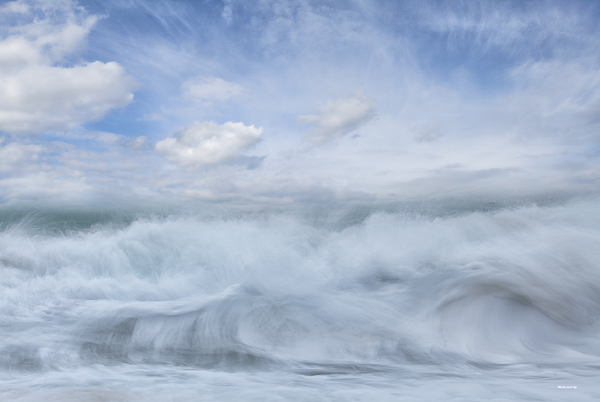


Inside, the foreword has been written in a beautiful alliterative style by accomplished landscape photographer, Pete Bridgwood. To quote Pete as he describes how David approaches his image making of the sea,

“He has a rare ability; to completely concentrate his creativity, to focus his intentions and develop a deep relationship with his subject…. it is immediately evident that this is no dalliance, no brief fling; this is an aching, impassioned love affair”

This gives an idea of the intensity and depth of the images that reveal themselves as we turn the pages. David also gives a brief introduction to his approach to making the series of images.
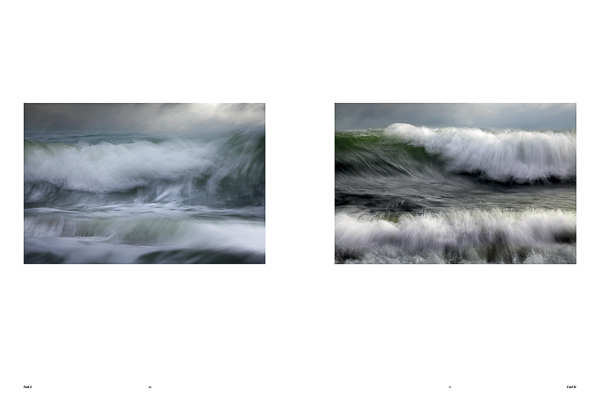


The book is printed in portrait format, an unusual choice for a book based mainly around landscape orientation images. However, the images that are shot in portrait orientation display well and then many of the landscape orientation images are displayed (by Dav Thomas, who has done a great job with the layout and design of the book) spread across two pages, often bleeding off of the edges to give the greatest impact. Others are often given wide margins, lots of ‘breathing room’ and this is pleasing to the eye. The fact that Triplekite have decided on such a generous page size means this all works well. Nothing feels cramped or stifled in any way. The images are the stars.

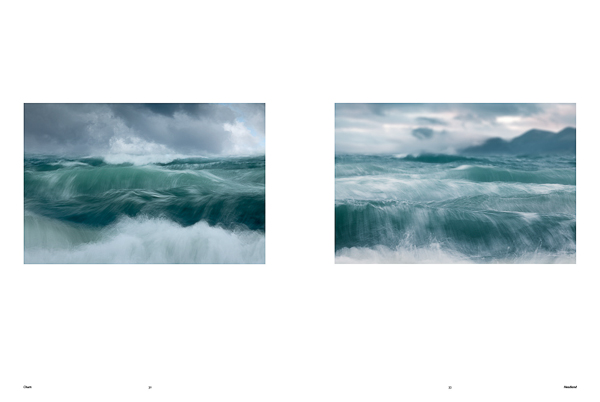
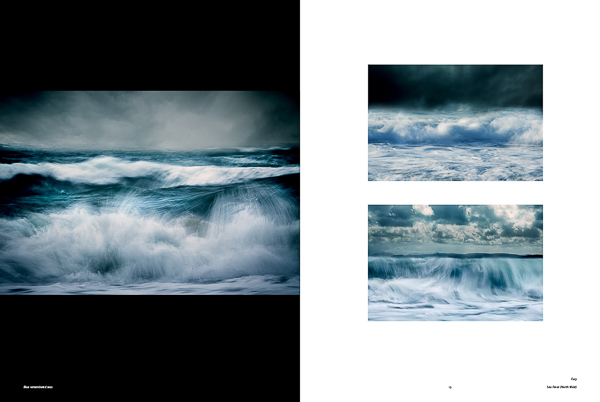
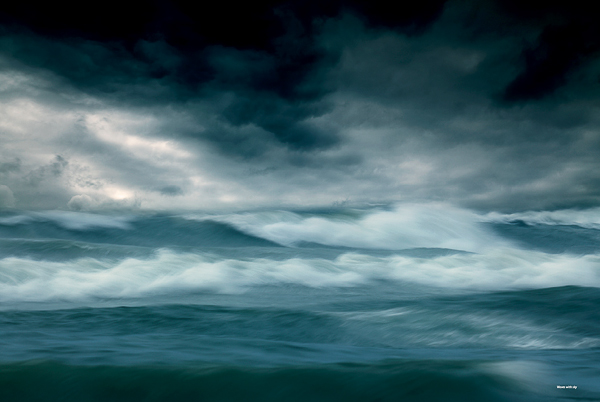
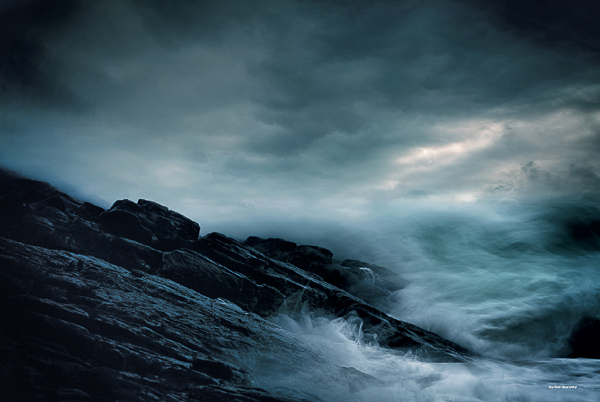
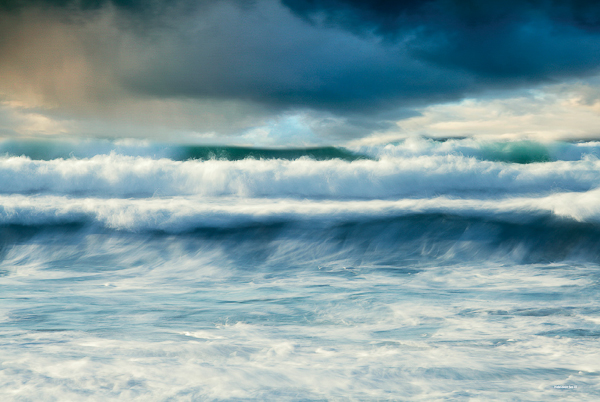
Davids “Sea Fever” images captured the imaginations of lovers of seascapes as soon as they began to appear. (and I have already seen a few ‘Sea Fever’ wannabes imitating the style! I suppose imitation is the sincerest form of flattery?). They have a power and transcendent beauty which seems to connect with all who have a love (and respect for) the sea. By slowing the shutter just a little he retains enough detail in the waves to show the power, movement and flow of the waves while softening the effect and merging the waves into the sky. There is no real, defined horizon in his images – they become almost ‘as one’. In fact, the skies are not playing ‘second fiddle’ to the waves but enhance and complement them perfectly, almost becoming part of the waves themselves.
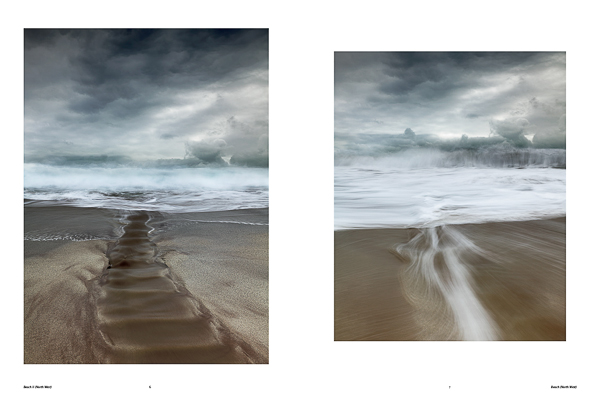


Every image in the book is just beautiful. Some are full of stormy ominous power, others gentle light and gracious delicacy. There is not a weak image in the portfolio and I would love to have any of these on my walls at home. Each has a mesmerising quality to hold our interest for many years.
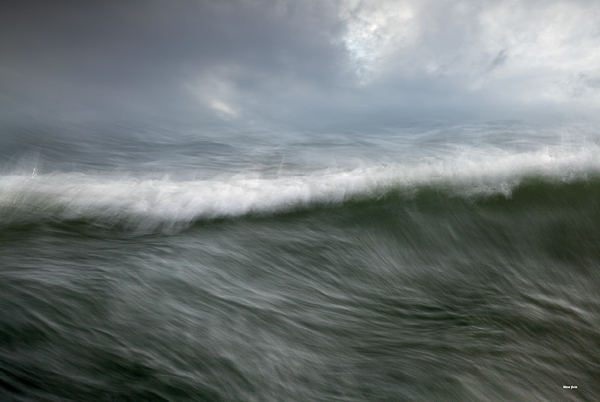


I had the opportunity to interview David a few days ago about the book and his work and thought you might enjoy his comments.

D: First of all, let me congratulate you on the publication of your first book, “Sea Fever”, I have seen an advance pdf copy and it looks stunning. How did you feel when you first saw the design?

DB: Many thanks! Yes, a great feeling to see the flow of images due to Dav’s design skills.

D: How did the book project come about?

DB: I was fortunate to be one of the exhibitors at Masters of Vision which opened in late July 2013 and during that weekend I met David Breen (Triplekite Publishing) and Dav Thomas. I knew of David’s photographic work and of course of Dav’s book. In early August David emailed suggesting a book based on the Sea Fever project part of which had been exhibited at MoV. A really good day!

D: How did you decide to focus on such a tight project as “Sea Fever”? Was it more difficult, do you think, than doing a retrospective on your work, or would that have been harder?

DB: I’ve held previous exhibitions which have been a selection of my favourite images and at the time of MoV I had just completed a show of the Ridge Trees project and was in the midst of Sea Fever so it seemed natural to show what I was passionate about.

D: How did you find the process of selecting the images for the book? Was the choice difficult? How did you go about narrowing down the selection?

DB: There wasn’t a huge selection anyway as I’m a ruthless editor. But for the book I provided the required number plus an extra 25% I think and then Dav undertook the skilful design.

D: Without giving away too many secrets can you give us an idea of how you make the “Sea Fever” style images? What kit do you use? Shutter speed etc?

DB: I experiment with a variety of shutter speeds and focal lengths whilst trying to look for relationships between the waves and ideally clouds. I aim to have at least a line of foreground or central wave across the frame. I try to take a painterly approach if that makes sense as I want the images to say this is how it feels to be at the shoreline with the battering wind full of salt, the spray, the thump of the waves, the sense of vulnerability. How can an hour at the shore be captured in an image?


D: How long have you been working on the “Sea Fever” project? How long did it take to perfect the style of the images?

DB: I was in the Outer Hebrides in March 2012. During my previous trip in February 2008, I had taken mostly long exposure shots (as during this time the B+W 10 stop filter featured in many a photoblogger’s work) but during March not one long exposure shot was made. Feeling a little ‘unsettled’ I started taking shots during the closing days of the trip to capture the sea’s power in a way I had not undertaken before.

The first image, Hebridean Sea III, was uploaded to my photoblog in late April 2012 and that was that. Nothing happened in terms of development of the project until August of that year when another image was processed. I hadn’t realised I had a potential project but something must have been percolating away as in March 2013 onwards I started experimenting in acquiring images to compliment Hebridean Sea III.

D: Do you like working on projects? Or do you prefer more random ways of working? If you prefer project working, what benefits do you see working that way?

DB: It’s only during the past couple of years that a project based approach has been developed. I worked up one called Ridge Trees which concentrated on the New Forest and was defined by three attributes – dawn, mist and geography. Whilst the structure of a project is appreciated, I’m not restricted to just that type of work.

D: Why the sea? What draws you to photographing it so intensely?

DB: Good question! I usually mumble something about energy, and change. It’s not something that I’ve nailed down yet, and I’m not sure I want to. I’m not a great deconstructor (in an image sense) although I written a little about this aspect in the book.

D: Have you always been interested in photography? What is your photographic ‘history’?

DB: At 15 I wanted to be an architect. My dad had introduced me to an architect client and despite the then (1978) 33% unemployment in the industry, I was keen on pursuing architecture as a career. Despite good grades, events didn’t entirely pan out as planned, and after dithering about a course at Salisbury Art College and flirting with a technical drawing apprenticeship, I joined the Civil Service. It’s fair to say that there’s been little creativity work-wise since. I’ve always had a great love of art (especially sculpture) so I guess the creative ‘urge’ has always been there albeit mostly dormant.

I started using a small compact digital camera in about 2003/04 documenting visits to stone circles, dolmens and standing stones. A friend subsequently talked about his new digital SLR and suggested that I also buy one, so in January 2005, trying to engage a creative aspect of myself, I also bought a 300D.

From a technical aspect, almost immediately I wondered what I had let myself in for. I started reading magazines, books (fortunately Southampton has an excellent library) and looking at other images in various exhibitions and photoblogs. In the spring of 2005, I began posting images on a web forum and as a consequence a photoblog was started in late 2005.

Why photography? It was accessible and there was an immense amount of support and inspiration from the photoblog community.


D: Who would you say was your first inspiration in photography? And who do you find inspirational now?

DB: Just after I started using a SLR, I saw a photograph in Outdoor Photography of a Hampshire beach at sunset by Guy Edwardes and the sea looked fantastic drawn over the shingle beach. The wave trails looked ethereal and a week or so later I attempted the same and that was that, I was caught and I’ve been a seascaper ever since. Current inspiration is from a wide variety of sources.

D: What does photography do for you? What do you get out of it that drives you to pursue it as a passion?

DB: I guess it’s the conduit for a creative aspect that must be present in myself.

D: Have you ever hit a creative block? If so, how do you get over it?

DB: I get very keen on my work and then very disappointed by it very rapidly. I then go off to make more images. And then the process starts again.

D: What camera equipment do you currently use?

DB: 5D2, 24-70 and 70-300 lenses, Lee filters, Gitzo tripod and a RRS ballhead. The camera, lenses and filters all fit in a Billingham bag. There’s no need to march huge distances for my work, and I’m (hopefully) finished with the days of rucksack wrestling against a rapidly incoming tide.

D: Is there a piece of kit you really couldn’t live without? A favourite piece of equipment?

DB: For years I used the Canon 17-40. Everything was at 17mm and hang the consequences. That used to be nailed to my 300D and then to the 5D. Now, I think the 70-300 zoom is used significantly more than ever. Almost everything is on the tripod too.

D: Is there any piece of equipment you lust after and would love to own?

DB: I was considering the Gitzo Ocean tripod.

D: I know you are a keen and active photoblogger and Twitter user. Why do you love photoblogging? What do you enjoy about Twitter and the photographic community on there?

DB: The immense amount of support and inspiration from the community plus the free exchange of ideas, links to work, exhibitions, and the occasional meet-up.

D: Would you describe yourself as a “Landscape/seascape Photographer” or do you enjoy other genres of photography?

DB: I’m a seascape/forest photographer really. I really like looking at the landscape big views plus the more intimate landscape compositions and also the very experimental ones. I also really like looking at street work (especially if there’s humour present).

D: What advice would you give to young or new photographers to help them make progress with their passion?

DB: Believe in the value of your talent and your images. Experiment, and have fun. If considering a project, make sure it’s personal to you, and choose a subject which will allow access to create the images you want. Think about the story and how the work will be shown – book, exhibition or blog.

D: What software do you use to process your images? Does much work go into processing the “Sea Fever” images?

DB: For ages (and ages…), I used RawShooter Essentials (which became Lightroom I think) as I loved the ease of use, and the mono images it could produce. During the last year I’ve used Canon DPP for the Raw files. I make no corrections in DPP aside from using the lens profiles and the auto-dust correction (the principal reason for moving from RSE). Everything else in undertaken in PS, and I use Bridge as a catalogue.

D: What is the URL of your website so readers can have a look at your work?

DB: milouvision.com (although some project highlights are also at dbphotographic.com).

D: So, finally David, what next? More “Sea Fever” images or is the project complete? Do you have other projects on the go? Any other plans?

DB: I’m not sure at present. It took a few Ridge Trees and Sea Fever images to realise I had the makings of a project so I’m sure something will present itself soon.


The soft back book itself is outsized at 410mm x 305mm and is being printed in Malta by the same high quality printers who printed Dav Thomas’s acclaimed “With Trees” book. The paper used for this book is 170 gsm Valletta Silk and it is being printed using the same Sublima 240 lps screen process as with Dav’s book which yielded spectacular print quality.

There will be two versions. For the serious collector there is a very limited edition of 50 which will be individually signed and numbered by David and comes complete with limited edition A3 print for £85. The standard edition is £25. The price excludes P&P of £8.50 (UK) or £23.50 (International). You can pre-order your copy HERE.


The attention to detail and print quality achieved for Dav’s book by Triplekite must inspire confidence that “Sea Fever” will look stunning when it arrives. (this review is based on seeing an advanced pdf copy, not a full print copy). David Breen and Dav Thomas seem to have started the company as they mean to continue. The fact they are both keen photographers first and have a passion for photography is reflected in the way they are putting the images ahead of profit. So many photography books are churned out by large publishing houses and treated much the same as cookery books and other books with pictures in. Often the paper and print quality is disappointing and doesn’t reflect well on the photographer whose work is often outstanding when seen in the flesh. With Triplekite the quality of the images comes first above everything, so the paper and print process choice has to be able to display the images at their very best. Attention to detail is seen at every step of the process, from the selection of the photographer and the images, to Dav’s design and layout right through printing and even into the packaging. It is a refreshing change to see a publisher who seems to care more about the photography than the bottom line.

I have a feeling many photographers around the world are going to beating down Triplekites door asking to be considered for their next book. But I also know Triplekite are putting their customers first by being very selective in those photographers work they choose to publish. Triplekite seem to have a tight focus on exactly where they are going with future publications to hold true to their vision for the company. This can be seen in the latest announcements that the next two “Portfolio” books will be by the wonderful Paul Kenny and Marc Wilson respectively. They have also announced a third series of books entitles “Land|Sea”, each of which will feature a small portfolio of work by five photographers carefully selected and which will build into a collectible library of great landscape work. 2014 Looks to be an exciting year for lovers of fine photography.
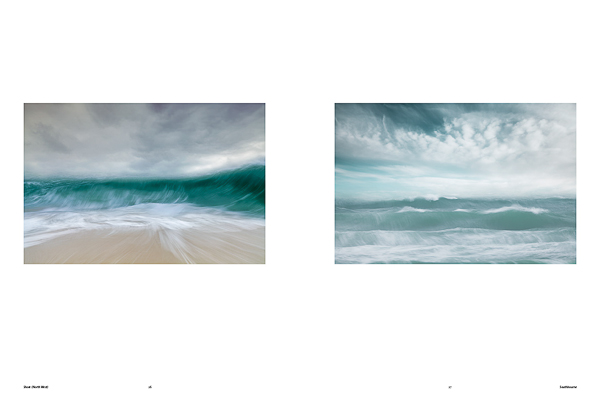


“Sea Fever” is the first in Triplekites new innovative “Portfolio” series, designed to be project based. Being focused on such a tight project with all of the images shot in a very similar style and with a common technique some may find they desire a greater variety of images, but that is not the purpose of this type of book. Its focus is its asset and it is a great example of how, as photographers, our work can get so much stronger if we focus on a tight themed project. While smaller and lower in cost, it will still adhere to Triplekites philosophy of making the images shine through large page sizes and superb print quality. These books are an ideal way to showcase the talent and work of some of the Worlds finest photographers. I can see the series becoming very collectable.

I, for one, pre-ordered the book as soon as I heard it was to feature Davids “Sea Fever” series and look forward to getting my signed copy and print. Having now seen the pdf proof I am even more excited. A firm delivery date is yet to be announced but is expected to be around mid to late November.

For lovers of fine land and seascape photography and especially if you love really fine photography books this is another ‘must-have’ (and what a great gift, even for non-photographers) from Triplekite. Order your copy HERE
 

How do I create Panoramas?

Panoramas

Before getting in to answering this question I just wanted to mention I am running a “Capture-to-Computer” workshop in Skegness, Lincolnshire on Saturday 21st January 2012. One place is taken but there is one free place left. The basis of the workshop is creative and artistic photography – blur, ICM (Intentional Camera Movement) and textures. The morning will be spent with me showing you the techniques for shooting this style of image and then after a meal (included) I will spend the second half of the workshop showing you how to process these images in Lightroom and Photoshop. If you would like to book the second place the price is £149. Please drop me a message and I will organise it for you. Right, now on with the business of making panoramas!

I love panoramic images and with modern digital cameras and software they are easy to make. I find myself rejecting the use of super wide lenses in favour of making panoramas more and more in my photography. I am not keen on the heavy distortion that comes with the super wides and the converging verticals they create. With a panorama I can get in even more width and maintain a natural looking image with far less distortion.

You can by purpose made panoramic tripod heads, such as the Panosaurus, which are designed to rotate the camera on the ‘nodal point’. If the camera is rotated while held on this point and kept absolutely level will allow it to create almost perfect panoramas with little distortion and a very natural look. However the heads are expensive and you either have to have them fitted to a dedicated tripod or be prepared to switch heads in the field, and few of us are that dedicated or have the backpack space to carry two tripod heads.

There are two very acceptable alternatives which are ideal for most of us and I use both in my image making. I will cover both methods here. You can use a tilt and shift lens (the expensive but easier option) or you can use a standard prime or zoom lens. Both require stitching images together in software and both produce great images if done carefully.

So, if you want to make high quality panoramas, how should you go about it? The first step is to get your tripod as level as possible and make sure the camera is as level as possible on the head. This is far better than angling the camera slightly upwards or downwards. The more our of level the tripod and camera are, the more distorted the final image and the area you will need to crop away from the edges of the pano will be larger. I use the small round level bubble on the top of my tripod below the head to level the tripod itself. This can be fiddly as you need to tweak the leg lengths to get it right but it is worth doing. I then level the camera on the head using my hotshot spirit level.

Next is getting the settings in the camera right before you start shooting. It is critical that nothing changes between shots or you will not be able to seamlessly stitch the image. Turn off auto focusing on your lens so the focus point does not change between shots. Switch the white balance to daylight so it doesn’t alter between shots. Zoom out further than you want to to allow for cropping the stitched image which you will have to do to a greater or lesser extent. Don’t frame the image as you want it to finally appear as some of the edges will be lost. Start the panorama further to the left or right than you want to for the same reason. I use the camera in portrait orientation for panoramas to give a larger file size and more depth for cropping (unless I am using a tilt and shift lens, but I will come to that later).

Working in aperture priority or manual, choose one area of the pano to set your exposure and focus. The exposure is often the tricky part, especially around dawn and dusk or when the scene has high contrast. I tend to aim to set my exposure based on the area of the pano which is almost the brightest. I take a test shot to get the histogram across to the right. You have to accept then, that as the camera moves to wares the darker area of the pano it will begin to under expose but we can tweak this later in the software to balance the image. I set my neutral density graduated filters for the same frame as the one I use to set the exposure. You have to accept that as you take the other frames the positioning of the grad may not be quite perfect, especially if the land rises or falls across the width of the range of shots but it will look worse if you try and move the grad up and down for each image. (I prefer to use soft grads for panos to make the transition line less obvious).Do not use a polarising filter when doing panos as this will cause havoc with the look of each frame and you won’t be able to stitch the images acceptably. Focus hyper focally or on a point very close to the base of the frame. I usually use f16 for panoramas to give a bit more latitude on depth of field, whereas in my other landscape work I am usually trying to get the aperture to f13 or f11.

Once you are all set up rotate the camera to the left or right hand end of the pano sequence. Remember go further left, or right, than you want to include in the final image you have in mind. I then take a single shot with my hand in front of the lens with my thumb up. This tells me the next image is the start of a pano sequence. Once I have taken the final shot in the sequence I take another with my thumb down. This indicates the end of a sequence. Believe me, you will be pleased you did when you get home as it can be hard to tell which images are for panos.

Take the first shot and then rotate the camera for the next as quickly as possible. The absolutely critical thing to remember is to overlap each frame by at least 30%. It is better to overlap by 50% than to go lower than 30%. The more data and overlap Photoshop has to work with the better the quality of the panorama you will get. The reason for working quickly during the sequence shooting is to minimise movement of objects in the pano. Anything moving makes it harder for the software to do the stitch, so scudding clouds, branches of trees blowing in the wind and so on can cause issues.

Don’t forget, panoramas don’t have to be horizontal. For a really different type of image use the same system but shoot vertically. Vertical panoramas look great on the wall.

Back at home on the computer there is some very specific things you can do to make the panorama stitching go well. I use Lightroom to work on my raw files so the screenshots below will show that, along with Photoshop for the stitching but Elements works in just the same way although the menu items might be in slightly different places. You can also get specific panorama stitching software but I have never used this so can’t comment on it.

Import the raw files into Lightroom. Do not allow the import dialog box to apply any changes to the images on import such as adjusting white balance or applying some preset as this will make stitching difficult or impossible to do seamlessly. It is vital you don’t do any work on them whatsoever before they are stitched. Find the sequence of images and shift click to elect them (this is when the thumbs up and thumbs down shots are a big help, but obviously don’t include them in the stitch!). Right click the selected images and select Edit in >> Merge to panorama in Photoshop. (see screenshot below)


This will open Photoshop (or Elements) with the following dialog box open


On the left hand side select the Auto  radio button and in the centre area of the window you will see the list of raw files you are using. Click OK. Now just leave Photoshop to do its thing. It will take a while depending on how many raw files you are stitching and how fast your computer is. On slower machines you will have tome to go and make coffee :).

Once stitched the image will look something like this;

Now you can see why cropping is required. In the layers panel you can see how Photoshop has stacked the three images and then masked them to achieve the stitch. The next step is to flatten the layers and then crop the image to the panoramic shape, losing all of the irregular edges. I then save this image as a tiff (or psd, if you prefer) and take it back into Lightroom. Now you can start making adjustments to the exposure, contrast, clarity and so on because now it will be across the whole image and will look right.

Once you have made the adjustments you want in Lightroom, move the image back to Photoshop for any final tweaks and adjustments there, and you are done.

The process is identical with Tilt and Shift lenses, with a few differences. Firstly, when doing horizontal panos you keep the camera in Landscape orientation. You make the sequence of images by using the shift mechanism and make three images, one shifted all the way to the left, one in the centre position and the final one shifted all the way to the right. All the information above about levelling and camera settings still apply and the stitching process is identical, you just need the three shots. The advantage of this method is the overlap the TSE lens produces is way beyond 30% so the stitch works well and the amount that needs to be cropped away is usually less as the lens tends to give a clean stitch if the tripod and camera have been set level.


So, why not have a go next time you are out with your camera. They are great fun to make and can be quite addictive. Enjoy!