Category: Gear Reviews

Using the Canon EOS R Mirrorless Camera for Multiple Exposure & ICM Photography
Using the Canon EOS R Mirrorless Camera for Multiple Exposure & ICM Photography

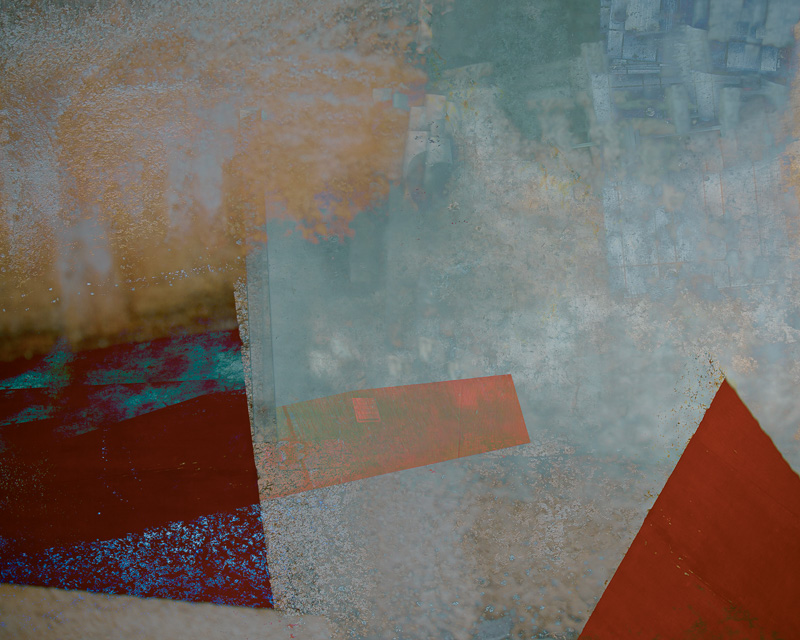
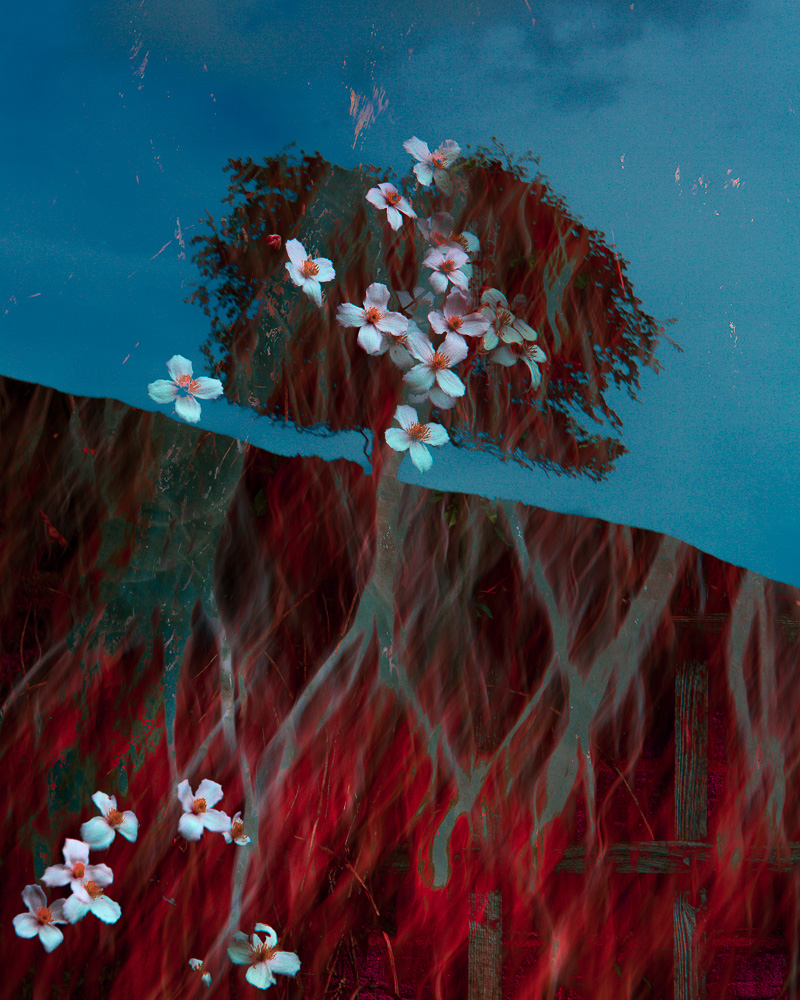
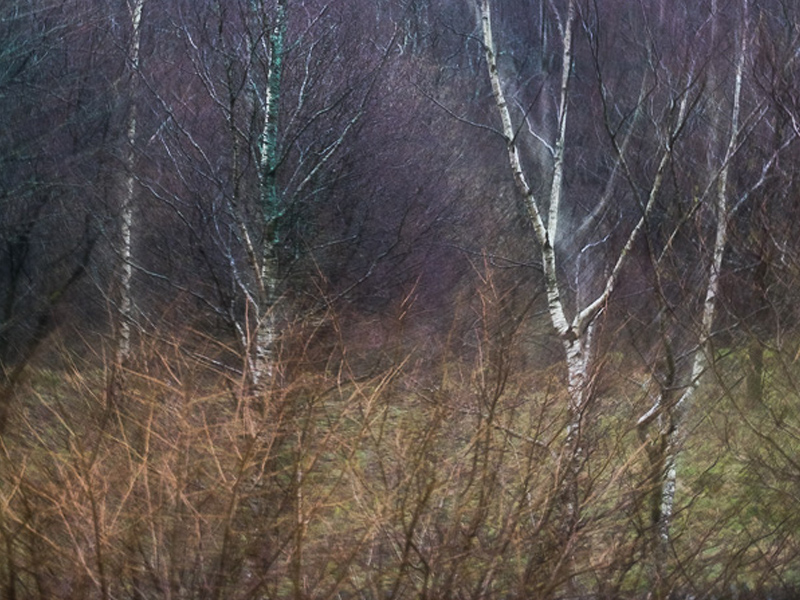
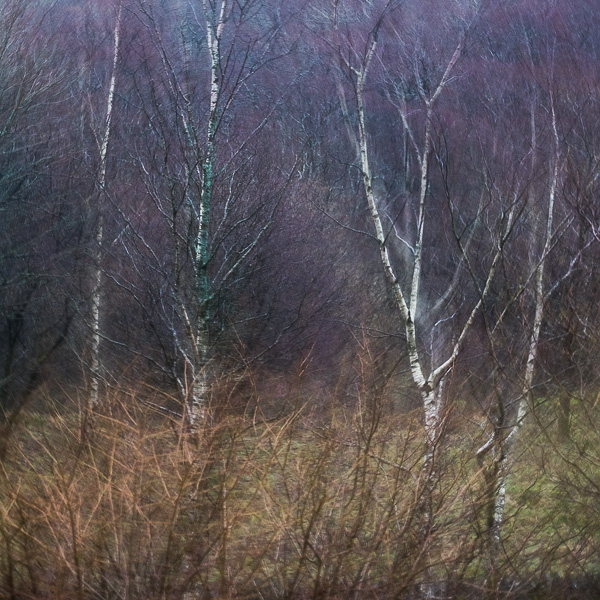
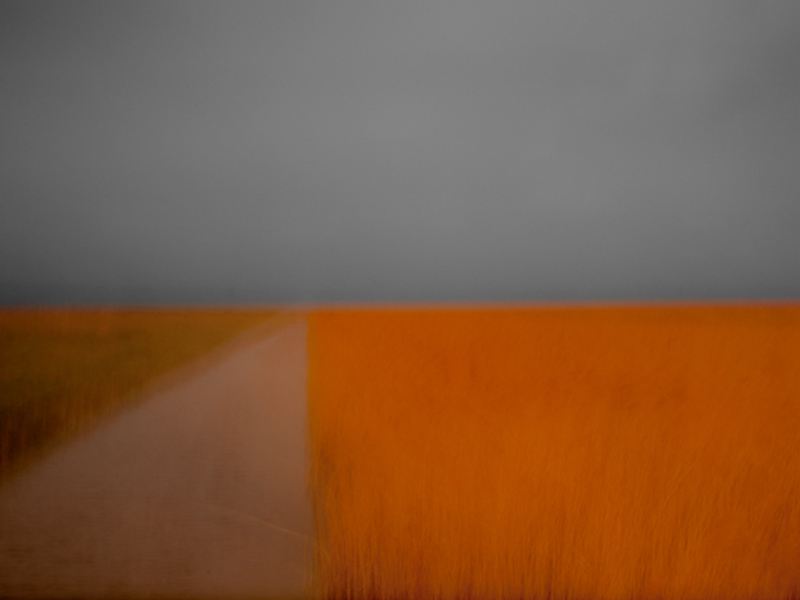
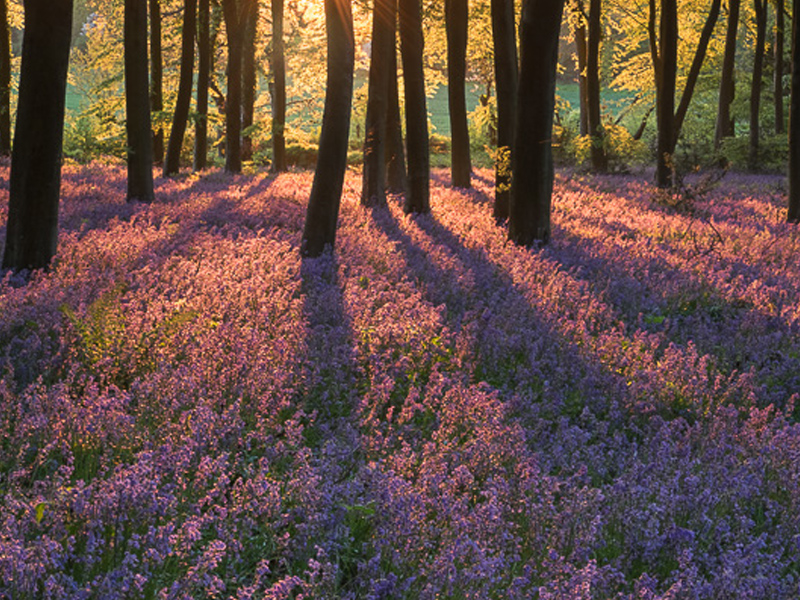
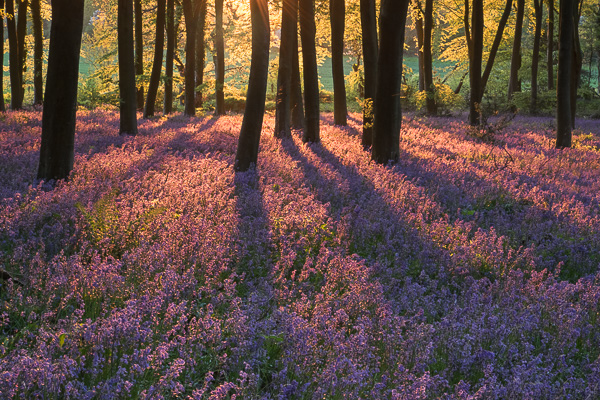
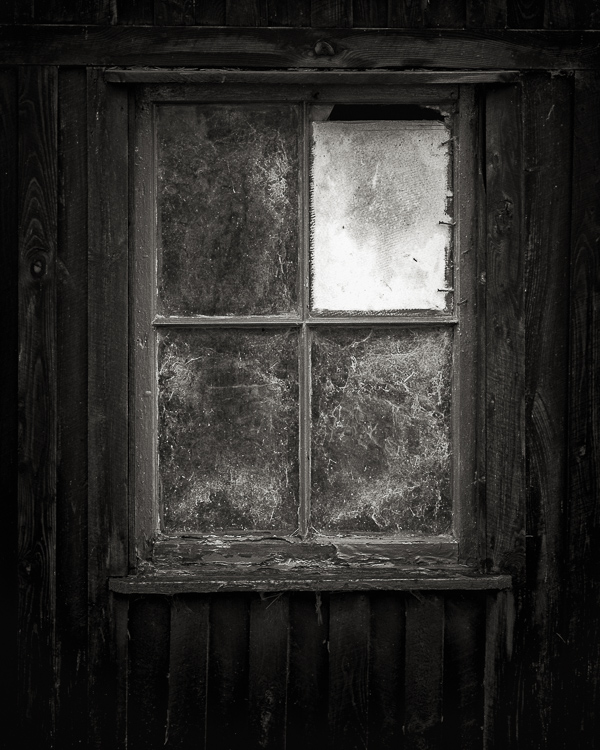
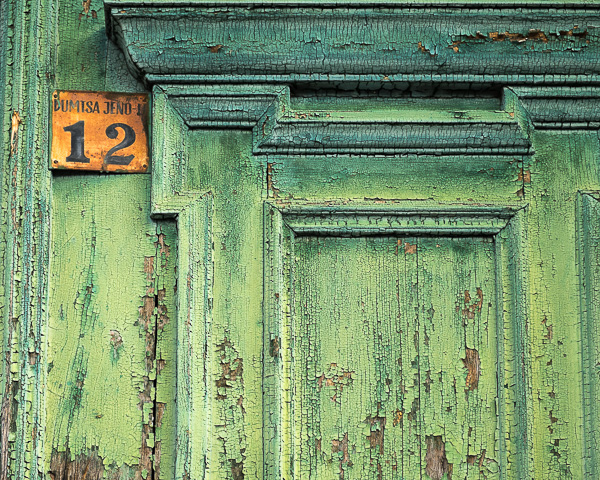
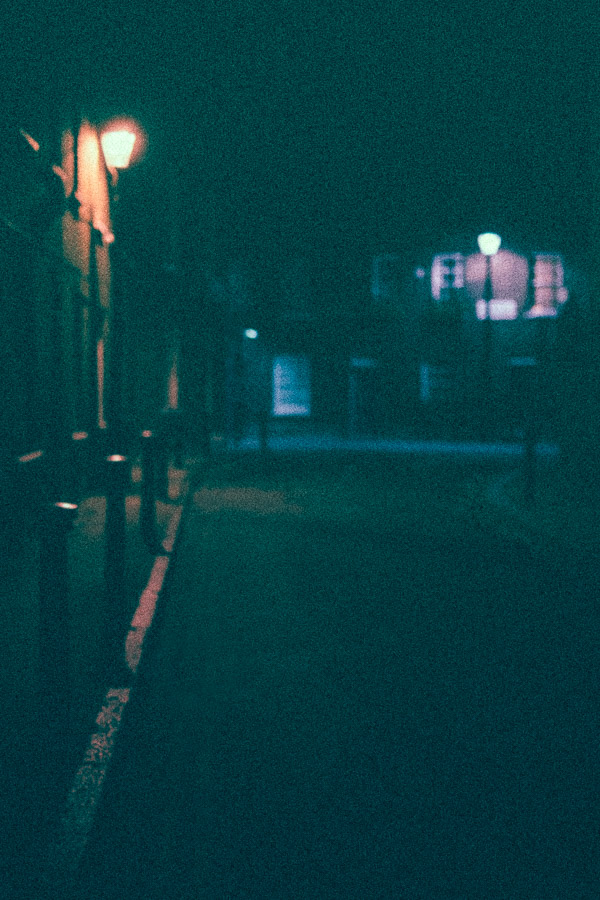
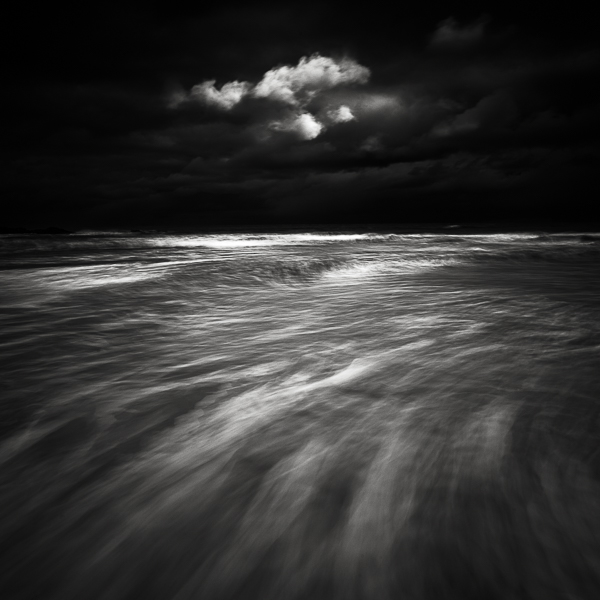
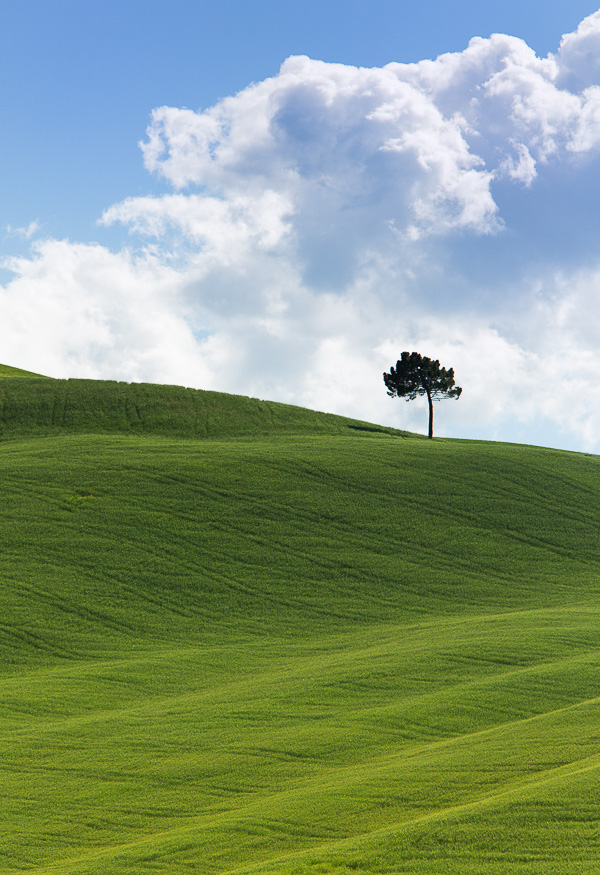
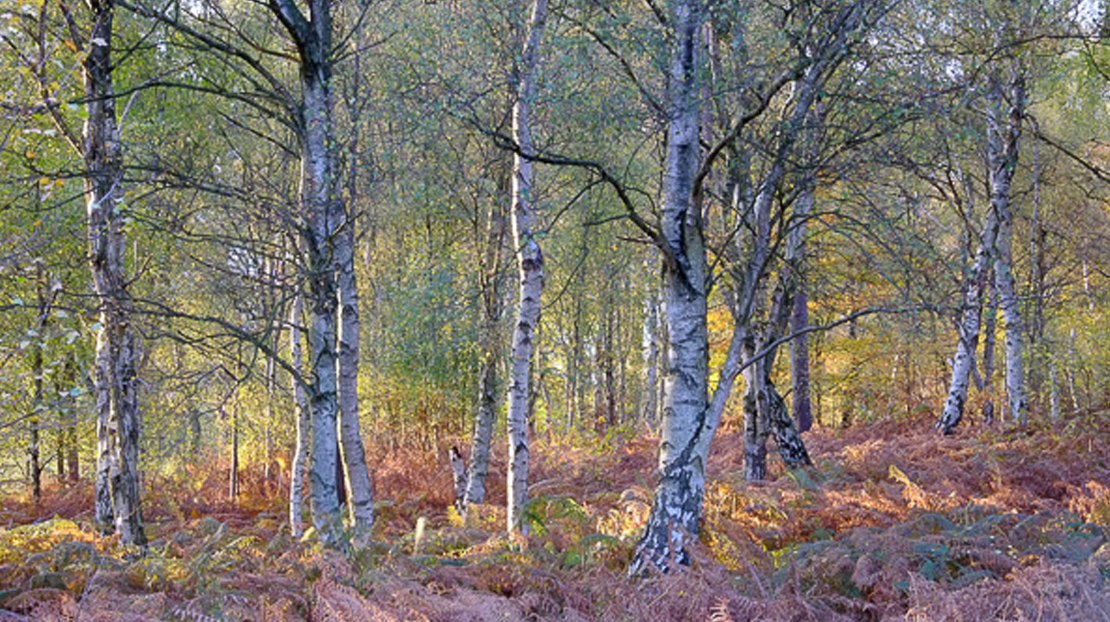
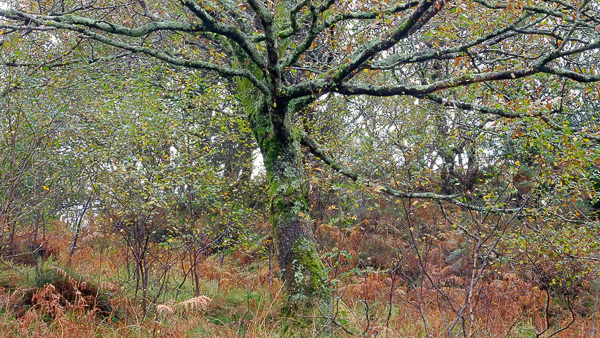
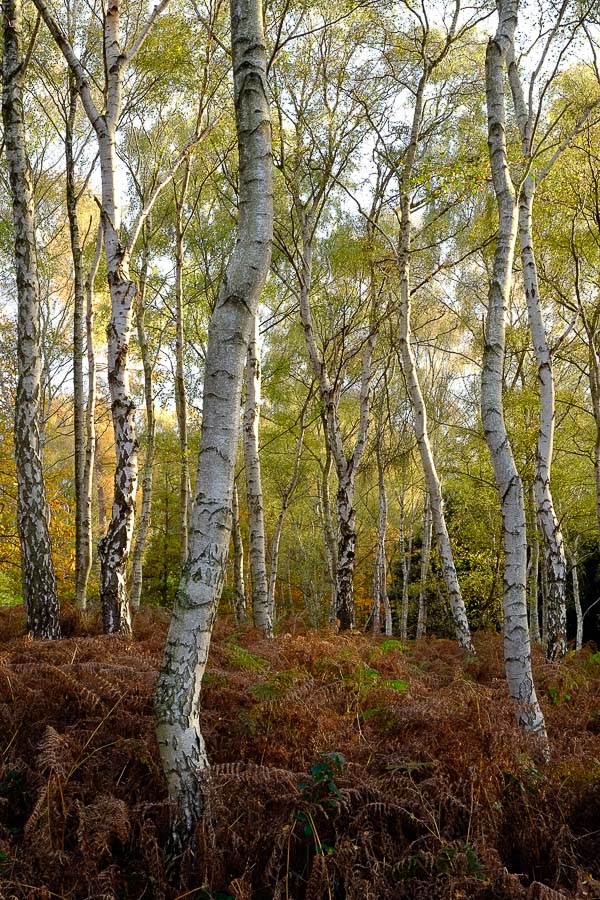
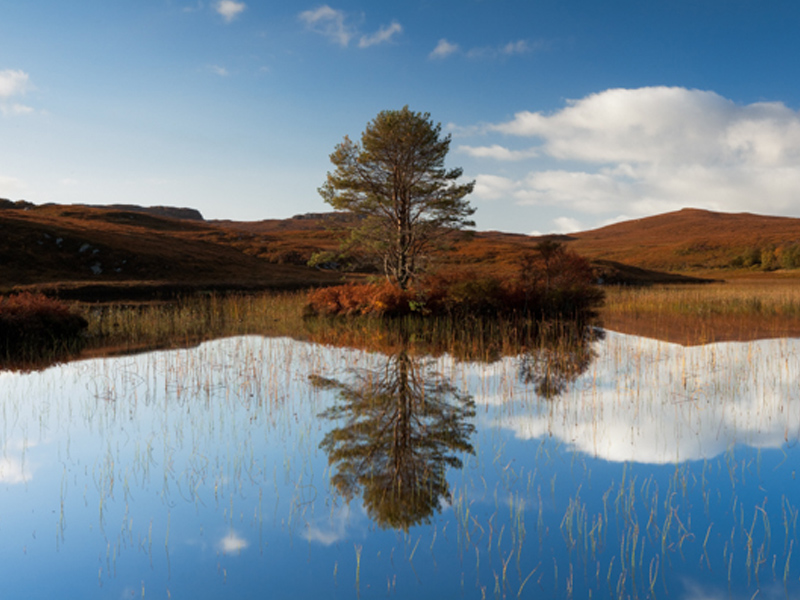
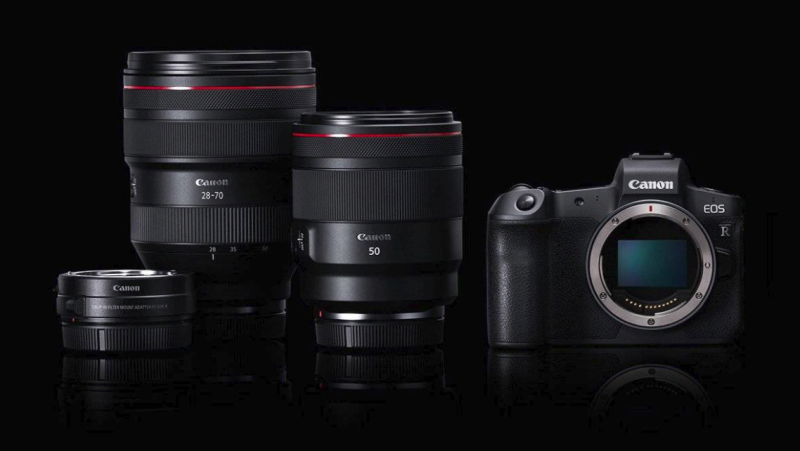
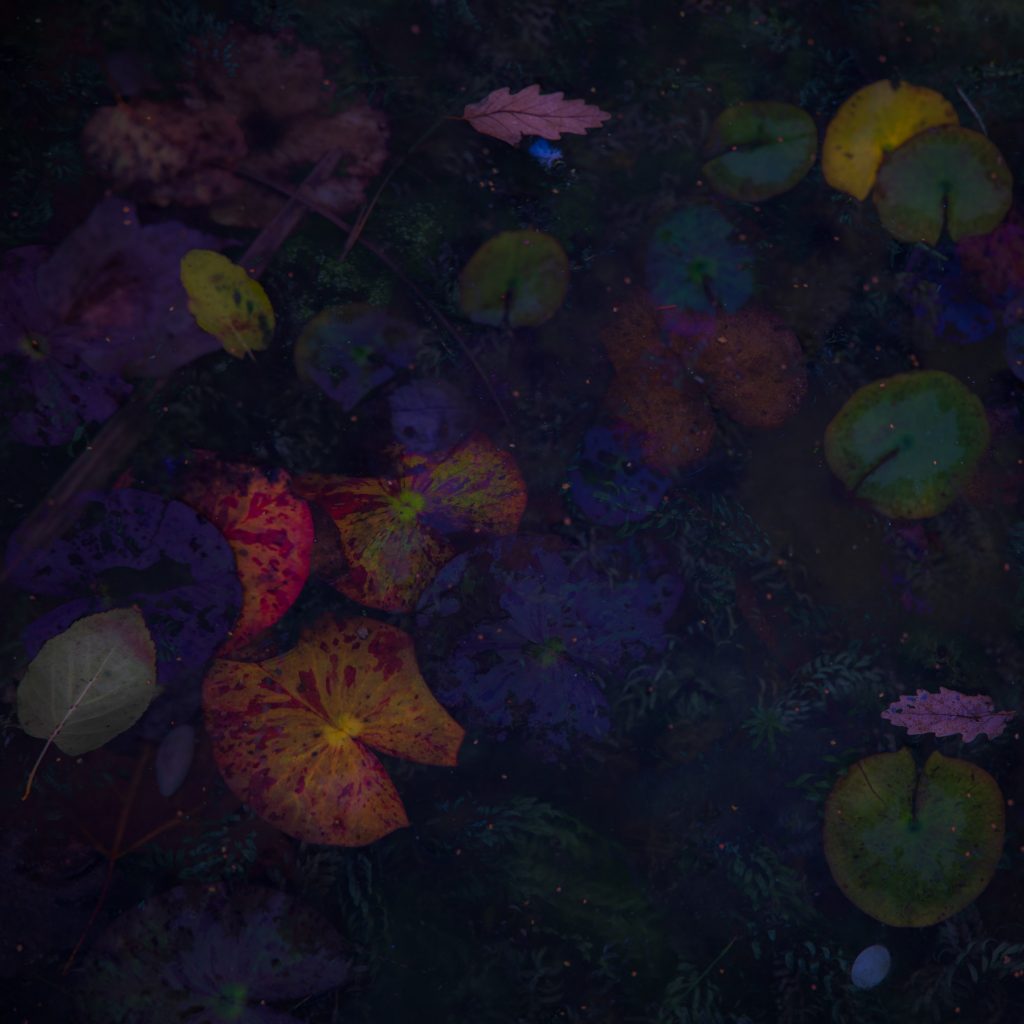
The new Canon EOS R full frame mirrorless camera system was released recently with much fanfare. Valda and I were immediately keen to get our hands on one and Rob Cook at Canon UK very kindly provided us with loan bodies, lenses and adaptors to give us that chance. (I made all of the images in this article on one day with the EOS R).

Our hectic lives, as usual, meant that time with the camera was frustratingly limited, but over the few weeks we had them we did manage to clock up several hours of use. Enough to put them through their paces and get a real feel of how this system performs for those of us that are working with the creative use of multiple exposures and intentional camera movement (ICM).

If you also use your camera for more conventional image making, this blog, while not concentrating on those areas (you will find hundreds of others out there that do) should also give you a feel for its potential.
Firstly, I’ll deal with some of the fundamentals around your possible reasons for switching to this new system.

1. Saving weight – mirrorless cameras tend to be lighter (and less bulky) than DSLR’s. The ‘R’ is no exception. It is, roughly, 30% lighter than a 5D mk4, for example. If you use a Fuji or Olympus, it is heavier, but it has more the feel and build quality of a DSLR, along with the high quality weather and dust sealing of pro Canon DSLR’s. For those who found the Fuji’s and Olympus systems too small and fiddly in the hand, you shouldn’t find this an issue with the ‘R’. The 24-105mm f/4 lens is a high quality L glass lens so it adds weight. Noticeably so, but it is also very versatile with 4 stops of image stabilisation and very sharp results (if sharpness is your thing). The 35mm lens (which is also a macro) is far lighter. I haven’t tried the 50mm. The EF adaptor which allows you to use all your EF lenses with all functions (auto focus, metering etc) weigh very little. I tried using my EF 70-300mm L lens and found it well balanced and very comfortable. The weight added depends on the lens, obviously.

2. The electronic viewfinder (EVF) is a revelation. It is fast, responsive and very sharp. I found I soon forgot I was using an EVF. For the multiple exposure image maker, the EVF is a real gamechanger over other Canon DSLR’S that have the blending modes. This is because as you make each frame you can see the next one overlaying the previous in the viewfinder. This allows precise lining up of frames. The effect of the blend mode is not shown until after you fire the shutter (but you do get to see that through the EVF which is especially good in bright light when viewing the live view screen is difficult. The overlay of the image is subtle but good enough to position things carefully. For me this is a major reason to switch to this new camera, the benefit is so significant.

3. The EF Adaptor with built in variable ND filter. ( https://www.canon.co.uk/mount-adapters-ef-eos-r/ ) This is the other game changer for me and a really innovative idea from Canon. The adaptor not only allows us to use our EF or EFs lenses on the EOS R, but it also has a slot in it, into which fits a beautifully designed two to nine stop variable neutral density filter. The strength of the neutral density effect is applied by rotating a small wheel on the filter holder. This innovation is perfect for those of us who love ICM and ME photography. It obviates the need for a Lee Filter system hanging off the end of the lens, or having to screw filters onto the end of the lens. It is so much neater, compact and is permanently available. These adaptors will be available in the UK from February 2019. (there is also a polariser and UV filter which can be purchased to slot into the adaptor – only one filter can be used at a time). The above link will show you just how beautifully designed this option is.

4. The tilt and swivel touch screen. A more minor benefit to me, but a benefit nonetheless. The screen tilts and swivels. This is very useful for low and high level images. It also means the screen can be completely rotated when the camera is not in use so it is facing the camera and not exposed and thus prone to being scratched. Additionally, the screen is touch sensitive. This means lots of things can be adjusted by touch instead of scrolling through menus with wheels and switches. You can also touch focus and even fire the shutter by touch on the screen if you wish. I particularly found making major changes to white balance much faster by touch than using the scroll wheel as on my 5D mk4.

There is an issue with the camera that has been much debated since its release. It has only one SD card slot. Many people have flown into a rage about this. For the sake of balance I would just throw a few points out there. Yes, I agree, it should have had a second slot. It would allow backing up images while shooting (or shooting alternative formats to each card etc). I am sure the next model will have a second slot. However, I think the outrage is overdone. Firstly, many people I have worked with often don’t have a card in the second slot. Those that have often have no idea how their camera is set up to use the second card – whether it is backing up the first, or writing jpegs, or perhaps filling one card then the other. There is also the fact that it is also only relatively recently that cameras have had two slots. We managed quite well with one for years prior to that and I have to say in all my years of using digital cameras, I have only ever had one card failure. So yes, it should have two card slots, I wish it did, but it’s not going to stop me owning the camera.

Let’s talk now about usability. The first thing I found was using the ‘R’ slowed me down. I guess we all get a certain amount of ‘muscle memory’ in using a particular camera model. When we switch to a new one it takes a while to adjust to the new button positions, menu layouts and just the general feel of the camera. Everything on our old camera is set up just the way we like it for the way we use it. It takes a while to get the new camera set up just so. I found this quite irritating at first, I longed to go back to the mk4. However, after a few hours, the familiarity with the ‘R’ started to build and I was able to focus less on operating the camera and more on making images.

The camera has a ‘multi-function bar’ which is operated by sliding your finger along it or tapping each end. It has the potential to be a useful control, but if I am honest, I found it lacked responsiveness. I couldn’t get it to work in a consistent way. This led to me being frustrated with it and I very quickly deactivated it. It would be difficult, if not impossible to use wearing gloves. I am sure some will get the hang of it quickly and really love it. I, however, am not a fan, sorry Canon.
A new innovation which is useful, is an additional ring on the ‘R’ Lenses (and fitted to one of the EF adaptors to add the function to all of our older EF lenses). So you now have three on a zoom lens, the focus and zoom rings plus a third which can be programmed to alter several settings according to your preference. (On a prime lens you have two, a focus ring and the new one). You can set the new ring to change aperture, shutter speed, ISO, exposure compensation etc. I set mine for ISO. I just found I had to take care when the camera was to my eye and I was, say, changing the focal length, that I didn’t hold the wrong ring by mistake and inadvertently find my ISO 3200 without noticing. The surface texture of each ring is different to help and if you prefer not to use it, the rings function can be deactivated.

Many have asked me what is it like using EF lenses with the new body? I tried it with my EF 70-300 IS L and the EF adaptor. The first thing to say is, yes, it is heavier – naturally. ‘L’ lenses, because of their build quality are weighty. But you are still saving the 30% of weight over an average DSLR. I found the balance was good, supporting the lens with my left hand as I would with a DSLR. This camera is not as small and light as, say, a Fuji XT-3, but I prefer the size. It fits my hands better, the buttons and dials are spaced and placed in a more ergonomical way and suit my hands. I like the grip design and balance, and I am speaking as someone who absolutely loved my Fuji cameras so I don’t say this lightly.

If you are looking to make the camera into a very lightweight system, I would seriously consider some of Canons lighter, mid-priced EF lenses, which are cheaper and will save a great deal of weight over the ‘L’ lenses. Yes, some image quality will be sacrificed, but they are still excellent for classic photography and for multiple exposures and ICM images the quality of the lens is fairly irrelevant. Take Canons lowest price, lightest 50mm f/1.8 lens for example, which is available for a little over £50. It weighs almost nothing and is ideal for ME and ICM.

To use the camera for multiple exposure images, I found the fastest way to access all the menus I needed – the ME menu itself, ISO and White balance primarily – was to add them all to a custom menu. I was then able to access this with one button push and go into whatever setting I needed. Very quickly I was using the camera instinctively and concentrating on image making, as I mentioned earlier.

Some of you may be thinking about waiting for the next iteration of the ‘R’ before investing, perhaps wanting a higher resolution sensor, for example. If you are a multiple exposure image maker I would add a word of caution. Making multiple exposures on the 50mp 5Dr is a very slow process compared to the 5D mk4 (which has the same sensor as the EOS R – 30mp approx). It seems combining several 50mp files takes its toll on the processing power of the camera. If the next ‘R’ has an upgraded sensor (and it seems logical the sensor from the 5Dr could be slotted in without too much trouble) then, unless Canon really beef up the processing power, the camera will be much slower for us ME photographers. It will be fine for classic image makers, but not for us. I have taken the decision not to upgrade to the 5Dr for just this reason, the slowness of it would hamper my creativity and the extra 20mp are simply not worth it for me.
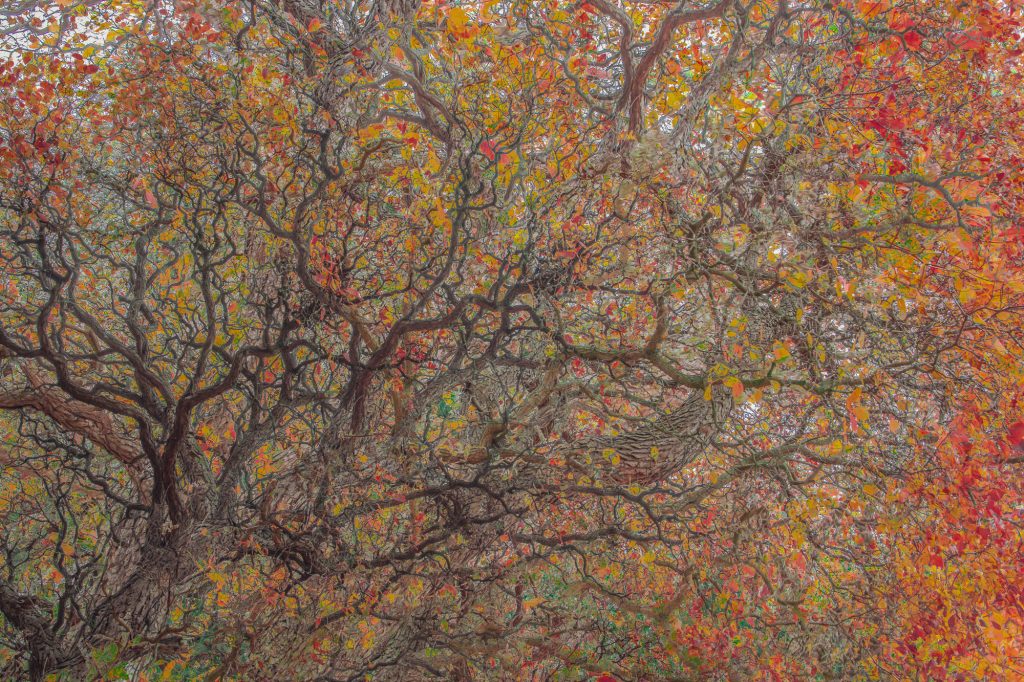
As for image quality, it is breath-taking. All the images in this article are made with it. The sensor is a tried and tested full frame 30mp sensor from Canons 5D mk4. This has fabulous resolution, with superb colour and contrast. The camera is fast and reliable. The raw files are full of detail and can be cropped and manipulated to your hearts content. The prints from the files are glorious. You will have no quality issues from this camera as regards images – unless you are some anal pixel peeping geek who is more interested in discussing the micro contrast in the shadows on relentlessly boring internet forums and barrel distortion tables on mindlessly obscure websites than in actually going out and making images. But that applies to most cameras these days – let’s face it, they are all pretty amazing. If I need to remind myself of this fact, I go back and look at images from my first 4mp digital camera. Case closed.

In conclusion, while I found it took me a few hours of using the camera intensively to get used to it and I had to customise the menus and controls to suit my way of working, I soon found it a very natural tool that felt comfortable in the hand and didn’t get in the way of my creativity. This is exactly what I want from a camera. I don’t really want to have to think to much about the camera at all, I want to think about the image. If I am having to fuss about too much with my equipment, if the gear is getting in my way or irritating me then I am using the wrong gear.

So once I was over the hurdle of unfamiliarity, and I was able to seriously concentrate on making images, I was able to enjoy the advantages that the EOS R has for me as a multiple exposure and ICM photographer. Being able to use the EVF to line up ME compositions was a dream and a major step forward in our genre of image making. Being able to see the blended image in the EVF straight after each frame is made was also hugely beneficial, not only in bright sunlight but in all conditions.
While I couldn’t try out the new EF adaptor with the variable ND filter, I have no doubts this will be a game changer for me. I am itching to get my hands on one in February when they arrive in the UK. I am expecting demand to be huge.

The weight and size saving is nice to have, but not a game changer for me. It will certainly help me as someone who travels the world constantly – but I am more interested in functions and usability than weight.

The big question, will I be changing to the EOS R as my system of choice? The answer? Yes, if I can. My big frustration is I bought a brand new 5D mk4 only a few weeks before the EOS R was released. I don’t think I can afford to lose what I have invested in the new body by trading it in so soon for the ‘R’. This breaks my heart but as a professional running a business I have to be pragmatic. These are tools of the trade for us and have to earn their keep. It might seem as though pros always have nice gear – and we most often do – but we have to work very hard to afford it and most of us can’t just keep jumping from one body to the next without thinking about the financial implications. So I may have to wait awhile before I can justify it. However, if you are able to afford it, I wouldn’t hesitate in recommending this very excellent new system to you. It is superb.

Now, a few final thoughts from Valda –

We decided to wait to put out this review until I had returned from Venice. When we led the three one-day EOS R Discovery Day workshops in London recently we had more people than cameras and it was me who drew the short straw and didn’t really get to use it.

I took one of the loan bodies to Venice recently – unfortunately once again, my time with it was limited. Partly because I was teaching but partly because there were no shortage of clients in the group wanting to try it out for themselves. It really has generated an enormous amount of interest.

I’m not sure I can add anything more to Doug’s lengthy and comprehensive review. I actually found the multi-function bar very useful for changing white balance but really couldn’t get to grips with the function ring on the front of the lens – I found myself grappling with the wrong wheel. Of course its use would no doubt become second nature after shooting with it for a lengthy period.

Like Doug, I found the newness of the camera got in the way of my creativity, but this cannot obviously be blamed on the equipment. Within an hour or so, it was all becoming very much easier. I love the EVF – the best I have ever used – and the overlay feature during multiple exposure made the building up of layers a lot more fun.

There was a slight hiccup when it appeared that the autofocus wasn’t working. Such is the complexity of modern cameras, it took me about four hours to realise that the last client had enabled the back button focus, thus disabling the button I usually use. Again, not the camera’s fault at all, but half a day lost in trying to figure out what might be the problem.

I too, have only recently invested in the 5D4 so I won’t be changing any time soon I don’t travel with a lot of gear anyway, so the weight issue is not a hindrance to me. I am very excited about the adaptor with the slot for a drop-in ND filter – I don’t get on well with accessories and other extraneous bits and bobs that can be sat on, broken, lost, smeared or cracked. So for me, the more streamlined the kit, the better.

My technical knowledge only extends as far as I need it to in order that I can make my images so I’m really not in a position to predict how this camera stacks up against the competition. However in terms of usability, and for what I would use it for, I think it is certainly a winner.
First thoughts on the Canon EOS R and Multiple Exposure Photography

I had the chance this week to briefly test the brand new Canon EOS R mirrorless camera with the 24-105mm lens (and the EF adaptor along with my EF 70-300mm IS L lens). This was courtesy of my good friend Carl, who had pre-ordered the camera and was prepared to entrust it to me.

My reasons for wanting to try it revolved around the weight saving of a mirrorless body and the advantages of having an electronic viewfinder for multiple exposure photography (EVF). I have been, in the past an advocate of the Fuji mirrorless systems – both the X and GFX medium format body – loving the weight saving and EVF as well as the image quality. However, the lack of a serious multiple exposure mode coupled with having to carry two systems in order to have a proper ME system meant I recently abandoned Fuji for good and dedicated myself to Canon. As someone who travels a great deal I need one system that does all everything and so I currently use the superb 5D mk4 and only have one lens, the 70-300mm L.

Before I go further, some clarification. I am not sponsored by Canon. This review is entirely impartial. I will aim to tell it exactly as it is. It is based on just a couple of hours at most with the camera, using the 24-105mm R lens and barely 15 minutes with my 70-300mm lens and the EF adaptor. All of this time I was working in multiple exposure mode, so please don’t expect a review of using the camera for classic photography.

I would also add that I am not interested in this camera for shooting video. I may shoot some, but I am an art photographer and this review is written from that perspective. I am sure other reviews will guide you if you have interests in serious video work.

My final plea concerned the images – I was working quickly and just experimenting around my home – they aren’t meant to be serious work, just samples of the camera in action. Please don’t be too hard on me!

I am also aware of the near apoplectic rage there seems to be that the camera only has one SD card slot. My feelings about this? Yes, I would have liked two card slots (both SD, for me please Canon). But I do think we need some perspective. Yes, two slots has become the norm in cameras of this quality and I am sure the next iteration of this body will have them. If it is that big an issue for you I would just suggest waiting. However, in my experience, most photographers don’t know how their second slot is utilised – whether it is having a backup copy written to it, or if one card fills and then the second card fills – or if one card has raw files writing to it and the second has jpegs writing to it. Many cameras I have seen clients using don’t even have a card in the second slot. I have been using digital cameras for, I don’t know, 12 or 14 years and I have only had a card totally fail once in all that time. Once. I buy quality cards and I push my cameras hard in all weathers – I don’t wrap them in cotton wool (or polythene). Its not so long ago all cameras only had one card and prior to that, one roll of film. We managed somehow. My feeling is that the outrage is just a little over done – and I know that me just saying this will outrage some people. But I am just being honest (but please Canon – get another card slot in ASAP, I am pretty certain your design guys can make one fit).

Now that is death with let us get down to the nitty gritty. My first impressions about the camera. The build quality is excellent, as you would expect from Canon. I have big hands but ergonomically it is very comfortable in the hand. The balance is good and I liked the shaped grip. I work with one hand a lot of the time and this suited me well. I was surprised at how light it felt, even with the quality lens fitted. The EF adaptor is ridiculously light – this is because it is, in effect, just an extension tube. There is no glass in it. It just moves the EF lenses further away from the sensor and links up the electronics. So all of the lens functions still work as normal and everything still works in the EVF – you notice no difference in operating the camera. Even with a big lens like the 70-300mm attached it felt well balanced and lighter, obviously, than my 5D mk4. The weight saving is not huge but it is noticeable but it is also physically smaller so when travelling it takes up less bag space and it is less obtrusive in the hand, attracting less attention. Yes, using your L EF glass brings the weight right up, but you have the quality of the glass and it will be lighter than your DSLR. For some of you the weight saving while using your DSLR lenses will not be enough – but the R lenses are L glass quality and lighter. Canon will widen the range quite rapidly. I am happy to use the 24-105 for now along with my L 70-300 and the adaptor and cope with the weight – while benefitting from the physical size decrease (and it is lighter – noticeably so) while I wait for a lighter 70-300 R lens to be released.You will need to decide for yourself what you can cope with.
The 24-105mm lens was superb – the optics were brilliant as you would expect from Canon L glass. The image stabilisation was faultless as was the auto focus. Don’t ask me about frames per second and whether this would be a good camera for shooting wildlife on the Serengeti – that is above my pay grade. I am sure other blogs will help you with those questions.

What does the EOS R have to offer us as respects multiple exposure modes? This was a question we were really interested in. The answer is, it has all of the modes and functions of the 5D mk’s 3 and 4 (and other fully featured Canon DSLR’s). You will not lose anything by switching. But will you gain anything? The answer, I feel, is ‘yes’, which is why I would like to move to the ‘R’ myself.

Firstly, I want the size and weight saving. I am a traveller and I am always looking for savings in this area as long as functionality is not compromised. The EOS R gives me this. It has the same 30mp sensor as my current 5D mk4 so image quality is identical. I am guessing the next iteration of the body will have an ‘improved’ sensor but with this I give a warning. Valda had the 5Dr for some time which has the amazing 50mp sensor. Now, while this produces eye watering quality and huge files it brings with it a big issue to multiple exposure photographers. It becomes painfully slow. Stacking up several 50mp files and blending them in camera takes huge processing power and time. Valda found this really slowed her down in the field and, to an extent stifled her creativity so she switched ‘down’ to the 5D mk4 and is happier as a result. You may not find this to be an issue but we certainly did – so unless new bodies have significantly more processing power and speed, we would be reluctant to move to them. We have never had an issue as professionals with the 30mp files with our clients and galleries. The 30mp files for us still allow image cropping and manipulation to meet our needs. You need to decide what your needs are.
The second, and for me game changing improvement for multiple exposure work with the EOS R, is the EVF. This allows you to see the image ‘shadowed’ as you make each frame. You can’t see the effect of the blend mode being applied before you fire the shutter (but you do see, in the EVF the blended image after the next frame is added) however the big advantage is being able to line objects up. This helps hugely with composition. The next frame you see shadowed in the EVF is ‘brighter’ and so you need to look closely but it is sufficient to do what you need to do. The EVF also works seamlessly, I was not conscious it was an EVF, to be honest, it didn’t interfere it only assisted me. I like to have the camera to my eye when making ME images and previously I had to visualise in my mind where objects would be. You could use the live view screen, but this slowed the process down and meant holding the camera away at arms length which I found didn’t suit my way of working. I was blown away by the difference using the EVF made to my workflow. I am now finding using my 5D mk4 very frustrating indeed. I have opened Pandoras Box!

I have heard people expressing concerns about the controls on the camera – that there is only one control dial and so on. This is not the case. You have two control wheels so you can change aperture and shutter speed independently (or exposure compensation). The touch screen is a delight (but would be tricky with gloves in cold weather) However everything can be accessed through the quick menu and control buttons (no joystick on this camera) There is a slider bar which I didn’t have time to get to grips with.

The tilt screen also swivels – which would be a first for a camera I own. Exciting for me. Little things please me. I am also delighted to see Canon have used the same battery for the ‘R’ as used in the 5D range. This means all of the spare batteries I have acquired over the years will fit. How good to see a manufacturer doing this when so many use the release of a new model to change the battery shape in order to force us to buy more new batteries at exorbitant prices.

Another innovation which is interesting and useful is the addition of an extra ring on the R lenses. This ring can be programmed in a menu so that you can use it to change shutter speed, ISO or aperture – whichever is most useful to you. I didn’t get time to check, but it wouldn’t surprise me if you could program it to change something else too, if you prefer, like white balance etc. This may be very handy for working in cold weather or to save you accessing a menu for something you alter frequently.

My final comment is about the another adaptor Canon has issued. It is a very clever piece of kit, sitting between the body and lens into which you can drop either a polariser or a variety-ND filter so that these do not have to be fitted to the front of the lens. For me, this is a revelation. It is such a simple solution, so small and compact and will allow me to do ICM images with such ease. The ND filter goes from 2 to 9 stops – which is absolutely perfect for me. A stroke of genius from Canon and one I will definitely be adding to my kit bag.

So my verdict. For multiple exposure and ICM shooters, I think this camera is a game changer. I see no reason to stay with a DSLR any more. You can keep all of your EF lenses and slowly replace them if you with with R lenses – or not – the choice is yours. I see no real deal breaking disadvantages with the camera. I think if you have any other brand of mirrorless camera such as Fuji and you have a passion for multiple exposure photography, I would seriously consider switching. It is a big thing to do, but I don’t think you will be disappointed. This is a seriously good camera that for me and my work ticks all the boxes (just get a second card slot in the next one, please, Canon…. and maybe come up with some more, new, innovative blend modes that we can see being applied live in the viewfinder before we press the shutter – then you really do have something amazing).
Valda and I are running some one day workshops in November where every participant has a loan EOS R for the day courtesy of Canon UK – you can read full details and BOOK HERE

Review of Fotospeed Cotton Etching 305 Signature Paper

Some things in life only come along once. The genius of Bob Dylan. Newcastle United winning something (still waiting). My mother in law being lost for words. (also still waiting). A phone call from Toby, the very nice boss at Fotospeed asking if I might possibly be interested in working with them to design my very own perfect ‘signature’ fine art paper. (actually happened – still pinching myself).

That call came almost two years ago now – making a new paper from scratch is not a quick process and it took me almost a nano second to accept the offer. Which photographer and printer wouldn’t? Here was a chance to work along with acknowledged experts in the field to come up with what is essentially my very own perfect paper for my art. A dream come true, because I had used many of the fine Fotospeed papers quite happily for years and loved them, but always there are those little tweaks I would like to make – a little more texture, a little whiter base, a little more weight and so on. Now I had my chance.

So how does it work, this paper designing business? Sadly, all visions I had of me donning a lab coat and goggles were soon put to bed. I wasn’t going to be allowed anywhere near chemicals, or big machines. I think the very nice folk at Fotospeed felt that was just a little too risky, especially when they saw the manic glint in my eyes. Rather, I was sat down in a darkened room, behind layers of security and…. well no, not that either. In fact, it all began with a very long and detailed cross examination about what I wanted from my paper. I was quizzed on my images, what I wanted to bring out of them, their characteristics, what I felt was missing from not only the Fotospeed range but also from fine art papers in general. I was basically asked what my dream paper would be. So what did my specification look like?

I had a vision along these lines;

1. It had to be a matt paper.
2. It had to be heavy. I wanted a paper with substance.
3. I wanted a heavy texture.
4. I preferred a pure white base colour. So that colours were rendered naturally.
5. I wanted it to make soft, gentle images to look soft and gentle.
6. When printing images full of texture and detail it needed to render them sharply.
8. I wanted it to have a high cotton content and to be of archival quality.
9. It needed to be acid free and be suitable for dye based and pigment inks.
10. I really wanted it to handle a very wide colour gamut and produce faithful colours.
11. Finally, for a matt paper it had to deliver sumptuous deep, rich blacks.

By this point, the nice people at Fotospeed were looking a little queasy. I understood why. To ask all of this from one paper, especially a high cotton content matt paper was a very tall order. They were in for a long night. It turned out to be a long year. I think they ate a lot of pizza and drank a lot of coffee.

I actually lost count of the iterations we went through, but I was sent, I think, seven batches of paper to test in all. It was the seventh – the paper which has now become the paper I use almost exclusively, Cotton Etching 305 – which I finally gave the approval for to bear my name. The one which met all of the criteria on my list. The only thing in the end I wanted to change, and where Toby had to call a halt, was with the surface texture. If you look very carefully at matt papers you will see a repetition in the texture. This is because it is made by a mechanical process. I asked if this could be randomised. Apparently it could. If the paper was handmade. As you can imagine this would have made it so expensive it wouldn’t have viable and so I had to concede on that one point (and I have to admit I was being very fussy as it is barely noticeable).

I have to applaud the team at Fotospeed and the people they work with for being able to achieve this. Technically it really is no mean feat. If you are used to printing on fine art matt papers you will know and understand just how tricky they can be at times. How occasionally getting the colours to sing can be difficult. You will also know how hard it can be to get really wonderful rich deep blacks from them is. They can have a tendency to ‘flatten’ our work and give it a milkiness, to almost suck some of the life out of it if we don’t know what we are doing. Even if we do know what we are doing with our printing, with many images getting the colour and contrast right sometimes is just impossible.

If this has been your experience, I would urge you to try some Cotton Etching 305. I continue to be amazed at how easy it is to print on. I am achieving blacks I have never been able to render on a matt paper before. The colours in my images really sing out like never before. Even with the generic profiles from the Fotospeed website you should get good results. If you use their free customers profile service this will get even better as your colour gamut will widen and the performance of the paper will increase. You may feel I am just over-hyping the paper because the box has my name on it. If so, I would urge you to take a look at THIS REVIEW in Photography News. (quick quote – “The paper’s all-round ability to handle such a wide range of subject matter, contrast range and different degrees of saturation and so capably was a nice surprise. Some textured fine art finishes are less good with rich images with deep blacks, but no such shortcomings here. Apologies if this is all rather gushy, but honestly there wasn’t a print that I was unhappy with so I had little to have a moan at.”)

As for handling of the paper, a couple of tips I can pass on. Firstly, store the boxes flat. This prevents curling on the leading edge which can cause ink to catch and mark the paper. I also use a ‘rocket blower’ to blow over the print surface of the paper to make sure there are no cotton fibres adhering. It is very frustrating to hold up your print to see these drop away leaving a small unprinted area beneath them. It is good to allow the print to cure for at least a few minutes or longer before any extensive handling after printing. Check the colours and contrast over by a window, preferably with bright overcast daylight, rather than side by side at your computer monitor. This is a better test for how beautiful your print is and how it will look when displayed in real life.

I hope you enjoy trying Cotton Etching 305. I now use it for almost every print I make. Valda Bailey and I also use it for virtually all the prints we make for clients in our bespoke printing service for photographers and artists who don’t have their own printer, or who want prints larger than their printer is capable of. (full details of our service HERE).

To help you if you would like to try it out, or if you already love it and would like to stock up, the very nice people at Fotospeed have given me a 15% discount code to pass on to you. PLEASE NOTE, this code is only valid for 30 days from Tuesday 24th July 2018 and it should apply not just to Cotton Etching 305 but to all their papers (but why would you want anything other than Cotton Etching now??). Just put your paper in your basket and apply the code on checkout. The discount will only be applied right at the end. DISCOUNT CODE – Doug15NL – I do hope you enjoy using the paper as much as I do. It has changed my printing forever.

And who knows, maybe this year is Newcastle’s year? Howay the lads!

YŪBI – Truly a book of ‘Gentle Beauty’

There is a (pleasing) trend towards more photographers publishing collections of their work as photobooks. Some are choosing to approach specialist publishers such as Triplekite or Kozu Books. These publishers will work in close partnership with the photographer and use their expertise in desktop publishing and printing to help bring a project to fruition. They may also have access to distribution and sales channels to help the photographer with, what is often the most difficult part of the project, selling the books.


Others prefer to do things on a much smaller scale and self publish using a proprietary platform such as Blurb, Lulu or one of the many others available. These companies often allow ‘print on demand’ so there is no upfront investment in pallets of stock and even if the photographer just wants a handful of copies to sell or give as gifts to family and friends this is relatively affordable. Some of these organisations include electronic versions and allow selling through Amazon and other sales channels. The quality can be good. It can be rather poor, but it may meet the needs of some.


There is now another approach some photographers are taking to make their work available to an appreciative photo-book collecting audience. The hand made (or partially hand made) photo book. These are made in very limited numbers due to the intensive nature of putting them together. They are usually beautifully printed on fine art papers, hand bound and often presented in hand made slip cases. The printing is usually of the very highest quality and as such they become treasured art objects in their own right.


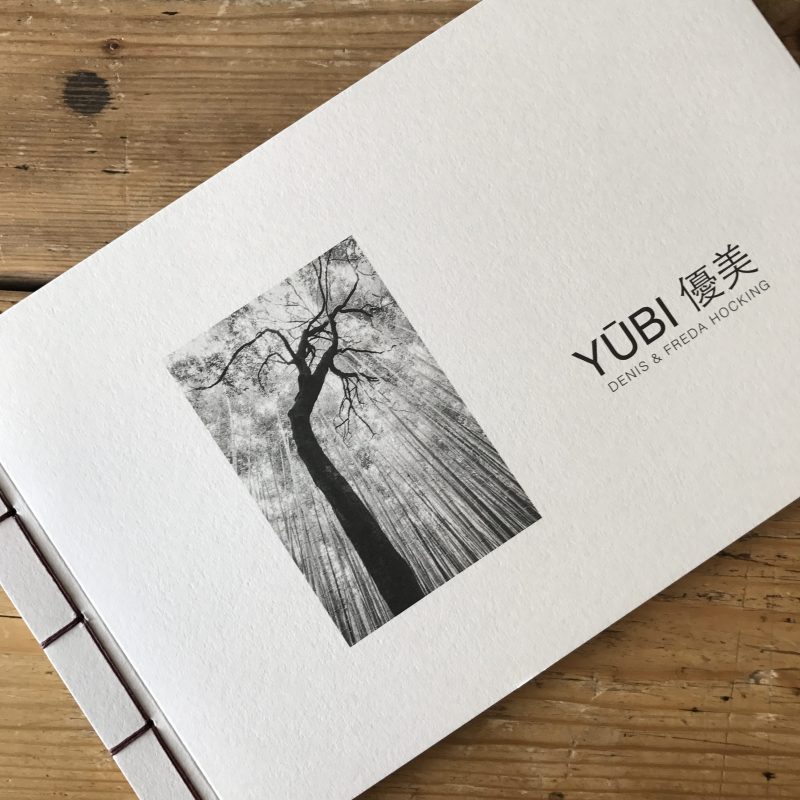
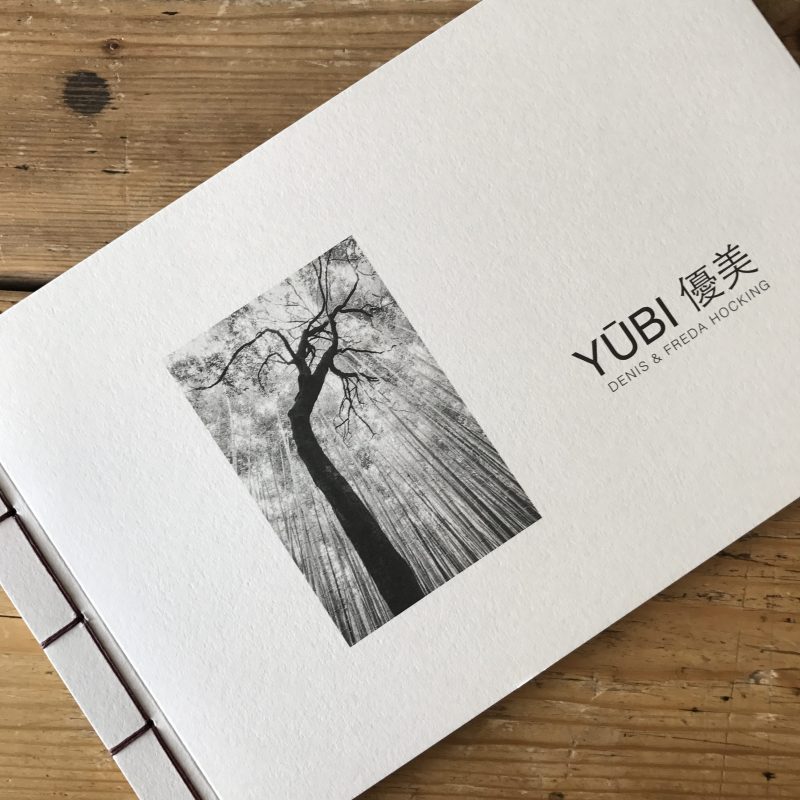
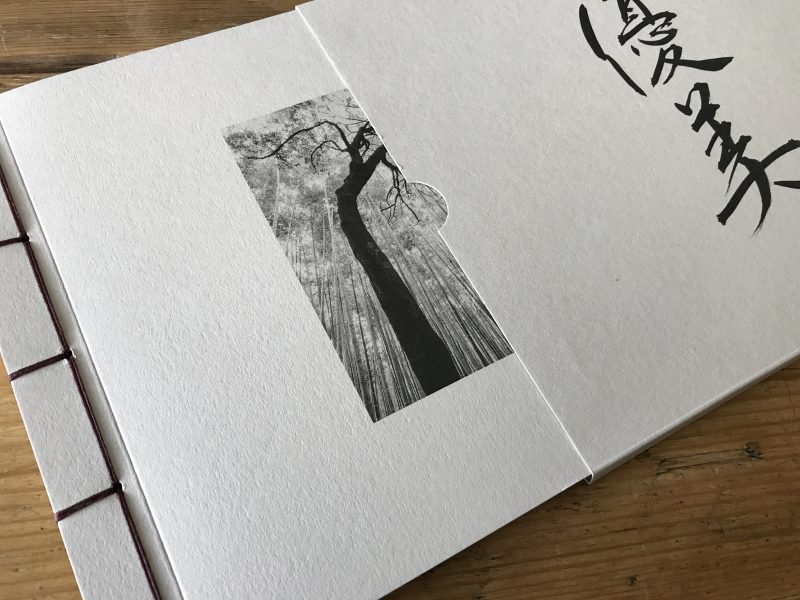
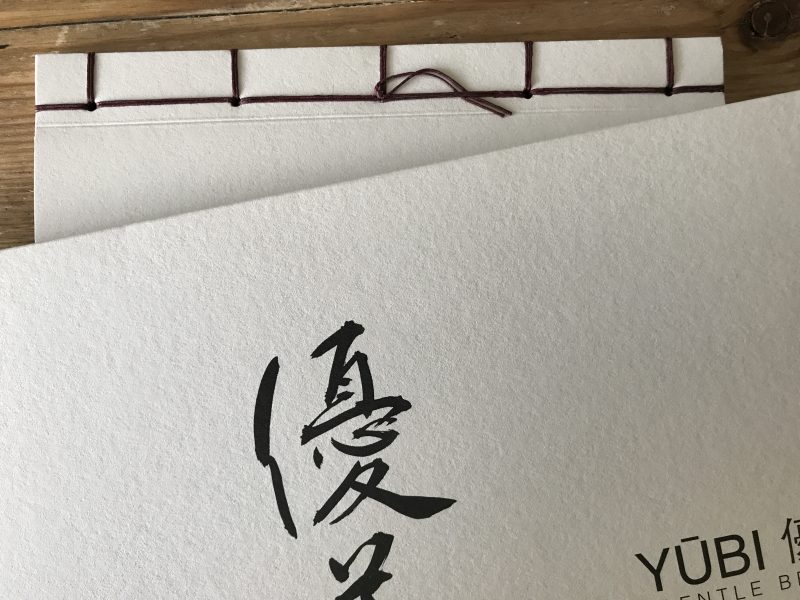
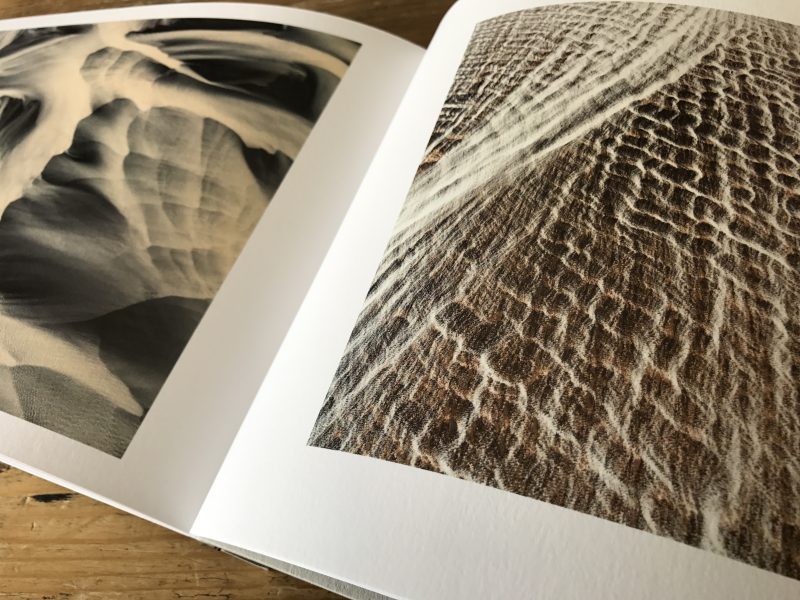
One such example I was very fortunate to add to my collection recently was ‘YŪBI’, a hand made photo-book by husband and wife landscape photographers Denis and Freda Hocking.


Freda came on a workshop I was running with Valda Bailey up in the Lake District and she had bought a copy of the book with her. As soon as I saw it, I knew I had to have a copy. It is unusual, though not unique, for a couple to work together so closely on photographic projects. If you visit the Hockings website (and I recommend you do) you will see they share it. The galleries display work from both of them. The galleries and images do not identify who has made them. This is truly a partnership at work. You will see images of the most wonderful quality throughout the website – and this is echoed in ‘YŪBI’. If you would like to listen to a great interview with Freda and Denis, I can highly recommend this one on the Togcast (I also recommend subscribing to the Togcast for great interviews with photographers on an almost weekly basis).


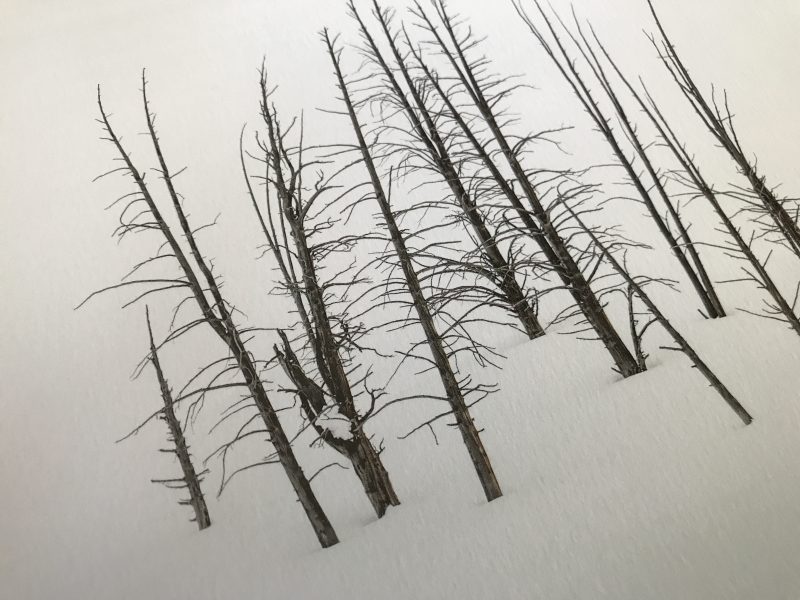
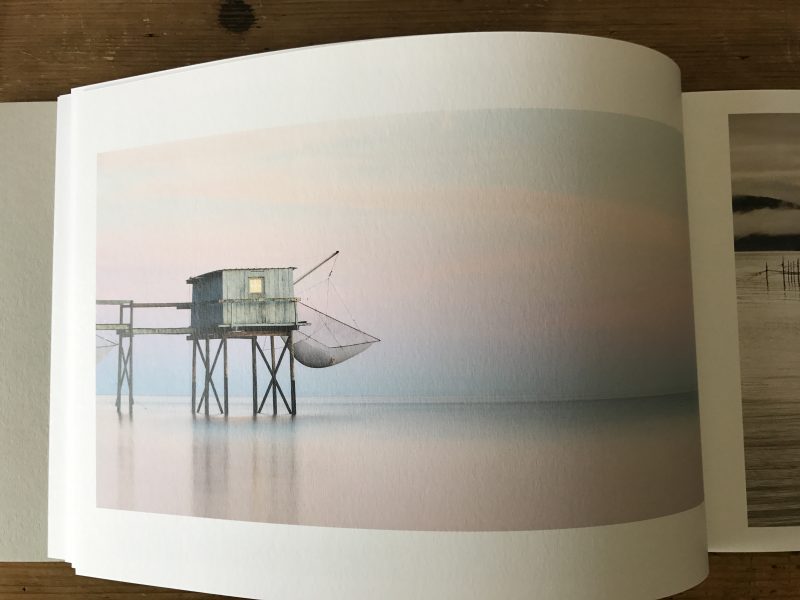
The book itself is a thing of great beauty. It goes without saying that the images within are stunning. Landscapes made world-wide on the Hockings global travels, that mesh with the meaning of the Japanese word ‘YŪBI’, which is ‘Gentle Beauty’. You will see images which reflect their individual styles (although no images are identified as to who took which – part of the fun is trying to second guess the originator). The whole book has a calmness, a serenity which aptly echoes the link with the principles of Haiku.


The couple had assistance from Eddie Ephraums at Envisage Books. He provided guidance on the format, sequencing, fonts, layout, paper choice, printing, binding and all the other areas where he has great expertise. His guiding hand is very evident in the quality of the book. But knowing Denis and Freda, it is also their incredible attention to detail, their striving for perfection and their intense love for the landscape and photography which completes this book. From the hand stitched Japanese binding (which must have taken many loving hours of work to complete, through to the perfect and beautifully printed slipcase complete with fine Japanese calligraphy (provided with help from the expert Yukiko Ayres) you can see this has been a real labour of love.


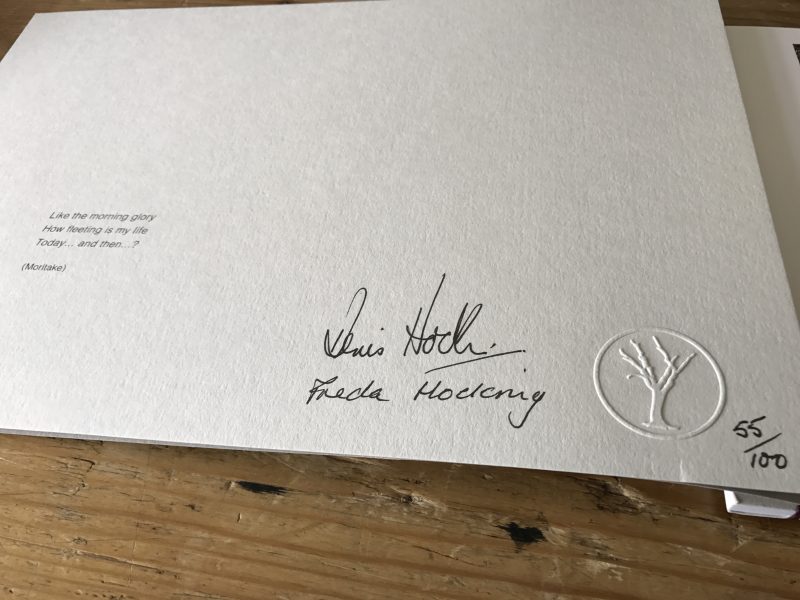
The first edition has been produced in just 100 copies, of which just a few remain. I can wholeheartedly recommend that anyone who loves the landscape and collects beautiful photo-books should invest in a copy of YŪBI. I am sure it will become a treasured addition to their collection, as mine has.

You can obtain your individually signed and embossed copy HERE.

Working with Fotospeeds New Square Fine Art Papers

Fotospeed

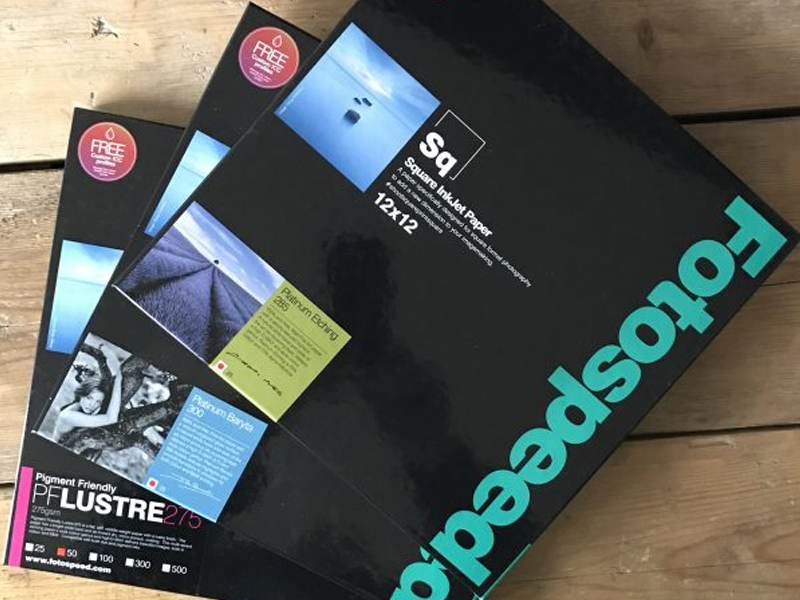
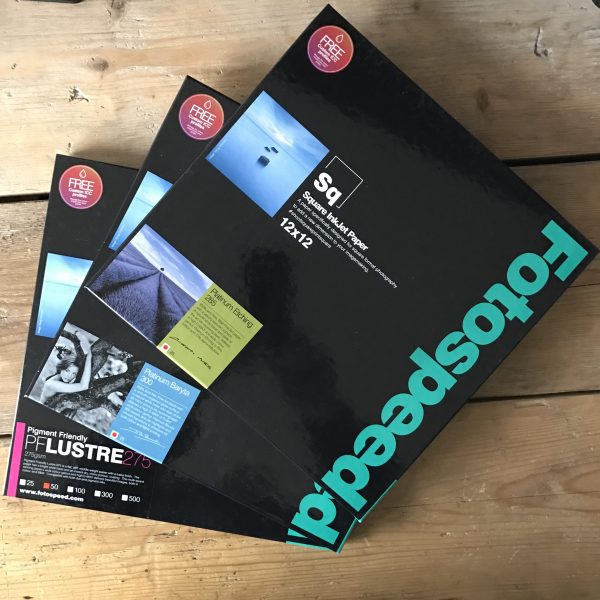
The new Fotospeed 12 x 12 inch square paper range

Many of us love making images in the square format. We either ‘see’ our photographs that way and compose for them in the field, often aided by the clever way many digital cameras these days allow us to display a square mask on the rear view screen. I love this feature and use it all the time on my Fuji X-Pro 2. Shooting in raw, I still have the option back in the studio to use the entire sensor area, but in the field it is so helpful to see the image on the screen cropped square. It makes composition so much easier. (If you shoot in jpeg, the file will be square and the data beyond the boundaries of the square is lost forever).

Sleeklens Landscape Plugin Review

Sleeklens

I was contacted recently by sleeklens.com who asked me to put one of their plugin packs for Adobe Photoshop through its paces. They make plugins for all types of photography, particularly portraiture and architecture but they also have a pack designed for landscape photographers so it seemed appropriate to give that a try. I opted for the Photoshop version, although they do a Lightroom version of all their plugins too for those who like to keep their workflows just within the Lightroom environment.

Trying a different approach to rucksacks

Trespass

Ask any photographer and they will tell you, you can never have enough camera bags. Or it might be that we can never find the perfect camera bag. I’m inclined to think that there is no single one bag that meets all our needs. I have different situations I go into with my camera and need a different bag for each. Recently, I found myself frustrated with a limitation placed upon us by camera bag manufacturers and so turned to a conventional rucksack manufacturer, Glasgow based company Trespass, for the solution.

‘Fragile’ by Valda Bailey

Fragile by Valda Bailey

IMG_3027

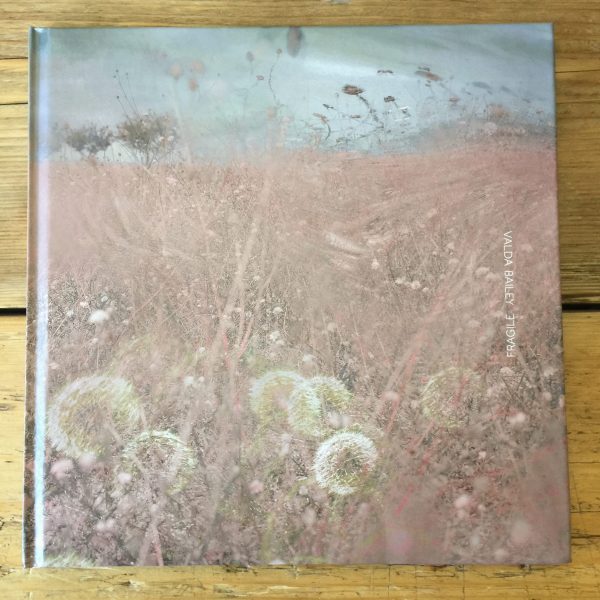
Before I start writing my review of ‘Fragile’ by Valda Bailey, I need to declare an interest. Valda is a good friend of mine. We teach workshops on alternative photography techniques for Light & Land and so it is very unlikely this review will be entirely unbiased, but I will try my best.

It is with a sense of pride that I opened this book when it arrived in the post from Triplekite Publishing. You see, I first met Valda on the 15th of August 2011. I can be very precise about that because she had booked me for a one to one – to learn about ICM (intentional camera movement) techniques, and in showing her some of those techniques that day I made an image which has become very popular for me – hence my ease of knowing the date, I just have to look at the raw file metadata. So, here we are, almost five years on, and Valda has gone from student of mine to co-workshop leader and has far surpassed me in her abilities with the camera in creating wonderful images. Indeed, here she has had a book published long before I am even considering such a thing.

New Dropbox Style Cloud Service I Am Trying – Sync

Sync

20160208-_DSF8875

I have been looking for a more flexible and better priced service than Dropbox for a while. I think I have found it. It is called Sync. They give you 5GB of free cloud storage, which I am currently testing (and if you USE THIS LINK I think you will get an extra GB, so 6GB in total, and I will get 1GB for referring you – https://www.sync.com/?_sync_refer=de5f7b0 )

The paid service gives you 500GB for $49 a year and 2TB for $98 a year, which is very competitive and will allow me to store virtually all of my data, including all of my images on the service.

Edgelands – The Floods by Joseph Wright

Edgelands by Joe Wright

Every now and then a photo book comes along which is a bit different, a bit special. Today was one of those days. I received my copy of Joseph Wrights ‘Edgelands – The Floods’.

The book is different in several ways. Yes, the images are beautiful, but not in a classic landscape photography way. Joe has chosen o venture into those areas that surround the places we live, the edges and margins of our towns, cities and villages, which most of us tend to ignore or dismiss as ugly, unkempt. The abandoned scrublands, the borderlands or neglect. Some were once used, now left to their own devices. Others are places which have never quite fitted the needs of developers, being the wrong shape, in the wrong place, too wet or perhaps difficult to build on. Nature has no such qualms about these places. Nature quietly gets on with colonising them, plants growing, animals living quiet lives while we rush by.

Joseph has ventured in and started to make sense of the chaos. He has discovered beauty in the confusion and documented this with his 10 x 8 large format camera. Then, he has taken the project in an interesting direction, printing the images at pretty much the same size as his film (8 x 10 inches) for this book. Imagine having a sensor in your camera that is 10 x 8 inches in size. Can you grasp the resolution and detail that would resolve? A 10 x 8 negative has to be seen to be believed and here they produce glorious prints. Joe has then gone on to learn, from none other than grand master John Blakemore, how to sequence the images and hand make them into a book. Joe has individually crafted and bound these books with his own hands. This is truly a craft process. Along the way he has had extensive mentoring from Eddie Ephramus who specialising in helping photographers who want to achieve their creative vision in print and it includes a foreword by Robbie Cowan which is an extract from a work of his based on these ‘edgelands’. The results are stunning.

I invested right at the beginning of the project (Joe ran this as a ‘Kickstarter’ style project to help raise the not inconsiderable funds required), in one of the very limited Collectors Editions, limited to just 30 copies. These came with a signed limited edition print from the project and the book itself enclosed in a beautiful linen covered hand made clam case with another inset image from the project. This inset image is unique to each clam case, so each collectors book becomes a unique item in itself. The collectors editions will never be released again. It is a beautiful thing to own. Seventy copies of the book alone are being made as a standard edition and some of these are still available (I am not sure at this time if any collectors editions are still available – if they are they will be in very short supply). You can read full details and purchase your copy HERE ON JOES WEBSITE.

I think the approach Joe has taken here, making a short run of a hand crafted photo book is a very interesting approach to self publishing. he had the pages produced commercially but hand crafted and assembled the book himself. I like the idea of the book being more of a craft object. It has a nice tactile feel and the hand made element ties in with the analogue approach of large format film photography. It provides another alternative to volume publishing for those looking to get their work before an audience, albeit a smaller one. I am drawn to the intimacy of it, to the deep involvement of the photographer, to the breadth of skills needed. I feel a greater engagement with the artist and the book becomes more of a treasure, an art object rather than being ‘just a book’ (although, never would I want to downplay just how valuable I feel books are). This becomes an object which bridges the gap between a fine wall print or painting and a volume run book. It takes a great investment of time, learning and passion from the photographer (and the team who has supported him) and this shows in the finished artefact. I am a big believer that art must have an artefact.

I have produced a brief video of my Collectors Edition to give you an idea of just how beautiful it is – please take a look.(and please forgive my very amateurish iPhone video skills).

How to Travel Light With Your Fuji Camera Gear

Fuji Gear

20110601-P1020446-Edit

Airlines seem to be making it increasingly difficult for us to travel with our camera gear these days, especially on budget flights. Most of us want to keep our precious cameras and lenses with us in our carry-on bags and yet the size permitted for those bags continues to decrease, as does the amount of weight we are allowed to pack into them.

Triplekite Books New Discovery Series

Triplekite Discovery

FullSizeRender

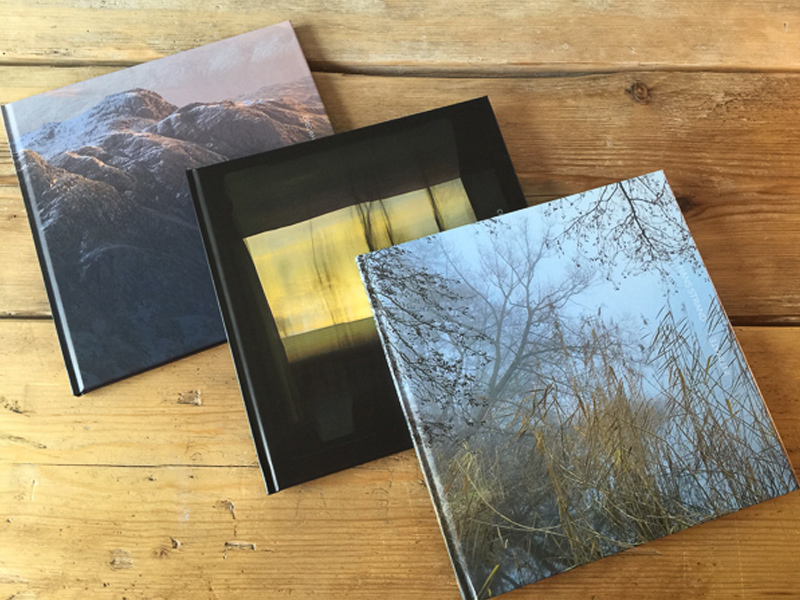
Its always a good day when a photography book is delivered at home. Today, three were delivered, making it a very good day. Triplekite Publishing have been hard at work producing the first three in what is planned to be an ongoing series of books under the ‘Discovery’ series.

The stated aim of this series from Triplekite is to produce a ‘cohesive representation of landscape photography’. The plan is to release three books a year, identical in size (240 x 240mm) and page count (48), each with 25 plates which, despite being smaller than Triplekite’s other photography books, will still be made to the same exacting production standards. The plan is to release a further three or four books in the series in 2016.

Printing With Fotospeed’s Panoramic Papers & Creating Custom Paper Templates in Lightroom

Fotospeed Panoramic

20150907-IMG_1369

Fotospeed are the only fine art paper company I am aware of who provide us with custom made panoramic papers. I shoot a lot of panoramas in my work, both combining exposures in software (now a feature of Lightroom CC as well as Photoshop, a welcome development) and by cropping into a single image to a ratio which yields an image with the characteristic panoramic ‘letterbox’ format. I am not a lover of really wide angle lenses having grown tired of the distortion they produce. I prefer, when I want to show the wide sweep of the landscape, to reveal it in a panorama. (I know wide angle lenses can be used to inject drama into images, but again, I am finding myself moving towards quieter, less dramatic images in my work and so I have sold on my super wide lenses now due to lack of use.

Hard Proofing Techniques – A Practical Example

Chris Friel
©Chris Friel

©Chris Friel

Today I had a client order for one of Chris Friels prints (the image above) to prepare and thought it would make a good subject for a blog post on hard proofing techniques.

Chris’s images can be very hard to print. He uses strong colours with low contrast and they look best printed on very matt paper. My paper of choice for most of his work is Fotospeeds superb Platinum Etching – a heavy-weight matt paper with a gentle texture which gives landscapes and many other types of images a beautiful feel and ‘presence’. Matt papers do bring with them challenges though. The matt surface reduces the gamut of colours they can display and so it can often take some work to translate what you are seeing on your screen on to the paper, even with a fully colour managed workflow. You can check out Fotospeeds papers on their website HERE – they are a great company to deal with.

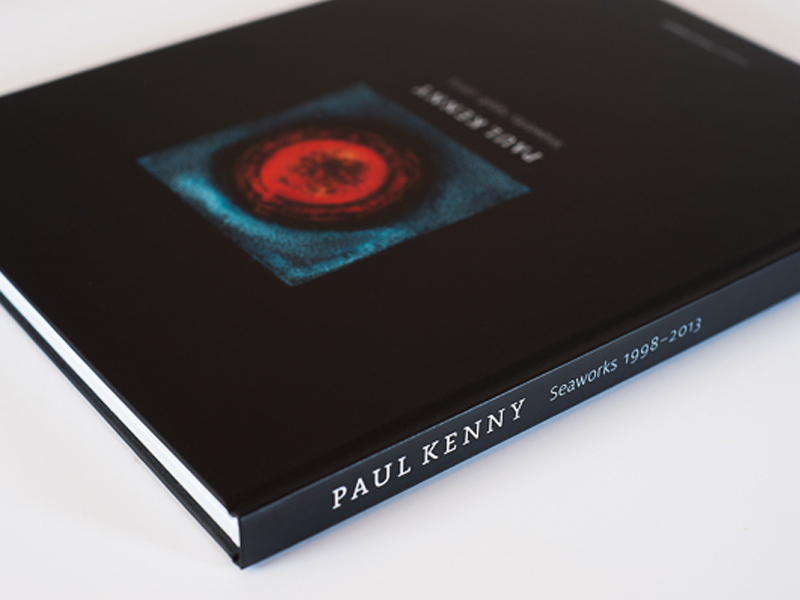
Seaworks 1998-2013 by Paul Kenny

Seaworks by Paul Kenny

I first became aware of a man, Paul Kenny, several years ago through an article in, I think, Outdoor Photography magazine. I read about a photographer who was visiting, annually, a small stone sheep pen by a beach on the west coast of Scotland. Here he camped for a week or two each year and photographed this sheep pen. The rocks, the lichen, the patterns, shapes and forms. The enclosure had been built no one really knows how many centuries or millennia previously, the rocks used were beautifully round, smooth and encrusted in lichen which grew painfully slowly over generations of mans existence, populating their own spherical worlds, forming continents and islands of life. I had never come across such devotion and application in a photographer before and he really made a deep impression on me.

Should I sell my DSLR and buy a Fuji?

buy fuji

I am being asked this question by clients so often now (twice in the last 24 hours, for example), I think it is time to put the answer in a blog, to save me writing endless emails if nothing else 🙂

So many photographers are hearing the buzz around the Fuji system (and other mirror-less systems. Many of these others are excellent, but I am a Fuji user so will use Fuji as the basis for my answer, but you can substitute the system you are considering just as well). They are seeing the amazing images these cameras produce and looking enviously at the small camera bags and lighter tripods required.

Many of us are getting to an age where kit weight becomes a bigger issue, year by year. It is a great shame if lugging kit gradually puts us off from going out with our cameras. Photography should not be about kit, but about making pictures and loving being out making them. Anything that gets in the way needs to be looked at and if possible, fixed.

The big question in the minds of DSLR users when considering switching to a mirror-less system is “will it be as good as my DSLR?”. Perhaps you are wondering, “will I lose quality?” “Will I be able to print as big?” “Are the lenses any good?” “How good is the autofocus?” and so on, and these are all very important questions. It’s important to look into the capabilities of kit before investing, but once the purchase is made it is even more important to get back to enjoying making images rather than obsessing about kit. Kit doesn’t make great pictures, we do.

So I will try and answer those questions for you based on my experience. I am not kit obsessed, I am not interested in brands (Despite me teasing Nikon users on Twitter on a regular basis) and I will tell you the facts, warts and all. I am not writing this as some Fuji evangelist to try and convince you to switch. Nor am I writing as a DSLR die hard with an obsession about megapixels who wants to put fear into your hearts. All I care about is pictures and enjoying photography. Read on and make up your own mind. (Oh, and all images in this post were made with the Fuji).

As you read, remember my comments on auto focus, battery life, frame rate etc are based on my Fuji X-Pro 1 (and some use of my wife’s XE-2, when I can prize it lout of her hands). The X Pro 1 is the ‘old man’ of the Fuji range now and all subsequent models out perform it in frame rate, auto focus, battery life etc – so I am experiencing a worst case scenario. If you opt for the XT-1, you will have a much better experience than me (and I love my X Pro 1).

How did I come to invest in the Fuji system? Well, I was doing a lot of foreign travel leading workshops for Charlie Waites company, Light & Land. On tours my main role is guiding and teaching, but when you are away for a few days you do get a chance to make some pictures of your own. I wanted a light, compact system I could fly with which produced good images, but was easier to travel with than my professional Canon system.

I am the privileged position that I can run two systems so I didn’t have to agonise about giving up my DSLR. But I realise for most photographers, a choice has to be made.

To be honest, I wasn’t really interested in the Fuji. I viewed it just as a second body, a compromise for limited use. I had no thoughts about it replacing my Canon kit. I bought a second hand X-Pro 1, with the 35mm and 18-55mm lenses. I got a nice lightweight tripod and set off on my first trip.

That trip was a revelation. From day one I loved using the Fuji, it felt great in the hand. The image quality when I got home astounded me. Bearing in mind this is a 16mp sensor and I am used to the 24mp of my full frame Canon 5D mk3, I could see little or no difference. In fact, the way the Fuji handles colour and contrast really appealed to me. In some ways the images were better than the Canons. There is something ’filmic’ about the images. I love using the camera so much I have hardly used my Canon in the last year.

I do prefer the Canon for macro photography. I have the Canon 100mm L macro lens which is breathtaking. The macro lens Fuji produce is perhaps their weakest, slow to auto focus and not a true macro as it only works at 2:1 rather than 1:1 like the Canon. Of course, as with all lenses, I could buy a Fuji/Canon adaptor and put my Canon macro on the Fuji, and this is certainly an option. I will say the Fuji macro lens us great for portraits and other types of photography.

You will also find the Fuji bodies slower to auto focus than most DSLRs. By slower, I don’t mean they take a week and a half to lock on, but they are just a little less responsive. I have the X-Pro1 and the XE-2. The XE-2 focuses faster than the X-Pro1. I understand the XT-1 focuses faster than the XE-2. Fuji are improving all the time. If you are PRIMARILY a sports or wildlife photographer then I would caution against jumping in to the Fuji system just yet. You will miss a lot of shots. If you are PRIMARILY a people, landscape, architecture or still life photographer I honestly think you have no worries at all. Many pro wedding photographers are using Fujis to shoot weddings beautifully, and they need responsive auto focus, but tracking a hunting cheetah on Safari is pushing the Fuji!

For outdoor photographers it needs to be born in mind that it’s only the XT1 that is weather sealed. Fuji have also just started releasing a range of weather sealed lenses. So if you plan to shoot in wet weather, go for the XT1 and weather sealed lenses.

You are NOT buying a DSLR and it won’t perform like one. The focus is a little slower. The frame rate might be slower. But how often, in reality, do you need to fire 9 frames a second and for all of them to be tac sharp. REALLY? But how often does having a big heavy bag on your back take the joy away from photography or make you quit earlier in the day than you would like?

You will hate the battery life on the Fuji. I carry five, yes five, spare batteries for a days shooting to make sure I have power. Having said that, batteries are only £9 currently from Amazon, so carrying several isn’t prohibitive. The battery warning light gives almost no warning it’s about to fail either. It’s a long way from DSLR battery performance. You will also find the cameras boot up time is slower than a DSLR (at least my xPros is). With each new model it is getting faster, but I have missed shots by having the camera off to preserve battery power, seeing something but by the time it is ready to fire the moment has passed. It takes a second or two to boot up. It doesn’t sound a lot but to a street photographer it’s an eternity.

On the XPro I also hate it that I have to remove my tripod quick release plate every time I need to change the battery. That’s bad design. But Fuji are addressing it on later models.

I was worried I wouldn’t like the electronic viewfinder (EVF), but these fears were unfounded. I love it. It is fast, responsive and well designed. It has got better model by model, so don’t worry that this will be an issue for you.

What is the high ISO performance like? I regularly use mine, handheld, at night, wide open at ISO 1600 and 3200. At 1600 and above noise is noticeable but, depending on your point of view, perhaps attractive. It is easily reduced in software. At 3200 it is very evident. At ISO 800 and below the camera produces clean files you will love. I often want the graininess of “noise” so for me it is not usually an issue.

How do I rate the lenses? Here Fuji have excelled. They have committed to a wide range (a lesson Sony could learn from for the amazing A7). I find the lenses as good as the Canon professional ’L’ lenses, and that is saying something. I now have the 18, 23, 35, 60, 18-55 & 55-200mm and love them all (just with the provisos about the limitations of the macro lens I mentioned earlier). I lust after the 56mm and will probably add the 14mm also. Most of the time the 23 and 35mm live on the camera and I often go out with just on or the other and force myself to work with it.

What about the big question of resolution and whether you can print big from the files? I have printed to A3+ with no issues and have customers printing much larger from the files (and by much larger, I mean several feet wide – sometimes the files are upscaled – yes, sharp intake of breath, that actually works really well). This comes down to a basic understanding of how big images are to be viewed. Enlarging beyond the native resolution of the sensor means detail is affected… But this is only noticeable if you stick your nose 2cm from the paper. Big prints are big because they should be viewed from several feet away. When you step back and enjoy them as designed there are no issues. If you are expecting the resolution of an A4 print to be maintained at A2 then forget it, but unless you have a medium format sensor or similar the same applies to DSLRS. If you are obsessed with micro sharpness and pixels, if you spend your life looking at images with your nose pressed against the paper and only print at A2 and above then the Fuji might not be for you. But if you really enjoy photographs and view at the correct distance for the size of print and generally print up to A3’ish, you have absolutely nothing to worry about. If you then need to occasionally print biggest, yes, the files will go bigger. Just don’t expect them to look like Phase IQ180 files at 3 meters wide. This is a pet gripe of mine, enjoy pictures, not pixels. (Please watch this video by Zack Arais on resolution and sensor size too – he puts things into perspective, and it’s funny).

I found I have to have a completely different workflow in the field when using the Fuji. I tried using it as I do my Canon system and found it frustrating, so I have developed a Fuji workflow. Whereas with the Canon I work in manual focus and manual exposure, on the Fuji I use auto focus and aperture priority. I also shoot in JPEG plus raw on the Fuji, whereas on the Canon I use raw only. This is because and (I never thought I would say this), I love the Jpegs the Fuji produces. I use them for Facebook, Twitter and quick work. For my master files I then process the raw files.

There are still issues processing the files in Lightroom. Some images (and it is only some) display a mushiness in the fine detail. There is a workaround you can read about HERE. I am sure Adobe are working on the situation and will soon remedy it. They have already added the Fuji film presets to LR so these can be applied to raw files if you wish.

I enjoy using a smaller tripod. I love having a tiny camera bag. I love the Lee filter kit designed for mirror-less systems. I love how inconspicuous the Fuji is, attracting less attention on the streets and in buildings. I love it’s retro look. I love the quality of the files it produces (the closest to film in I have found from a digital camera). I love how it will shoot square format for me. I love the film simulation modes, especially the mono ones. I love the ease of packing for flights. I love being able to work for longer without feeling tired. Yes, I am a convert. The Fuji is now my camera of choice for just about all of my photography, except macro and multiple exposures.

A point I would like to mention which really sets Fuji apart from just about all of the other manufacturers, notably so, is the way they listen to customer feedback. All modern companies say they value our feedback, but so often disappoint us by not doing anything about what we say, or falling short in meeting what we ask for. However, I am constantly surprised and delighted by Fuji who REALLY DO listen and react to customer comments. Often within weeks customer suggestions are implemented in firmware upgrades and in new models we see the majority of customer requests implemented. I strongly believe this is a major reason why Fuji has built such a loyal following so quickly. They are making cameras we want, the way we want and improving them all the time in response to the ways we use them. They are a fabulous company to buy into. It gives me great confidence to invest my money into their gear.

So, should you sell your DSLR and jump on the Fuji bandwagon? It’s up to you. Ask yourself, what is most important to you? Remember, currently, in some areas, they don’t perform like DSLRS, but be honest, do you really push your DSLR hard? I honestly think that for the majority of camera users a mirror-less system is ideal and will exceed your expectations. They are not for everyone, wildlife, sports and perhaps people who do a lot of astro photography should stick to a DSLR. For most others, switching needs to be seriously considered as an option. I’m fortunate I can run two systems (I run several, actually, if I include my old film Hasselblad, my pinhole etc) so don’t have to choose. I have the best of both worlds. But as soon as Fuji bring out a model which is just a little better, I can see me selling my Canon system. At the moment it is only macros and multiple exposures that are keeping me with it.

Whatever you decide I hope that, once the choice is made, you get back to enjoying making images rather than obsessing about the kit!

I would be very interested in your thoughts on this. Please leave a comment with your experiences or questions, below.

My first experiences with Fotospeed papers & lessons learned about soft proofing

soft proofing

"After Hours"

I have long used Ilford Gallerie Gold Fibre Silk as my paper of choice for my monochrome prints and Hahnemuhle 308 Photorag for most of my colour prints. I was happy with the Ilford, but the Hahnemuhle was causing me issues. Despite being a beautiful paper, with a lovely texture, it frequently got jammed in my Epson R2880 printer or picked up roller pinch marks. I also found, despite being air blown before printing, that it would shed fibres after printing, leaving white areas on the image. It is an expensive paper and these frustrations got the better of me.

Working for Light & Land with Charlie Waite and his team of photographers I saw how they used Fotospeed papers. I went to see Charlie’s exhibition, currently on at the National Theatre in London (If you haven’t been, go, it’s wonderful – allow an hour to enjoy it) and he had printed it all on Fotospeed Platinum Etching 285. I was stunned by the prints, being sure the paper choice had enhanced Charlie’s sublime photographs. I was also aware of Joe Cornish high regard for the Smooth Cotton White 300, printing his work on this paper. This encouraged me to investigate their products further.

My first purchase was Platinum Etching 285. From the first image I printed I was hooked. It ran smoothly in the printer without shedding fibres and the colours and tones were a near perfect match to what I was seeing on my screen. The soft Matt texture was ideal for the style of the image.

The above image "After Hours", printed on Fotospeed Platinum Etching 285

My next print job with Fotospeed papers was more important. Not only was it for a client, rather than a print for myself, but also the images were Chris Friels, rather than my own. I always feel a greater sense of responsibility printing the work of another photographer, trying to realise their vision for the image.

If you are familiar with Chris’s work you will know he uses extreme dark tones and some intense colours. This makes them challenging to print. This job proved to be true to form. The first image I tried was in grey tones with a very slight magenta/lilac tone. This I felt was the easiest of the three, to get me started.

I always print from Lightroom, loving the controls there. I had no worries over the colours so didn’t soft proof the image and went straight to print. It came out bright magenta. And I mean BRIGHT! My immediate thought was a cartridge had run out, throwing off the colour balance. I replaced three cartridges showing low levels and hit print again. Same result!

mmm... Magenta!

Now I was perplexed. I soft proofed the image but apart from an issue with some deep blacks it wasn’t showing any issues. Then I realised I hadn’t downloaded the ICC profile for the Platinum Etching paper from Fotospeed, I had it set to Hahnemuhle 308 PhotoRag. (I’m ashamed to say) That must be it! I remedied that, hit print again. Same problem. Now I was worried. What was going on.

iPhone shot of my computer screen to show what the image SHOULD have looked like!

I decided to follow Fotospeeds printing instructions (Typical man, only refer to the manual as a last resort). Their instructions apply to Photoshop so I decided to give it a try and did to the letter what they recommend. This got to the root of the problem. It reminded me of a bug I read about somewhere. I had 16 bit output checked in my original prints as I am usually printing from tiffs. However this particular image of Chris’s was shot as an 8 bit JPEG. The Fotospeed instructions showed the 16 bit option turned off, this reminded me of the issue so I deselected it. The print was perfect. Lesson learned.

The three stages - On the right the magenta madness, in the centre an improved print but still a magenta cast. On the left the final print (wrapped for dispatch in archive sleeve - but you can see the colours are matching the original image).

I was on a roll now and moved to the second image. This image was made up of extreme colours so I soft proofed in Photoshop. This showed that almost nothing in the image was printable!!! I tried my usual soft proofing techniques to pull the colours into gamut but they were so far out it ruined the image. The colours differed too much from the original and went very flat, losing vibrancy. Not an option. So I tried changing the rendering intent from Perceptive to Relative (see this post for more details on rendering intents) but this didn’t help either.

Hard to see from this iPhone shot but the left image is printed on Platinum Etching 285, a matt paper (with a beautiful texture but narrower gamut capabilities), the print on the right which is on Platinum Baryta was able to cope with the bright, rich reds in the original file. The Etching muted these to a duller more burnt orange with less vibrancy. Showing that paper choice can affect the appearance of the final print colours & contrast.

My next option solved the problem. I switched the paper (And the ICC profile) from Platinum Etching 285, which is a matt paper, to Fotospeeds Platinum Baryta. Why did I do this? Because matt paper is only able to display a very limited range of colours (a gamut of colours) than lustre papers. Gloss papers can display an even wider colour gamut. So if ever you have issues getting the colours right on matt paper, try moving to a lustre or gloss paper (remembering to switch ICC profiles in your print software). Often this will fix the issue. Fotospeeds Baryta paper had a gamut wide enough that I didn’t have to make any colour adjustments in soft proofing. The image printed beautifully.

Then on to the third and final image, another with extreme colours. This time, using the Baryta paper I soft proofed with no issues and it printed first time.

This whole process taught me several lessons. Firstly, I need to always check I have the correct ICC profile loaded for the paper I am using. Secondly, to use soft proofing to check the paper can handle the colour gamut. If the gamut is an issue, to make changes in software or to move to a different paper with the ability to display a wider gamut of colours.

The big lesson for me, though, was how much easier it was to work on the image to get it right for printing in Photoshop. I hate to say this. I have always loved printing from Lightroom and it does print beautifully. I also like how easy it is in Lightroom to set up page layout templates.

However, I found Photoshop is much better at making colour tweaks to an image to pull colours into gamut without spoiling the whole image. You can be very targeted in the colour ranges you work with, whereas Lightroom doesn’t allow you to be as precise. I Also preferred the way Photoshop displays the image with the papers ICC profile applied to simulate the print. The other thing I liked was sizing the print in Photoshop. So I have moved from being a die hard lover of Lightroom for printing to someone who will use Photoshop for tricky prints in future. I guess it is all about personal preferences and also using the right tool for the job. I definitely think that for difficult prints, Photoshop is the tool to use.

Printed on Platinum Etching 285 - Beautiful subtle tones

(One nice feature I will miss from Lightroom if I soft proof in Photoshop is something the soft proof virtual copy does for us. When we soft proof in Lightroom it offers to create a virtual copy if the file with the soft proofing adjustments, so that our master file remains unchanged. A great thing about this virtual copy is that it embeds the ICC paper profile into itself for the paper we are proofing for. Then when you print it automatically communicates this profile to the printer along with the rendering intent you proofed for. This is clever stuff and a benefit of soft proofing in Lightroom)

A lesson I have learned, which explains a lot, since doing this print job concerns the visible gamut warning in Photoshop and Lightroom. I have always used this thinking it was an accurate warning of colours which the printer would be unable to reproduce on my chosen paper. However, I must admit, I have often found (and told my students) it often is best to go ahead and print even if the gamut warning is indicating an issue with some colours as the resulting print is often fine. I put this down to the rendering intent doing a good job at replacing those out of gamut colours with close replacements. However, further reading has revealed that the gamut warning system used by Adobe is rather old and predates ICC colour management. It was designed for a graphic arts based workflow rather than photography and modern fine art printers actually will have no issues rendering those colours. What is actually of more importance now is the contrast ratio of monitors compared to papers. Many monitors are set to a contrast ratio of 500:1 or similar whereas gloss paper is closer to 200:1 with matt and lustre papers running even lower than that. Soft proofing should focus on correcting contrast issues and tweaking colours to bring them back to a correct state in soft proofing with the gamut warning turned off in most cases. I am going to try this and see how I get on.

I have now switched my studio over to using the Fotospeed range of papers exclusively because I have been so impressed with them. I will blog about each type I use as I put them through their paces and I am pleased to be working closely with the guys at Fotospeed too. They are a long established company and really know their stuff.

Another printed on Fotospeed Platinum Etching 285 (and its an ICM image so its supposed to look like that 🙂

Soft proofing is a big subject and will make a huge difference to the quality of your prints. It’s one of the things I cover in my Lightroom and Photoshop workshops and will be dealing with on my print workshops with Master Printer, Jack Lowe. The next Jack Lowe workshop is fully booked but if you would like to go on the no-obligation short list to hear of future dates, please just click THIS LINK TO EMAIL ME.

I am pleased to say that from now on in my Lightroom and Photoshop workshops (which I hold in my home studio) you will go home with a free print on one of Fotospeeds beautiful papers (perhaps one of mine, or one of your own) along with the knowledge of how to make beautiful prints of your own work too.

You will find available workshop dates ON THIS PAGE or, please CLICK THIS LINK and drop me an email if you would like more details or would like to book a one to one session with me.

You can find full details about and buy Fotospeed papers HERE – I recommend you give them a try.

Should I Back Up to the Cloud?

cloud

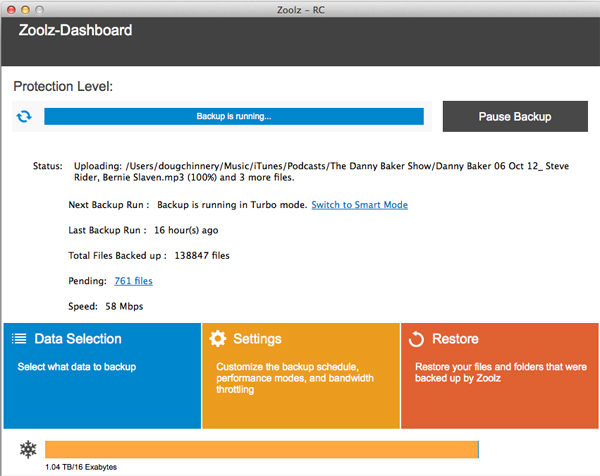
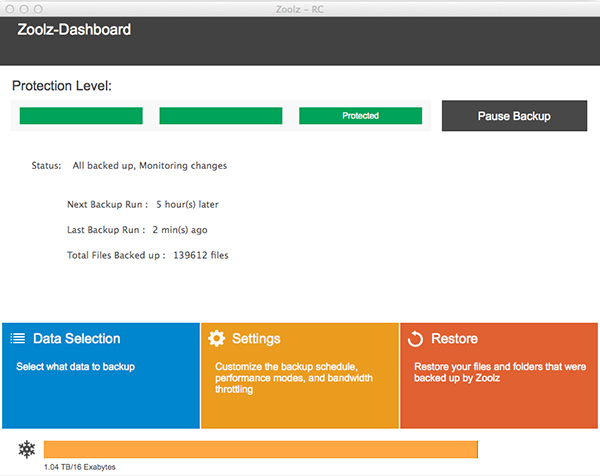
(New information added September 2017 – since writing the post below I have been using Backblaze for about a year now as my cloud back up provider. Zoolz became just too slow and was never fully backing me up – I always had files in my queue, especially after photographic trips, which defeated the object of a cloud back up. I NO LONGER RECOMMEND ZOOLZ. So after doing more extensive research I opted for Backblaze and have found them to be excellent. The cost is about £3.85 UK Pounds a month – less than $5 US Dollars. This gives me unlimited storage. I have just under two terabytes stored with them now. It is always up to date and is very fast. I have had to retrieve a couple of individual files from them and the system works reliably and well. I also like it that they allow you to back up unlimited external USB hard drives. Many other companies do not. If you would like to try their service, please sign up using THIS LINK as it will give you (and me) an extra free month of service from Backblaze at no extra cost to you on top of the free period they offer new customers to test out the service. Thank you).

Can I start by just apologising for this being such a long post, but I wanted it to cover the subject in depth and, hopefully, answer everyones questions. (and I have added some cloud type pictures, just to keep it interesting).

With the advent of fast broadband internet access the possibility of uploading large amounts of data to ‘The Cloud’ has finally become realistic for many. (If you live in a rural area, struggling with primeval broadband speeds, I feel your pain. I have only had a fibre optic connection for the last 18 months. Prior to that I was with you in the slow lane, so I know how it feels).

Firstly, what is ‘The Cloud’? Simply put it is a term used to describe data storage on the Internet. Our files aren’t floating in space somewhere, they are actually on hard drives in huge data centres in different parts of the World. These data centres often, for reasons of data security, copy all of the files to more than one location, usually in different countries and continents. If one data centre gets destroyed by an earthquake or invading martians at least your files and photos will be safely stored somewhere else on the planet for you. That is, until the martians land there too.

The bigger and more reliable suppliers of cloud based storage usually have the data in at least three nuclear bomb proof storage centres, each on a separate continent. The data is encrypted using very strong encryption methods and protected behind the most secure firewalls available. These guys are very serious about security. We tend to be paranoid about our bank details, but these data centres often hold the accounts of the largest companies on earth as well as the data of the worlds governments. Frankly, their data security is more important than ours (to them, at least) and so we benefit from security systems designed to protect them.

There are two forms cloud storage can take that I will look at it in this article. Firstly, the type provided by companies that have quickly become well known such as Dropbox and Copy. (Others include GoogleDrive, SkyDrive (incidentally, Microsofts Skydrive have just increased their free offering to 15GB to put pressure on the market leader, Dropbox – this makes them well worthy of consideration for a basic free service, and there are many more). These provide some free tempter storage for us, usually in the region of 2GB. This allows us to store a certain amount of data with them that we want to access from various places. They all provide web browser access to your files and in addition have apps for smart phones and tablets of all flavours. These allow access to your files from these devices too, wherever you have internet access.

I use and recommend people use Copy as their free Cloud based regular storage service. It works in the same way as Dropbox but instead of the measly 2GB of free space you get from Dropbox, Copy give you 10GB free. If you CLICK THIS LINK to sign up you will also get ANOTHER 5GB FREE, giving a total of 15GB free for life. (and I will get another 5GB free as you have used my link and for that I thank you). With Copy you can have a free app on your smartphone and tablet to access your files. You can also access them via any web browser anywhere in the world and you have an app on your PC or Mac to access them too, so everything is synchronised. I have been using it for a year now and the service has been flawless.

The types of files these services are designed to store are those we want regular access to. There is no charge for uploading or downloading files and there are no data limits for how much you transfer, just your storage limit, from the free amount they give you upwards. Many people find they can survive with just the free amount. Others soon find the service so useful that they want to exceed the free storage amount. Here is where these suppliers make their living. They charge for extra storage in packets of space. For example, £7.99 a month or £79 a year (if paid in advance) will get you 100GB of space on Dropbox.

These services also allow you to share files with friends, family and colleagues. This is very useful for files which are too large to email and where you want to share a file or files with a whole group of people. It can also be used to move files between your computers. Users soon find the service indispensable.

The main downside comes with large volumes of data (and for us as photographers, that means our images). For us, 100GB is nothing. In the days when many photographers happily fill 32GB memory cards in a day in their cameras and measure their photo libraries in terabytes it soon becomes prohibitively expensive to back up your entire library to these services. (an alternative to the Cloud for those who don’t want to pay or whose broadband connection is just too slow, is to rotate back up drives to an off site location. Some take one to work with them and leave it there in a safe place and bring back the previous drive to update. Some do the same, rotating drives at the home of a family member or friend. Always the issue with this is remembering to do it. It is surprising how easy it is for weeks or months to go by before we get around to swapping drives. If this happens it makes the system almost, but not quite, pointless).

This is where deep freeze storage comes in. An example of this style of cloud back up service is Amazons Glacier. This service is designed primarily for business users and is difficult for home users to work with, but more on that later.

Amazon have set up Glacier for individuals but mainly for companies who have vast amounts of data. Terabytes are shrugged off by Amazon, Glacier can handle Petabytes. Why ‘deep freeze’? This is because the idea behind this style of service is to upload files that we may never need to access again. We are putting them into deep freeze. This is in preparation for disaster recovery, for the day our house burns down and our computer and all our back up drives get destroyed. We can then pull back all of our data and restore it.

The price for this service is incredibly low. In fact it is hard to imagine how it could get any lower. The current fee is 1 US Cent per GB per month. So you can store 100GB for a year for $12, about £8. Compare that to Dropboxes £79!!!!!!! (Please note, many users are happy with other services, such as Backblaze and Crashplan which offer slightly different pricing structures and which may suit you better – I suggest you also check them out. I haven’t used them, so can’t comment based on experience. I have heard both good and bad about both, but then that is true of just about every supplier of any product or service!)

How do they get the price so low? A number of ways;

Firstly, As you upload the files they go into a queue at Glacier and can take up to five hours to be put into place on their servers. By controlling the flow of data to suit demand, Glacier can control costs.

Secondly, you pay to restore data back to your computer. You are allowed to restore about 20GB per month for free but beyond this you pay to restore data. This emphasises that the service is for cold storage, not the shuffling back and forth of files that Dropbox is used for. Again, by placing this restriction on its clients the price can be kept very low.

Next, it is not user friendly. It is designed to be used by IT departments with techy types who understand this stuff. I managed to work it out using various help files and web sites, but it took some research. I will explain the method later in the article.

Finally, you can’t ‘see’ your files. You don’t have a browser like File Manager or Finder to look at your folder structure and examine your files. Its all more obscure than that. This can be unnerving. Are my files really there?

The process for uploading to Glacier is a pain, frankly. You cannot upload data in packets of more than 4GB. You also need to use a piece of client software to handle the uploading process. I used Arq Backup on my Mac which is shareware and available to buy for a few dollars. This has to be configured to allow it access to your space on Glacier.

Then, to save space on Glacier (even though the storage costs are so low I still wanted to optimise the space – remember you will be paying for it for every month forever, even at one cent per gigabyte per month, over 20, 30 or 40 years with a growing data pile this will add up) I zipped up my folders. This has to be done manually and I grouped the folders into roughly 4GB zip files.

I then directed Arq backup to copy these to Glacier, which it did beautifully. With my BT Infinity 2 broadband connection and an ‘up to 20mb’ (and often faster than that) upload speed, I could upload 80GB overnight. The slow and time consuming part was manually and laboriously zipping folders into 4GB packets.

It was such a painful process that I got bored and was falling way behind schedule. Vital files that ought to have been copied to Glacier sat on my drives waiting to be prepared for Arq. It was one of those jobs that just kept being pushed down my to do list in favour of other ‘more important’ jobs. But with backing up, in reality, this is unacceptable.

This is where a company called Zoolz comes to the rescue. Zoolz are part of Genie, a large and well established organisation, and are based in the UK. They have a Cloud based back up system which uses Amazon Glacier to store our files. The great thing about Zoolz is they have realised how difficult Glacier is for most people to use and so they have designed their own client software for us.

This software allows us to simply click on folders on our hard drives and Zoolz backs them up to Glacier for us. No zipping, no grouping into 4gb packets (you can even upload files that are individually bigger than 4GB). The software also allows you to see all of your folders on Glacier just as if they were on your computer and, with image files (including raw files) you can see a thumbnail of the image which is so useful if you have accidentally deleted a file or files and need to selectively restore them. It is simplicity itself to use it and the client is available now for both Windows and Mac users.

They have a number of pricing plans for home users (and a range of products for business users too) so you can choose which is ideal for your needs and upgrade as your needs change.

Plan One – 100GB for £9.99 per year (£0.83 a month paid yearly in advance) – 1 user (1 computer and 1 external drive connected to that computer, no backup limitations)

Plan Two – 500GB for £34.99 per year (£2.91 a month paid yearly in advance)- 3 users (3 computers with 3 external/network drives connected to those computers, no backup limitations)

Plan Three – 1TB for £49.99 per year (£4.16 a month paid yearly in advance)- 5 users (3 computers with 3 external/network drives connected to those computers, no backup limitations)

Plan 4 – UNLIMITED DATA for £139.99 per year (£11.66 a month paid yearly in advance) – 5 users (UNLIMITED external/network drives connected to those computers, no backup limitations)

These prices are extremely competitive in the current market, especially if you factor in the time cost of manually preparing your files for Glacier by dealing with Amazon direct, along with the ability to view your files etc. I will still be very happy to pay the unlimited option price when my subscription runs out.

So what is Zoolz like to use in practise? As I have mentioned, the selecting of folders and files to back up is simplicity itself. Just click the ‘Data Selection’ option, click ‘select folders’ and then click on the folder or folders on your hard drive you want Zoolz to copy to Glacier for you.
 

The Zoolz Client running in 'Turbo' mode.

As a word of caution. I found the client works better if you select One main folder at a time and allow that to be backed up before selecting another. When I first started I selected my entire pictures folder, my music, my documents – the whole cahoona! That seems to slow things down somewhat! I soon found it better to, say select, the 2013 folder in Pictures and let Zoolz plough through backing up that years pictures before feeding it 2012 and so on.

Bearing in mind I could upload about 80GB a night to Glacier using Arq backup directly, Zoolz is massively slower. Zoolz say the don’t throttle the data flow, but whatever is happening, it is much slower. I rarely managed to get more than 20 or 25GB uploaded in any 24 hour period, let alone overnight.

I am using the Mac client which is actually in late beta so it may run a bit slower and be a bit buggier than the Windows version, so please allow for this (as of this writing in July 2014).
The issue is both that data doesn’t flow at the maximum upload speed of my broadband connection and the software stalls frequently. You will see that it seems to go through a process of ‘analysing’ and then ‘preparing’ each file before uploading it. This runs along fine but for some unknown reason the client will get stuck, usually when ‘analysing’ a particular file when it gets to 100% of that process.

This is not to bad if you are working at your desk and notice it. You can close the client, restart it and off it goes again quite happily. It is much more frustrating if it happens five minutes after you go to bed and when it could have run all night you find in the morning it has only uploaded a couple of files and then been stuck all night.

An amusing ‘feature’ is the client software tells you the upload speed. I was taken in by this on the first day. It will show a figure of say, 12mbps. Out comes the calculator and I worked out my entire backup should take about nine days. None too shabby. I posted this on Twitter and some wise IT types howled with derision at my foolishness. I soon found out why. Firstly, I soon found this speed to be fictitious. Also the speed shown only ever gets faster. Mine now shows 58mbps!!!!! I think what is happening is that the client logs the fastest speed it ever attains, even for a millisecond and proudly proclaims it to you. Don’t be fooled. It is a lie.

I soon realised that even in ‘Turbo Mode’ (more howls of derision) the Zoolz client is only ever using about a third of my upload bandwidth AT BEST, even thought he software warms you that in ‘Turbo Mode’ other upload processes on your computer will be affected as Zoolz will use all available bandwidth. Not on my system it doesn’t.

The alternative upload mode is ‘Smart Mode’. (Still hearing those howls). This is supposed to flex the upload speed depending on what else you are doing on the computer and uploading so that it doesn’t slow other things down. It makes no difference whatsoever if you use this mode, in fact, I think it is even slower.

I have just finished my backup to the Cloud this very day! It ended up being a bit smaller than I anticipated at about 1.1TB. This has taken me about nine weeks. I have had the computer on 24 hours a day and have run it as flat out as I can. Whenever I am at home I pop in to my studio to check progress and make sure it hasn’t stalled. If it has, I restart the software. I couldn’t have done the uploading any faster without sitting at my desk 24 hours a day. It will feel strange to just have it scheduled to update daily now and for me not to have to worry about it or nurse it along.

Restarting the software becomes a bit of a bugbear as time goes on too. This is because the software is designed, each time it starts to check every folder for changes that it has been told to back up. Early on this only takes a minute as you have only selected a few folders, but as the data selected increases so does the time it takes to check it all. At 1 TB it now takes perhaps 15 minutes or more. So every time the software stalls and I have to restart it I then have to wait around, or remember to go back because it doesn’t then commence the back up automatically, it sits waiting for you to tell it to proceed.

This all probably sounds like a nightmare to you, and it is a nuisance, but it has become part of my life over the last two months. The end is in sight for me. I know once it is done then the software will just monitor the folders I have told it to automatically and once every two hours it will just back up all the new or changed files which will be quick and painless. The best thing is I know I will have as secure a backup regime as it is possible for me to have. My images, which are my business and my livelihood are protected against even the most catastrophic hardware failure or disaster/theft. Barring nuclear armageddon or those pesky martians, I am protected.

So despite the shortcomings of Zoolz right now, I still wholeheartedly recommend them. The pricing is excellent and once uploaded the client software is a dream. You may well have much less data than me (and if you are a Windows user, your upload may be much faster as I am using the beta release of the software) I have heard from some Windows Zoolz users who have uploaded a TB of data in just a couple of days, so my experience shouldn’t be taken as the norm.

If you do decide to try the free trial of Zoolz or to subscribe, please use THIS LINK. If you do, I will receive a small payment (you won’t pay any more). If you prefer it if I don’t receive a payment, simply go to www.zoolz.com. I never recommend products or services I haven’t tried myself and don’t use myself. I am always 100% honest about the good and bad about any products I describe.

The window I have waited nine weeks to see - my completed Cloud backup to Zoolz.

If you are still with me at this point, well done for getting this far. You might be wondering what my onsite back up system is. It has changed a little since I last blogged about it, so I will, for the sake of completeness just run through it here.

I have a multilayered approach to backing up. The Cloud back up I have described above I view as my disaster recovery only to be used in a worst case scenario. I hope I will never use it.

The question I ask myself, and I encourage you to ask yourself when designing your back up system is, “how much data am I prepared to lose?” The answer will be the basis for how far you go with your back up system. Some people care nothing for their files and pictures, or seem not to, as the don’t or rarely back up. They don’t seem to grasp that EVERY hard drive will one day fail. Its a mechanical, electrical device and has a working life. It might fail in the next 15 seconds or it might run for another five years. We never know, thats the problem.

Those people who are less than diligent about backing up often ay they don’t care if they happen to lose a load of ‘stuff’. That is right up to the day they do and then they suddenly realise how vital a lot of that stuff is to everyday life and also just what sentimental value lies in many of our images. Personally, I think it is foolish and lazy not to back up, but it is a personal decision.

So, you may be prepared to lose a weeks work, so only back up weekly. If you could lose a months work, back up monthly. Personally, I would hate to lose a days work, so I back up continuously.

The next thing is to make your system as easy to use, both in backing up and in restoring data, as possible. A difficult system to use is likely to be neglected. That is pointless.

I am a Mac user and so my first line of defence is built in to all Macs and is called Time Machine. If you have a Mac and are not using it, I strongly urge you to connect an external drive to your computer and switch it on. It is ridiculously simple to use, is completely automatic and does (usually) a great job. It makes a mirror copy of your hard drive (and any other drives connected to your Mac that you want it to copy to. What I would caution is DONT TRUST IT ALONE. It can fail. Mine has. The disk copy can get corrupted and you need to format the drive and start again. But as a first line of defence it is marvellous and has saved my life a couple of times. I had a new iMac delivered which suffered a total hard drive failure three days after delivery. I had just got all my software loaded and configured. Apple sent me a new iMac, I connected the Time Machine drive and 30 minutes later the new machine was fully set up exactly (and I mean EXACTLY) as the other machine was just minutes before it failed. I don’t have to do a single thing. That saved me the best part of three days work configuring, setting up and loading the new iMac all over again. That converted me to Time Machine. I have also deleted odd files by mistake and Time Machine makes it a doodle to restore these in an instant.

It backs up your system completely – every single byte of data. Then it updates this every hour for a day, then it keeps daily backups for a week and then weekly backups for a month and so on and it keeps doing this until the drive you store it on is full. The it just deletes the very oldest files to make space. My 2TB Time Machine drive will hold about 6 months or so of backups of my system and I can go back to any point in that 6 months and restore a file or files, or reinstate the whole computer to that point.

I am sure there must be similar software available for Windows users (but it would be much better to buy a Mac 🙂

That is my first line of defence. But, as I said, I don’t rely on this. I then use a piece of Mac shareware called Superduper. This costs about $20 or so. It is a superb piece of software because it simple clones one drive onto another drive. You can schedule it to do this automatically, or, as I do, you can run it when you want.
 

Superduper - Super Simple

I copy my iMac drive and my external drives to other drives using it. This makes a mirror copy so when you look at those drives with Finder it is exactly like looking at the original drive. The files aren’t compressed or put into archives in the way many back up programs do. I like to be able to see all my files like this.

To speed the back ups, Superduper uses ‘Smart Copy’. The first time you copy a drive it takes a few hours depending on the size of the drive. However, future copies take much less time as it only adds files you have added, deletes files you have deleted and updates files you have deleted.
 

Super Duper about to 'Smart Copy'

The disadvantage of this is if you have deleted a file by mistake on your main drive and then run the backup before you realise, it will be deleted form the backup too. This is where Time Machine covers me (and Zoolz). I also copy each of my drives to three other drives and I stagger these rather than doing them all at one, so there is a chance I will still have one which has the file I need on it.

Why do I copy each drive three times, especially as I have Zoolz and Time Machine? Well, I am a bit obsessed with backing up. But also, one of the copies is on to small portable drives which I take with me on the road to connect to my laptop. This means I have all my images and files with me when I am away and can work as normal. This also gives me an off site backup when I am away. If something was to happen to the house, a fire, flood or theft then I would be able to get back up and running quickly without having to resort to Zoolz. The other two drives are at home under my desk and I have two just in case one fails. These drives are a bit older and so I am prepared for them failing. It is so easy to just click the backup no button I don’t find it a chore to run the backups. I tend to run them when I am about to leave the computer, to go down for a meal or when I go to bed. then the backup is complete by the time I am finished.

Superduper has another advantage in that it will, if you want, make the backup of your main drive ‘bootable’. This means if your main hard drive fails you can boot your computer from the back up, keep working until you get a new drive in the computer and restore the Time Machine drive. This again is a massive time and hassle saver when things go wrong.

Some ask me why I don’t use a RAID or NAS system. These are very good and have many advantages. Your data is spread over several drives simultaneously. If one drive fails your data is safe and you can swap out the failed drive. Many units allow them to be connected over the internet so you can access your files from anywhere in the world where you have an internet connection. They are also great as home entertainment systems for streaming music and films around the home.

But I do have some issues with them, although here I have to say I am not an IT expert and so my understanding may not be correct. If a drive fails in a RAID system or something like a DROBO, it is great that your data is safe and you can swap out the drive. However, the weakness in the system as I see it is in the next few days. It can take some days depending on the speed of the system and the amount of data involved for the RAID system to rebuild the volumes. During this period your data is very vulnerable. If another drive fails (or if there is a power cut, flood etc) you will probably loose everything. As I understand it, the only really safe way to work with these systems is to have them backed up to another RAID or NAS. Then you are protected.

I think that, perhaps, RAID users tend to view them as a magic and infallible solution and so often neglect other additional back up methods. At a company I worked for I saw the firms RAID based server lose five drives in one day. This was a system that was under a year old and maintained by professional IT people. An extremely rare occurrence but it just shows complacency is foolish. The firm almost collapsed. Its entire financial system, factory planning system, customer database, artworks, quality system etc etc was all lost – everything. If one of the IT guys hadn’t continued to run each night an ancient manual tape back up (which often failed to work) which fortunately worked the night before the RAID failure the company could easily have collapsed. It took a week for the IT department to rebuild the RAID, restore the tape backup (very delicate) and test everything. Another few days and the firm would have been in serious trouble. Believe me, the MD had a second RAID installed immediately to mirror the first and another backup system put in place too. One bitten…

From a personal point of view, as a not very tecchy person, I find them a bit harder to understand and work with. I like the simplicity of cloned drives that I manage myself and that are all independent of each other. I understand that, it is all very simple and it is easy for me to manage. This I like.

So there it is, what must be the longest blog I have ever written. If you are still reading this you deserve a medal! Now I urge you to think through how protected your data is and if you see holes in your system, then get provisions put in place to deal with them. Data is becoming more and more important. Especially for us as photographers, our images are irreplaceable and their value to us tends to grow over time. Most of us can’t afford not to deal with this stuff, so even though all the above seems like a lot of hassle, in fact, now I have it in place it is really easy to manage and it works so simply. And I sleep well at night.

My final word to you. Hard drives. Don’t trust ‘em. Ever.

The Fuji X-Pro 1 – How did it perform in the Arctic?

fuji x pro

Fuji X-Pro 1. 18-55mm Lens at 18mm, f22 for 30 seconds with Vari-ND filter & tripod. ISO 200

I recently had the chance to take the Fuji X-Pro 1 with me on a workshop I was co-leading up above the arctic circle in the far north of Norway. I thought this would be an ideal opportunity to see how the camera performed in extreme conditions. I also had with me a newly delivered 23mm f1.4 Fuji lens to try out too. The images in this article were all made on the trip and all but the aurora shot are jpegs straight or virtually straight from the camera. If you followed my trip reports from the expedition you will have seen most of these images before (sorry!), but the aurora image with the 23mm lens is new, as are one or two of the others.

The idea of testing the lens here was to see how it performed shooting the “Northern Lights”, the Aurora Borealis, if we had a chance to see it. In theory the fast f1.4 aperture would make it ideal but I was also interested to test the sharpness of the lens and also to get a feel for its width, which although 23mm works out at about 35mm as a full-frame DSLR equivalent.
 

Fuji X-Pro 1, ISO400, 18-55mm Lens at 45.4mm, f6.4, 1/18 sec, Tripod

My main concern before setting off with the camera was battery performance in the extreme cold. I have found with the X-Pro 1, as many others have, that battery life is much poorer than I am used to with my DSLR. Of course, the battery is physically much smaller and the camera is fitted with a great electronic viewfinder (EVF) which must use quite a bit of power, so there are reasons behind this.

My frustrations with battery life are compounded by the fact of how difficult it is to change batteries quickly. I have the extended grip fitted to the camera which I find helps me with handling the camera and this has to be removed for every battery change. But, when shooting landscapes I also have to fit a quick release plate for my tripod and this requires a screwdriver (or coin) to remove it and this is also required to change the battery. The way I work I can easily go through four or more batteries in a days shooting and so this stripping down of the camera every time gets very tiresome. You can imagine how much I was looking forward to the drop off in battery performance in the minus 10 to minus 20 degree temperatures we were expecting.
 

Fuji X-Pro 1, ISO 800, 55-200mm lens at 156.1mm, f8, 1/170 sec, handheld

So, how did the batteries perform? Surprisingly, quite well. In fact, I can’t say I noticed a deterioration over what I am used to. True, when shooting in such cold you tend not to shoot for extended periods, however the camera is cold, even in the bag. But I didn’t have to do more battery changes than normal. For that I was thankful.

How did the camera perform? There were a couple of issues. Bear in mind that at times I was using it at minus 20 degrees and often at well below freezing. The first issue I discovered almost straight away was the Fn button on the top of the camera which is programmable to whatever function you choose (I have it set to allow me to quickly change ISO) became “sticky”. To be honest, as it happened straight away I thought at first I had perhaps damaged the camera during the flight as the body had been in my pocket (with no lens attached). However, when the camera warmed up again later in the hotel the button returned to normal action. The next day, back in the cold, the stickiness returned. I found kit still worked but I had to press it carefully and be patient with it.
 

Fuji X-Pro 1, ISO 200, 18-55mm lens at 34.3mm, f8, 1/40 sec, tripod

This button issue later extended to the AF button on the rear of the camera which allows you to select focus points for the auto focus system. In this case it went beyond sticky and refused to work, but again returned to life on warming up in the hotel.

Apart from these two issues the camera performed flawlessly in the extreme conditions we worked in and produced some images I am very happy with.
 

Fuji X-Pro 1, 18-55mm Lens at 23.3mm, ISO400, f8, 1/25 sec, handheld

What I would say, however, is, that I found myself (contrary to what I have been doing here in the UK since buying the Fuji) reaching for my Canon 5D mk3 first. The Fuji has been my camera of choice since I bought it second hand a couple of months ago and I absolutely love it. But after a couple of days I realised I was favouring the Canon unconsciously over it, whereas since buying the Fuji I had not used the Canon at all except for a commissioned shoot which required it. I analysed why this was and realised that the Canon was much easier to use in the cold. I was wearing a pair of thin Merino wool inner gloves and with the Canon I could keep these on and operate the camera easily. However, the Fuji buttons required I take the gloves off due to the size and positioning of the buttons.

I also found the physical size of the Canon easier with gloves. So it was nothing to do with image quality, but rather the practicalities of usability in the arctic weather. I was also conscious of the button stickiness. The Canon had zero issues. It is a testament to the build quality that it shrugged off minus 20 easily. To give you an idea of what these temperatures are like to work in, my camera bag (and I) were getting frosted up at minus 20. Oh, and I didn’t change a battery in the Canon for the whole trip.
 

Fuji X-Pro 1, ISO3200, Handheld, f5, 1/55 sec, 18-55mm lens at 18mm

So, conclusions on the bodies. If I go to the arctic again the Fuji will stay at home (although it grieves me to say it). It is not ideal for these conditions. If it was my only camera it can handle it, but it is starting to show stress. I would, next time, take the 5Dmk 3 and and mk2 body as my spare body. However, on trips to warmer locations abroad, the Canon will be staying at home and My Fuji will be my travel camera and if my wife, Liz, will let me, her XE-2 body will be my spare body).

Now, thoughts on that 23mm lens. If you have used the 35mm lens you will know how wonderful it is. So you might be wondering if the 23mm is as good? Is it worth adding to your lens stable? Well, my in my opinion, you should. I have only used it a little but I am already blown away by it. It is as sharp, if not sharper. Wide open it is extraordinary. The bokeh is soft and dreamy. On the body of the X-Pro 1 the camera is nicely balanced in the hand (I use the body with the added grip). I am on the train going to London as I type this and I have the lens with me. If time allows I am going to put it through its paces on some street photography – a genre it is made for. I’ll post some images if they are up to scratch.
 

Fuji X-Pro 1 18-55mm lens at 44.4mm, f5, 1/50 sec, ISO3200, handheld

I used it for some aurora images in Norway. For shooting the aurora you have the lens wide open and focused on infinity. I could have done with a wider lens, in reality, to get more of the landscape in the shot. We were in a forest miles from any light pollution and this means total darkness so composing the image is very tricky. More width gives you latitude to crop away the edges if they are a bit messy. But it is not the fault of the lens that it wasn’t wide enough for what I wanted. The wide aperture gave me great speed, so at ISO1600 I was able to make these images at 10 to 20 seconds which is ideal for aurora images of this type. Had we had a more extreme display I think my shutter speed would have been down to a couple of seconds which would have captured the ‘curtain’ effect had we seen it. Even wide open, with the difficulty of focusing on infinity in absolute darkness I was able to get sharp images with surprising depth of field. The X-Pro 1 performs really well at high ISO’s. I pushed some images to ISO3200 and these do show some noise, but nothing that my Nik noise reduction plugin can’t reduce for me.
 

Fuji X-Pro 1, 23mm f1.4 lens, ISO1600, f1.4, 12 sec, tripod (processed raw file)

So, there we have it. A brief run down on the Fuji X-Pro 1 in the Arctic. It survived, but had a couple of issues. Its not ideal for these extreme conditions, but it held its own and I am delighted with the images it gave me. (all the images here were shot on it). As I am blessed with being able to have two camera systems, the Fuji and the Canon, I have the luxury of choice so if ever I get the chance to return it will be without the Fuji. But if I was a sole Fuji user, I would happily take it knowing I would come home with a great set of images.
 

Fuji X-Pro 1, 23mm f1.4 lens, ISO200, f11, 1.2 sec, tripod

The Fuji X-Pro 1 – Is It a Landscape Photographers Camera? Some Initial Thoughts.

fuji initial thoughts

As followers of my work will know, I have been shooting exclusively wit he Fuji X-Pro 1 for about a month now. My main camera is a Canon 5D mk3 (and I also shoot on film with an ancient and much beloved Hasselblad 500C and wooden Zero Image pinhole camera).

I bought the Fuji primarily for lightweight travel photography, street photography and as a carry anywhere camera. However, as soon as I started to see the results it produced I was keen to see how it performed in my main shooting environment as a professional – the landscape.

First a few caveats. This is not a full frame camera like the 5D mk3, the sensor is smaller and has a lower pixel count. The Fuji has 16 million pixels compared to the Canons 22 million. The aspect ratio of the sensor is the same as the Canon at 3:2. I am also mindful that the range of lenses available for the Fuji is far smaller than for the Canon, but more on this later. So I knew I was not comparing apples with apples.


Autumn Woodland. Handheld, ISO1600, f11, 1/30 sec

Having said that, the results shooting landscapes have blown me away. (all the images in the post are taken with the X-Pro 1. Sorry they are all tree images, but it is autumn and it would be rude not to spend my time in the woods. Please also note, all of these images are jpegs either straight out of camera or at most have just had a little high pass sharpening applied for uploading to the web. One or two have had VERY slight contrast tweaks, but that is it. I haven’t had time to really set about working on raw files from the camera yet). The X-Trans sensor is astounding. I am not a techno geek on such matters, but whatever Fuji are doing, long may it continue. The clarity of the files, the rendition of colours and contrast is stunning. I am sure this is partly due to the wonderful Fuji lenses which I see as being on a par with, if not exceeding the quality of the Canon L lenses, and that is saying something.

I am loving the weight and lack of bulk of the Fuji. I have bought a smaller travel tripod to use with it which is more than adequate. It fits in a tiny bag and even with several prime lenses, filters and spare batteries it weighs a minute fraction of the DSLR kit. I have been surprised at how much pleasure this has given me back. I can work for longer and walk further without fatigue and I am much more inclined to have the camera with me, in fact I rarely go out of the door without it. (I am in London as I type this and have it in my jacket pocket with the 18-55mm lens on. Couldn’t do that with the 5D). My feeling is that a lot of photographers as they get that bit older or as aches and pains start will be keen to move to a lighter more portable kit to help them maintain their joy in the field. I also think as the quality of these cameras will mean more will gradually move away from DSLR’s, especially if a full frame version emerges.


Padley Gorge - Handheld, ISO1600, f8, 1/30 sec


All the images in this article have been taken in the last month with the Fuji using the in camera “film simulation” presets for Astia and Velvia films. (I am sure these will annoy film users as they can’t possibly be anything like true Velvia or Astia, they are just adjustment presets, but he results can still be very nice, just don’t expect them to replace true films by any stretch of the imagination).

I have been shooting with raw plus fine Jpegs switched on. Annoyingly, when Lightroom imports these files it copies them all to the computer but only imports the raws into the Lightroom database. You will find the Jpegs in the same folder, but they won’t show in LR. I tend to go in to Finder (on the Mac, Windows Explorer on Windows) and find the JPEG file I am after and drop it into Photoshop. There I tweak it if necessary and save it as a tiff. This tiff is then imported into LR using the synchronise folder command in the Library module. A bit of a faff, but it works for me. (I have just been sent this tip by great photographer Lizzie Shepherd – In LR, go into Preferences and on the General tab you can tick a box which gets LR to treat jpegs as separate images next to raw files – problem solved, thanks Lizzie!)

I am shooting Jpegs as well as raw files because the quality of the Jpegs is really VERY good. I like the mono conversions the camera does as well as the film presets and these are permanent in the Jpegs whereas they are not saved in the raw files. The Jpegs also preserve the aspect ratio presets I use in the field. You can set the Fuji to shoot in square format (which I use a lot) and in a 16:9 panoramic format. For portraits and less critical images the Jpegs are often quite sufficient for my needs. For landscapes and images I will use professionally, it’s the raw files I will process.


Tree, North Wales. Tripod, ISO200, f22 (in error - rather extreme!) 1.6 sec


A word on some of the niggles I have with the Fuji, because it does have some quirks in the way it needs to be used, especially if you are used to a DSLR, and it has some very irritating “features” too.

Firstly, let’s talk about that battery life. It’s dire. I suspect it’s the electronic viewfinder that’s the culprit but if I am shooting for a day I will go through four batteries. I carry five and still feel nervous. I will be buying a couple more. I just can’t stand having to economise on battery power as I work. The batteries you can get on Amazon for around £12 seem to work just as well as the genuine Fuji ones which sell for £60. Guess which I am buying?

The other really irritating thing is the position of the tripod mount. This really hasn’t been thought through by Fuji. As soon as you fit a quick release plate it partially covers the battery/memory card bay door. Seeing as you have to change batteries every two hours, it is very annoying to have to unscrew the quick release plate every time to do this when simply positioning the tripod thread a few centimeters further away would prevent the issue.

I have found a couple of the buttons on the rear of the camera are easily activated in error. I particularly seem to catch the Q’ menu button. It is placed on a raised part of the body moulding and this makes it prone to being pressed. However, I notice this button has been recessed on the Fuji XE-2 which has just been released which is great (and I love it that Fuji really seem to listen AND RESPOND to customer feedback on these cameras. How many manufacturers ask for feedback but then never implement any of the changes we ask for? 

There are also some quirks in how you use the camera in the landscape. At least I see these as quirks having been used to using a Canon DSLR. The first is the focusing system employed by the Fuji. It works in a completely different way to a DSLR. On a DSLR the focusing sensors are most accurate when they can detect high contrast edges, where light areas but up against dark areas. By locking on to these they can measure distance and achieve focus. However, on the Fuji, such high contrast edges are just what the focus sensors don’t want to lock on to. They are most accurate when they can find a surface with texture, say a tree trunk or the surface of a wall. This takes some getting used to but I have found when the Fuji does lock focus I get a higher proportion of sharp shots compared to using autofocus with the DSLR. It is very accurate.


Silver Birch - Clumber Park. Tripod, ISO200, f16, 1/4sec


This leads me to another change I make in my workflow when making landscape images with the Fuji compared to the Canon. With the Canon I use Live View focusing with the lens on manual and love this approach. It is very accurate and allows for checking of depth of field with ease. However, on the Fuji, I have found It easier and more effective to have the lens set to auto focus but to press the AF button on the rear of the camera and select the AF point I want it to use. This locks the focus accurately for me and at f11/f16 I am getting excellent depth of field. With the sensor size of the Fuji, I am now experimenting with shooting wider, f8/f11 to see if this maintains sufficient depth of field while getting me closer to the sweet spot of the excellent Fuji lenses. My next experiment is to try back button focusing with the Fuji. I understand you can switch the lens to manual focus but still use the BBF button to focus and this sounds like it might be a good system.

Now I am used to how the Fuji works I have developed a modified workflow and have found I can already work at speed in the field with it, enabling me to stop thinking too much about camera operation and focus more on capturing changing light and composition which is much more important to me.


Tran Hows, Dawn - Tripod, ISO200, f16, 0.5 sec


I am finding the light meter on the Fuji to be very accurate and so, as opposed to how I work with the DSLR where I shoot in full manual, I have been using aperture priority and then tweaking the exposure after checking the histogram using the exposure compensation dial on the top of the camera. This is working really well for me. Other than in really low light or very contrasty light, though, I am tending to find the light meter is pretty accurate.

I have now used the Lee Filters Seven5 system on the Fuji and love it. If you have the full sized Lee system you can save a lot of money by just buying step up rings as it works fine. It’s a bit big, but the cost saving is significant. However, if you can afford it or if you are new to Lee Filters the purpose designed system is a delight. Small, beautifully made and balanced it is the perfect match to cameras of this size. As always with Lee, you get what you pay for and the optical quality and clarity of the grads is superb. Positioning the grads using the live view screen is a doddle and they do the job just as designed.


Padley Gorge - Derbyshire. Tripod, ISO200, f9, 1/5 sec


I have been trying a vari-ND filter for my ICM shots with the Fuji and have been pleasantly surprised with it. It is very convenient being able to dial in the amount of neutral density effect you need and being a screw on filter it is better suited to ICM work than using a Lee holder. I also have a Tiffen screw on 10 stop filter but have to try this out, so no verdict as yet, but I see no reason why it shouldn’t be perfectly fine.

I am taking delivery of the brand new 23mm f1.4 lens on Monday (it has since arrived. Sadly the first lens had two scratches on the front element but the replacement was fine) and am excited to try this out. If it is as good as the 35mm it will be a terrific lens. I must add, my next lens purchase, which surprises me to say it, will be the XF 55-200mm. (since typing this on the train I have caved in and flexed the plastic and am now the proud owner of said lens). The last few weeks have made me realise how much I use a long lens in my landscapes. I often have my 100mm macro on my Canon (both as a macro and as a landscape lens) and I also carry the 70-200mm which I use a lot in my landscapes. I had anticipated shying away from long lens for the Fujis I imagine it might look a bit ungainly, but I have really missed the reach of a longer lens.I have also bought the 60mm macro, partly because (great excuse) my wife now has the XE-2 and she loves macro photography, but of course, we can share 🙂

I am travelling to Norway in two weeks to co-lead an aurora workshop with Antony Spencer for Light and Land. I will be taking my 5D kit, but the Fuji is coming with me too. This will be a great test for it, both as a landscape camera but also the ultimate test for long exposure high ISO shooting, with the 5D to compare it to. It will also be interesting to see how it copes with the low temperatures north of the arctic circle. (All bar two days of the trip we will have no daylight at all as the sun won’t rise above the horizon – we will be living I a world or twilight and darkness for 10 days). Note to self. Buy even more batteries for the Fuji.

I will try and find time to blog from up there to let you know how it goes as well as posting some images. Watch this space.


Clumber Park - Tripod, ISO200, f18, 1/3 sec


First Impressions of the Fuji X Pro 1 – A Day on the Streets

first thoughts

and, no, this is not the Fuji X Pro 1, but a shot I took with it 🙂

I have taken the plunge and bought a second hand Fuji X Pro 1. Why? A number of reasons. I needed a smaller camera system for some trips that could produce high quality commercial images but without the weight and bulk of my DSLR system. I had also had a chance to use the X Pro and it’s sibling the X100sa nd both had blown me away both in terms of usability and in the ‘filmic’ quality of the images the sensor and lenses produce. I also hold my hands up and unashamedly admit to being seduced by the beautiful retro styling and the superb build quality of the Fuji’s. I have some workshop ideas for the camera too, so there were commercial considerations in my mind also.

As I bought second hand I didn’t have a choice of lenses. The kit I bought came with the 35mm f1.4 prime (which I would have chosen even if I was buying new) and the 18-55mm zoom lens which I probably wouldn’t have gone for, rather erring towards a set of primes. However, the zoom is by no means a ‘kit lens’, this is a full on, high quality piece of glass which is solidly made and performs incredibly well. So I may well hold on to it. Only time will tell.


I have had the camera just three days and today was the first real outing for it. So my comments here are based purely on this first days shooting and my feelings may modify with time. I am writing this on the train home so I have only seen the images on the back of the camera, and we all know how deceptive camera monitors can be! I will review the images when I get home to add some to this post and may have to add some paragraphs once I have seen the images full size.

But that aside, what are my initial thoughts on the X Pro?

Let’s look at the camera from a number of angles. Remember, I have been doing fast moving hand held street photography with it today, so my comments are based on this. I will blog about how it performs as a landscape camera once I have used it for that purpose.

So, firstly, what is it like ‘in the hand’? It is not a compact camera. With one of the Fuji lenses attached it has some weight but is quite usable one handed. I have the extended grip fitted (this is not a battery grip but it just makes the grip for the right hand bigger and more comfortable, especially if you have big hands – it costs about £75 as an extra). I also have fitted a leather wrist strap which I am delighted with. I can let go of the camera if necessary knowing it is secure on my wrist. I much prefer this to a neck strap. 


I also fitted a ‘thumbs up’ which is a small £5.99 accessory which slides into the hot shoe and provides an anchor for your thumb. It is designed to aid stability when shooting one handed (as street photographers often do). I have found these very useful on other cameras but today, on the larger X Pro, I found the distance from the right hand edge of the camera to the Thumbs Up was too large. I just didn’t find my thumb naturally sat in the groove and so I can see me removing it as unnecessary for me.(an overnight afterthought – I may try removing the hand grip and seeing if I prefer using the camera with the Thumbs Up and without the grip as removing the grip moves your thumb closer to the Thumbs Up. It also reduces the bulk of the camera somewhat.)


I did find my thumb kept activating the Quick Menu button inadvertently as it is placed right where the heel of my hand and my thumb naturally rest on the camera. This is not a major issue, but as I lifted the camera to my eye I had to press the shutter button half way to clear them I to see my shot which slowed me down a bit – a disadvantage when street shooting, without a doubt.


All of the controls are beautifully placed and you soon find you can adjust just about all the settings without taking the camera away from your eye. This is aided by the very sophisticated electronic viewfinder (EVF) which shows the menus as you access them through the eyepiece just as if you were looking at the rear screen. It also shows you your last shot, which is a nice feature too.


You can flick to the optical viewfinder (OVF) and this shows you a wider view than the lens sees, which many street photographers love. They can see people before they enter the frame and antipate when to fire the shutter. However, you have to get used to the fact you are not looking through the lens when you do this and the framing is slightly different to what the lens sees. You can still overlay technical information, like shutter speed and aperture etc into the OVF which is very useful.


The aspect ratio of the sensor is the same a s a full frame sensor, 3:2, but the sensor is not full frame. It is smaller. How’re the image quality is reputed to be amazing at 16mp and capable of exhibition quality prints at A3+ and above. Pete Bridgwood has exhibited prints from his X Pro to great acclaim. (Petebridgwood.com)

Other aspect ratios can be set including my beloved 1:1 as well as vararious rectangular ratios including panoramic modes. The raw files will always be imported at full size, no matter what aspect ratio y select but Jpegs will maintain the ratio you choose. This applies to the film simulation modes Fuji have built into the camera too. So you can shoot as if using Velvia, Astia or other film types along with some gorgeous mono styles utilising colour filters. I particularly like the mono mode with the red filter applied. In orders o maintain what I see on the monitor while maintaining the greatest flexibility with my files I have set the camera to shoot in fine JPEG and raw. Thus I can refer to the JPEG to see what I saw on the camera screen and use the JPEG if the file size etc suffices of my needs or use it as a reference to convert the raw to mimic that look back in the digital darkroom.

Another nice feature, shown to me today by Tim Allen, ( http://www.timallenphoto.co.uk/ ) is you can, in camera, take any raw file and apply any of the film or crop effects and save a copy as a JPEG. We quite enjoyed playing with this, taking shots we liked and experimenting with different versions in camera. The raw file remans untouched, of course, and you will have the various JPEG versions when you gets home.


You can set seven custom presets on the Fuji. I have used these straight away and found myself flipping between them all the time today. I programmed in various mono settings at different ISO settings etc and also a couple of Astia settings as these are my favorites already. It saved me messing about in menus and I could quickly grab the set up I needed for a particular set of images.

If you are a DSLR user you have to change the way you use the camera. Firstly, the autofocus is much slower than a DSLR, but apparently more accurate (I can’t verify or deny this yet, it’s what I have read). The autofocus works differently. Whereas with a DSLR we are used to locking on to high contrast areas, points where light and dark areas touch, with cameras like the Fuji this is exactly what you don’t want to do. The focus works best when aimed at surfaces with texture. This takes some getting used to, but is very effective once you do. The fact the focusing is slower is just something we have to accept for now. Fuji have issued several firmware updates (and it is easy to update the firmware for your body and each of your lenses, and ought to be done to get the very best from your system) and these have, apparently, improved things, but it is still slower and less responsive than a DSLR.


Now let’s talk battery life. I was surprised at how quickly the X Pro eats batteries. I am used to a Canon 5D mk3 which can go all day on one battery, two at most. I burned through two and run out of power nearly tw hours before my time to head home had come. I could have done with at least one more battery, probably two to be on the safe side. Now, I was shooting continuously, using the screen, and working the camera really hard. Nonetheless, it is obvious this is a power hungry beast. I will be ordering two more batteries when I get home. One other things about the batteries, they get to the point where they show red, quarter remaining then all of a sudden the camera just shuts down. The first part of the battery discharge gauge takes some time to fall then the last half goes really fast. Beware. It’s like a car with a. Fuel gauge that says full for ages then drops like a stone!


I really enjoyed using the camera. It is not tiring in the hand, it’s black body is unobtrusive and the 35mm lens is exquisite. I have a feeling more primes will be in the offing. There is a 56mm f1.2 due in January which sounds very nice indeed.

The camera was a dream to carry all day, with a spare lens and filters in my bag. It was so liberating not to have my big rucksack with all the DSLR kit. Will it replace my DSLR? I doubt it, but I am no ruling it out. I wil see what the image quality is like. I will see how it performs as a landscape camera from a usability point of view. I am not wedded to the DSLR by any means. If the Fuji proves it’s worth and can produce the quantity and size of files I need, I see no reason to carry on with the big DSLR kit. However, if it falls short, I am happy to run two systems and use whichever suits the job at hand ( but I will be reaching for the Fuji as often as possible due to its lightness and portability).

If you are considering the Fuji X Pro 1 then you really ought to be take a very close look at the X E-1 too (and the XE-2 which is rumoured to be released any day now). It takes all the same lenses. The sensor and many other specs are identical but it is smaller and lighter and may well be a wiser choice for you. Take a close look, see what you think.


I am excited to get home tonight and look at the images I have. Let’s hope they live up to my expectations.

(Added the day after) I have now had a chance to look at my images. first things first. I need to work on my skills as a street photographer!  I can see I missed some opportunities, sometimes by a fraction of a second. I am going to have to concentrate harder when doing this type of photography. I also have some images I am moderately happy with, especially as this was my first day out with a new camera I was totally unfamiliar with.

I have put a few images from the day into this post. Most were shot with the 18-55 lens, wide open although a few towards the end of the day were shot with the 35mm. I wish in hindsight I had used the 35mm more. I. Used this wide open too. Most of the images were shot at ISO1600. The day was dull and I wanted to ensure a decent shutter speed. I ignored the histogram, this is not landscape photography (as long as I wasn’t clipping the highlights). I just let Aperture Priority do it’s job for me. I have not run any noise reduction on these files, just tweaked them a little in Lightroom, and I have not sharpened the files either. I wanted to show them more as the camera produced them.

So, that’s my initial thoughts. No doubt, I’ll have more to say as I get used tot he camera. I have another day out with it next week on the south coast. A different environment and a different style of shooting to look forward to.


A BIG thank you to Tim Allen ( http://www.timallenphoto.co.uk/ ) for organising the day and our walking route and to both Tim and Valda Bailey ( www.valdabailey.co.uk ) for being such good company on this day out in London. I am sure their images will be way better than mine.

Adobe announce new Creative Cloud package for photographers

Adobe caused a huge amount of anger, resentment and upset with its surprise announcement some months ago that along with launching its Creative Cloud service it would no longer be releasing any of its Creative Suite products (including Photoshop) in any other format in future. No more downloadable version to own. No more DVD’s.

Basically, the Creative Cloud allows you to have any of the Adobe Creative Suite program’s installed on your computer and for this ‘privilege’ you pay a monthly subscription. It was a brave move by Adobe to make this move so decisively. I believe this model is the one all major software manufacturers will want to move us to in order to guarantee cash flow into their coffers. Anything other than a complete termination of supplying the software by other means will mean few would opt for this system. We naturally don’t like it. We don’t own the software, we are leasing it. We have no way to decide if we want to upgrade or not.

Hence the anger amongst many of Adobes customers. But perhaps I ought to be more specific. The anger was chiefly raised among lone users, hobby photographers, one person businesses and so on. Adobes main customers,  graphics companies, design agencies, large academic institutions and so on, were delighted with the plan on the whole. The pricing works for them, access to all the programs, free updates and monthly pricing works well for business, it helps with cash flow and budgeting.

For most small users it was a disaster. Adobe had not thought through the impact on these small users who only use Photoshop and Lightroom. For us the model is hugely overpriced. The outcry was massive. It took Adobe by surprise. It led to lots of bad publicity. 

It seems Adobe listened to the outcry. They have just announced a new level of membership aimed at users of just Photoshop and Lightroom. 

This is how it will work. If you have bought a legitimate copy of Photoshop CS3 or above you will qualify. Between now and the end of the year you will be able to subscribe to the Creative Cloud. In the US the price is $9.99 per month. In the UK I thought it would be jacked up to £9.99 but in fact it will be £8.78 per month and it starts in two weeks time.

For this you will get unlimited use of Photoshop CC, Lightroom 5, all updates which are released as soon as they are available, 20gb of Cloud storage, a free Pro Behance portfolio website and free support. If you already subscribe to the Photoshop only version of the Cloud you will be moved automatically to this new level when it goes live.

For those who now feel aggrieved that this offer is just for those who have bought CS3 and above please spare a thought for those who have. They have spent in excess of £600 on the program and then upgrades have added more to this investment. It is only right that they be compensated for this outlay and loyalty to Adobe. We don’t yet know how much the subscription will be for those who are currently Elements users or who have never bought a legitimate copy of Photoshop. I estimate £12 to £14 a month, but this is only my guess.

For those who qualify for the £8.78 price point I feel this is an exceptionally good deal. Do the maths. How much do Dropbox charge for 20gb of storage? You can’t by just 20gb but 100gb, the lowest amount is $9.99 a month so 20gb has to be worth $2 a month. A Behance Pro site, which is a good portfolio site, costs $99 a year – so those two features alone cover the subscription. Now most of us wouldn’t go for a Behance site, but if you currently are paying for a Smugmug, Clikpic or other site you might use this to save that subscription and move to Behance (which is professionally recognised and viewed by many creatives). If you are paying for Cloud storage you could save that cash and use the Adobe space instead.

Besides this you are getting £600 plus of Photoshop and the very latest version of Lightroom along with all future updates. Already Photoshop CC has some great new features and no doubt over time more will follow. How much do you spend on Photoshop and Lightroom purchases and upgrades over, say, three to five years? Add it all up and I think the subscription represents good value.

Even if you don’t have CS3 or a newer version of PS, decide you want to buy in to the Creative Cloud and have to pay, say £12 or £14 a month, I still believe it represents good value for money.

I think, despite our reluctance to accept the leasing model, we are going to have to get used to it. Other software companies will soon follow Adobes lead. Microsoft is already offering, but not forcing, a Cloud edition of Office. The others will follow. It makes sense for them and they have us where they want us. We can resist for a while by not upgrading but gradually the new features will draw us in. Or, our current computers will get old, our version will not run well on new operating systems, file formats will change. Bit by bit it will become impossible to resist for all but the most determined.

In the meantime hopefully this news from Adobe will cheer some up who were rightly aggrieved by Adobes heavy handed and thoughtless first offering of the Creative Cloud. I think they should be given credit for at least listening to and responding to what their smaller and less profitable customers said. Quite refreshing in today’s corporate world.

 
Here are some FAQ’s to help explain things further, taken from Terry Whites excellent tech blog
 
Q: What is the Photoshop Photography Program Offer?
A: This offer includes access to Photoshop CC and Lightroom 5, plus feature updates and upgrades as they are available, 20GB of cloud storage for file sharing and collaboration, a Behance ProSite, and access to the full library of video tutorials in Creative Cloud Learn.
This offer is available to customers who own a previous version of Photoshop or Photoshop Extended product, version CS3 or later (CS3.x, CS4, CS5.x, or CS6). Suites do not qualify. Requires annual commitment, billed monthly.
Offer valid through December 31, 2013 and is available in countries where Creative Cloud is purchased directly from Adobe.com. This offer is not available in China, Vietnam or Turkey.
Q: Can I get Adobe Bridge CC with the Photoshop Photography Program Offer?
A: Yes. Bridge CC is available for download and use as part of your Creative Cloud membership.
Q: I am already a Creative Cloud member; do I qualify for this offer?
Existing Creative Cloud members who wish to transition to this offer must own a previous version of Photoshop or Photoshop Extended product, version CS3 or later (CS3.x, CS4, CS5.x, or CS6). Suites do not qualify.
Those who meet the qualifications have two options:
Creative Cloud Single App members for Photoshop CC who already completed the qualification process when they originally signed up for their membership will be automatically transitioned to this new program when it ships, with the additional benefits and lower ongoing price.
All other Creative Cloud members who meet the qualification requirements may contact Adobe Customer Service to discuss transitioning their membership to this new offer.
Q: I own an earlier version of Lightroom but not Photoshop. Do I qualify for this Photoshop Photography Program offer?
A: Only customers who own a previous version of Photoshop CS3 or later qualify for this offer.
Q: Will the cost of my membership increase?
A: This price is not a special introductory price for your first year only; it is the standard price for this level of membership. Customers who sign up by December 31, 2013 will be able to continue their membership at the same price. But if you cancel your membership in the future, you will not be able to re-join at this special price.

Why Usability is More Important than Image Quality To Me and Why I Wouldn’t Buy Nikon.

usability

Lets get one thing really clear at the outset. This post is not a Canon verses Nikon post. I am a Canon user and this post will go some way to explaining why, but right from the beginning lets be clear, If image quality is the most important factor to you in camera choice right now, as a DSLR buyer then go right ahead and get yourself a Nikon D800. It is amazing. What you read in the reviews is right about the quality of the files it produces. Here, at last is a DSLR which produces files very (very) close to medium format quality. You will not be disappointed by the images you get from it as regards the way it handles colour, contrast or detail. You will be able to crop into images heavily and still be able to produce wonderful prints. It is a ‘game changer’.

Would I buy one? No.

Is that because I am biased? No.

Is that because I am heavily invested in Canon EOS lenses? No.

Is it because, in reality, I like blurry, soft, images and, in fact love analogue images more than digital? No.

Why then?

One word. Usability.

I work with workshop participants weekly. I work with every make of camera on the market they bring along. Every model. Without exception, Canon DSLR’s are the most user friendly cameras on the market today.

Let me give you some examples of issues I have with Nikon’s in particular which make them unusable FOR ME (but you might be fine with).

1. Exposure simulation in Live View. In both Canon and Nikon systems as you adjust the aperture or shutter speed while in Live View the monitor will get brighter or darker to simulate this for you, just as a helpful approximation, the affect of those changes on your image. Slow down the shutter speed and the screen gets brighter. Speed it up and it gets darker and so on. Except, and it baffles me as to why, but the Nikon designers decided tht this really useful feature should stop working when the shutter speed exceeds 2 seconds (6 seconds on some models). Yup, thats right. Do they think it is of no help to see what’s happening when light levels are so low that we need exposures longer than 2 seconds? What on earth possessed them to BUILD THIS IN? Canons on the other hand simulate the exposure right up to 30 seconds. Usability.

2. I would love a Nikon designer to explain to me why they decided you can’t see the light meter gauge superimposed on the Live View screen. You have to turn Live View OFF, and either put your eye to the eyepiece or switch on the “Quick Info” menu to see the Light Meter gauge. Baffling. Needless to say on the Canon it is viewable in Live View.(UPDATE: apparently, you can see some sort of light meter gauge by pressing the OK button in LV on some Nikon bodies, high end it seems, but not all. I will have to see exactly what this looks like next time I have a Nikon in my hands to assess)

3. Another completely unforgivable omission on a Nikon that I find unacceptable is that while you can focus in Live View mode, manually or automatically, you cannot use the depth of field preview button in Liew View to check you have focused on the correct point and have everything you require in sharp focus.  Whereas, of course, you can on the Canons, even the most basic models.(UPDATE; I have, since writing this, found out that on the D3 and D800 models depth of field is simulated constantly in Live View. This seems to me to be a great feature. The only thing I would say is, in using D3’s and D800’s, the graniness of the monitor compared to those used by Canons is so bad that I hadn’t noticed that this was, in fact the case. So although I applaud the ‘feature’ It would be good, now, to improve the sharpness of the monitors on these cameras to make the feature useable)

By the time I get to point three I find that a Nikon is so frustrating to use I just refuse to consider buying one, no matter how good the image quality is over a Canon. I know that at some point Canon will release a full frame body which will rival or exceed the D800 in image quality. In the meantime I also know the 5D mk2 and 3 still exceeds any requirements for image quality my customers have ever required already, so they are not poor cameras. I can wait. I am baffled by those who have sold their (in my opinion) superior L EOS lenses  and bodies to jump on the D800 bandwagon, seduced simply by image quality. 

They certainly do have amazing, stunning image quality. No doubt about that whatsoever. But I wonder how many are secretly fuming and regretting the move. Furious that they didn’t realise how poorly designed the Nikon’s are and how frustrating they are to use to to those who are used to the amazing usability and functionality of Canons EOS range? I wonder how many stand behind the D800 in low light in turmoil wondering if they have the depth of field they need? Remembering how easy it was to check on a Canon? Annoyed about yet again having to turn off Live View and turn on another screen just to make exposure adjustments, while reminiscing at how easy it was back in the day when they had a Canon? And more money in their bank account?

If you are a Nikon owner, please don’t get me wrong. They are superb cameras that will give you years of great service. If you have never owned a Canon you probably haven’t even noticed these issues and have no problems using your camera. My comments are aimed more at Nikon themselves or these design flaws and at Canon users, especially high end 1ds and 5d users who are being seduced away from Canon by the IQ of the D800. It is these I am urging to think again.

(UPDATE:Since writing this, I have have had others raise issues to do with Nikons being difficult to operate with gloves on, compared to Canons, issues to do with how complex and baffling their menu systems are, that in Live View the D800 drops to just 4 frames per second, the inexplicable AF/MF switch on Nikons etc, etc, etc. I am sure there are many more. For me the functions I have mentioned are just those that would affect the way I use a camera the most. All cameras have their foibles and I know Canons have some of their own too. I also wanted to add that if you don’t use a camera in the way I do, maybe the features I have discussed may have no impact on your choice of body manufacturer, which is fine. I just felt I had to flag up certain things about Nikons which most users do not become aware of until after they have spent a huge amount of money buying into a system of bodies and lenses and are pretty much tied into for the foreseeable future. I just wanted you to go in with your eyes open).

So if you are thinking of switching systems, think long and hard. Don’t just consider IQ. Think about usability and functionality. If you are thinking about buying a DSLR for the first time, think about the same things too. The decision you make now will tie you in to a system, potentially for many years to come. 

It’s not all about megapixels. It’s about usability, so that operating the camera becomes simple and invisible. Thus your mind is free to concentrate on what is really important. Composition. Timing. Light. Art. Not faffing about with a bit of kit that just frustrates you.

New Dropbox Style Cloud Based Service with 20gb Free Space

Copy

As followers of my blog are aware, I am a keen backer up of my files and advocate using off site cloud based services, such as Dropox, Skydrive, Googledrive etc.

Each of these companies gives its users a small amount of storage space for free to get them used to using the cloud. They also hope that soon we will want more space and so sign up for their paid service. Here you pay for how much space you require per month.

I use all of these services, just accessing the free space each gives. I find Dropbox is very user friendly, especially as they have free apps to help you access your files from your smartphone, tablet and computer as well as via a browser. If you would like to try Dropbox, please CLICK HERE to get your free space and the I will get some extra space for referring you, thank you.

I also want to tell you about a new service called “Copy”, which is being very generous in the free space they are giving us. Currently you get 15gb free when you sign up. But even better, if you use THIS LINK to sign up you will get an extra 5gb of free space. You need to send back the confirmation email to confirm your email address and download the Copy app to manage your space. This will activate your free space.

I use this space to back up my important files and also to share large files with friends, family and customers (you can send them links to files you want to share). While 20gb is not enough to back up all our photos and music, in most cases, it is usually ample for backing up all of our other documents and files so at least these are protected.

I find cloud storage is also useful when away from home. You can access files you have uploaded from any computer which has web access from anywhere in the world. It has saved me many times. (for example, I copy all my flight tickets, hotel reservations, scans of my passport, airport parking details, travel insurance, emergency contact numbers etc to the cloud before a trip. If anything gets lost or stolen, you can recover the details from wherever you are).

I hope you find these links useful and get your stuff backed up safely.