
I am being asked this question by clients so often now (twice in the last 24 hours, for example), I think it is time to put the answer in a blog, to save me writing endless emails if nothing else 🙂
So many photographers are hearing the buzz around the Fuji system (and other mirror-less systems. Many of these others are excellent, but I am a Fuji user so will use Fuji as the basis for my answer, but you can substitute the system you are considering just as well). They are seeing the amazing images these cameras produce and looking enviously at the small camera bags and lighter tripods required.
Many of us are getting to an age where kit weight becomes a bigger issue, year by year. It is a great shame if lugging kit gradually puts us off from going out with our cameras. Photography should not be about kit, but about making pictures and loving being out making them. Anything that gets in the way needs to be looked at and if possible, fixed.
The big question in the minds of DSLR users when considering switching to a mirror-less system is “will it be as good as my DSLR?”. Perhaps you are wondering, “will I lose quality?” “Will I be able to print as big?” “Are the lenses any good?” “How good is the autofocus?” and so on, and these are all very important questions. It’s important to look into the capabilities of kit before investing, but once the purchase is made it is even more important to get back to enjoying making images rather than obsessing about kit. Kit doesn’t make great pictures, we do.

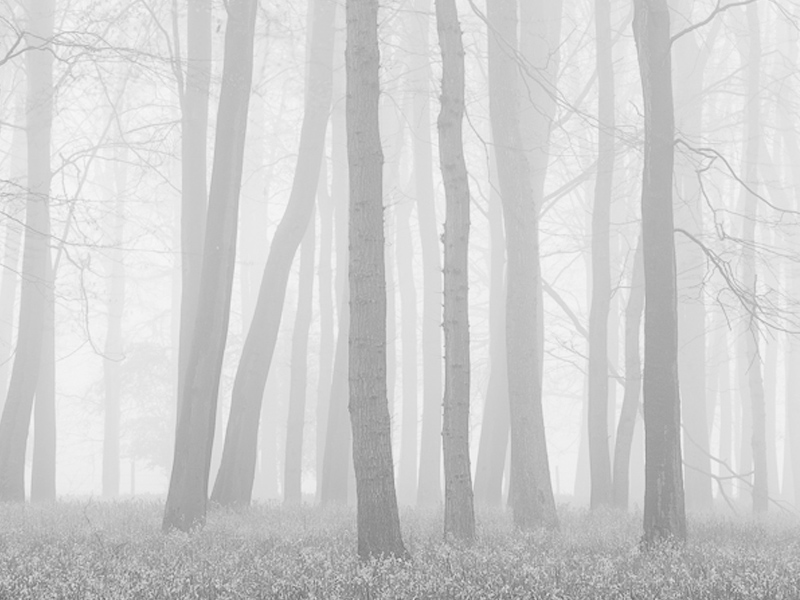
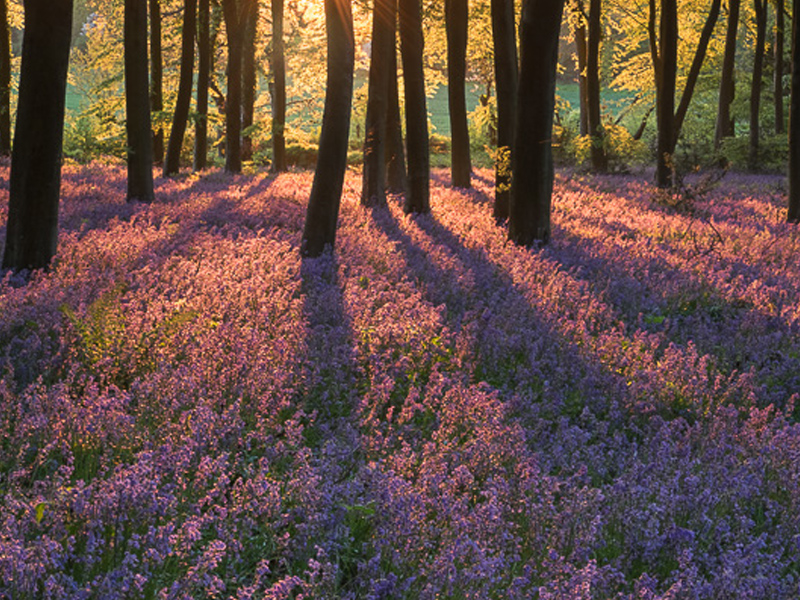
So I will try and answer those questions for you based on my experience. I am not kit obsessed, I am not interested in brands (Despite me teasing Nikon users on Twitter on a regular basis) and I will tell you the facts, warts and all. I am not writing this as some Fuji evangelist to try and convince you to switch. Nor am I writing as a DSLR die hard with an obsession about megapixels who wants to put fear into your hearts. All I care about is pictures and enjoying photography. Read on and make up your own mind. (Oh, and all images in this post were made with the Fuji).
As you read, remember my comments on auto focus, battery life, frame rate etc are based on my Fuji X-Pro 1 (and some use of my wife’s XE-2, when I can prize it lout of her hands). The X Pro 1 is the ‘old man’ of the Fuji range now and all subsequent models out perform it in frame rate, auto focus, battery life etc – so I am experiencing a worst case scenario. If you opt for the XT-1, you will have a much better experience than me (and I love my X Pro 1).

How did I come to invest in the Fuji system? Well, I was doing a lot of foreign travel leading workshops for Charlie Waites company, Light & Land. On tours my main role is guiding and teaching, but when you are away for a few days you do get a chance to make some pictures of your own. I wanted a light, compact system I could fly with which produced good images, but was easier to travel with than my professional Canon system.
I am the privileged position that I can run two systems so I didn’t have to agonise about giving up my DSLR. But I realise for most photographers, a choice has to be made.
To be honest, I wasn’t really interested in the Fuji. I viewed it just as a second body, a compromise for limited use. I had no thoughts about it replacing my Canon kit. I bought a second hand X-Pro 1, with the 35mm and 18-55mm lenses. I got a nice lightweight tripod and set off on my first trip.

That trip was a revelation. From day one I loved using the Fuji, it felt great in the hand. The image quality when I got home astounded me. Bearing in mind this is a 16mp sensor and I am used to the 24mp of my full frame Canon 5D mk3, I could see little or no difference. In fact, the way the Fuji handles colour and contrast really appealed to me. In some ways the images were better than the Canons. There is something ’filmic’ about the images. I love using the camera so much I have hardly used my Canon in the last year.
I do prefer the Canon for macro photography. I have the Canon 100mm L macro lens which is breathtaking. The macro lens Fuji produce is perhaps their weakest, slow to auto focus and not a true macro as it only works at 2:1 rather than 1:1 like the Canon. Of course, as with all lenses, I could buy a Fuji/Canon adaptor and put my Canon macro on the Fuji, and this is certainly an option. I will say the Fuji macro lens us great for portraits and other types of photography.
You will also find the Fuji bodies slower to auto focus than most DSLRs. By slower, I don’t mean they take a week and a half to lock on, but they are just a little less responsive. I have the X-Pro1 and the XE-2. The XE-2 focuses faster than the X-Pro1. I understand the XT-1 focuses faster than the XE-2. Fuji are improving all the time. If you are PRIMARILY a sports or wildlife photographer then I would caution against jumping in to the Fuji system just yet. You will miss a lot of shots. If you are PRIMARILY a people, landscape, architecture or still life photographer I honestly think you have no worries at all. Many pro wedding photographers are using Fujis to shoot weddings beautifully, and they need responsive auto focus, but tracking a hunting cheetah on Safari is pushing the Fuji!

For outdoor photographers it needs to be born in mind that it’s only the XT1 that is weather sealed. Fuji have also just started releasing a range of weather sealed lenses. So if you plan to shoot in wet weather, go for the XT1 and weather sealed lenses.
You are NOT buying a DSLR and it won’t perform like one. The focus is a little slower. The frame rate might be slower. But how often, in reality, do you need to fire 9 frames a second and for all of them to be tac sharp. REALLY? But how often does having a big heavy bag on your back take the joy away from photography or make you quit earlier in the day than you would like?
You will hate the battery life on the Fuji. I carry five, yes five, spare batteries for a days shooting to make sure I have power. Having said that, batteries are only £9 currently from Amazon, so carrying several isn’t prohibitive. The battery warning light gives almost no warning it’s about to fail either. It’s a long way from DSLR battery performance. You will also find the cameras boot up time is slower than a DSLR (at least my xPros is). With each new model it is getting faster, but I have missed shots by having the camera off to preserve battery power, seeing something but by the time it is ready to fire the moment has passed. It takes a second or two to boot up. It doesn’t sound a lot but to a street photographer it’s an eternity.

On the XPro I also hate it that I have to remove my tripod quick release plate every time I need to change the battery. That’s bad design. But Fuji are addressing it on later models.
I was worried I wouldn’t like the electronic viewfinder (EVF), but these fears were unfounded. I love it. It is fast, responsive and well designed. It has got better model by model, so don’t worry that this will be an issue for you.
What is the high ISO performance like? I regularly use mine, handheld, at night, wide open at ISO 1600 and 3200. At 1600 and above noise is noticeable but, depending on your point of view, perhaps attractive. It is easily reduced in software. At 3200 it is very evident. At ISO 800 and below the camera produces clean files you will love. I often want the graininess of “noise” so for me it is not usually an issue.

How do I rate the lenses? Here Fuji have excelled. They have committed to a wide range (a lesson Sony could learn from for the amazing A7). I find the lenses as good as the Canon professional ’L’ lenses, and that is saying something. I now have the 18, 23, 35, 60, 18-55 & 55-200mm and love them all (just with the provisos about the limitations of the macro lens I mentioned earlier). I lust after the 56mm and will probably add the 14mm also. Most of the time the 23 and 35mm live on the camera and I often go out with just on or the other and force myself to work with it.
What about the big question of resolution and whether you can print big from the files? I have printed to A3+ with no issues and have customers printing much larger from the files (and by much larger, I mean several feet wide – sometimes the files are upscaled – yes, sharp intake of breath, that actually works really well). This comes down to a basic understanding of how big images are to be viewed. Enlarging beyond the native resolution of the sensor means detail is affected… But this is only noticeable if you stick your nose 2cm from the paper. Big prints are big because they should be viewed from several feet away. When you step back and enjoy them as designed there are no issues. If you are expecting the resolution of an A4 print to be maintained at A2 then forget it, but unless you have a medium format sensor or similar the same applies to DSLRS. If you are obsessed with micro sharpness and pixels, if you spend your life looking at images with your nose pressed against the paper and only print at A2 and above then the Fuji might not be for you. But if you really enjoy photographs and view at the correct distance for the size of print and generally print up to A3’ish, you have absolutely nothing to worry about. If you then need to occasionally print biggest, yes, the files will go bigger. Just don’t expect them to look like Phase IQ180 files at 3 meters wide. This is a pet gripe of mine, enjoy pictures, not pixels. (Please watch this video by Zack Arais on resolution and sensor size too – he puts things into perspective, and it’s funny).

I found I have to have a completely different workflow in the field when using the Fuji. I tried using it as I do my Canon system and found it frustrating, so I have developed a Fuji workflow. Whereas with the Canon I work in manual focus and manual exposure, on the Fuji I use auto focus and aperture priority. I also shoot in JPEG plus raw on the Fuji, whereas on the Canon I use raw only. This is because and (I never thought I would say this), I love the Jpegs the Fuji produces. I use them for Facebook, Twitter and quick work. For my master files I then process the raw files.
There are still issues processing the files in Lightroom. Some images (and it is only some) display a mushiness in the fine detail. There is a workaround you can read about HERE. I am sure Adobe are working on the situation and will soon remedy it. They have already added the Fuji film presets to LR so these can be applied to raw files if you wish.
I enjoy using a smaller tripod. I love having a tiny camera bag. I love the Lee filter kit designed for mirror-less systems. I love how inconspicuous the Fuji is, attracting less attention on the streets and in buildings. I love it’s retro look. I love the quality of the files it produces (the closest to film in I have found from a digital camera). I love how it will shoot square format for me. I love the film simulation modes, especially the mono ones. I love the ease of packing for flights. I love being able to work for longer without feeling tired. Yes, I am a convert. The Fuji is now my camera of choice for just about all of my photography, except macro and multiple exposures.
A point I would like to mention which really sets Fuji apart from just about all of the other manufacturers, notably so, is the way they listen to customer feedback. All modern companies say they value our feedback, but so often disappoint us by not doing anything about what we say, or falling short in meeting what we ask for. However, I am constantly surprised and delighted by Fuji who REALLY DO listen and react to customer comments. Often within weeks customer suggestions are implemented in firmware upgrades and in new models we see the majority of customer requests implemented. I strongly believe this is a major reason why Fuji has built such a loyal following so quickly. They are making cameras we want, the way we want and improving them all the time in response to the ways we use them. They are a fabulous company to buy into. It gives me great confidence to invest my money into their gear.

So, should you sell your DSLR and jump on the Fuji bandwagon? It’s up to you. Ask yourself, what is most important to you? Remember, currently, in some areas, they don’t perform like DSLRS, but be honest, do you really push your DSLR hard? I honestly think that for the majority of camera users a mirror-less system is ideal and will exceed your expectations. They are not for everyone, wildlife, sports and perhaps people who do a lot of astro photography should stick to a DSLR. For most others, switching needs to be seriously considered as an option. I’m fortunate I can run two systems (I run several, actually, if I include my old film Hasselblad, my pinhole etc) so don’t have to choose. I have the best of both worlds. But as soon as Fuji bring out a model which is just a little better, I can see me selling my Canon system. At the moment it is only macros and multiple exposures that are keeping me with it.
Whatever you decide I hope that, once the choice is made, you get back to enjoying making images rather than obsessing about the kit!
I would be very interested in your thoughts on this. Please leave a comment with your experiences or questions, below.