Tag: doug

Review of Fotospeed Cotton Etching 305 Signature Paper

Some things in life only come along once. The genius of Bob Dylan. Newcastle United winning something (still waiting). My mother in law being lost for words. (also still waiting). A phone call from Toby, the very nice boss at Fotospeed asking if I might possibly be interested in working with them to design my very own perfect ‘signature’ fine art paper. (actually happened – still pinching myself).

That call came almost two years ago now – making a new paper from scratch is not a quick process and it took me almost a nano second to accept the offer. Which photographer and printer wouldn’t? Here was a chance to work along with acknowledged experts in the field to come up with what is essentially my very own perfect paper for my art. A dream come true, because I had used many of the fine Fotospeed papers quite happily for years and loved them, but always there are those little tweaks I would like to make – a little more texture, a little whiter base, a little more weight and so on. Now I had my chance.

So how does it work, this paper designing business? Sadly, all visions I had of me donning a lab coat and goggles were soon put to bed. I wasn’t going to be allowed anywhere near chemicals, or big machines. I think the very nice folk at Fotospeed felt that was just a little too risky, especially when they saw the manic glint in my eyes. Rather, I was sat down in a darkened room, behind layers of security and…. well no, not that either. In fact, it all began with a very long and detailed cross examination about what I wanted from my paper. I was quizzed on my images, what I wanted to bring out of them, their characteristics, what I felt was missing from not only the Fotospeed range but also from fine art papers in general. I was basically asked what my dream paper would be. So what did my specification look like?

I had a vision along these lines;

1. It had to be a matt paper.
2. It had to be heavy. I wanted a paper with substance.
3. I wanted a heavy texture.
4. I preferred a pure white base colour. So that colours were rendered naturally.
5. I wanted it to make soft, gentle images to look soft and gentle.
6. When printing images full of texture and detail it needed to render them sharply.
8. I wanted it to have a high cotton content and to be of archival quality.
9. It needed to be acid free and be suitable for dye based and pigment inks.
10. I really wanted it to handle a very wide colour gamut and produce faithful colours.
11. Finally, for a matt paper it had to deliver sumptuous deep, rich blacks.

By this point, the nice people at Fotospeed were looking a little queasy. I understood why. To ask all of this from one paper, especially a high cotton content matt paper was a very tall order. They were in for a long night. It turned out to be a long year. I think they ate a lot of pizza and drank a lot of coffee.

I actually lost count of the iterations we went through, but I was sent, I think, seven batches of paper to test in all. It was the seventh – the paper which has now become the paper I use almost exclusively, Cotton Etching 305 – which I finally gave the approval for to bear my name. The one which met all of the criteria on my list. The only thing in the end I wanted to change, and where Toby had to call a halt, was with the surface texture. If you look very carefully at matt papers you will see a repetition in the texture. This is because it is made by a mechanical process. I asked if this could be randomised. Apparently it could. If the paper was handmade. As you can imagine this would have made it so expensive it wouldn’t have viable and so I had to concede on that one point (and I have to admit I was being very fussy as it is barely noticeable).

I have to applaud the team at Fotospeed and the people they work with for being able to achieve this. Technically it really is no mean feat. If you are used to printing on fine art matt papers you will know and understand just how tricky they can be at times. How occasionally getting the colours to sing can be difficult. You will also know how hard it can be to get really wonderful rich deep blacks from them is. They can have a tendency to ‘flatten’ our work and give it a milkiness, to almost suck some of the life out of it if we don’t know what we are doing. Even if we do know what we are doing with our printing, with many images getting the colour and contrast right sometimes is just impossible.

If this has been your experience, I would urge you to try some Cotton Etching 305. I continue to be amazed at how easy it is to print on. I am achieving blacks I have never been able to render on a matt paper before. The colours in my images really sing out like never before. Even with the generic profiles from the Fotospeed website you should get good results. If you use their free customers profile service this will get even better as your colour gamut will widen and the performance of the paper will increase. You may feel I am just over-hyping the paper because the box has my name on it. If so, I would urge you to take a look at THIS REVIEW in Photography News. (quick quote – “The paper’s all-round ability to handle such a wide range of subject matter, contrast range and different degrees of saturation and so capably was a nice surprise. Some textured fine art finishes are less good with rich images with deep blacks, but no such shortcomings here. Apologies if this is all rather gushy, but honestly there wasn’t a print that I was unhappy with so I had little to have a moan at.”)

As for handling of the paper, a couple of tips I can pass on. Firstly, store the boxes flat. This prevents curling on the leading edge which can cause ink to catch and mark the paper. I also use a ‘rocket blower’ to blow over the print surface of the paper to make sure there are no cotton fibres adhering. It is very frustrating to hold up your print to see these drop away leaving a small unprinted area beneath them. It is good to allow the print to cure for at least a few minutes or longer before any extensive handling after printing. Check the colours and contrast over by a window, preferably with bright overcast daylight, rather than side by side at your computer monitor. This is a better test for how beautiful your print is and how it will look when displayed in real life.

I hope you enjoy trying Cotton Etching 305. I now use it for almost every print I make. Valda Bailey and I also use it for virtually all the prints we make for clients in our bespoke printing service for photographers and artists who don’t have their own printer, or who want prints larger than their printer is capable of. (full details of our service HERE).

To help you if you would like to try it out, or if you already love it and would like to stock up, the very nice people at Fotospeed have given me a 15% discount code to pass on to you. PLEASE NOTE, this code is only valid for 30 days from Tuesday 24th July 2018 and it should apply not just to Cotton Etching 305 but to all their papers (but why would you want anything other than Cotton Etching now??). Just put your paper in your basket and apply the code on checkout. The discount will only be applied right at the end. DISCOUNT CODE – Doug15NL – I do hope you enjoy using the paper as much as I do. It has changed my printing forever.

And who knows, maybe this year is Newcastle’s year? Howay the lads!

Aurora Hunting in Norway, Trip Report, Day Two

aurora hunting day 2

Last night Tony and I took it in shifts to keep a watch on the skies and the aurora reports but sadly the auroral activity was extremely low and there was nothing to be seen here despite broken cloud. At least the group had a long nights unbroken sleep to get over jet lag.

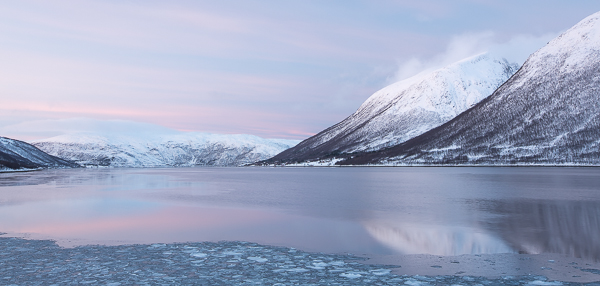
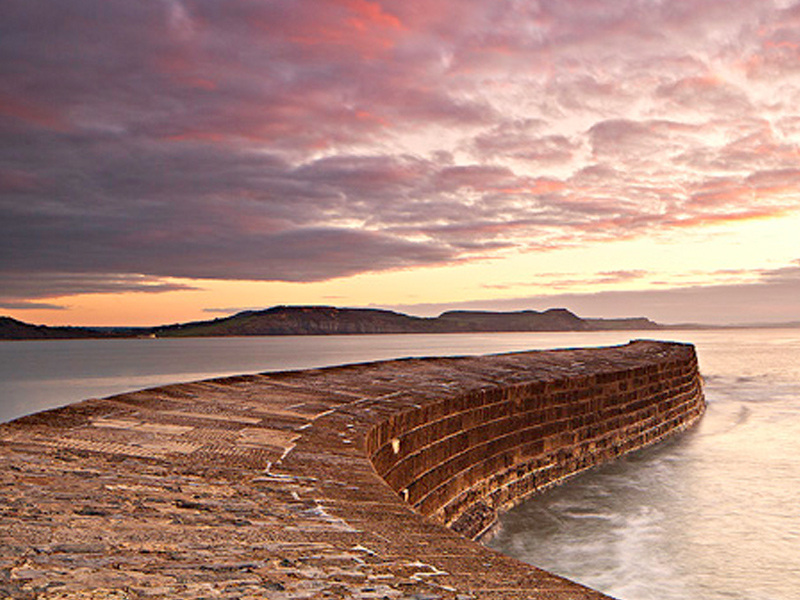
We headed out after breakfast into great soft pink light (the image above was one I managed to grab from one of the mornings locations). The temperatures here were below freezing all day and are currently around minus 10 a few miles inland. Here on the coast they are a little higher at around minus 2 to 4 but the wind is rising so it feels much colder. No snow has fallen after yesterdays blizzards.

The group were getting used to working in such cold conditions. You soon learn not to let snow get onto your gear. For example, I dropped a body cap into the snow. It would have been crazy to put this on to the body of my camera. The snow melts in the bag then when the camera gets cold the snow then re-freezes causing damage or sticking the cap into place. One member of the group had her tripod head accidentally dropped in the snow. This quickly froze the ball head, which we had to defrost on location.

Keeping yourself warm is key too. As hands get cold it quickly becomes impossible to operate the camera, so, even though it slows down picture making, it is important to wear gloves (only removing them when necessary and putting them back on again as quickly as possible). Hats, gloves and warm coats are all very necessary. Decent boots here are very important. Not only do they need good grip for walking on compacted snow and ice but they also need to have good thermal barriers in the soles to help keep the feet warm when standing by the tripod for long periods. I am wearing North Face Chilkats and they are performing perfectly.

Fuji X-Pro 1, Handheld, 35mm f2 lens, ISO3200, f14, 1/17 sec

At these temperatures the cameras are working well. Batteries do drain more quickly but it is not so cold that this is becoming a real issue at this stage. It is also not so cold yet that we have to put our cameras in poly bags when returning them to the vans to stop condensation forming and refreezing. This becomes an issue when the temperature gets lower – closer to minus 20. Then it is vital to bag and seal the camera body and lenses in sealed poly bags when moving from outside into the van or a building. This helps stop condensation forming. The condensation is not too much of a problem until you take the gear back into the cold when it instantly re-freezes. This kills cameras and when on the front of lens elements will need to be scrapped off, much like scrapping ice off of a car windscreen. Not something you want to be doing with your beloved pro-lenses.

For those interested in how the Fuji X-Pro 1 is performing I have a few things to mention. It is interesting. I am finding the Canon 5D mk3 easier to use with gloves on and some of the scenes are so stunning I am feeling the need to use the bigger sensor. I have noticed the ‘function’ button gets a bit sticky in the cold when it drops very low (I have the button programmed to quickly change the ISO). I haven’t been using it for long periods so I can’t say battery performance has seen a noticeable drop in performance. The image quality continues to be superb.

As we haven’t seen the aurora yet, I can report on how it performs being pushed to capture that!

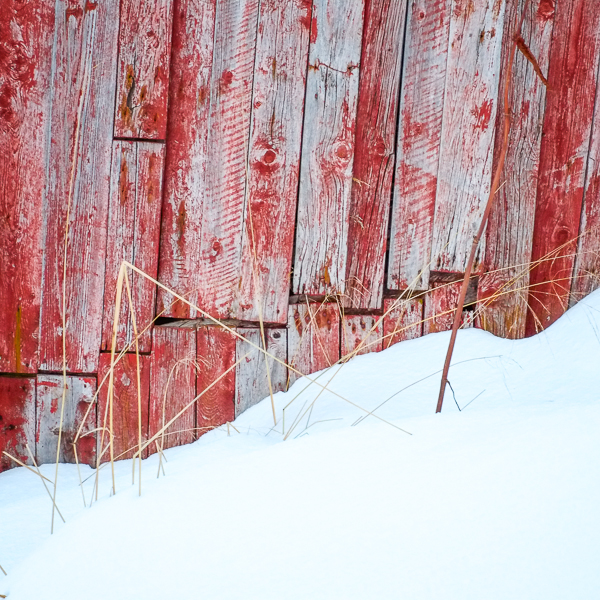
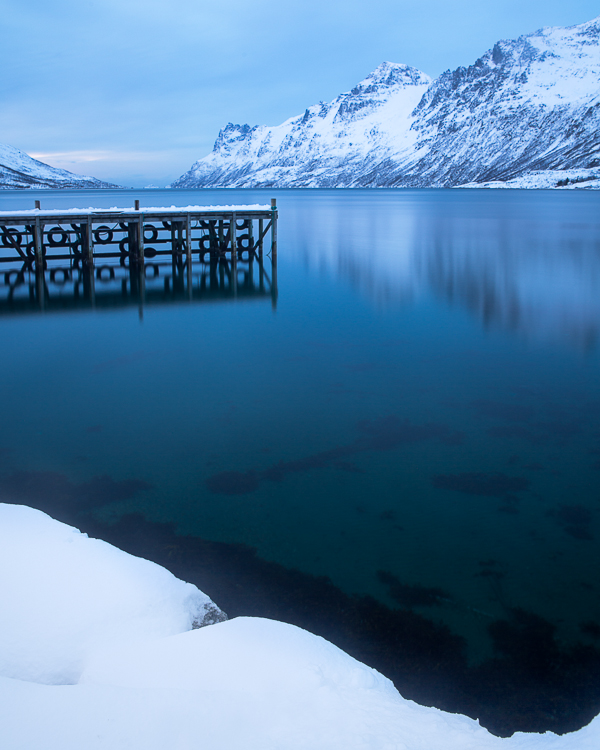
We covered three locations today. The first was an inland fjord (you can see an image from here at the top of this post). Ice was forming at the edge of the fjord and the pink light in the sky was beautifully subtle. From here we moved to a small frozen lake with a range of jagged mountains behind. The group worked on capturing the snow, ice, small silver birch tree with some stunning Alpen glow on the mountains behind. Our final location was another fjord, with a great jetty to use as foreground with rugged mountains and delicious silvery blue light. Great for a lengthened exposure just to flatten the water a little. My image is shown below. Once we had finished here (which included shooting a lovely fisherman’s hut full of textures and detail) we dived into a coffee shop for some well earned Lattes and chocolate brownies (well, its not all work on these trips, you know!).

Back at the hotel we are now resting in our rooms prior to our evening meal. On an aurora trip its important to use the afternoon darkness to sleep in case we spend the night out shooting the skies. Over the meal we will consult the space weather, cloud cover, and auroral activity reports to see if everything might come together in our favour. Who knows what the night holds. (23:30 update – sadly the cloud has rolled in and although the charts show a little auroral activity it is impossible to see it. Even with no activity we had planned to go out and shoot star trails but with heavy clouds, a rising and biting wind with heavy wind chill this was just pointless, so it is back to bed. There is always tomorrow).

A new era at Doug Chinnery Photography

New Era

Things never seem to stay the same, do they? Look at Mars Bars – they are way smaller than they were when we were kids. Its no different in business. To succeed they need to change and adapt. So its time for change here with my photography business.

Since going full time as a professional photographer in 2011 my business has grown and developed much quicker than I anticipated. As many one person businesses find, the work load can become overwhelming and as a result customer service can suffer. My business background is in sales and marketing management and so I know how important it is to give excellent customer service. I have been having to spend increasing amounts of my time at my desk processing paperwork and answering customer questions which means less time doing what I love, which is being creative. I also have loads of ideas about projects that I want to launch, but time is making this impossible. There are also family issues with being a professional outdoor photographer and workshop leader. It is inevitable that you have to spend quite a bit of time away from home. I love being out in the beautiful places in the UK but I would enjoy it a whole lot more if my wife (and Stan, our dog) could be with me occasionally.

Until now, my long suffering and eternally supportive wife, Elizabeth, has worked part time every day as an administrator in the NHS meaning she has to stay home while I go off on various expeditions. However, this week, she handed her notice in at work in order to join me in the business. This 100% growth in staff has a lot of consequences. It will mean when you contact us, initially your enquiry will be handled by Elizabeth. She is an excellent administrator, well organised and efficient so hopefully you will see a faster response to emails. Any photography related questions she will route to me to handle. It also means I will be running more and diverse workshops as I will be freed from much of the mundane business management. You may get to meet Elizabeth (and Stan) on occasional workshops if she comes with me (and she is promising to make her world famous cup cakes and tea in the camper while we go off shooting too, so we will have refreshments on our return). I will also be free to write more blog posts and articles, to increase the amount of personal photography I do and I will have more openings in my diary for one to ones etc.

This is a big change for us. It is a leap of faith to give up a secure job and source of income, but we feel that to look after our customers in the way we want and to develop the business it is an essential progressive move. So, from mid-September onwards you will find Elizabeth on hand to help you in any way she can and I am here too, to help answer your technical and location questions. It also means that, a la David & Wendy Noton, she may well appear in more of my images as the ‘lone figure in the landscape’ (probably with a blurred dog running around her, too).


My wife, Elizabeth

New Digital Photography Workshops for Winter/Spring 2012

digital workshop

Here is the new winter/spring 2012 workshop schedule for my digital photography workshops.

I am introducing a range of new workshops and locations for 2012. You will also see I have teamed up with two more very talented photographers as co-leaders on some special locations. I will be posting full details of these workshops on my website in a few days time and soon you will be able to book and pay online via PayPal. Direct booking via email will still be available.

As a special offer for the new season I am offering the first ten who book and pay their deposits a 10% discount off of the cost of a workshop in the schedule. This does not apply to Capture-to-Computer workshops but will apply to one-to-ones. (just four reduced places now remaining)

If your family or friends are struggling to buy the perfect gift for you, why not suggest they buy you one of my gift vouchers. They can select any value they wish from £10 upwards and it can be redeemed against any workshop, one-to-one or Capture-to-Computer workshop of your choice. If the value of the vooucher exceeds your chosen workshop I will refund the difference or it can be credited towards another workshop. If the workshop exceeds the value of the voucher you can use it in part payment. I even send you a blank greetings card with the voucher with one of my images on for you to present the gift to a loved one.

JANUARY

6th & 7th – ‘Coast & Castles’ Northumberland, with Antony Spencer (now a Light & Land tour leader). Two days photographing the spectacular coast of Northumberland so beloved of photographers like Joe Cornish, including three castle locations. £149 per day or £125 per day if booking both days. Includes breakfast. Does not include accomodation.

13th – Capture-to-Computer’, Yorkshire Coast, Yorkshire Limited to two people & includes breakfast. £149 per person

16th – Black & White Landscapes, Peak District. Includes processing in Silver EfEx Pro & Photoshop. Includes breakfast. £70 per person

22nd – Beginners introduction to your camera, Clumber Park, Nottinghamshire. Three hours approx. Any camera no matter how basic. £35 per person

23rd – Complex Compositions – Bole HIll Quarry, Peak District. Includes breakfast. £70 per person

30th – Peak District (New Locations) includes breakfast. £70 per person

FEBRUARY

11th – Lakeland Landscapes. A day spent photographing classic lakeland locations. Includes breakfast. £70 per person.

18th – Northumberland. A day photographing the finest coastal locations in Northumberland. Includes breakfast. £70 per person.

24th – Capture-to-Computer, Somerset coast. Limited to two people and includes breakfast. £149 per person

25th – Black & White Photography, including long exposures, with co-leader & mono specialist, Paul Wheeler. Weston-Super-Mare. Inlcudes breakfast & ‘how-to’ pdf’s. £99 per person.

29th – Peak District Landscapes, Half day, including refreshments. £45 per person.

MARCH

3rd – North East Coast – Nature & Industry – Saltburn & Paddys Hole. £70 per person including breakfast

5th – Peak Woodlands, Bole Hill Quarry. Includes breakfast. £70 per person

9th – Capture-to-Computer – Yorkshire Coast for Seascapes & Long Exposures. Includes breakfast. Limited to two people. £149 per person

10th – Long Exposures, Yorkshire Coast with long exposure specialist, Noel Clegg. Includes breakfast. £99 per person.

17th – Capture-to-Computer, Spurn Point, Yorkshire. Limited to two people, includes breakfast. £149 per person.

18th – Beginners introduction to your camera, Clumber Park, Nottinghamshire. Three hours approx. Any camera no matter how basic. £35 per person

APRIL

2nd – Peak District Landscapes, with Antony Spencer. £125 per person, includes breakfast.

3rd – Peak District Landscapes, with Antony Spencer. £125 per person, includes breakfast.

10th – Private macro workshop for members of the Nottingham Photographic Society.

13th – Bole Hill Quarry, Peak District woodland landscapes, half day, including refreshments. £45 per person

22nd – Peak Landscapes, half day to sunset, including refreshments. £45 per person

28th – Bluebells in Ashridge Forest, Buckinghamshire with co-leader Tim Smalley. Includes breakfast. £99 per person.

I look forward to seeing you on a workshop soon

Best wishes

Doug

Some recent testimonials from customers;

“Just wanted to say a huge thank you for a fantastic weekend!”

“I thought all the venues were spot on and enjoyed the fact that both of you brought so many different skills and knowledge to the event.”

“Since I started doing “serious” photography about 7 or 8 years ago I’ve been on at least half-a-dozen workshops or courses. I gained more from this one day than I have from all the others put together.”

How do I dodge and burn in Photoshop?

dodge burn


Dodging and burning is a technique which harks back to the days of film and darkroom developing. In the darkroom film users employ strange techniques to darken areas of their prints and lighten others to improve the look of the image. For those of us working digitally it falls to Photoshop to act as our digital darkroom to achieve the same effect.

‘Dodging’ refers to the lightening process while ‘Burning’ is the darkening of areas in the image. I remember which is which by thinking that burning an object blackens it, so burning = darkening. The goal is to introduce contrast into the image in such a way that the impression is of light falling on the subject in very controlled ways, highlighting the beauty or key aspects of the image. In my photograph above (and I have selected an extreme example rather than a subtle one) you will see I have burned the tractor tracks, areas of the clouds and areas of the surface of the wheat. To contrast with this I have dodged areas of cloud and highlighted the light falling on the barn with dodging. I was aiming for a dramatic image.

The biggest tip I can give you with this process is to do it very gradually, to be patient. Most people I see using this technique want to see dramatic effects too quickly and end up spoiling their image by creating a patchy look. The process is simple but it takes time and the vision to visualise the final result before you start. It is not good to approach it in a random way and hope the end result is going to be effective.

Now to the process. Firstly convert your image to black and white using your preferred method, either in Photoshop or a plugin such as Silver EfEx Pro 2. At the conversion stage, beware making the image too contrasty as you are going to tune the contrast carefully using the dodge and burn tools. Open the mono image in Photoshop.

Duplicate the background layer by selecting it in the layers panel and pressing cmd+J (windows = ctrl+J). Always do this and dodge and burn this new layer so that if you make a mistake you can always delete it an start again without spoiling the base layer. The layers panel should now look like the image below.


I decide whether to start with dodging or burning depending on the image but in reality it usually doesn’t matter which you start with as you will be alternating between the two. The image below shows the flyout toolbox from the main toolbox which shows the two tools.


I am going to select the burn tool first. The icon looks like a clenched fist. (don’t ask me why). The next step is to set the burn brush up correctly. This is done on the top toolbar as in the image below.

You will see I have selected a very soft brush and set the hardness to zero. This really feathers the effect and helps prevent hard edges to the burned areas. In the range drop down box you can see I have selected ‘shadows’. This is something important to understand when dodging and burning. The tones you select in this box tell the brush the only tones to affect. So if shadows is selected when you brush over pixels in the image the brush will only darken shadow, the darkest, pixels. It won’t touch mid-tones or highlights. Similarly, if you select mid-tones then only they will be darkened. Shadows and highlights will be unaffected. The same applies to the dodge brush. In most cases the other thing to remember is do not burn highlights and do not dodge shadows. If you do it usually gives the pixels a ‘damaged’ look because the change is too dramatic. Stick to burning shadows and mid-tones and dodging mid-tones and highlights.

The next vital thing to note in the above screenshot is the exposure level I have selected. In the shot above it is at 3%. This is where most people go wrong, they set the percentage too high. I work between 1 and 5%. I never go higher than 5% and rarely use that. I am usual working between 1 and 3%. When you use this setting the effect builds up very slowly and delicately giving you control. If you go higher you loose control and damage the image.

Now size the brush using the [ ] keys as usual and start brushing over the image. Use large flowing strokes. Avoid at all costs scrubbing away wit the brush at small areas as this soon creates a blotchy look. Keep switching between dodging and burning and build both together gradually. Keep changing between working on the shadows, mid-tones and highlights. Keep turning the layer on and off by clicking the ‘eye-con’ on the layers pane so you can see how far you are going and how far you have come. Work towards your pre-visualised goal. Take your time and don’t overdo it!

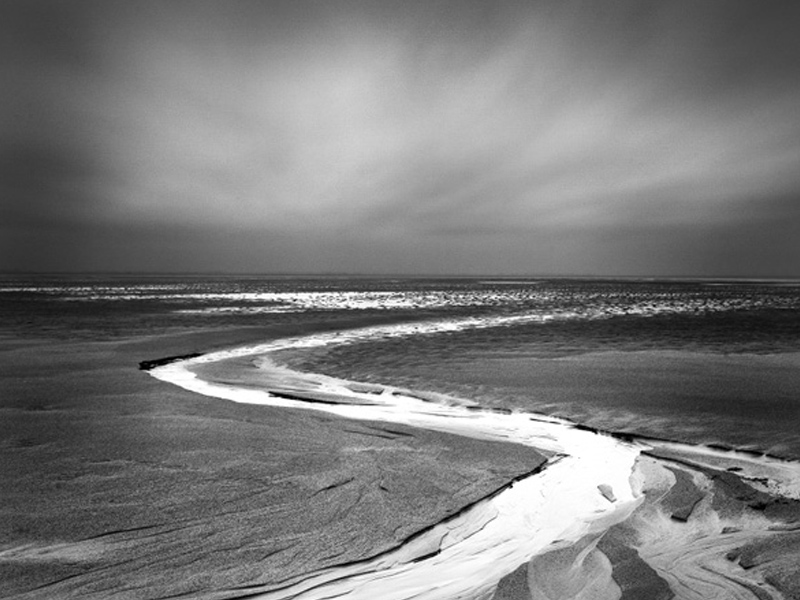
Here is my image. The first screen shot shows the basic mono conversion. The second it the dodged and burned final image. I have created a vignette to draw the eye to the water flow. I have brightened the water to give sparkle and punch and added a bit more drama to the sky.

Most mono film photographers would not consider printing an image without some dodging and burning to enhance it. Read what Ansel Adams wrote about this process as part of his print making to see how important he felt it was. He was a master of the technique. I hope you enjoy practising the effect and feel sure your mono images will improve dramatically as a result.

To learn much more about dodging and burning and all the other aspects of mono image making, why not consider coming on one of my specialist mono workshops where we work on thinking in mono, composing for mono and then processing to make mono images full of drama, light and character. You will find full details on the workshops pages of my website.