(New information added September 2017 – since writing the post below I have been using Backblaze for about a year now as my cloud back up provider. Zoolz became just too slow and was never fully backing me up – I always had files in my queue, especially after photographic trips, which defeated the object of a cloud back up. I NO LONGER RECOMMEND ZOOLZ. So after doing more extensive research I opted for Backblaze and have found them to be excellent. The cost is about £3.85 UK Pounds a month – less than $5 US Dollars. This gives me unlimited storage. I have just under two terabytes stored with them now. It is always up to date and is very fast. I have had to retrieve a couple of individual files from them and the system works reliably and well. I also like it that they allow you to back up unlimited external USB hard drives. Many other companies do not. If you would like to try their service, please sign up using THIS LINK as it will give you (and me) an extra free month of service from Backblaze at no extra cost to you on top of the free period they offer new customers to test out the service. Thank you).
Can I start by just apologising for this being such a long post, but I wanted it to cover the subject in depth and, hopefully, answer everyones questions. (and I have added some cloud type pictures, just to keep it interesting).
With the advent of fast broadband internet access the possibility of uploading large amounts of data to ‘The Cloud’ has finally become realistic for many. (If you live in a rural area, struggling with primeval broadband speeds, I feel your pain. I have only had a fibre optic connection for the last 18 months. Prior to that I was with you in the slow lane, so I know how it feels).
Firstly, what is ‘The Cloud’? Simply put it is a term used to describe data storage on the Internet. Our files aren’t floating in space somewhere, they are actually on hard drives in huge data centres in different parts of the World. These data centres often, for reasons of data security, copy all of the files to more than one location, usually in different countries and continents. If one data centre gets destroyed by an earthquake or invading martians at least your files and photos will be safely stored somewhere else on the planet for you. That is, until the martians land there too.
The bigger and more reliable suppliers of cloud based storage usually have the data in at least three nuclear bomb proof storage centres, each on a separate continent. The data is encrypted using very strong encryption methods and protected behind the most secure firewalls available. These guys are very serious about security. We tend to be paranoid about our bank details, but these data centres often hold the accounts of the largest companies on earth as well as the data of the worlds governments. Frankly, their data security is more important than ours (to them, at least) and so we benefit from security systems designed to protect them.
There are two forms cloud storage can take that I will look at it in this article. Firstly, the type provided by companies that have quickly become well known such as Dropbox and Copy. (Others include GoogleDrive, SkyDrive (incidentally, Microsofts Skydrive have just increased their free offering to 15GB to put pressure on the market leader, Dropbox – this makes them well worthy of consideration for a basic free service, and there are many more). These provide some free tempter storage for us, usually in the region of 2GB. This allows us to store a certain amount of data with them that we want to access from various places. They all provide web browser access to your files and in addition have apps for smart phones and tablets of all flavours. These allow access to your files from these devices too, wherever you have internet access.
I use and recommend people use Copy as their free Cloud based regular storage service. It works in the same way as Dropbox but instead of the measly 2GB of free space you get from Dropbox, Copy give you 10GB free. If you CLICK THIS LINK to sign up you will also get ANOTHER 5GB FREE, giving a total of 15GB free for life. (and I will get another 5GB free as you have used my link and for that I thank you). With Copy you can have a free app on your smartphone and tablet to access your files. You can also access them via any web browser anywhere in the world and you have an app on your PC or Mac to access them too, so everything is synchronised. I have been using it for a year now and the service has been flawless.
The types of files these services are designed to store are those we want regular access to. There is no charge for uploading or downloading files and there are no data limits for how much you transfer, just your storage limit, from the free amount they give you upwards. Many people find they can survive with just the free amount. Others soon find the service so useful that they want to exceed the free storage amount. Here is where these suppliers make their living. They charge for extra storage in packets of space. For example, £7.99 a month or £79 a year (if paid in advance) will get you 100GB of space on Dropbox.
These services also allow you to share files with friends, family and colleagues. This is very useful for files which are too large to email and where you want to share a file or files with a whole group of people. It can also be used to move files between your computers. Users soon find the service indispensable.
The main downside comes with large volumes of data (and for us as photographers, that means our images). For us, 100GB is nothing. In the days when many photographers happily fill 32GB memory cards in a day in their cameras and measure their photo libraries in terabytes it soon becomes prohibitively expensive to back up your entire library to these services. (an alternative to the Cloud for those who don’t want to pay or whose broadband connection is just too slow, is to rotate back up drives to an off site location. Some take one to work with them and leave it there in a safe place and bring back the previous drive to update. Some do the same, rotating drives at the home of a family member or friend. Always the issue with this is remembering to do it. It is surprising how easy it is for weeks or months to go by before we get around to swapping drives. If this happens it makes the system almost, but not quite, pointless).
This is where deep freeze storage comes in. An example of this style of cloud back up service is Amazons Glacier. This service is designed primarily for business users and is difficult for home users to work with, but more on that later.
Amazon have set up Glacier for individuals but mainly for companies who have vast amounts of data. Terabytes are shrugged off by Amazon, Glacier can handle Petabytes. Why ‘deep freeze’? This is because the idea behind this style of service is to upload files that we may never need to access again. We are putting them into deep freeze. This is in preparation for disaster recovery, for the day our house burns down and our computer and all our back up drives get destroyed. We can then pull back all of our data and restore it.
The price for this service is incredibly low. In fact it is hard to imagine how it could get any lower. The current fee is 1 US Cent per GB per month. So you can store 100GB for a year for $12, about £8. Compare that to Dropboxes £79!!!!!!! (Please note, many users are happy with other services, such as Backblaze and Crashplan which offer slightly different pricing structures and which may suit you better – I suggest you also check them out. I haven’t used them, so can’t comment based on experience. I have heard both good and bad about both, but then that is true of just about every supplier of any product or service!)
How do they get the price so low? A number of ways;
Firstly, As you upload the files they go into a queue at Glacier and can take up to five hours to be put into place on their servers. By controlling the flow of data to suit demand, Glacier can control costs.
Secondly, you pay to restore data back to your computer. You are allowed to restore about 20GB per month for free but beyond this you pay to restore data. This emphasises that the service is for cold storage, not the shuffling back and forth of files that Dropbox is used for. Again, by placing this restriction on its clients the price can be kept very low.
Next, it is not user friendly. It is designed to be used by IT departments with techy types who understand this stuff. I managed to work it out using various help files and web sites, but it took some research. I will explain the method later in the article.
Finally, you can’t ‘see’ your files. You don’t have a browser like File Manager or Finder to look at your folder structure and examine your files. Its all more obscure than that. This can be unnerving. Are my files really there?
The process for uploading to Glacier is a pain, frankly. You cannot upload data in packets of more than 4GB. You also need to use a piece of client software to handle the uploading process. I used Arq Backup on my Mac which is shareware and available to buy for a few dollars. This has to be configured to allow it access to your space on Glacier.
Then, to save space on Glacier (even though the storage costs are so low I still wanted to optimise the space – remember you will be paying for it for every month forever, even at one cent per gigabyte per month, over 20, 30 or 40 years with a growing data pile this will add up) I zipped up my folders. This has to be done manually and I grouped the folders into roughly 4GB zip files.
I then directed Arq backup to copy these to Glacier, which it did beautifully. With my BT Infinity 2 broadband connection and an ‘up to 20mb’ (and often faster than that) upload speed, I could upload 80GB overnight. The slow and time consuming part was manually and laboriously zipping folders into 4GB packets.
It was such a painful process that I got bored and was falling way behind schedule. Vital files that ought to have been copied to Glacier sat on my drives waiting to be prepared for Arq. It was one of those jobs that just kept being pushed down my to do list in favour of other ‘more important’ jobs. But with backing up, in reality, this is unacceptable.
This is where a company called Zoolz comes to the rescue. Zoolz are part of Genie, a large and well established organisation, and are based in the UK. They have a Cloud based back up system which uses Amazon Glacier to store our files. The great thing about Zoolz is they have realised how difficult Glacier is for most people to use and so they have designed their own client software for us.
This software allows us to simply click on folders on our hard drives and Zoolz backs them up to Glacier for us. No zipping, no grouping into 4gb packets (you can even upload files that are individually bigger than 4GB). The software also allows you to see all of your folders on Glacier just as if they were on your computer and, with image files (including raw files) you can see a thumbnail of the image which is so useful if you have accidentally deleted a file or files and need to selectively restore them. It is simplicity itself to use it and the client is available now for both Windows and Mac users.
They have a number of pricing plans for home users (and a range of products for business users too) so you can choose which is ideal for your needs and upgrade as your needs change.
Plan One – 100GB for £9.99 per year (£0.83 a month paid yearly in advance) – 1 user (1 computer and 1 external drive connected to that computer, no backup limitations)
Plan Two – 500GB for £34.99 per year (£2.91 a month paid yearly in advance)- 3 users (3 computers with 3 external/network drives connected to those computers, no backup limitations)
Plan Three – 1TB for £49.99 per year (£4.16 a month paid yearly in advance)- 5 users (3 computers with 3 external/network drives connected to those computers, no backup limitations)
Plan 4 – UNLIMITED DATA for £139.99 per year (£11.66 a month paid yearly in advance) – 5 users (UNLIMITED external/network drives connected to those computers, no backup limitations)
These prices are extremely competitive in the current market, especially if you factor in the time cost of manually preparing your files for Glacier by dealing with Amazon direct, along with the ability to view your files etc. I will still be very happy to pay the unlimited option price when my subscription runs out.
So what is Zoolz like to use in practise? As I have mentioned, the selecting of folders and files to back up is simplicity itself. Just click the ‘Data Selection’ option, click ‘select folders’ and then click on the folder or folders on your hard drive you want Zoolz to copy to Glacier for you.
As a word of caution. I found the client works better if you select One main folder at a time and allow that to be backed up before selecting another. When I first started I selected my entire pictures folder, my music, my documents – the whole cahoona! That seems to slow things down somewhat! I soon found it better to, say select, the 2013 folder in Pictures and let Zoolz plough through backing up that years pictures before feeding it 2012 and so on.
Bearing in mind I could upload about 80GB a night to Glacier using Arq backup directly, Zoolz is massively slower. Zoolz say the don’t throttle the data flow, but whatever is happening, it is much slower. I rarely managed to get more than 20 or 25GB uploaded in any 24 hour period, let alone overnight.
I am using the Mac client which is actually in late beta so it may run a bit slower and be a bit buggier than the Windows version, so please allow for this (as of this writing in July 2014).
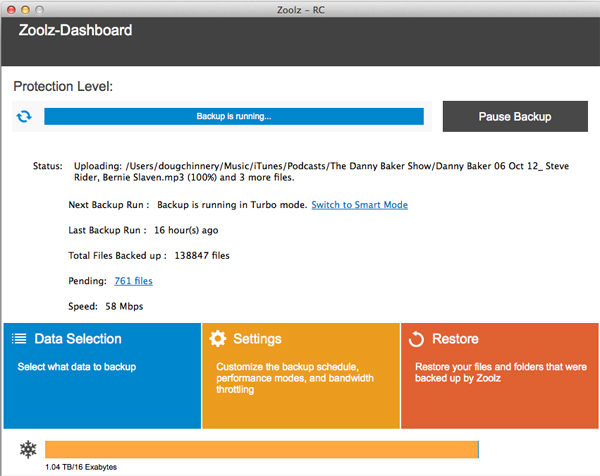
The issue is both that data doesn’t flow at the maximum upload speed of my broadband connection and the software stalls frequently. You will see that it seems to go through a process of ‘analysing’ and then ‘preparing’ each file before uploading it. This runs along fine but for some unknown reason the client will get stuck, usually when ‘analysing’ a particular file when it gets to 100% of that process.
This is not to bad if you are working at your desk and notice it. You can close the client, restart it and off it goes again quite happily. It is much more frustrating if it happens five minutes after you go to bed and when it could have run all night you find in the morning it has only uploaded a couple of files and then been stuck all night.
An amusing ‘feature’ is the client software tells you the upload speed. I was taken in by this on the first day. It will show a figure of say, 12mbps. Out comes the calculator and I worked out my entire backup should take about nine days. None too shabby. I posted this on Twitter and some wise IT types howled with derision at my foolishness. I soon found out why. Firstly, I soon found this speed to be fictitious. Also the speed shown only ever gets faster. Mine now shows 58mbps!!!!! I think what is happening is that the client logs the fastest speed it ever attains, even for a millisecond and proudly proclaims it to you. Don’t be fooled. It is a lie.
I soon realised that even in ‘Turbo Mode’ (more howls of derision) the Zoolz client is only ever using about a third of my upload bandwidth AT BEST, even thought he software warms you that in ‘Turbo Mode’ other upload processes on your computer will be affected as Zoolz will use all available bandwidth. Not on my system it doesn’t.
The alternative upload mode is ‘Smart Mode’. (Still hearing those howls). This is supposed to flex the upload speed depending on what else you are doing on the computer and uploading so that it doesn’t slow other things down. It makes no difference whatsoever if you use this mode, in fact, I think it is even slower.
I have just finished my backup to the Cloud this very day! It ended up being a bit smaller than I anticipated at about 1.1TB. This has taken me about nine weeks. I have had the computer on 24 hours a day and have run it as flat out as I can. Whenever I am at home I pop in to my studio to check progress and make sure it hasn’t stalled. If it has, I restart the software. I couldn’t have done the uploading any faster without sitting at my desk 24 hours a day. It will feel strange to just have it scheduled to update daily now and for me not to have to worry about it or nurse it along.
Restarting the software becomes a bit of a bugbear as time goes on too. This is because the software is designed, each time it starts to check every folder for changes that it has been told to back up. Early on this only takes a minute as you have only selected a few folders, but as the data selected increases so does the time it takes to check it all. At 1 TB it now takes perhaps 15 minutes or more. So every time the software stalls and I have to restart it I then have to wait around, or remember to go back because it doesn’t then commence the back up automatically, it sits waiting for you to tell it to proceed.
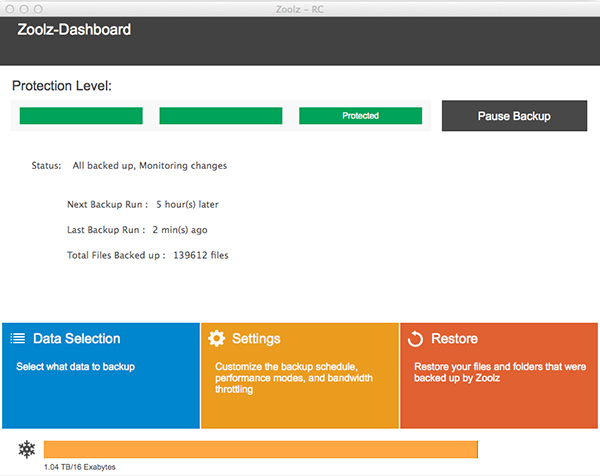
This all probably sounds like a nightmare to you, and it is a nuisance, but it has become part of my life over the last two months. The end is in sight for me. I know once it is done then the software will just monitor the folders I have told it to automatically and once every two hours it will just back up all the new or changed files which will be quick and painless. The best thing is I know I will have as secure a backup regime as it is possible for me to have. My images, which are my business and my livelihood are protected against even the most catastrophic hardware failure or disaster/theft. Barring nuclear armageddon or those pesky martians, I am protected.
So despite the shortcomings of Zoolz right now, I still wholeheartedly recommend them. The pricing is excellent and once uploaded the client software is a dream. You may well have much less data than me (and if you are a Windows user, your upload may be much faster as I am using the beta release of the software) I have heard from some Windows Zoolz users who have uploaded a TB of data in just a couple of days, so my experience shouldn’t be taken as the norm.
If you do decide to try the free trial of Zoolz or to subscribe, please use THIS LINK. If you do, I will receive a small payment (you won’t pay any more). If you prefer it if I don’t receive a payment, simply go to www.zoolz.com. I never recommend products or services I haven’t tried myself and don’t use myself. I am always 100% honest about the good and bad about any products I describe.
If you are still with me at this point, well done for getting this far. You might be wondering what my onsite back up system is. It has changed a little since I last blogged about it, so I will, for the sake of completeness just run through it here.
I have a multilayered approach to backing up. The Cloud back up I have described above I view as my disaster recovery only to be used in a worst case scenario. I hope I will never use it.
The question I ask myself, and I encourage you to ask yourself when designing your back up system is, “how much data am I prepared to lose?” The answer will be the basis for how far you go with your back up system. Some people care nothing for their files and pictures, or seem not to, as the don’t or rarely back up. They don’t seem to grasp that EVERY hard drive will one day fail. Its a mechanical, electrical device and has a working life. It might fail in the next 15 seconds or it might run for another five years. We never know, thats the problem.
Those people who are less than diligent about backing up often ay they don’t care if they happen to lose a load of ‘stuff’. That is right up to the day they do and then they suddenly realise how vital a lot of that stuff is to everyday life and also just what sentimental value lies in many of our images. Personally, I think it is foolish and lazy not to back up, but it is a personal decision.
So, you may be prepared to lose a weeks work, so only back up weekly. If you could lose a months work, back up monthly. Personally, I would hate to lose a days work, so I back up continuously.
The next thing is to make your system as easy to use, both in backing up and in restoring data, as possible. A difficult system to use is likely to be neglected. That is pointless.
I am a Mac user and so my first line of defence is built in to all Macs and is called Time Machine. If you have a Mac and are not using it, I strongly urge you to connect an external drive to your computer and switch it on. It is ridiculously simple to use, is completely automatic and does (usually) a great job. It makes a mirror copy of your hard drive (and any other drives connected to your Mac that you want it to copy to. What I would caution is DONT TRUST IT ALONE. It can fail. Mine has. The disk copy can get corrupted and you need to format the drive and start again. But as a first line of defence it is marvellous and has saved my life a couple of times. I had a new iMac delivered which suffered a total hard drive failure three days after delivery. I had just got all my software loaded and configured. Apple sent me a new iMac, I connected the Time Machine drive and 30 minutes later the new machine was fully set up exactly (and I mean EXACTLY) as the other machine was just minutes before it failed. I don’t have to do a single thing. That saved me the best part of three days work configuring, setting up and loading the new iMac all over again. That converted me to Time Machine. I have also deleted odd files by mistake and Time Machine makes it a doodle to restore these in an instant.
It backs up your system completely – every single byte of data. Then it updates this every hour for a day, then it keeps daily backups for a week and then weekly backups for a month and so on and it keeps doing this until the drive you store it on is full. The it just deletes the very oldest files to make space. My 2TB Time Machine drive will hold about 6 months or so of backups of my system and I can go back to any point in that 6 months and restore a file or files, or reinstate the whole computer to that point.
I am sure there must be similar software available for Windows users (but it would be much better to buy a Mac 🙂
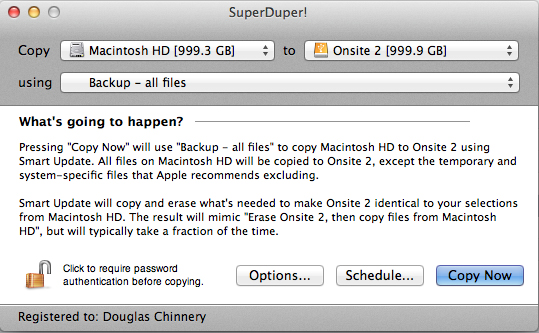
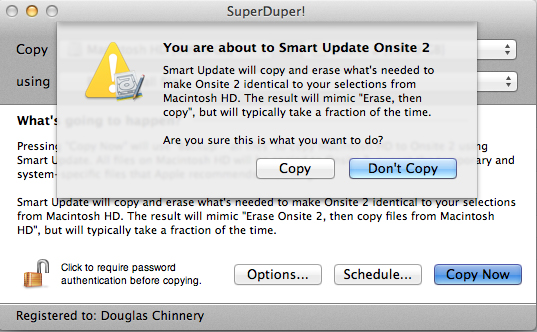
That is my first line of defence. But, as I said, I don’t rely on this. I then use a piece of Mac shareware called Superduper. This costs about $20 or so. It is a superb piece of software because it simple clones one drive onto another drive. You can schedule it to do this automatically, or, as I do, you can run it when you want.
I copy my iMac drive and my external drives to other drives using it. This makes a mirror copy so when you look at those drives with Finder it is exactly like looking at the original drive. The files aren’t compressed or put into archives in the way many back up programs do. I like to be able to see all my files like this.
To speed the back ups, Superduper uses ‘Smart Copy’. The first time you copy a drive it takes a few hours depending on the size of the drive. However, future copies take much less time as it only adds files you have added, deletes files you have deleted and updates files you have deleted.
The disadvantage of this is if you have deleted a file by mistake on your main drive and then run the backup before you realise, it will be deleted form the backup too. This is where Time Machine covers me (and Zoolz). I also copy each of my drives to three other drives and I stagger these rather than doing them all at one, so there is a chance I will still have one which has the file I need on it.
Why do I copy each drive three times, especially as I have Zoolz and Time Machine? Well, I am a bit obsessed with backing up. But also, one of the copies is on to small portable drives which I take with me on the road to connect to my laptop. This means I have all my images and files with me when I am away and can work as normal. This also gives me an off site backup when I am away. If something was to happen to the house, a fire, flood or theft then I would be able to get back up and running quickly without having to resort to Zoolz. The other two drives are at home under my desk and I have two just in case one fails. These drives are a bit older and so I am prepared for them failing. It is so easy to just click the backup no button I don’t find it a chore to run the backups. I tend to run them when I am about to leave the computer, to go down for a meal or when I go to bed. then the backup is complete by the time I am finished.
Superduper has another advantage in that it will, if you want, make the backup of your main drive ‘bootable’. This means if your main hard drive fails you can boot your computer from the back up, keep working until you get a new drive in the computer and restore the Time Machine drive. This again is a massive time and hassle saver when things go wrong.
Some ask me why I don’t use a RAID or NAS system. These are very good and have many advantages. Your data is spread over several drives simultaneously. If one drive fails your data is safe and you can swap out the failed drive. Many units allow them to be connected over the internet so you can access your files from anywhere in the world where you have an internet connection. They are also great as home entertainment systems for streaming music and films around the home.
But I do have some issues with them, although here I have to say I am not an IT expert and so my understanding may not be correct. If a drive fails in a RAID system or something like a DROBO, it is great that your data is safe and you can swap out the drive. However, the weakness in the system as I see it is in the next few days. It can take some days depending on the speed of the system and the amount of data involved for the RAID system to rebuild the volumes. During this period your data is very vulnerable. If another drive fails (or if there is a power cut, flood etc) you will probably loose everything. As I understand it, the only really safe way to work with these systems is to have them backed up to another RAID or NAS. Then you are protected.
I think that, perhaps, RAID users tend to view them as a magic and infallible solution and so often neglect other additional back up methods. At a company I worked for I saw the firms RAID based server lose five drives in one day. This was a system that was under a year old and maintained by professional IT people. An extremely rare occurrence but it just shows complacency is foolish. The firm almost collapsed. Its entire financial system, factory planning system, customer database, artworks, quality system etc etc was all lost – everything. If one of the IT guys hadn’t continued to run each night an ancient manual tape back up (which often failed to work) which fortunately worked the night before the RAID failure the company could easily have collapsed. It took a week for the IT department to rebuild the RAID, restore the tape backup (very delicate) and test everything. Another few days and the firm would have been in serious trouble. Believe me, the MD had a second RAID installed immediately to mirror the first and another backup system put in place too. One bitten…
From a personal point of view, as a not very tecchy person, I find them a bit harder to understand and work with. I like the simplicity of cloned drives that I manage myself and that are all independent of each other. I understand that, it is all very simple and it is easy for me to manage. This I like.
So there it is, what must be the longest blog I have ever written. If you are still reading this you deserve a medal! Now I urge you to think through how protected your data is and if you see holes in your system, then get provisions put in place to deal with them. Data is becoming more and more important. Especially for us as photographers, our images are irreplaceable and their value to us tends to grow over time. Most of us can’t afford not to deal with this stuff, so even though all the above seems like a lot of hassle, in fact, now I have it in place it is really easy to manage and it works so simply. And I sleep well at night.
My final word to you. Hard drives. Don’t trust ‘em. Ever.


