Tag: workshop

Seaworks 1998-2013 by Paul Kenny

Seaworks by Paul Kenny

I first became aware of a man, Paul Kenny, several years ago through an article in, I think, Outdoor Photography magazine. I read about a photographer who was visiting, annually, a small stone sheep pen by a beach on the west coast of Scotland. Here he camped for a week or two each year and photographed this sheep pen. The rocks, the lichen, the patterns, shapes and forms. The enclosure had been built no one really knows how many centuries or millennia previously, the rocks used were beautifully round, smooth and encrusted in lichen which grew painfully slowly over generations of mans existence, populating their own spherical worlds, forming continents and islands of life. I had never come across such devotion and application in a photographer before and he really made a deep impression on me.

Creative Photography Webinars with Onlandscape

Creative Photography Webinars

I made three hour long videos for OnLandscape magazine in 2013 and they are now available via YouTube.

I have collected them together here for you to watch (and enjoy?)

Part I – a discussion of my creative/alternative technique images and approach (the echo on Tim’s mike is removed after about a minute)

Part II – A session filmed with me working live in the field showing camera techniques

Part III – The final video where I demonstrate my Adobe Lightroom and Photoshop techniques for processing these types of images

I hope you find these videos useful.

Adventures in Polaroid

Polaroid

Avast, Me Hearties!


As many of you will know, I do like quirky photographs! Among the styles I love is the Polaroid. My dad had one when I was young. Being keen on holding on to his cash, he resented having to pay Boots or Bonusprint to develop his films and so thought Polaroid was the answer. He soon realised the costs were similar, you, in effect, paid up front for the instant development of Polaroids in higher film costs and so once the novelty had worn off the camera rarely came out to play.

Ever since, I have loved the washed out images the Polaroid film produces. There are digital tweaks you can make to imitate the look, but nothing really compares to true Polaroid for that sixties/seventies feel. Like many, I was so disappointed when, in 2008, Polaroid announced they would no longer be making the film – again economics took priority over art. However, a small group of dedicated European Polaroid lovers put their faith in the medium and with great foresight bought the old Polaroid film making machinery that was being sold off. They had no idea how to make the film. No idea of the chemicals involved. Oh, and they had no money.

Kippers by Post

Thus started the ‘Impossible Project”. The name came from the fact that whet they were trying to achieve was deemed ‘impossible’ by everyone they asked but this just seemed to make them all the more determined to succeed. To raise money they started a website along the crowd-funding principle. They asked Polaroid lovers world-wide to commit to buy a certain amount of film if they could make it. Once they had enough pledges they called the money in, bought a load of chemicals and put on the rubber gloves. I am sure it would make a great movie, because, against all the odds they succeeded in making  batch of film. (you can read the full story here). From there, the team have gone from strength to strength and employ 25 people, many of whom originally worked for Polaroid.

Fishing Boat - Whitby Harbour

A few words about the film itself. They make a colour and a mono film. Both are, shall we say, very unpredictable. VERY unpredictable. But it is this unpredictability which makes them so good in my eyes. The film has to be shielded from light in the first few seconds after shooting and can take half an hour to develop (best done in one of the film boxes). In fact, it can continue to develop for the next 24 hours. Sometimes the chemicals don’t mix correctly. The exposure can be all over the place. Flare and other aberrations abound. I am currently using some of the early close to prototype film which they sell at a reduced price and so am experiencing extreme quirkiness. The new generation films they have released this year apparently show greater consistency.

I bought an old Polaroid camera from eBay and adore it. The film packs are expensive (think, about £1.50 an image once postage is factored in) but the packs are well made, quite complex and contain a battery to power the camera and flash, so there is a lot going on. You get eight shots per pack and it is best kept in the fridge (DO NOT freeze the film). The camera is totally retro and I feel like a seventies Dad walking about with it. I used it in Whitby earlier this week sand people were stopping and staring 🙂 It got a great reaction. The Impossible Project have plans on the drawing board to make a new Polaroid camera, so exciting times lie ahead. The project has been such a success that they are opening Polaroid shops in capitals around the world to service customers. I got my film, from Germany, via UPS in a couple of days.

Camera meets Camera

Today I put a pack of the Silver Shade mono film in the camera and am blown away by the results. The tones are beautiful. I can’t wait to use the new generation of mono film they have released. I have one pack but am going to use up the old batch film first. new products in the pipeline will please large format film users as they are working on 10 x 8 and 4 x 5 versions of the film which was used by many large format camera users to test exposures and for quick client approval shots. The possibilities are endless.

On My Desk


I am keen to get out with the camera as soon as possible to continue experimenting. Ideas I have in mind are a trip on a train with just the Polaroid to see what it brings. Also, I would like to try some urban decay as well as ‘seaside’ photography. If you decide to give it a go, be warned, it is addictive and could be expensive but the results can be wonderful. Even the ‘spoiled’ frames can become happy accidents that in their own way are works of art. I enjoy the lack of precision and unpredictability of the Polaroid. I love the retro feel of the images and the tactile nature of holding a Polaroid in your hand to admire it. I already have some which I will frame for my walls. No doubt you will be seeing more of them from me in the near future.

If you fancy dabbling in film photography to see if it is for you, why not consider joining Jonathan Stead and myself on a film based workshop in September. We provide the camera (if you need one), a roll of film and show you how to develop the film cheaply and easily at home (without any need for a darkroom). You can get full details here — Go on, come and try some ‘real’ photography and enjoy the pleasures of analogue.

Me, myself and I

Tips for photographing in the rain

Rain Tips

Wet Day in the Forest

I am sitting in my studio with rain lashing down. April showers is one thing, but this is ridiculous! I thought it might be an idea to post my top tips on photographing in the rain.

Many photographers simply dismiss making images in wet weather out of hand, but in doing so I think they are missing out on some wonderful and different images. Granted, if  the rain is really driving and especially if it is blowing directly onto the lens, it is pretty much impossible to work outside. It is then I look for an indoor location or head home, fire up the iMac and do some image processing with some good music on and a nice hot cup of tea to enjoy.

However, we often get gentler rain or it is blowing in from behind us so the lens stays clear. It could be the rain is coming down vertically or is intermittent. In those circumstances it can be ‘game on’.

The first thing is to protect our gear. Whether we shoot on film or digitally, water and cameras are not a good mix. If our body and lenses are from a pro range, like the Canon 1ds and ‘L’ lenses, they are heavily sealed against water and dust and can perform in extreme conditions, but mid range bodies and lenses down, while having some weather sealing can soon start to be affected (often terminally) by water and dust. I have tried all kinds of camera protectors and to be honest, most are just impractical. At one end there are over designed complex polythene systems with arm holes and gussets, seals, elastic and goodness knows what that take a couple of days and a lot of patience to fit and are then so bulky and restrictive in their desire to totally protect the kit that operating the camera with them fitted is like trying to thread a needle with our hands submerged in a bucket of jelly.

There are other simpler protectors which are so flimsy they are worse than useless.

I do carry a couple of the disposable Optech ‘Rainsleeves’. These are low cost, come in packs of two and are designed to be used a few times and then thrown away. With careful use they can last quite a while. They take up little space in the kit bag and the price is very reasonable. It has to be bad for me to put them on though because, like most rain covers, they restrict us in using the camera. Everything becomes fiddly and a bit of a chore. The worst problem is getting your eye to the eye piece to compose and focus (or, if you use Live View, seeing the monitor clearly as the polythene is not optically clear enough to focus critically). There is a hole in the protector which is designed to go around the eye piece but to fit it you need to take the eye pice rubber off and then re-fit it over the polythene and by this time I am losing the will to live.

A simpler and much cheaper option is to carry a thick polythene bag. I carry one which is big enough to simply pop over the whole of my set up on the tripod. It covers camera, lens and filters. Obviously, you can’t work with this in place but it saves packing up for every shower. As soon as the rain has passed over, just whip it off and got on with the business of making images.

I also carry a cover similar to this one. Bought on EBay for less than £15 it gives good access to the cameras controls and is quick to fit and remove. Focusing and zooming are a bit tight but the cameras body controls are very easy to use, as is the eye piece and screen. I have been using mine for a couple of years and it is stills waterproof. Made from proofed nylon you buy one to fit each lens and body combination (in theory) but I bought one for my longest lens, my 200mm f2.8, and use it on all my lenses – the shorter lenses just have the cover a bit bunched up but it is not an problem for me.

Then, yesterday, on one of my bluebell wood workshops, a client had a new ‘device’ which seems like a brilliant idea to me (Thanks for the tip, Maria!). She was given the idea by photographer, Jeremy Walker. It may sound a bit strange but in really wet conditions yesterday she was able to shoot with ease and keep her kit dry. It was a very large sheet of Chamois leather. Told you it sounds strange. However, it is is not your average Chamois from Halfords. She got this from Skye Skynes – here on this page . Now, when you see the price (£22 delivered in the UK) you will probably have a sharp intake of breath and think I have finally lost my marbles, but before you shake your head and leave this post let me just tell you, these are the most amazing Chamois you have ever seen or felt. Skye Skyns make them from sheep skins on the Isle of Skye and they are very thick – many times thicker than the Chamois I use when cleaning the car. It is also the softest Chamois I have ever felt. The sheet is really big and you just drape it over your camera and lens. In between exposures you can drape it over the front of the lens (and filters) to protect the glass from drops of rain. It absorbs the rain and is perfect for wiping kit dry too. Because it is a sheet rather than something fitted you can double or triple fold it and just drape it over the lens and position it as you wish. As I watched my client work I was impressed with how easy it was for her. The Chamois has another advantage, it makes a great thing to wrap kit in to protect it. So even in dry weather it iso earning its keep in the rucksack. They are washable so when they get grubby they can be spruced up easily. I have ordered mine and can’t wait for it to be delivered, although knowing me it will come the day a long drought starts and I won’t get to use it in anger for months!

A good style of hat to wear in the rain is a hat with a rigid peak, like a baseball cap (but waterproof). This keeps us a bit drier and warmer but also the peak goes over the top of the camera while we have our eye to the eyepiece and helps stop the rain fogging the viewfinder. Absorbent lens cloths (and often several of them are needed for a rain session) are essential for drying fog off of the viewfinder and lens.

I also keep all those little bags of silica gel which come in many products packaging when they are delivered to us, you know the little white sachets with beads in which have ‘do not eat’ written on the outside. Silica gel absorbs moisture. I keep them all and drop a few in my camera bag, to help dry the air in the bag. Every now and then I swap them out, dry the old ones out at home and let the new ones do their job in my rucksack. (I also keep them in my laptop bag, lens cases and so on. Every little helps.

What about drying kit off after the session? I use absorbent cloths to dab the camera and lens dry, getting the worst of the wet off. I then let the kit dry slowly and naturally in a warm spot in the house, but not by direct heat. Then, once dry it needs a clean and polish to get any residue off of the body and glass. For cleaning my lenses I have stopped buying the ridiculously expensive lens cleaning fluid the manufacturers would like us to use. I get a big bottle of lens cleaner from my opticians for £2.75 (and that amount lasts me a couple of years!!). I use it to clean my glasses and honestly can’t see any difference when using it on my lens compared to the stuff sold by camera suppliers. I have a small spray bottle I decant some into to take into the field from the large bottle which stays at home.

That’s enough on keeping the kit dry. What about technique?

Passing Shower - Isle of Harris

Firstly, I don’t tend to use lens hoods for protecting against flare but I do use them to keep rain off of the lens. The two lenses I have which have particularly effective lens hoods are the Canon 24-70 L and the 70-200mm. Both of these come with a lens hood which is a full tube, not ‘petals’ which is more usual on wider angle lenses. These completely shield the lens glass from all but rain which is driving towards the lens in strong winds. The downside is that you can’t use Lee filters. To overcome this limitation I take bracketed exposures and blend them later in Photoshop. Problem solved.

I sometimes carry a golf umbrella which is useful to work under as long as there isn’t much wind. (This is the umbrella I use – designed for use in high winds – CLICK HERE) If the rain is coming in horizontally or the wind is strong, forget the umbrella, it is just impractical. I have been toying with the idea of trying studio lighting clamps to see if I can find one which will lock on to my tripod leg and hold the umbrella over me and the camera so that my hands are free to work. I will let you know if I find one that is suitable.

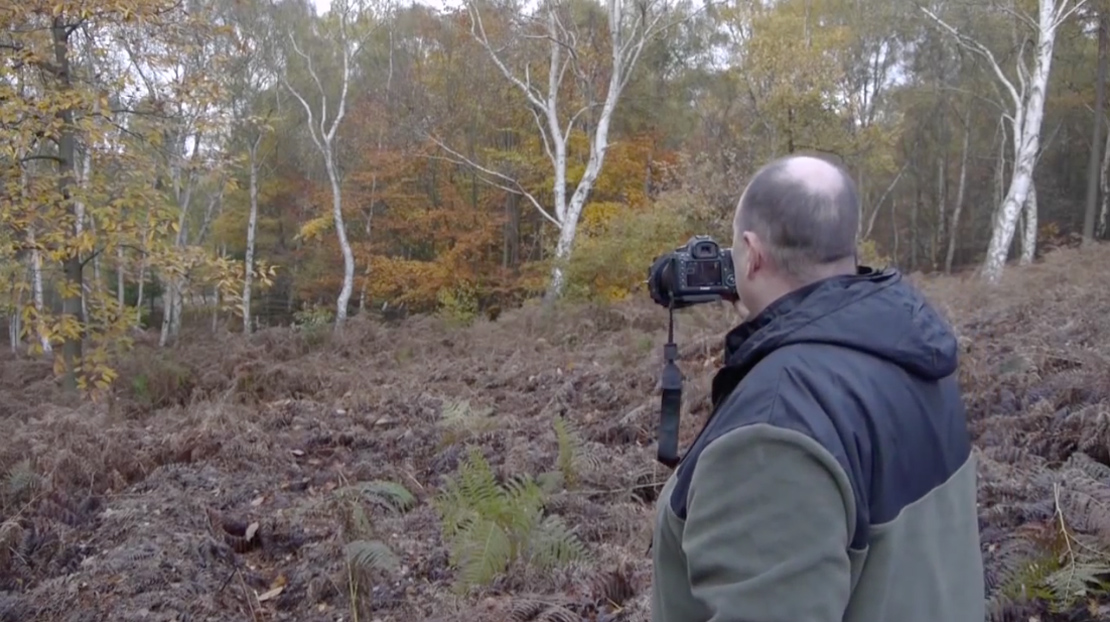
It makes sense not to fight the rain, so if it is blowing in from a particular direction, see if there are images to be made that will enable you to turn the lens away from the direction it is coming from. I also often head to woodlands in the rain. Trees in leaf will provide good cover although when the leaves get very wet it will start to get through to you, but it is dripping vertically from the leaves and not blowing in to the lens so with some of the protection I describe above we can continue working.

Cromer Pier - Winter Rain

So, there we are, all set up with a protected camera and some techniques to help us keep dry while we shoot. Is there any way we can use the rain to enhance our images? Most certainly.

The first thing to say is that the light as ‘bad’ weather passes or just before it arrives, is often spectacular. Foregrounds can be lit with glorious golden light with a deep black sky (one of the rare occasions that the sky is darker than the foreground). Shafts of light can pour from the clouds and glide across the land or sea. Rainbows decorate the sky. It is the photographer who is prepared to be out in the rain that gets to capture this glory.

In rain I often focus on making detail images, intimate landscapes. In woodland or in amongst the shelter of rocks there are lots of fascinating details which look great when wet. The diffused soft light when it rains is perfect for detail images as there are no strong shadows to contend with and the colours are rendered beautifully. The woods or rocks provide some cover and working on the close landscape provides a nice change from shooting the wider world.

While it is raining keep an eye open for things being back-lit. As the sun emerges from the clouds, wet trees, plants and buildings can glow as the sun catches the wet surfaces. If you want the opposite effect and want to kill reflections and saturate colours, fir a polarising filter and rotate it while looking through the eyepiece and see the reflections disappear. Shooting in the rain is also an ideal time for more creative image making – try shooting through wet glass from inside a car or cafe. The rain blurs the world and creates an impressionistic feel to things. Or go the whole hog and have a go at ICM (intentional camera movement) utilising the low light to lengthen the shutter speed and create images with blur by moving the camera.

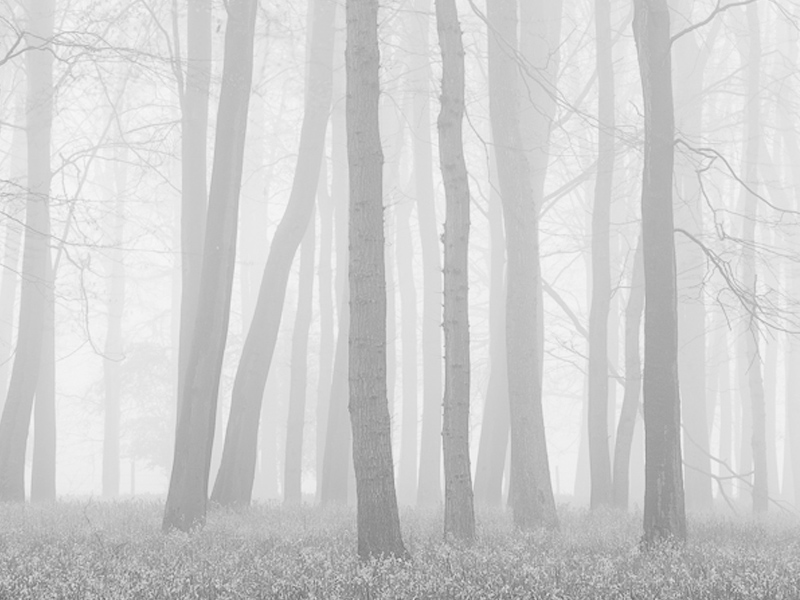
If you like long exposures, try shooting them in the rain. If you can keep the kit dry, the effect of the long exposures is to turn the rain into mist and you end up with an image which looks like it has been shot on a misty or foggy day.

A final idea is to shoot puddles and running water. The raindrops create radiating patterns and often the light and colours above the water is reflected in it and yields great creative possibilities.

It has taken me a few days to put this post together. Now, as I finish it, the day is warm and bright. the rain seems a million miles away, but it is forecast again for tomorrow. I find myself hoping it will rain, so I can go out and have a go at capturing something with my camera. I hope you feel inspired to, too.

A Break in the Cloud


New Farm Harvest Workshop

Those who subscribe to my newsletter know that I have been trying to organise an unusual workshop on a farm, of the potato harvest. Well, I am pleased to announce it is now on.

The farmer and his wife have been really helpful and we have been able to put a plan together for a small group to photograph the potato harvest – hopefully with stunning evening light. Apparently gulls follow the tractor as the potatoes are lifted and so the whole scene should be very photogenic. There may also be opportunities for unusual incidental images of things like potato boxes in the barns and farm buildings and so on. It sounds like there will be two tractors working, one is driven by the farmer actually lifting the crop, the other driven by his wife will be transporting the potatoes from the fields to the farm buildings. I have all sorts of images in mind we can try and get.
They are kindly arranging parking as close to the harvest fields as possible to reduce walking but please note the ground will be muddy and uneven so wellies or boots are required and anyone with mobility issues needs to take this into consideration when booking.
It is vital we do not encroach on the harvest, get in the way of farm machinery or impede the work in any way. I imagine we will be working from the field margins most of the time. I will give advice later on lens choice and more information on how things will work to those who book. You are, as with all of my workshops, responsible to organise your own insurance if you feel it is necessary. Our individual health and safety is our own responsibility and booking is an acceptance of this fact.
I have offered to pay a fee to contribute to the farm for each person joining us on this unique workshop and this is included in your fee. No meals or refreshments are included in this workshop but apparently there is a pub just a mile away which does serve food and snacks so it may be feasible to adjourn at some point to go and refresh ourselves -or to enjoy something there before or after the workshop.
The date will be Monday 19th September. We will meet at the farm to start at 2.30pm. Sunset is at 19:09 so I assume we will be finished by 19:30. This should give plenty of time and the best light on the day to get some memorable and unusual images. The farm is located near Lincoln. I can’t guarantee the weather, of course, but September is often lovely for landscapes.
I haven’t visited the farm myself and don’t know how ‘photogenic’ it is so will be approaching this as I do a commercial shoot where I often have to arrive without seeing the location advance and work ‘on the hoof’. It might be useful for you to see how I approach working out the best shooting positions and so on without prior knowledge of the place – a skill all commercial photographers need. There are pylons on the farm (as there is in much of Nottinghamshire and Lincolnshires farmland) so some work in PS might be needed, unless you like pylons – I will be showing how to frame images and use lenses to reduce their inclusion in shots.
Please also note I will be using my camera on this workshop to make my own images so I will not be quite as focused as I am on most of my other workshops on giving instruction. I will, of course, be happy to help you with your image making and will give as much time as I can to helping you, especially early on in the session so that yo are ready for later on, but as the light gets to its best or if the photo opportunities are good I will be shooting myself too and I just want you to be aware of this. Those who are closest to me in the fields will have the best chance of getting lots of help. I am reflecting this in the price of the workshop which is lower than my usual fee.
Oh, and one other thing. The farm is just half a mile from where the Red Arrows are based and they do practise over the farm. So, while they probably won’t put in an appearance, there is always a chance the will – so you never know the photographic opportunites might be amazing!
This is a rare chance to shoot a harvest at close range and get some great images of real farm life. I am really looking forward to it. Places are limited to 10 and I was deluged with interest so it may be wise to book early to avoid disappointment. Half the places have now gone. The fee, including a contribution to the farm will be £39 per person. This will be payable in full on booking.
I would like to thank in advance Mr & Mrs Marris for their kindness, cooperation and help in making this workshop possible.
if you would like to book please use the ‘CONTACT ME’ form on the right and I will organise it for you and remember your booking will not be secured until your fee is received.

Top ten tips for photographing seascapes

Landscape photographers love the chance to photograph the sea. We love the wide horizons, big skies and the magnification of the glorious light at dawn and dusk reflected in the water. To make the most of your trips to the coast here are some tips for making great seascape images.

1. Go prepared. Welly boots, while not glamorous, are the best footwear on the shore. They allow you to work in soft mud, lapping waves and rock pools without worrying about getting wet, cold feet. Neoprene lined wellies are more expensive but much more comfortable and warmer than cheaper brands. I have also found seawater rots the adhesives and stitching in modern walking boots. I had a pair of new boots fall apart after a trip to Skye due to me wading about in seawater for two weeks.

2. Check the tides in advance. Often the best time to make seascapes is with a falling tide at sunrise or sunset. The exposed rocks and sand will be wet from the receding tide which reflects the light in the sky and adds much more interest than a drier foreshore with an advancing high tide. To find the tide time for your location enter the name of the nearest harbour or port into Google along with the words ‘tide table BBC’. this will bring up a link for the generally reliable tide tables on the BBC website. If you don’t live in the UK just enter the nearest harbour name and the words’ tide table’ and you should get a link for your country. Being aware of the tide times also helps you be aware of not being cut off from the mainland by a fast rising high tide. Very easy, believe me, when you are engrossed in making images.

3. Check where and when in relation to the location the sun will rise and set to find the best time to visit that location. The best way to do this is to download ‘The Photographers Ephemeris’. This free software uses Google Earth and shows on the map exactly where the sun and moon rise and set in any location on the planet on any day. One of the best bits of software a landscape photographer can have on the computer. You will find it here. There is even a version for the iPhone.

4. Take a towel, lens cloth and lens cleaning fluid. You will find, even in quite calm conditions that your lens and filters start to get coated in salt while making images at the sea. This soon ruins images. Keep an eye on this and clean your glass regularly. I also have a golf towel clipped to my tripod for quickly drying off salt spray from the camera and for draping over the camera if the waves start to get high.

5. Wash you tripod legs in fresh water after a seascapes session. Tripods often get stood in seawater to get the perfect shot, and get coated in abrasive sand from beaches. To preserve your kit, wash it off well with fresh water after the shoot.

6. Get there early. I usually get my best seascapes 30, 45 minutes or more before the sun is due to rise. Trust me, that extra 20 minutes in bed is not worth missing the best light for.

7. Stay late. As with the preceding point, at the end of the day i often get my best images up to an hour after the sun has set. Don’t pack up and go home when the sun dips below the horizon – keep shooting.

8. Get the tripod down low. So often photographers fully extend the tripod legs so the camera is at head height for comfort or out of habit. Get down low for more interesting images with a different perspective.

9. Use ND filters. ND filters from 2 to 10 stops help lengthen exposures and create wonderful effects on moving water and clouds. The 10 stop filters, such as the Lee Filters ‘Big Stopper’ enable me to shoot great seascapes long after the best light has gone thus lengthening the shooting time on location. they also enable great images to be had in poor light and cloudy conditions.

10. Shoot details. it is easy to just shoot the wide seascape before you and to miss some of the beautiful ‘intimate landscapes’ of the shore. Rock patterns, seaweeds, shells and pebbles, patterns in the sand, beach furniture and buildings and so on.

I hope you have found these tips helpful. I would be interested in hearing from you if you have tips to add.

If you would like more help with improving your seascape photography, please use the form on the right to add your email address to my mailing list. You will get advanced notice of all of my future seascape and other workshops before they are announced elsewhere.